• Skip to primary navigation
  • Skip to main content
  • Skip to primary sidebar
Life Around The Table
  • Home
  • Recipe Index
  • Fall Favorites
  • About Me
  • eBooks
  • Subscribe
menu icon
go to homepage
  • Home
  • Recipe Index
  • Fall Favorites
  • About Me
  • eBooks
  • Subscribe
    • Email
    • Facebook
    • Instagram
    • Pinterest
  • subscribe
    search icon
    Homepage link
    • Home
    • Recipe Index
    • Fall Favorites
    • About Me
    • eBooks
    • Subscribe
    • Email
    • Facebook
    • Instagram
    • Pinterest
  • ×
    Home » Recipes

    Blog

    Prepare Your Heart and Home for Company

    Jun 14, 2021 · 13 Comments

    An image of a kitchen table and chair to show the concept of hospitality and hosting guests.

    9 Tips to Improve your Hosting Skills

    Here are some thoughts and ideas to help make your home a more welcoming place for friends, family or strangers. Please share in the comments your thoughts on these tips and which one resonates with you. Do you have anything to add? Please share! What do you think is the secret to intentional hospitality?

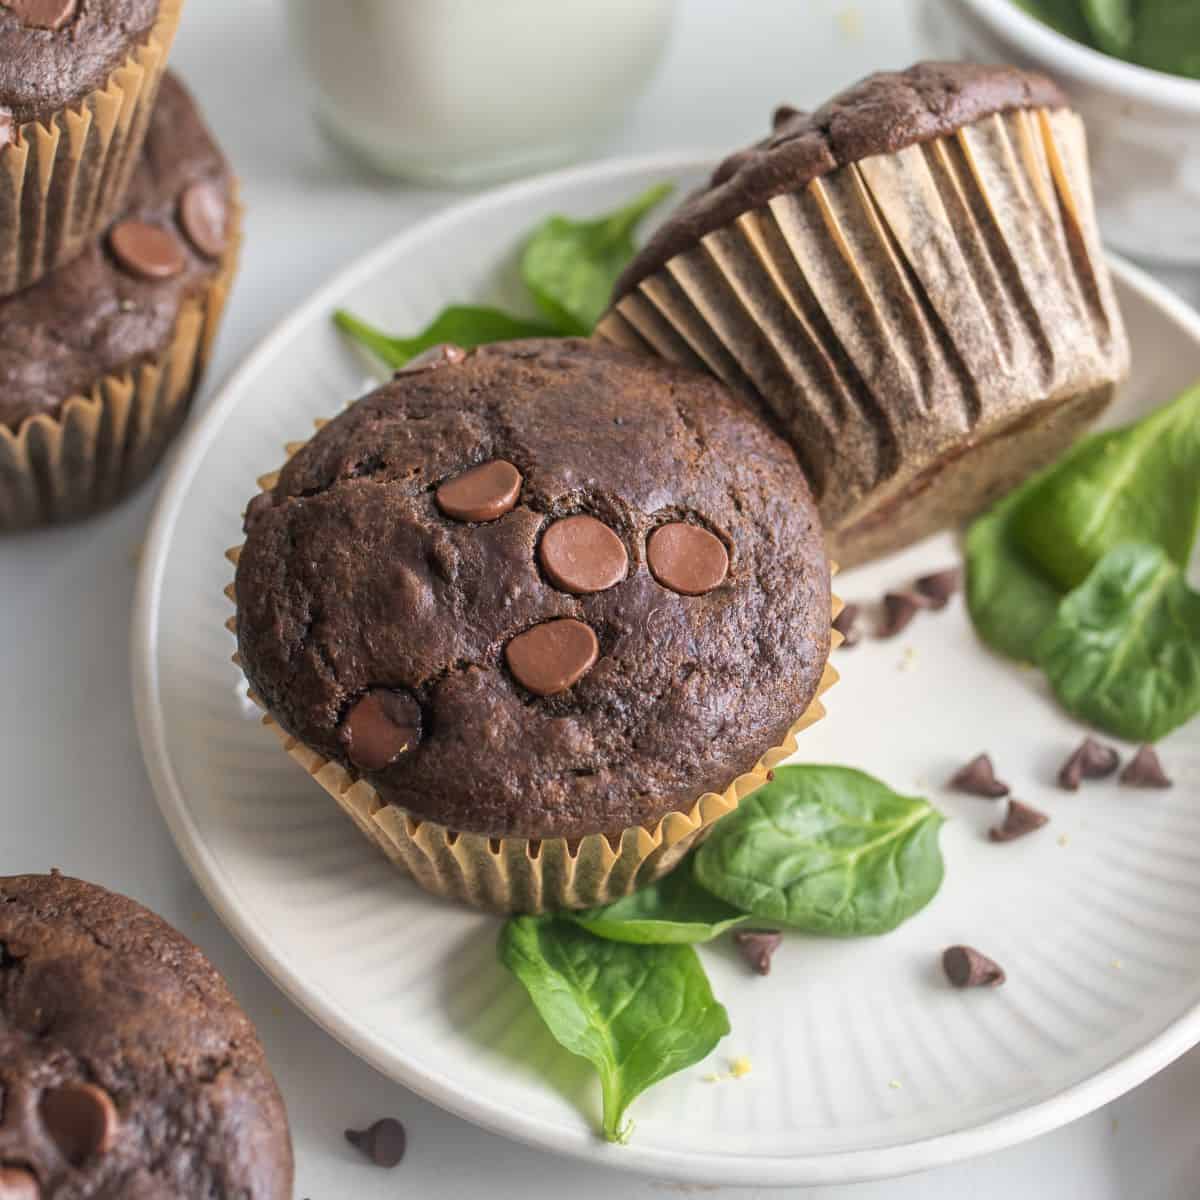
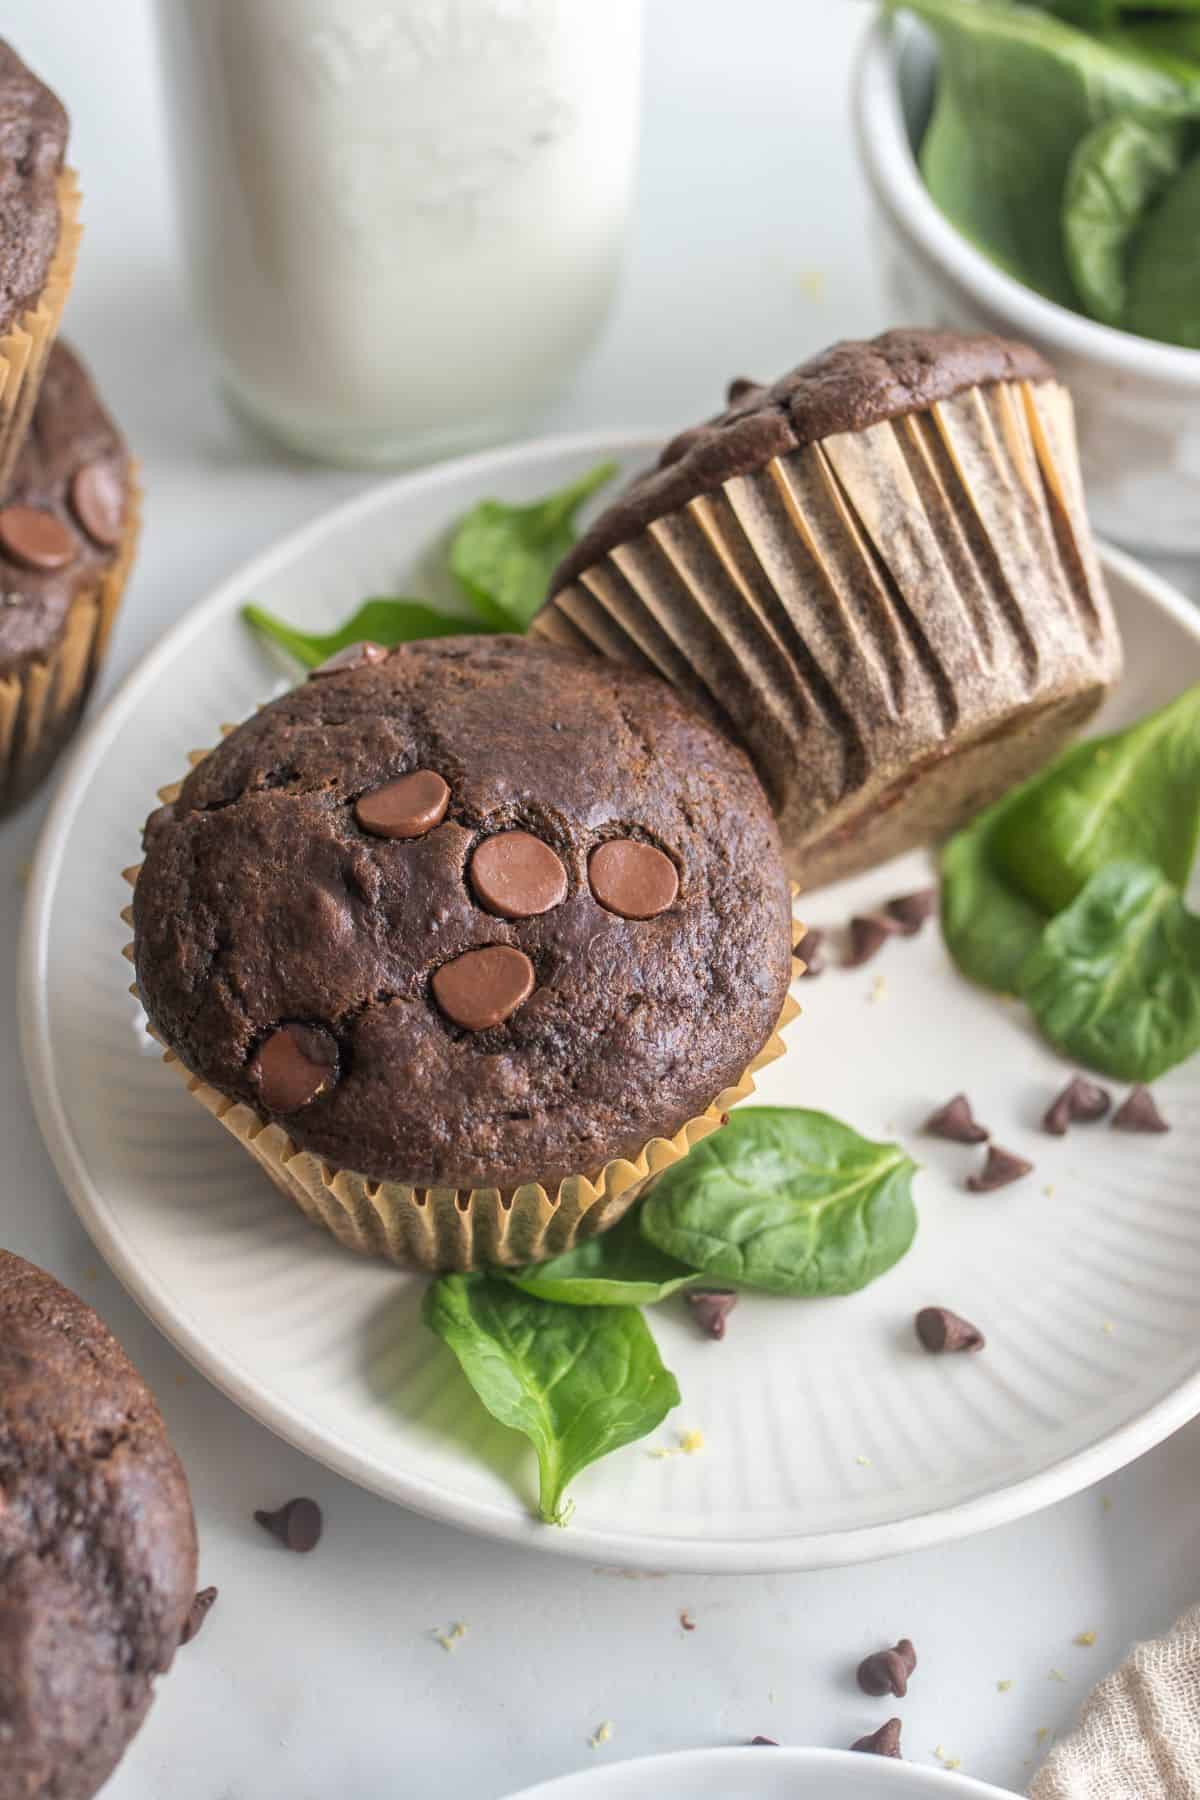
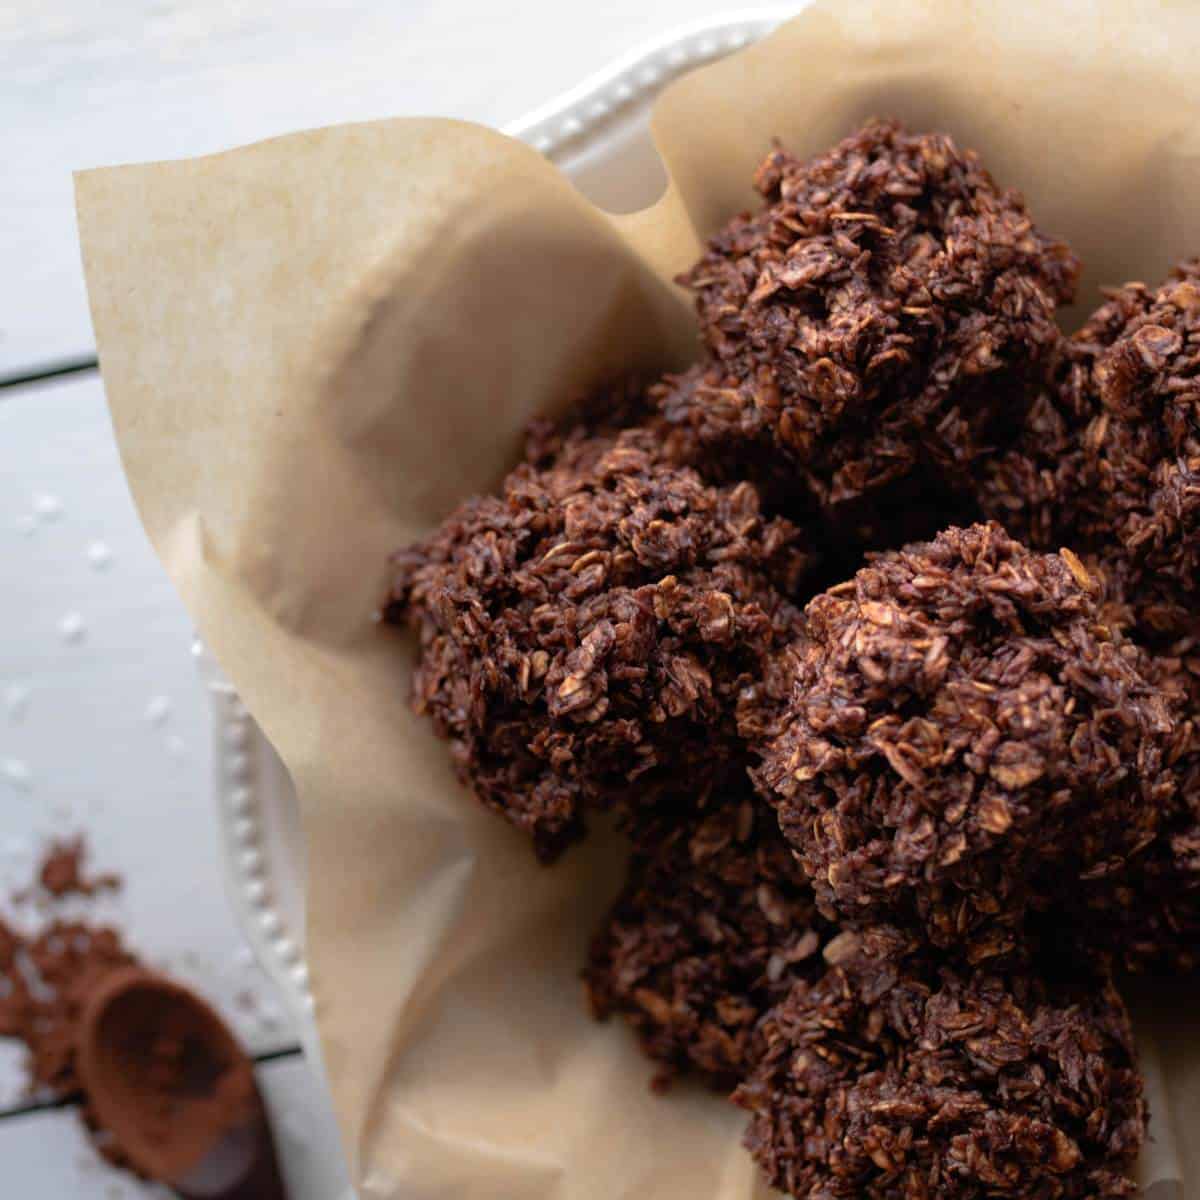
    1) Freshly Baked Cookies Ready in 15 minutes.

    I remember a moment after my first son was born when I was able to get out of the house by myself and do something relaxing. I took a book to a coffee shop, ordered a coffee and a donut, and sat down to read, rest and dream. I was reading Sally Clarkson’s book Lifegiving Home.

    I remember being totally romanced by one of her ideas in the book. Sally recommended having frozen cookie and scone dough in your freezer to be stocked and ready for an unexpected guest stopping in.  It’s such a simple idea but it really caught hold of my heart! Being prepared in that small way means you can prepare a special moment in a flash.

    In just the time it takes to preheat the oven, brew some coffee or tea and get the cookies out onto a baking tray you’re ready to spend intentional time with guests or people you love, treats in hand. To make it really easy for yourself you can preroll the cookie dough into perfectly sized balls before freezing so you just have to plop them on the tray and put them in the oven for 10 minutes.

    Having freshly baked cookies ready in 15 minutes requires some prep work on a weekend morning so you can make extra cookie dough but it will be so helpful when you just wish you had some treats to offer guests or for your family! Coming home from church after a busy morning is a moment when I often wish I had some cookie dough ready in the freezer for a special Sunday afternoon coffee time.

    Spelt Chocolate Chunk Cookies on a plate on a countertop.
    Spelt Chocolate Chunk Cookies are chewy and delightfully chocolatey. These cookies taste delicious and feel indulgent all while being made with healthier ingredients like coconut sugar and spelt flour.

    2) Let Art Serve as a Conversation Starter

    When decorating your living space, consider creating pockets of space with little “conversation starters” such as pictures from your travels, coffee table books, framed art, unique trinkets or magazines.

    Coffee table books or beautiful magazines can give your guests something to browse through. Carefully placed trinkets or eye-catching art can also serve as a great conversation starter. Finding the perfect art piece can be a fun challenge. I have a suggestion of one place you could start.

    My friend Amber Reesor from the blog Little Reesor House has this amazing resource on her blog where she has curated beautiful affordable landscape art for the home. I love the third art piece she shared and I am looking forward to browsing more collections from the sources she curated!

    3) Children Have a Role to Play

    Young children can participate in helping guests feel at home. As a parent, you can provide them with intentional questions to ask others. Brainstorm with your children ahead of time on how they can be helpful while you’re serving your guests. Here are some suggestions: 

    • They can answer the door and offer to take coats.
    • They can offer guests a drink.
    • They can practice listening to others. 
    • They can carry a plate around with appetizers.
    • They can clear dishes.

    They can ask questions like:

    • Where do you work? 
    • When you were a kid what was your favourite subject in school? 
    • What are you looking forward to? 
    • What is your favourite food?

    Give children the tools so that they can confidently contribute to the work that goes into hosting. I heard something in a podcast recently that really resonated with me. The guest on the podcast said that the number one indicator for adults who have high self-esteem is that they felt needed when they were a child. I really love that. Children love to be helpful.

    Our role is to help and guide them so they can succeed.

    4) The Power of Sustained Attention --- Really Listen

    Giving someone your full undivided attention is easier said than done. I’ve come to think of hospitality as a skill that needs to be developed. Paying attention to one person for a prolonged period of time is a lost art for some.

    I’m really trying to practice true listening. It’s surprisingly difficult at times. I’m sure we’ve all had those experiences when a well-meaning person asks you a question about your life but then you feel their attention drift away from you as you begin to respond. It doesn’t feel very nice.

    To contrast that, think back to a time when someone was fully present and really listening to you. You can feel their care and attention. It’s something to think about next time you’re visiting with someone. How present can you be? 

    5) Beauty in Ordinary

    Little inexpensive touches can go a long way to make people feel special. Some examples are:

    • Providing ice water with a slice of lemon in it.
    • Lighting candles at dinner.
    • A simple bouquet of flowers on the table.
    • Providing your guest’s favourite food or drink. 
    • Name card at their place setting (children especially love this).
    • Music playing in the background.

    6) Start Thinking Outside of the Box

    We are attracted to people who look like us, are the same age as us and are generally at the same economic level as us. When I started thinking about the people I spend the most time with I realized they are almost exactly like me. I was inspired to start looking for opportunities to connect with people that I wouldn’t naturally gravitate to.

    It’s not that they wouldn’t make great friends and acquaintances. It’s just too easy to stay inside our comfort zone.  I encourage you to look beyond your typical social circle. Is there an older couple that you really admire that you could invite over? If you’re single, hey, why not invite a married couple with kids? Start pushing the limits of the social group you’re in and you’ll find some new rich relationships.

    7) Invest in Fun Group Games

    In the future, I’m planning to do a whole blog post on games that are great for larger groups of friends. But for now, I can recommend two games:

    Saboteur

    Good for 3-10 players and each round takes 30 minutes. In this game, you play the role of a dwarf who is working to lay down tunnel cards to reach some nuggets of gold.

    But someone among the group is a saboteur trying to stop the mission. Players need to identify the saboteur before they are successful in stopping the game.

    Codenames

    Good for 4-8 players and each round takes 15-30 minutes. This is a popular game for a reason. I think everyone should own this game if you frequently host large groups of people.

    This is a word-based game. Two spymasters give clues to their teams that connect multiple words on the board. The beauty of this game is that it’s fun and easy to do the guessing and anyone can participate even if they don’t want to take on the task of being a spymaster.

    8) One Day It’ll be Your Turn to Receive

    Sometimes it’s your turn to be the recipient of hospitality. If you’re reading this blog post I assume you’re often the one who is hosting the parties and gathering people around your table.

    You’re probably the one busy in the kitchen feeding hungry people and I bet you love it. There are times in life though where you need to be the recipient of love and food and care. It can be harder for some personalities to accept help. Or you may feel the burden that you need to be helping someone less fortunate than you at all times.

    I encourage you to consider that perhaps it’s your season to accept help and enjoy being cared for. Embrace the season.  

    9) Pause and do Some Dreaming

    Take a moment.

    Look around the space you have in this world. Take some time to imagine what you could do to make your home feel a little more inviting for yourself and for others.

    Sometimes it’s a simple task that could be done almost instantly that would make your space more comfortable. Or maybe there’s one errand you need to run that will positively change your environment. In my own living room, I can immediately think of a few things that I should update or improve.

    For example, my sons recently broke our living room lamp and now in the evenings, it’s incredibly dim. It would make a big difference if I purchased a new lamp. I encourage you to jot a few things down and commit to putting a bit of energy into making your space a little more functional and comfortable.

    Thank you for reading this post. If you’d like to keep reading, I share more hospitality tips in the post, Intentional Hospitality.

    There is no hospitality like understanding.


    Vanna Bonta

    Do you have any tips to add? Share your wisdom with all of us in the comments!

    Double Chocolate Banana Bread

    Jun 7, 2021 · 26 Comments

    Double Chocolate Banana Bread is a delightful treat for anyone with a love for chocolate and nostalgic comfort foods. This banana bread recipe is made with wholesome ingredients and is naturally sweetened, and the texture of the crumb is wonderfully tender and moist. Grab those ripe bananas on your counter and let's get baking!

    As far as nostalgic foods go, banana bread is in a league of its own.

    This sweet quick bread is also really easy to mix up. It can be topped with a banana cut in half lengthwise or a dusting of coarse sugar or a sprinkle of extra chocolate chips or some crushed nuts.

    People have strong opinions about what makes the perfect loaf of banana bread. What are your banana bread must-haves? Are you a walnut or pecan fan? Do you like it slightly undercooked and doughy in the very center? For me, chocolate chips are an absolute must in all banana breads!

    If you're a true chocolate lover, explore my other recipes like Chocolate Orange Pudding Cake, Chocolate Banana Buckwheat Muffins, Chocolate Peppermint Crinkle Cookies, Chocolate Peanut Butter Rice Cake Bars, and Chocolate Covered Dates.

    Enjoy!

    The Secret To Good Banana Bread

    The secret to amazing banana bread is seriously overripe bananas.

    A lot of the taste and goodness of banana bread is dependent on overripe bananas. Many bakers see bright yellow bananas sitting on their counter and consider those bananas “over-ripe” a little prematurely. In the ingredient shot below you can see a bunch of bananas with brown spots on their peels that are just on the verge of being ripe enough for banana bread for reference.

    In my recipe testing stage, I tested making banana bread with bananas at varying stages of ripeness. I even tried roasting bananas in the oven to see if that would bring the sweetness out. All in all, I discovered you really just have to be patient to let bananas naturally ripen on your counter to a perfect sweet stage.

    [feast_advanced_jump_to]

    Why You'll Love This Recipe

    • This recipe is ultra flavorful and moist!
    • Banana bread is the ultimate comfort food snack
    • Made with healthier ingredients
    • Option to use either whole grain spelt flour or all-purpose flour
    • Option to have this recipe entirely sweetened with coconut sugar and maple syrup or to use brown sugar if that's what you have on hand
    • Ripe bananas add a natural sweetness to this loaf
    • This recipe is versatile and you can experiment with a variety of add-ins to make it to your preferences
    • Make ahead and freezer friendly

    Ingredients

    Ingredients to make chocolate banana bread laid out on a countertop in bowls, including ripe bananas.
    • Flour - this recipe has been tested with both all-purpose flour and whole-grain spelt flour.
    • Cocoa powder - choose good quality unsweetened cocoa powder.
    • Baking soda
    • Salt - I choose an unrefined sea salt.
    • Butter
    • Coconut sugar - or swap for brown sugar if you prefer.
    • Eggs
    • Bananas - the key to really delicious and sweet banana bread is truly overripe bananas.
    • Maple syrup
    • Brewed coffee - this is optional but this add-in helps to enhance the chocolate flavor.
    • Chocolate chips - choose sugar-free chocolate chips if desired!

    See the recipe card below for a full list of ingredients and measurements.

    Substitutions & Variations

    • Flour: you can use all-purpose flour instead of spelt flour if preferred.
    • Sugar: you can use brown sugar instead of coconut sugar if preferred.
    • Swap the brewed coffee for 1 teaspoon of vanilla extract or 1 teaspoon of fine espresso powder.
    • Chocolate chips could be swapped for chopped chunks of baker's chocolate.
    • Add a crunchy texture and nutty flavor by incorporating chopped walnuts, pecans, almonds, or hazelnuts into the batter.
    • For an attractive decorative topping, slice an additional banana in half lengthwise and gently lay it on top of the batter in the loaf pan just before placing it in the oven for baking.

    I have not experimented with any other substitutions or alterations for this recipe. If you decide to make any changes by adding or substituting ingredients, I would love it if you could share your results with us by leaving a comment below.

    How To Make Double Chocolate Banana Bread

    Here are the step-by-step instructions to make this recipe.

    Step 1: Preheat the oven and combine dry ingredients.

    Preheat the oven to 350 degrees F. Lightly grease a 9x5 loaf pan with butter or line with parchment paper.

    Combine dry ingredients (flour, baking soda, cocoa powder and salt) in a medium bowl and mix well.

    Dry ingredients in a mixing bowl ready to be mixed together.

    Step 2: Beat butter and sugar together.

    Mix butter and brown sugar for 5 minutes with an electric mixer until light and fluffy.

    Beaten butter and sugar in a mixing bowl showing a light and fluffy texture.

    Step 3: Beat in eggs.

    Beat in room temperature eggs one at a time. Once eggs are combined, add room temperature maple syrup.

    A hand blender beating eggs into wet ingredients in a mixing bowl.

    Step 4: Combine wet and dry ingredients.

    Fold in dry ingredients a bit at a time until just incorporated. Be careful not to overmix.  Gently fold in mashed bananas.

    Mashed banana sitting on top of wet and dry ingredients just mixed ready to be folded in.

    Step 5: Add chocolate chips

    Fold in chocolate chips.

    Chocolate chips sitting on top of banana bread batter ready to be mixed in.

    Step 6: Pour into a loaf pan.

    Pour into a greased 9x5 loaf pan.

    Someone using a spatula to pour completed banana bread batter into a greased stoneware loaf pan.

    Step 7: Sprinkle with chocolate chips.

    Smooth out the top of the batter and sprinkle with some extra chocolate chips.

    Chocolate chips sprinkled on top of completed banana bread batter resting in a loaf pan.

    Step 8: Bake.

    Bake for 60-70 minutes. Test your banana bread at 60 minutes with a toothpick or cake tester.  Continue to bake until the tester comes out clean. Allow to cool in the pan for at least 1 hour before cutting into the loaf.

    Baked chocolate banana bread fresh out of the oven.

    Expert Tips

    • Always be prepared to make banana bread: Next time you go to the grocery store, buy several extra bunches of bananas and let them get really ripe on your counter. When they’re the perfect ripeness for banana bread,  simply peel them and freeze them in a freezer-safe container and then you are ready for delicious banana bread at any time.
    • Measure the flour carefully and accurately. The best way to do this is to spoon the flour into your measuring cup and level it off with the back of a knife.
    • I included a small amount of sugar in this recipe so that you can beat the butter and sugar together for 3-5 minutes before adding the rest of the wet ingredients. Beating butter and sugar together for this long allows the sugar granules to really whip up the butter and make it light and fluffy. This method results in a lighter loaf.
    • Mix the dry ingredients and wet ingredients until just combined. Overmixing can give you tough banana bread. 
    • Try setting aside 100-150 grams of banana to mash more gently so your loaf has more texture and bits of banana. 
    Single slice of chocolate banana bread on an ornate plate showing the moist texture of the bread.

    Recipe FAQs

    Does banana bread freeze well?

    Yes, absolutely!  Banana bread freezes really well. I encourage you to double the recipe and enjoy one loaf now and the other loaf with company at a later date. Freezing banana bread for a few months will not affect the flavor or texture of the bread.

    Can banana bread be made into muffins?

    Yes, absolutely! Distribute the batter into muffin tins and bake in a 350-degree oven for approximately 20 minutes or until a toothpick inserted comes out clean.

    How to ripen bananas quickly for banana bread?

    Paper Bag Method: Place the bananas in a paper bag. Close the bag and leave it at room temperature for about 24 hours. The bananas release ethylene gas, and the enclosed space will help trap the gas, ripening the bananas faster.
    Oven Method: Preheat your oven to 300 degrees Fahrenheit (150 degrees Celsius). Place the unpeeled bananas on a baking sheet and bake them for about 15-20 minutes. The peels will turn black, and the bananas inside will soften and sweeten.

    Slices of chocolate banana bread staggered, laying on a table.

    Storage

    Room Temperature

    Once the loaf has fully cooled wrap it tightly in plastic wrap or store it in an airtight container at room temperature for 2-3 days.

    Freezer

    Once the loaf has fully cooled, wrap it tightly in plastic wrap or store in a freezer-safe airtight container and store in the freezer for up to 3 months.

    More Recipes You'll Love

    • Green Smoothie Chocolate Muffins
    • Date Sweetened Chocolate Chip Cookies
    • Close up spelt cookie with melted chocolate chips and finishing salt on top, broken in two.
      Spelt Chocolate Chunk Cookies
    • Healthy Chocolate Haystack Cookies

    Did you make this recipe? Let me know!
    Leave a review or comment below!

    Recipe

    Double Chocolate Banana Bread

    Christy Faber
    Double chocolate banana bread is a delightful treat for anyone with a love for chocolate and nostalgic comfort foods. This banana bread recipe is made with wholesome ingredients and is naturally sweetened, and the texture of the crumb is wonderfully tender and moist.
    5 from 12 votes
    Print Recipe Pin Recipe SaveSaved!
    Prep Time 30 minutes mins
    Cook Time 1 hour hr
    Total Time 1 hour hr 30 minutes mins
    Course Breakfast, Snack
    Cuisine American
    Servings 10 slices
    Calories 348 kcal

    Ingredients
      

    Dry Ingredients

    • 1 ½ cup spelt flour (or all-purpose flour)
    • ¼ cup cocoa powder
    • 1 teaspoon baking soda
    • ½ teaspoon grey unrefined salt

    Wet Ingredients

    • ½ cup butter at room temperature
    • ¼ cup coconut sugar (or dark brown sugar)
    • 2 eggs large eggs at room temperature
    • 4 bananas very ripe bananas (1½ cups mashed) (360g)
    • ½ cup maple syrup at room temperature
    • 1 tbsp brewed coffee (optional)
    • 1 cup chocolate chips

    Topping:

    • 1 tbsp chocolate chips to sprinkle on the top

    Instructions
     

    • Preheat the oven to 350 degrees F. Lightly grease a 9x5 loaf pan with butter or line with parchment paper.
    • Combine dry ingredients (flour, baking soda, cocoa powder and salt) in a medium bowl and mix well.
    • Mix butter and sugar for 5 minutes with an electric mixer until light and fluffy.
    • Beat in room temperature eggs one at a time. Once eggs are combined, add room temperature maple syrup.
    • Fold in dry ingredients a bit at a time until just incorporated. Be careful not to overmix.  Gently fold in mashed bananas and chocolate chips.
    • Pour into a greased pan and top with a sprinkle of additional chocolate chips.
    • Bake for 60-70 minutes. Test your banana bread  after 60 minutes with a toothpick or cake tester.  Continue to bake until the tester comes out clean. Allow to cool in the pan for at least 1 hour before cutting into the loaf.

    Notes

    • For truly delicious banana bread, the bananas you use need to be truly overripe.
    • Measure the flour carefully and accurately. The best way to do this is to spoon the flour into your measuring cup and level it off with the back of a knife.
      Try setting aside 100-150 grams of banana to mash more gently so your loaf has more texture and bits of banana. 
    • Mix the dry ingredients and wet ingredients until just combined. Overmixing can give you tough banana bread. 
    • I included a small amount of sugar in this recipe so that you can beat the butter and sugar together for 3-5 minutes before adding the rest of the wet ingredients. Beating butter and sugar together for this long allows the sugar granules to really whip up the butter and make it light and fluffy. This method results in a lighter loaf.

    Nutrition

    Serving: 45.1gCalories: 348kcalCarbohydrates: 49.2gProtein: 6gFat: 16gSaturated Fat: 9.9gCholesterol: 65mgSodium: 339mgPotassium: 411mgFiber: 4.6gSugar: 27.5gCalcium: 64mgIron: 2mg
    Tried this recipe?Let us know how it was!

    If you make this recipe please leave a comment and give this recipe a rating! I aim to respond to every single comment. I am so grateful when you trust me and try one of my recipe creations in your own kitchen. I love to hear how it went!  Let’s connect on Instagram and tag me in your food pics!

    ‘Til next time,

    Christy

    The Best Children's Picture Books (Part 3)

    Jun 2, 2021 · 2 Comments

    Feature image for Life Around the Table's post, The Best Children's Picture Books Part. 3.
    Cover of Come On Rain, a children's picture book.

    Come on Rain by Karen Hesse (Illustrated by Jon J Muth)

    “I stare out over rooftops,
    past chimneys, into the way off distance.
    And that’s when I see it coming,
    clouds rolling in,
    gray clouds, bunched and bulging under a purple sky.

    A creeper of hope circles ‘round my bones.

    “Come on, rain!” I whisper.

    This book really puts one in mind of a sweltering hot summer day when the humidity is thick in the air and you just know it’s got to rain. A young girl named Tessie calls her friends to come over with their swimsuits on and they stand and wait in the alleyway under the “swollen sky” and wait for the rain to come. And then they dance in the rain. Their mothers soon join them. You can feel the joy and the relief. “Come On, Rain!” is a delight to read. It is full of beautiful poetic imagery and unique words to expand a child’s vocabulary. The watercolour illustrations are emotional, down-to-earth and authentic. A wonderfully diverse group of families is represented in these pages. A must have book.

    Cover of The Gruffalo, a children's picture book.

    The Gruffalo by Julia Donaldson and Axel Scheffler 

    “A mouse took a stroll through the deep dark wood.
    A fox saw the mouse and the mouse looked good.
    “Where are you going to, little brown mouse?
    Come and have lunch in my underground house.”
    “It’s terribly kind of you, Fox, but no--
    I’m going to have lunch with a gruffalo.”

    The little mouse in this story meets three different predators as he walks through the forest. He outsmarts a fox, an owl and a snake by telling them that he’s on his way to have lunch with a fearsome creature called a Gruffalo. The mouse describes this mythical creature of his own invention as having terrible claws, orange eyes and purple prickles all over his back. The mouse frightens away predators by telling them the gruffalo has an appetite for forest creatures like them. Just when the mouse thinks he has outwitted his foes he ironically stumbles upon a real gruffalo who says mouse is his favourite food! But the clever mouse won’t give up so easily, he has a plan…

    This is a simple, entertaining and rhythmic story that stands up to many rereadings. Your child will request this one over and over. The illustrations are so colourful and engaging. Using different voices for each creature is a must.

    Cover of Sonya's Chickens, a children's picture book.

    Sonya's Chickens by Phoebe Wahl

    “Sonya took her job of tending to the chickens very seriously, and they grew quickly into gawky pullets. As her mama and papa went about the duties of the farm, Sonya was proud to do her part. Everywhere Sonya went, her little birds were at her heels, peeping loudly.”

    This book provides a gentle way to introduce your child to the concept of loss. Sonya has one of her chickens stolen by a fox and her father helps her process her loss and to understand that the fox has a family of baby foxes to feed. Phoebe Wahl’s illustrations are beautiful enough to frame as artwork.

    Cover of Make Way for Ducklings, a children's picture book.

    Make Way for Ducklings by Robert McCloskey

    Mr. and Mrs. Mallard, the ducks, are hunting for the ideal place to live.

    “This is better,” quacked Mr. Mallard. “That island looks like a nice quiet place....Yes, '' said Mrs. Mallard, remembering the peanuts. “That looks like just the right place to hatch ducklings.”

    Once the ducklings hatch, Mrs. Mallard leads her eight ducklings on a journey through Boston to travel from one pond to the other with the help of a friendly policeman named Michael. This book is an absolute classic and for good reason. A quiet, slow and light-hearted story I personally believe belongs on every child’s bookshelf. The illustrations are charming and the ducks’ faces are so expressive. 

    Cover of The Mitten, a children's picture book.

    The Mitten by Jan Brett

    The Mitten is a retelling of an old Ukrainian folktale. A boy named Nicki drops one of his white mittens into the snow and he leaves it behind. Animals stumble upon the mitten and burrow inside to shelter from the cold. Animals of varying sizes from a tiny mole to a big brown bear struggle to squeeze inside the wool mitten. By the time Nicki finds his mitten again the animals are gone but his mitten is stretched to five times its original size.

    “It started snowing, but the animals were snug in the mitten. A waft of warm steam rose in the air, and a fox trotting by stopped to investigate. Just the sight of the cozy mitten made him feel drowsy. The fox poked his muzzle in. When the mole, the rabbit, the hedgehog, the owl, and the badger saw his shiny teeth, they gave the fox lots of room.”

    We own many Jan Brett books and her illustrations are unmatched. The best part of Jan Brett’s illustrations is the decorative border around the pages that include additional scenes and sneak peeks into what other characters are doing. Jan Brett often uses this decorative border to foreshadow which character is coming into the story next. She accomplishes so much more with her illustrations because of this technique and my children love pointing out what’s going on in these border pictures.

    Cover of Last Stop on Market Street, a children's picture book.

    Last Stop on Market Street by Matt de la Peña

    “CJ looked around as he stepped off the bus. Crumbling sidewalks and broken-down doors, graffiti-tagged windows and boarded-up stores. He reached for his Nana’s hand. “How come it’s always so dirty over here?” She smiled and pointed to the sky. “Sometimes when you’re surrounded by dirt, CJ, you’re a better witness for what’s beautiful.” 

    CJ is a young boy who asks a lot of questions, including some of the harder questions in life. He wonders why they always have to take the bus and why they don’t own a car. He wonders why the man on the bus is blind and he wonders why he doesn’t have an iPod like those bigger kids are able to afford. His Nana shares with him a positive perspective on how to view what surrounds them. Your child is introduced to many different people in this book. It’s rich with diversity. I especially love this book for the ending when CJ and his nana arrive at their destination and it’s revealed that they’re heading to a soup kitchen to volunteer to feed people in the city. CJ and his nana are obviously not “rich” themselves but they have hearts that are happy because they help others and have a generous perspective on life.

    Cover of Strega Nona, a children's picture book.

    Strega Nona by Tomie dePaola

    “She sang,
    Bubble, bubble, pasta pot,
    Boil me some pasta, nice and hot,
    I’m hungry and it’s time to sup,
    Boil enough pasta to fill me up.
    And the pasta pot bubbled and boiled and was suddenly filled with steaming hot pasta.”

    This is the story of Big Anthony who “didn’t pay attention”.  He was a young man who went to work for Strega Nona, an old and kindly witch because she was “getting old and needed someone to help her keep her little house and garden”. Shortly after hiring Big Anthony, Strega Nona leaves on a journey and tells Anthony to never touch her magic pasta pot. Big Anthony agrees but he can’t help but tell the people in the town square about the wonders of the magic pot that can make endless amounts of spaghetti. Naturally, they laugh at him because it sounds too good to be true. Big Anthony is hurt and decides to prove to them that the pasta pot is magic. He says the magic words he heard Strega Nona say to bring the pasta pot to life but alas he didn’t hear the ending of the spell Strega Nona used to turn it off! The pasta spills out of the pot, out of the house, down the road and threatens to cover the town! But mercifully at that moment, Strega Nona comes down the road, home from her visit….. 

    This book is a fun read and full of suspense with an important reminder to listen to instructions. My oldest son loves this book and his eyes are wide in his head when he’s watching the pasta spill down the road toward the town.

    More Picture Books

    • First Picture Books for Baby
    • The Best Picture Books (Part 1)
    • The Best Picture Books (Part 2)

    Poetry Posts

    • Winter and Christmas Poems for Children
    • The Best Poems to Share with Young Children
    • Poems Young Children Love

    All photos are taken from Amazon.com. Please let me know which of these you're familiar with and which one you'll try next!

    Green Smoothie Chocolate Muffins

    Jun 1, 2021 · 10 Comments

    These Green Smoothie Chocolate Muffins are the perfect way to sneak nutrient-dense greens into your life effortlessly. Two cups of fresh spinach are hidden away in a rich chocolate batter that's naturally sweetened with coconut sugar. Easily whip up the batter with the help of your blender and then share these with friends and family!

    For another muffin recipe check out my Chocolate Banana Buckwheat Flour Muffins.

    Two green smoothie chocolate muffins on a plate with spinach leaves around.

    Whether you're looking for a delicious treat to enjoy with your morning coffee, a healthier snack option or a fun way to add greens into your diet these muffins are the thing!

    For more delicious Chocolate treats try my Raspberry Chocolate Thumbprint Cookies, Chocolate Buckwheat Crepes and Tahini Hot Chocolate.

    [feast_advanced_jump_to]

    Why You'll Love This Recipe

    • Two cups of "sneaky" spinach in the batter
    • A rich chocolate flavor
    • Lemon zest adds brightness
    • Great grab n go snack
    • Easy to whip up the wet ingredients with the help of your blender
    • Naturally sweet
    • Kid Friendly!

    Ingredients

    Ingredients to make green smoothie chocolate chip muffins in bowls and pinch bowls around a glass measuring cup full of spinach.
    • Flour: This recipe has been tested with both whole-grain spelt flour and all-purpose flour with success!
    • Sugar: This recipe has been successfully tested with brown sugar and coconut sugar!
    • Lemon zest: The lemon zest in this recipe is optional. It just adds a subtle flavour and I think compliments the chocolate well. 

    See the recipe card below for a full list of ingredients and measurements.

    How To Make Green Smoothie Chocolate Muffins

    Here are the step-by-step instructions to make this recipe.

    Step 1: Prep and Preheat and whisk together dry ingredients.

    Preheat the oven to 400 degrees F. Grease muffin tin well or line with paper liners.

    In a medium bowl, whisk together the spelt flour, cocoa powder, salt, baking powder and baking soda.

    Dry ingredients for green smoothie muffins in a glass mixing bowl with a whisk inside.

    Step 2: Add wet ingredients to a blender.

    In a blender combine melted and cooled coconut oil, coconut sugar, spinach, buttermilk, eggs and lemon zest.

    Spinach and lemon zest in a blender.

    Step 3: Blend

    Blend for 1-2 minutes until the mixture is really smooth to create a "green smoothie".

    Blended coconut oil, coconut sugar, spinach, buttermilk, eggs and lemon zest in a blender container.

    Step 4: Combine dry and wet ingredients.

    Add the green smoothie to the dry ingredients and mix until just combined.

    Dry ingredients dropped on top of wet ingredients in a glass mixing bowl with a whisk into ready to combine.

    Step 5: Add chocolate chips.

    Add chocolate chips and stir until just incorporated.

    Chocolate chips sitting on top of muffin mixture in a glass mixing bowl.

    Step 6: Distribute batter and bake.

    Distribute batter into the prepared muffin wells.

    (If desired, top muffins with a few chocolate chips.)

    Bake in a preheated oven at 400 degrees F for 5-6 minutes and then lower the oven temperature to 350 degrees F. (No need to open the oven door.) Continue to bake for 13-15 minutes. 

    Total baking time is approximately 20 minutes. The muffins are ready when a cake tester comes out clean.

    Muffin mixture in lined muffin tin with chocolate chips dropped on top of each one.

    Expert Tips

    • To properly measure flour for this recipe use a spoon to scoop the flour into a measuring cup. Do not pack the flour into the cup. Use the back of a knife to level off the excess flour.
    • Using fresh baking powder and baking soda is really important in baking. I recommend buying smaller containers of these baking ingredients and writing the date you open them on the box. They should be replaced every 4 months or so. Old baking powder and baking soda lose their effectiveness.
    • Splurge for an organic lemon when you’re including the zest in a recipe!
    • Be careful not to overmix muffin batter. Overmixing can result in dense muffins. Stir with a spoon until the dry ingredients and wet ingredients are just combined.
    • If you want to be consistent with the muffin size I weighed 85 grams of batter into each muffin well.
    • For a better rise, bake the muffins in the upper third of the oven.

    Recipe FAQs

    Is spelt flour good for you?

    Spelt is an ancient grain that hasn’t undergone the level of hybridization of modern wheat. Spelt has higher amounts of protein and fibre and provides important nutrients like manganese, niacin, copper and phosphorus. (health information sourced from healthline)

    Can I make my own buttermilk at home?

    Yes! To make a homemade buttermilk substitute for this recipe combine 1 cup whole milk with 1 tablespoon lemon juice. Let it sit for 5 to 10 minutes to curdle and mimic store-bought buttermilk for these muffins.

    How should I store these muffins?

    Store the muffins in an airtight container at room temperature for up to 2 days, or in the refrigerator for longer freshness. They can also be frozen for several weeks.

    Can I use frozen spinach instead of fresh?

    I have never tested using frozen spinach for these muffins instead of fresh. If you used frozen spinach I would allow it to thaw completely and drain any excess liquid before blending with the wet ingredients so as not to introduce any extra moisture to the batter.

    Green smoothie muffin on a staged counter top with muffins and spinach around.

    More Recipes You'll Love

    • Close up spelt cookie with melted chocolate chips and finishing salt on top, broken in two.
      Spelt Chocolate Chunk Cookies
    • Sliced banana, peanut butter and walnuts topping date oatmeal on a staged countertop.
      Banana Date Oatmeal
    • Chocolate Peanut Butter Rice Cake Bars
    • No-Bake Carrot Cake Energy Balls

    If you tried these Green Smoothie Chocolate Muffins or any other recipe on my website, please leave a 🌟 star rating and let me know how it went in the 📝 comments below. I love hearing from you!

    Recipe

    Green Smoothie Chocolate Muffins

    Christy Faber
    These Green Smoothie Chocolate Muffins are the perfect way to effortlessly sneak nutrient-dense greens into your life. Two cups of fresh spinach are hidden away in a rich chocolate batter that's naturally sweetened with coconut sugar. Easily whip up the batter with the help of your blender and then share these with friends and family!
    5 from 5 votes
    Print Recipe Pin Recipe SaveSaved!
    Prep Time 20 minutes mins
    Cook Time 20 minutes mins
    Total Time 40 minutes mins
    Course Breakfast, Snack
    Cuisine American
    Servings 12 muffins
    Calories 207.7 kcal

    Equipment

    • Blender

    Ingredients
      

    Dry Ingredients:

    • 1 ½ cups spelt flour (or all-purpose flour)
    • 5 tablespoon cocoa powder
    • ½ teaspoon salt
    • 1 ½ teaspoon baking powder
    • 1 teaspoon baking soda 

    Wet Ingredients:

    • ⅓ cup coconut oil (melted)
    • ¾ cup coconut sugar  (or brown sugar)
    • 2 cups packed down spinach (or 60 grams)
    • 1 cup buttermilk
    • 3 eggs large
    • zest from one lemon
    • ½ cup chocolate chips (plus some to top the muffins if desired) (or ¾ cup if you really love chocolate)

    Instructions
     

    • Preheat the oven to 400 degrees F. Grease muffin tin well or line with paper liners.
    • In a medium bowl, whisk together the spelt flour, cocoa powder, salt, baking powder and baking soda.
      1 ½ cups spelt flour, 5 tablespoon cocoa powder, ½ teaspoon salt, 1 ½ teaspoon baking powder, 1 teaspoon baking soda 
    • In a blender combine melted and cooled coconut oil, coconut sugar, spinach, buttermilk, eggs and lemon zest and blend to create a "green smoothie".
      ⅓ cup coconut oil (melted), ¾ cup coconut sugar , 2 cups packed down spinach, 1 cup buttermilk, 3 eggs large, zest from one lemon
    • Add the green smoothie to the dry ingredients and mix until just combined. Stir in chocolate chips.
      ½ cup chocolate chips (plus some to top the muffins if desired)
    • Distribute batter into the prepared muffin wells. If desired, top muffins with a few chocolate chips. (If you want to be consistent with the muffin size I weighed 85 grams of batter into each muffin well)
    • Bake in a preheated oven at 400 degrees F for 5-6 minutes and then lower the oven temperature to 350 degrees F. (No need to open the oven door.)
    • Continue to bake for 13-15 minutes. Total baking time is approximately 20 minutes. The muffins are ready when a cake tester comes out clean.

    Notes

    • To properly measure flour for this recipe use a spoon to scoop the flour into a measuring cup. Do not pack the flour into the cup. Use the back of a knife to level off the excess flour.
    • Using fresh baking powder and baking soda is really important in baking. I recommend buying smaller containers of these baking ingredients and writing the date you open them on the box. They should be replaced every 4 months or so. Old baking powder and baking soda lose their effectiveness.
    • Splurge for an organic lemon when you’re including the zest in a recipe!
    • Be careful not to overmix muffin batter. Overmixing can result in dense muffins. Stir with a spoon until the dry ingredients and wet ingredients are just combined.
    • If you want to be consistent with the muffin size I weighed 85 grams of batter into each muffin well.
    • For a better rise, bake the muffins in the upper third of the oven.

    Nutrition

    Serving: 36.42gCalories: 207.7kcalCarbohydrates: 53.5gProtein: 13.5gFat: 12.4gSaturated Fat: 7.4gCholesterol: 94mgSodium: 3975mgPotassium: 2514mgFiber: 14.7gSugar: 15.6gCalcium: 640mgIron: 9mg
    Tried this recipe?Let us know how it was!

    If you make this recipe please leave a comment and give this recipe a rating! I aim to respond to every single comment. I am so grateful when you trust me and try one of my recipe creations in your own kitchen. I love to hear how it went!  Let’s connect on Instagram and tag me in your food pics!

    ‘Til next time,

    Christy

    The Best Poems to Share with Young Children

    May 24, 2021 · 4 Comments

    Poems to Share with Young Children, photo by Annie Spratt

    “When I say to a parent, "read to a child", I don't want it to sound like medicine. I want it to sound like chocolate.”

    Mem Fox

    Most parents have heard that reading poetry to young children is important but many parents struggle with incorporating poetry into daily life. Choosing which poems to read is another challenge.

    To make your life a bit easier, I have curated a few of our favourite poems that I read regularly to my young children. My personal favourite from this list is “The Mouse in the Wainscott”.  Please share in the comments what your favourite poem is to read with your children or which poem from the list is your favourite. Follow me on Instagram @lifearoundthetable.ca where I share poems for children on my stories.

    Keep a Poem in Your Pocket

    Keep a poem in your pocket
    And a picture in your head
    And you'll never feel lonely
    At night when you're in bed.
    The little poem will sing to you
    The little picture bring to you
    A dozen dreams to dance to you
    At night when you're in bed.
    So 
    Keep a poem in your pocket 
    And a picture in your head 
    And you'll never feel lonely 
    At night when you're in bed.

    -Beatrice Schenk de Regniers- 

    The Mouse in the Wainscot

    Hush, Suzanne!
    Don’t lift your cup.
    That breath you heard
    Is a mouse getting up.

    As the mist that steams
    From your milk as you sup,
    So soft is the sound
    Of a mouse getting up.

    There! Did you hear
    His feet pitter-patter,
    Lighter than tipping
    Of beads in a platter,

    And then like a shower
    On the windowpane
    The little feet scampering
    Back again?

    O falling of feather!
    O drift of a leaf!
    The mouse in the wainscot
    Is dropping asleep

    -Ian Serraillier-

    Sunflakes

    If sunlight fell like snowflakes,
    gleaming yellow and so bright,
    we could build a sunman,
    we could have a sunball fight,
    we could watch the sunflakes
    drifting in the sky.

    We could go sleighing
    in the middle of July
    through sundrifts and sunbanks,
    we could ride a sunmobile,
    and we could touch sunflakes—
    I wonder how they'd feel.

    -Frank Asch-

    The Tale of Custard the Dragon

    Belinda lived in a little white house,
    With a little black kitten and a little gray mouse,
    And a little yellow dog and a little red wagon,
    And a realio, trulio, little pet dragon.
    Now the name of the little black kitten was Ink,
    And the little gray mouse, she called her Blink,
    And the little yellow dog was sharp as Mustard,
    But the dragon was a coward, and she called him Custard.

    Custard the dragon had big sharp teeth,
    And spikes on top of him and scales underneath,
    Mouth like a fireplace, chimney for a nose,
    And realio, trulio, daggers on his toes.
    Belinda was as brave as a barrel full of bears,
    And Ink and Blink chased lions down the stairs,
    Mustard was as brave as a tiger in a rage,
    But Custard cried for a nice safe cage.

    -Ogden Nash-

    Measurement

    Stars and atoms have no size,
    They only vary in men’s eyes.
    Men and instruments will blunder
    Calculating things of wonder.
    A seed is just as huge a world
    As any ball the sun has hurled.
    Stars are quite as picayune
    As any splinter of the moon.
    Time is but a vague device;
    Space can never be precise;
    Stars and atoms have a girth
    Small as zero, ten times Earth.
    There is, by God’s swift reckoning,
    A universe in everything.

    -A.M. Sullivan-

    No Shop Does the Bird Use

    No shop does the bird use,
    no counter no baker.
    but the bush is his orchard,
    the grass is his acre,
    the ant is his quarry,
    the seed is his bread,
    and a star is his candle
    to light him to bed.

    -Elizabeth Coatsworth-

    The Tree in the Garden

    There’s a tree out in our garden which is very nice to climb,
    And I often go and climb it when it’s fine in summer time,
    And when I’ve climbed right up it I pretend it’s not a tree
    But a ship in which I’m sailing, faraway across the sea.
    Its branches are the riggin and the grass so far below
    I make believe’s the ocean over which my ship must go;
    And when the wind is blowing then I really seem to be
    A-sailing, sailing, sailing, far away across the sea.

    Then I hunt for desert islands and I very often find
    A chest stuffed full of treasure which some pirate’s left behind—
    My good ship’s hold is filled with gold—it all belongs to me—
    For I’ve found it when I’m sailing faraway across the sea.
    It’s a lovely game to play at —though the tree trunk’s rather green,
    Still, when I’m in my bath at night I always come quite clean.
    And so through all the summer, in my good ship Treasure-Tree,
    I shall often go a-sailing far away across the sea.

    -Christine Chaundler-

    Jabberwocky

    ’Twas brillig, and the slithy toves
        Did gyre and gimble in the wabe:
    All mimsy were the borogoves,
    And the mome raths outgrabe.

    “Beware the Jabberwock, my son!
      The jaws that bite, the claws that catch!
    Beware the Jubjub bird, and shun
    The frumious Bandersnatch!”

    He took his vorpal sword in hand;
        Long time the manxome foe he sought—
    So rested he by the Tumtum tree
          And stood awhile in thought.

    And, as in uffish thought he stood,
    The Jabberwock, with eyes of flame,
    Came whiffling through the tulgey wood,
    And burbled as it came!

    One, two! One, two! And through and through
    The vorpal blade went snicker-snack!
    He left it dead, and with its head
      He went galumphing back.

    “And hast thou slain the Jabberwock?
        Come to my arms, my beamish boy!
    O frabjous day! Callooh! Callay!”
    He chortled in his joy.

    ’Twas brillig, and the slithy toves
      Did gyre and gimble in the wabe:
    All mimsy were the borogoves,
      And the mome raths outgrabe.

    -Lewis Carroll-

    Don't be intimidated by the strange words in this poem. It is so fun and children LOVE it. You can look up a video on YouTube of someone reading Jabberwocky to get the correct pronunciations. 

    The Library

    It looks like any building
    When you pass it on the street,
    Made of stone and glass and marble,
    Made of iron and concrete.
    But once inside you can ride
    A camel or a train,
    Visit Rome, Siam, Or Nome,
    Feel a hurricane,
    Meet a king, learn to sing,
    How to bake a pie,
    Go to sea, plant a tree,
    Find how airplanes fly,
    Train a horse, and of course
    Have all the dogs you'd like,
    See the moon, a sandy dune,
    Or catch a whopping pike.
    Everything that books can bring
    You’ll find inside those walls.
    A world is there for you to share
    When adventure calls.
    You cannot tell its magic
    By the way the building looks,
    But there’s wonderment within it,
    The wonderment of books.

    -Barbara A. Huff-

    Please share in the comments what your favourite poem is to read with your children or which poem from the list is your favourite.

    More Picture Books

    • First Picture Books for Baby
    • The Best Picture Books (Part 1)
    • The Best Picture Books (Part 2)

    Poetry Posts

    • Winter and Christmas Poems for Children
    • Poems Young Children Love

    Spicy Sausage Pasta

    May 23, 2021 · 22 Comments

    This Spicy Sausage Pasta is a great choice when you’re entertaining, enjoying a date night at home or any time you want some comfort food. Every bite of creamy pasta provides a hint of tangy Dijon mustard, and smoky-spice from the chipotle peppers and spicy Italian sausages. If you’re looking for a new recipe to add to your repertoire, this is it! Delicious!

    Bowl full of pasta with pepper and Italian sausage on top on a staged countertop.

    This recipe is based on a dish my mom makes from time to time. I have many great memories associated with this meal (although my mom's version isn't spicy).  We enjoy it every summer up at the cottage.

    I am the kind of person who has to know what we’ll be eating for dinner and it’s what I look forward to most all day! The formula is simple: delicious food equals JOY.  This creamy pasta dish is in my top 5 favorite dinners of all time!

    Explore more comfort food recipes on the blog: Cauliflower Sausage Soup, Apple Cider Butternut Squash Soup, Cozy Wild Rice Soup, Pumpkin Pie Pecan Bars and Chocolate Orange Pudding Cake.

    [feast_advanced_jump_to]

    Why You'll Love This Recipe

    • The ultimate comfort food
    • Great at home date night meal!
    • Easily adjust the level of spice in this dish
    • You'll love the leftovers of this recipe for lunch the next day
    • Surprisingly easily to prepare with impressive results
    • A full meal in a bowl: veggies, pasta and protein all in one!

    Ingredients

    Ingredients to make spicy sausage pasta in bowls, plates and cups on a countertop.
    • Pasta - I recommend buying a spelt pasta for a healthier alternative. I chose a rigatoni shape.
    • White wine - Purchase your favorite white wine for this recipe because it only calls for ½ cup and you'll be able to serve the bottle with your dinner.
    • Chipotle Peppers in Adobo Sauce - If you like extra spice and smoky flavor then don't hesitate to add additional chipotle.
    • Red peppers- slice them quite thinly as pictured in the shot above.

    See the recipe card below for a full list of ingredients and measurements.

    Substitutions & Variations

    • Rigatoni Pasta: you can swap this pasta shape for another. You can also swap for a gluten free pasta or whole grain pasta.
    • Sausages: swap spicy Italian sausages for your favorite type of sausage or consider trying chicken sausages which are my favorite!
    • White wine: I haven't tested this but theoretically you could swap the white wine for chicken broth to deglaze the pan. The finished dish just won't be quite as flavorful.
    • Maple syrup: you can swap for honey or sugar of your choice.
    • Optional Addition: Stir in a tablespoon of tomato paste while sautéing the vegetables for a creamy tomato-based sauce.
    • Bump up the heat: Enhance the heat by adding a pinch of cayenne pepper or red pepper flakes along with increasing the chipotle in adobo.
    • Veggies: Add a handful of fresh baby spinach for some added nutrition and added color.

    I have not experimented with any other substitutions or alterations for this recipe. If you decide to make any changes by adding or substituting ingredients, I would love it if you could share your results with us by leaving a comment below.

    How To Make Spicy Sausage Pasta

    Here are the step-by-step instructions to make this recipe.

    Step 1: Cook the sausages and set aside.

    Begin by cooking the spicy Italian sausages in a large frying pan until thoroughly cooked. Once done, set them aside on a plate to rest.

    5 cooked, Italian sausages in an enameled pan.

    Step 2: Cook the pasta to al dente according to package directions.

    In a large pot, bring water to a boil for the pasta. Remember to heavily salt the water for enhanced flavor. Once the water is boiling, add the dried pasta and cook it to al dente according to the directions on the package. Once cooked, drain the pasta, run it under cold water to prevent it from sticking together and set it aside.

    Drained and cooked pasta in a colander  on a countertop.

    Step 3: Chop the veggies.

    While the sausages and pasta are cooking, prepare the onion, red bell peppers, and cremini mushrooms by chopping them into appropriate sizes.

    Chopped red pepper on a cutter board with a large chef's knife beside them.

    Step 4: Cook the onion.

    Heat 2 tablespoon of olive oil over medium heat in the same pan used for cooking the sausages. Sauté the diced onion until it turns translucent.

    Sautéed onion in the bottom of an enamel pan.

    Step 5: Deglaze the pan.

    Pour the white wine into the pan with the sautéed onions. Stir for about 1 to 2 minutes to cook off the alcohol and thoroughly deglaze the pan.

    White wine being poured over sautéed onion in an enamel pan from a small dish.

    Step 6: Cook peppers and mushrooms and add all sauce ingredients.

    Add the thinly sliced red bell peppers and the sliced cremini mushrooms to the pan. Cook them for a few minutes until they soften.

    Now, add the heavy cream, grainy Dijon mustard, crushed chipotle peppers in adobo sauce, and maple syrup. Season the mixture with salt and pepper according to your taste.

    Cream being poured over cooked veggies in an enamel pan from a glass measuring cup.

    Step 7: Reduce the sauce and adjust for seasoning.

    Let the sauce simmer until it reduces and coats the back of a spoon. This takes approximately 15 minutes. Take your time to taste the sauce and adjust the seasoning.

    Cream sauce mixed with vegetables in an blue enamel  sauce.

    Step 8: Add the cooked sausages and cooked pasta.

    Slice the cooked sausages into thin coins and add them to the sauce. Add the cooked pasta with the sauce as well, stir until they are evenly coated in the sauce.

    Cream sauce, veggies, sausage mixed together in enamel pan with pasta laid on top.

    Step 9: Garnish and serve

    To finish, sprinkle the dish with freshly chopped parsley and a sprinkle of crushed red pepper flakes to add additional spiciness. Serve hot and enjoy!

    Parsley sprinkled over finished spicy sausage pasta in a blue enamel pan with a wooden spoon in it on a staged marble countertop.

    Expert Tips

    • Get organized before beginning the cooking process. If you gather your ingredients and do all of your chopping ahead of time it creates a stress free cooking experience.
    • When adding wine to the pan, use a wooden spoon to scrape up any flavorful bits stuck to the bottom. This adds so much flavor to the sauce!
    • Let the cream sauce simmer gently until it thickens enough to coat the back of a spoon. Stir consistently and avoid the sauce coming to a full boil, which can cause the cream to separate.
    • Cook the pasta to "al dente". The residual heat from the sauce will continue to soften it.
    • Take your time to taste and adjust for seasoning before serving. This step is the difference between a good meal and a great meal.

    Recipe FAQs

    How can I make this recipe less spicy?

    To reduce the spiciness, you can use milder sausages and adjust the amount of chipotle in adobo. Start with a small amount and add more gradually until you reach your desired level of heat.

    Is there a non-alcoholic substitute for the white wine?

    Yes, you can replace white wine with chicken or vegetable broth. It won't have the same depth of flavor, so you may need to add some additional Dijon mustard and chipotle pepper in adobo to compensate.

    Can I omit the maple syrup in this recipe?

    If you want to reduce your sugar intake you can omit the maple syrup from this recipe.

    Bowl full of pasta with pepper and Italian sausage on top an a golden spoon in it on a staged countertop.

    More Recipes You'll Love

    • Halloumi Stroganoff
    • Creamy Carrot and Parsnip Soup
    • High Protein Cottage Cheese Quiche
    • Spinach, Sun-dried Tomato and Pesto Quiche

    If you tried this Spicy Sausage Pasta or any other recipe on my website, please leave a 🌟 star rating and let me know how it went in the 📝 comments below. I love hearing from you!

    Recipe

    Spicy Sausage Pasta

    Christy Faber
    This Spicy Sausage Pasta is a great choice when you’re entertaining, enjoying a date night at home or any time you want some comfort food. Every bite of creamy pasta provides a hint of tangy Dijon mustard, and smoky-spice from the chipotle peppers and spicy sausages. If you’re looking for a new recipe to add to your repertoire, this is it! Delicious!
    5 from 14 votes
    Print Recipe Pin Recipe SaveSaved!
    Prep Time 15 minutes mins
    Cook Time 45 minutes mins
    Total Time 1 hour hr
    Course Main Course
    Cuisine Italian
    Servings 6 People
    Calories 578 kcal

    Ingredients
      

    • 4-5 (500g) sausages spicy Italian sausage
    • 200g rigatoni pasta uncooked
    • 2 tablespoon olive oil
    • 1 onion diced
    • ½ cup white wine
    • 2 red bell peppers thinly sliced
    • 250 grams cremini mushroom diced
    • 1 ½ cup heavy cream 36%
    • 2 tablespoon grainy dijon mustard
    • 2 ½ tablespoon chipotle peppers in adobo sauce smashed with the back of a fork
    • 1 tablespoon pure maple syrup
    • salt and pepper to taste
    • 1 tbsp tomato paste optional

    Garnish

    • sprinkle of fresh parsley optional
    • sprinkle of crushed red pepper flakes optional

    Instructions
     

    • In a large frying pan, cook the sausages thoroughly and set aside on a plate to rest.
    • In a large pot, bring heavily salted water to a boil for the pasta. Once the water is boiling, add the dried pasta and cook it to al dente according to the directions on the package. Once cooked, drain the pasta, run it under cold water to prevent it from sticking together and set it aside.
    • Meanwhile, prepare and chop the onion, peppers and mushrooms.
    • Heat 2 tablespoon of olive oil over medium heat in the same pan used for cooking the sausages. Sauté the diced onion until it turns translucent.
    • Pour the white wine into the pan with the sautéed onions. Stir for about 1 to 2 minutes to cook off the alcohol and thoroughly deglaze the pan.
    • Add the thinly sliced red bell peppers and the sliced cremini mushrooms to the pan. Cook them for a few minutes until they soften.
    • Now, add the heavy cream, grainy Dijon mustard, crushed chipotle peppers in adobo sauce, and maple syrup and tomato paste if using. Season the mixture with salt and pepper according to your taste.
    • Let the sauce simmer until it reduces and coats the back of a spoon. This takes approximately 15 minutes. Take your time to taste the sauce and adjust the seasoning.
    • Slice the cooked sausages into thin coins and add them to the sauce. Add the cooked pasta with the sauce as well, stir until they are evenly coated in the sauce.
    • To finish, sprinkle the dish with freshly chopped parsley and a sprinkle of crushed red pepper flakes to add additional spiciness. Serve hot and enjoy!

    Notes

    • Get organized before beginning the cooking process. If you gather your ingredients and do all of your chopping ahead of time it creates a stress free cooking experience.
    • When adding wine to the pan, use a wooden spoon to scrape up any flavorful bits stuck to the bottom. This adds so much flavor to the sauce!
    • Let the cream sauce simmer gently until it thickens enough to coat the back of a spoon. Stir consistently and avoid the sauce coming to a full boil, which can cause the cream to separate.
    • Cook the pasta to "al dente". The residual heat from the sauce will continue to soften it.
    • Take your time to taste and adjust for seasoning before serving. This step is the difference between a good meal and a great meal.

    Nutrition

    Calories: 578kcalCarbohydrates: 31.6gProtein: 19.7gFat: 40.1gSaturated Fat: 15.2gCholesterol: 124mgSodium: 892mgPotassium: 356mgFiber: 3.1gSugar: 5.9gCalcium: 103mgIron: 5mg
    Tried this recipe?Let us know how it was!

    If you make this recipe please leave a comment and give this recipe a rating! I aim to respond to every single comment. I am so grateful when you trust me and try one of my recipe creations in your own kitchen. I love to hear how it went!  Let’s connect on Instagram and tag me in your food pics!

    ‘Til next time,

    Christy

    The Best Children's Picture Books (Part 2)

    May 18, 2021 · 2 Comments

    Book cover of The Seven Silly Eaters

    The Seven Silly Eaters by Marla Frazee

    “When Peter was just one year old,
    He did not like his milk served cold.
    He did not like his milk served hot.
    He liked it warm…
    And he would not
    Drink it if he was not sure
    It was the proper temperature.
    But Mrs. Peters did not mind.
    She was a mother sweet and kind;
    And when his milk spilled on the floor,
    She patiently prepared some more.
    She’d take the bottle from the shelf
    And chuckle softly to herself, ‘What a silly sort of eater
    Is my darling baby Peter.’"

    Marla Frazee is one of my favourite illustrators. I never get tired of reading this book to my kids because the illustrations are so detailed and relatable. Mrs. Peters looks more frazzled and weary as the book goes on and as she has more and more children. Her house gets messier and messier as she has to accommodate more picky eaters. I can relate.

    Book cover of How to Make an Apple Pie and See the World Children's Picture Book

    How to Make an Apple Pie and See the World by Marjorie Priceman 

    “Making an apple pie is really very easy. First, get all the ingredients at the market. Mix them well, bake and serve. Unless, of course, the market is closed. In that case, go home and pack a suitcase. Take your shopping list and some walking shoes. Then catch a steamship bound for Europe.”

    In this story, harvest some wheat in Italy, coax a French chicken to lay an egg, peel off some cinnamon bark from a tree in Sri Lanka, and pick some apples in an orchard in Vermont, all before heading home to bake a pie to share with friends!

    Cover for The Quiltmakers Gift

    The Quiltmaker’s Gift by Jeff Brumbeau

    “There was once a quiltmaker who kept a house in the blue misty mountains up high…Many people climbed her mountain, pockets bursting with gold, hoping to buy one of the wonderful quilts. But the woman would not sell them. ‘I give my quilts to those who are poor or homeless,’ she told all who knocked on her door. ‘They are not for the rich.’”

    The Quiltmaker's Gift is a story about a selfish and greedy king who is obsessed with hoarding gifts and treasures all for himself. When he discovers that the quiltmaker will not sell a quilt to him for any amount of money, he becomes angry and desperate. The quiltmaker says to him “Make presents of everything you own... and then I’ll make a quilt for you”. The king begins to give his treasures away to others, reluctantly at first, but as he sees the joy that it brings others, he becomes happier and happier himself. I love this story for teaching children the joy of sharing with others. The illustrations are colourful, whimsical and engaging.  This is a picture book I never get tired of reading to my children.

    Book cover of Angelica Sporket's Pockets

    Angelica Sprocket’s Pockets by Quentin Blake

    “Angelica Sprocket lives next door. Her overcoat has pockets galore.”

    This is a silly, rhyming, nonsensical book and it is so fun. Angelica Sprocket has an extensive collection of strange items in her many coat pockets. If you grew up reading Roald Dahl books like I did, then you know what I mean when I say Quentin Blake’s illustrations are so nostalgic and incredibly unique.

    Cover of Thundercake a Children's Picture Book

    Thundercake by Patricia Polacco

    “Grandma looked at the horizon, drew a deep breath and said, ‘This is Thunder Cake baking weather, all right. Looks like a storm coming to me...Don’t pay attention to that old thunder [child], except to see how close the storm is getting….We need to know how far away the storm is, so we have time to make the cake and get it into the oven before the storm comes, or it won’t be real Thunder Cake.’”

    I love the concept of this story! A young child staying with her grandma fears the sound of thunder and her grandma distracts her by taking her around the farm to collect ingredients for baking a “Thunder Cake”. They have to hurry so they can get the cake into the oven in time for it to be ready when the storm is right above them!

    Cover of The Raft

    The Raft by Jim LaMarche

    The Raft is a dreamy story of a young boy spending the summer with his grandma. At first, the young boy is afraid he’ll have a boring summer but his grandma lives by the river and he soon finds the magic in it. He spends his days exploring on a floating raft and getting up close to the creatures who live in and near the river. The author himself says: “This story is about… a summer in the woods, a special grandparent, becoming a river rat, and becoming an artist.”

    “After that, I had little time for anything but the raft. I raced through whatever chores there were, then ran down to the dock, wondering what animals I’d see that day. It wasn’t just birds that the raft attracted. One morning three raccoons followed me along the shore. Another time a turtle climbed on board and spent the morning sunning itself. And one afternoon I saw a family of foxes slip through the trees along the river.”

    Cover of The Circus Ship a children's picture book

    The Circus Ship by Chris Van Dusen

    "Five miles off the coast of Maine
    and slightly overdue,
    a circus ship was steaming south
    in fog as thick as stew.
    Onboard were fifteen animals
    who travelled to and fro.
    The next day it was Boston
    or another circus show.”

    This story is about a circus ship full of animals (and their demanding circus owner) who get caught in a big storm that destroys their ship. The circus owner selfishly saves only himself on a small life boat. The animals end up swimming to shore and landing in a quiet town on the coast of Maine.  “Soon animals were everywhere, and into everything”. A woman finds a python in her pantry! A man finds an ostrich in the outhouse! Eventually, the townspeople begin to get along with all these new exotic visitors. When the greedy circus owner arrives on a big ship to collect his animals, the townspeople hide their new friends in fun and creative ways.

    Cover of The Curious Garden, a children's picture book.

    The Curious Garden by Peter Brown

    Liam lives in a city without gardens or trees or greenery of any kind and then one day he stumbles upon a small struggling garden.

    “Since Liam had always wanted to explore the [railway] tracks, there was only one thing for the curious boy to do. Liam ran up the stairs….The first thing he saw was a lonely patch of color. Wildflowers and plants were the last things he had expected to find up there. But when he took a closer look, it became clear that the plants were dying. They needed a gardener.”

    Liam returns every day to water and tends to the flowers. The small struggling garden starts to spread and travel throughout the whole city. The illustrations in this book show the ugly brown city slowly getting covered in fresh green plant life. Plants pop up everywhere and new gardeners join Liam in the beautifying project! 

    All photos are taken from Amazon.com. Please let me know which of these you're familiar with and which one you'll try next!

    More Picture Books

    • First Picture Books for Baby
    • The Best Picture Books (Part 1)
    • The Best Picture Books (Part 3)

    Poetry Posts

    • Winter and Christmas Poems for Children
    • The Best Poems to Share with Young Children
    • Poems Young Children Love

    Spelt Flour Cinnamon Buns

    May 15, 2021 · 6 Comments

    What is more comforting than a warm cinnamon bun freshly iced right out of the oven?

    You're going to love these wholesome and delicious Spelt Flour Cinnamon Buns with a unique orange-infused cinnamon filling and cream cheese icing. They're lightly sweetened with maple syrup and coconut sugar and will make your kitchen smell amazing as they bake up!

    Finished cinnamon buns with swirled icing on top in a 12", blue enamel, coated cast iron skillet.

    The braiding technique is easier than you think! I will walk you through the process with step-by-step photos below.

    The hint of orange in the filling really compliments the nutty flavor of whole grain spelt flour (just like in my Gingerbread Bundt Cake) These braided cinnamon buns are satisfying but not overly sweet and you still feel great after eating them!

    If you're looking for more recipes to make with spelt flour check out these Spelt Chocolate Chunk Cookies and Spelt Flour Pancakes.

    [feast_advanced_jump_to]

    Why You'll Love This Recipe

    • Naturally sweetened!
    • Easy braiding technique that looks beautiful and impressive
    • Delicious hint of orange in the filling and icing
    • Great depth of flavour from the whole grain spelt flour
    • Make ahead option!

    Ingredients

    Ingredients to make spelt cinnamon buns in mixing bowls, plates and pinch bowls.
    • Yeast - I used an 8g packet of active dry yeast.
    • Butter - choose unsalted butter so the buns won't be too salty.
    • Sugar - either coconut sugar or brown sugar will work for the cinnamon filling.
    • Maple syrup - either maple syrup or honey will work for sweetening the dough and the icing.
    • Flour - for this recipe, I use a combination of spelt flour and all-purpose flour. It will also work to swap the whole grain spelt flour in this recipe for whole wheat flour.
    • Orange Juice & Zest - these are optional flavourings. You could swap these for vanilla extract or lemon zest and juice if you prefer!

    See the recipe card below for a full list of ingredients and measurements.

    How To Make Spelt Flour Cinnamon Buns

    Here are the step-by-step instructions to make this recipe.

    Step 1 & 2: Scald the milk and add the yeast to the cooled milk, butter and maple syrup.

    Step One: Heat the milk in a small saucepan. Watch the milk carefully and as soon as it starts bubbling around the side of the saucepan take it off the heat. (This is referred to as scalding. This is an important step to ensure the yeast is able to rise properly later.)

    Step Two: Pour the milk into an electric mixer with butter, and maple syrup. Before you add the yeast ensure that the temperature of the milk mixture has come down to room temperature. It's important to be patient at this step because if it's too warm it can kill the yeast. Stir in the yeast and wait until you see it begin to get bubbly and foamy on the surface. This takes about 15 minutes.

    Cooled milk with butter, maple syrup and yeast in a metal mixing bowl, showing the correct bubbly texture.

    Step 3 & 4: Add the rest of the ingredients for the dough and begin mixing.

    Step Three: Add the eggs, spelt flour and all-purpose flour and salt. Place the bread hook on the stand mixer and turn on low.

    Step Four: Initially the dough will have a rough and shaggy appearance but trust the process and keep mixing.

    Step three and four to make spelt cinnamon buns with the dry ingredients as well as the texturing of the mixture in the mixer showing a rough and shaggy appearance.

    Step 5&6: Mix for 15 minutes. Allow the dough to rise until doubled in size.

    Step Five: Run the mixer for 15 minutes and you'll see the dough go from rough and sticky looking to a nice soft homogenous ball of dough.

    Step Six: Turn the mixer off and cover the top of the mixing bowl with a clean kitchen towel and wait for the dough to rise until at least doubled in size. (This can take anywhere from an hour to an hour and a half but it's more important to go by eye than by time.)

    Step five and six to make spelt cinnamon buns showing the mixed down before and after rising.

    Step 7&8: Mix up the cinnamon filling.

    Step Seven and Eight: Cream together the sugar, softened unsalted butter, cinnamon, nutmeg, orange zest and orange juice until smooth. Mixture should be room temperature when you are ready to spread it out on the dough.

    Step seven and eight of making spelt cinnamon, showing the raw ingredients for the cinnamon filling in a ceramic mixing bowl and then mixed together.

    Step 9-12: Roll out dough, evenly spread cinnamon filling and fold up the dough.

    Step Nine: Turn the risen dough out onto a lightly floured work surface. Roll into a rectangle approximately 16 inches high by 20 inches wide.

    Step Ten: Spread the sugar and cinnamon filling evenly over the rolled out dough.

    Step Eleven: Fold up the bottom edge to meet the middle of the dough.

    Step Twelve: Now fold down the top edge even with the new bottom edge.

    Steps nine, ten, eleven and twelve showing how to roll, fold and prepare dough with cinnamon mixture on top.

    Step 13-16: Cut and braid the rolls.

    Step Thirteen: Trim off the rough edges with a sharp knife or bench scraper. Cut strips from top to bottom that are approximately 2 ½ inches wide. You should be able to get 10-12 strips.

    Step Fourteen: Take each individual strip and leaving an inch of dough at the top, make two cuts to create three sections of dough for braiding.

    Step Fifteen and Sixteen: Braid the three strands tightly.

    Steps thirteen, fourteen, fifteen and sixteen showing how to cut and fold spelt cinnamon rolls.

    Step 17-20: Roll the braid into a bun.

    Step Seventeen-Twenty: Roll the braid from the top down into a bun shape.

    Steps seventeen, eighteen, nineteen and twenty showing how to roll spelt cinnamon rolls.

    Step 21-22: Place buns in a baking dish and allow the rolls to rise again.

    Step Twenty-One: Place buns in a 9x13 inch baking dish or 12 inch round cast iron pan.

    Step Twenty-Two: Preheat the oven to 350 degrees Fahrenheit. Place the baking dish on the top of the oven as the oven preheats and allow the rolls to rise for at least 20 minutes.

    You can see in the images below the amount the buns should rise.

    Steps twenty-one and twenty-two to make spelt cinnamon rolls showing rolled and folded cinnamon rolls in a low cast iron pan.

    Step 23: Bake the rolls.

    Step Twenty-Three: Bake the rolls for 25-30 minutes until lightly brown at the top.

    Spelt cinnamon rolls freshly out of the oven in a low cast iron pan showing browned tops and cinnamon filling.

    Step 24&25: Make the icing.

    Step Twenty-Four and Twenty-Five: Beat the softened cream cheese, softened butter, honey and orange zest together until light and fluffy. When the rolls come out of the oven, spoon the icing over the buns. Enjoy!

    Steps twenty-four and twenty-five showing cream cheese and icing ingredients before and after being mixed.

    Expert Tips

    • If you're using salted butter instead of unsalted butter, decrease the amount of added salt to the dough.
    • Ensure that you're using fresh dry active yeast that hasn't expired.
    • Measure the flour carefully and accurately. The best way to do this is to spoon the flour into your measuring cup and level it off with the back of a knife.
    • For recipes that use yeast, it’s more important to go by eye than by time.   If the recipe says it takes one hour for the dough to double in size and an hour has gone by and your dough hasn’t risen much,  just give it more time.  If your house is a bit colder,  you could try setting the bowl in a warmer spot.    A trick I sometimes use is to heat the oven to 200 degrees and then crack the door open slightly.  I set my bowl of dough on the top of the oven so it can catch the rising heat. 
    • I recommend splurging on organic oranges when you’re using the zest for a recipe. 
    • Allow the cinnamon buns to cool slightly before spreading the icing. This prevents the icing from melting and resulting in a messy presentation.
    • Make Ahead Option: If you plan to serve fresh cinnamon buns for breakfast, you can do most of the preparation the evening before.  Just follow all the steps up to when the buns are shaped and placed in a baking dish.  Cover the pan and pop them in the fridge. The next morning,  preheat the oven to 350F.   Place the covered baking dish on top of the oven for half an hour to 45 minutes to allow the cinnamon buns to warm up and rise to double their size.  Bake as instructed in the recipe.

    Recipe FAQs

    Why do some recipes call for scalding milk?

    Milk-based doughs rise more easily if the milk has been scalded first. The whey found in milk can inhibit the yeast’s ability to rise but when the milk is heated to a temperature of 180-185 degrees Fahrenheit, then the whey in the milk is weakened and the yeast can do its job.
    An indicator that the milk is scalded is when small bubbles begin to appear on the perimeter of your pot. Remember to stir frequently and watch the milk carefully because it’s easy to have it get too hot.
    Allow the milk to cool down to room temperature again before adding in your yeast. When the milk is too hot it can kill the yeast. 

    Can I sweeten the icing with powdered sugar?

    Yes! If you prefer icing that contains icing sugar,  just swap out the maple syrup/honey for ½ cup of icing sugar.

    Can I prepare the dough ahead of time?

    If you plan to serve fresh cinnamon buns for breakfast, you can do most of the preparation the evening before.  Just follow all the steps up to when the buns are shaped and placed in a baking dish.  Cover the pan and pop them in the fridge. The next morning,  preheat the oven to 350F.   Place the covered baking dish on top of the oven for half an hour to 45 minutes to allow the cinnamon buns to warm up and rise to double their size.  Bake as instructed in the recipe.

    How should I store these cinnamon buns?

    Store these cinnamon buns in an airtight container in the fridge for 3-4 days. To rewarm the buns you can place them in a 300 degree oven for 5-10 minutes.

    Final spelt cinnamon roll on a small dessert plate on a staged table top with cream cheese icing on top.

    More Spelt Flour Recipes You'll Love

    • Close up spelt cookie with melted chocolate chips and finishing salt on top.
      24 Delicious Spelt Flour Recipes
    • Spelt Flour Pie Crust
    • Healthy Spelt Flour Pancakes
    • Close up spelt cookie with melted chocolate chips and finishing salt on top, broken in two.
      Spelt Chocolate Chunk Cookies

    If you tried these Spelt Flour Cinnamon Buns or any other recipe on my website, please leave a 🌟 star rating and let me know how it went in the 📝 comments below. I love hearing from you!

    Recipe

    Healthy Spelt Flour Cinnamon Buns

    Christy Faber
    What is more comforting than a warm cinnamon bun freshly iced right out of the oven? You're going to love these wholesome and delicious Spelt Flour Cinnamon Buns with a unique orange-infused cinnamon filling and cream cheese icing. They're lightly sweetened with maple syrup and coconut sugar and will make your kitchen smell amazing as they bake up!
    4.50 from 2 votes
    Print Recipe Pin Recipe SaveSaved!
    Prep Time 45 minutes mins
    Cook Time 25 minutes mins
    Dough Rising 1 hour hr 30 minutes mins
    Total Time 2 hours hrs 40 minutes mins
    Course Breakfast, Dessert
    Cuisine American
    Servings 12 Rolls
    Calories 485 kcal

    Equipment

    • Stand Mixer

    Ingredients
      

    For the Dough

    • 1 cup scalded milk
    • ½ cup unsalted butter
    • ¼ cup maple syrup
    • 1 packet dry active yeast (8g)
    • 2 cups whole grain spelt flour
    • 2 cups all purpose flour
    • 2 large eggs
    • 2 teaspoon unrefined sea salt

    For the Filling

    • ¾ cup coconut sugar
    • ½ cup softened unsalted butter 
    • 2 tablespoon ground cinnamon 
    • ¾ teaspoon ground nutmeg 
    • zest from one small orange 
    • 1 tablespoon orange juice 

    For the Icing:

    • ½ cup unsalted butter softened
    • 4 oz cream cheese softened
    • 2 or 3 tablespoon honey or maple syrup
    • 1 orange zest from one small orange

    Instructions
     

    For the Dough:

    • Heat the milk in a small saucepan. Watch the milk carefully and as soon as it starts bubbling around the side of the saucepan take it off the heat. (This is referred to as scalding. This is an important step to ensure the yeast is able to rise properly later.)
      1 cup scalded milk
    • Pour the milk into an electric mixer with butter, and maple syrup. Before you add the yeast ensure that the temperature of the milk mixture has come down to room temperature. It's important to be patient at this step because if it's too warm it can kill the yeast.
      ½ cup unsalted butter, ¼ cup maple syrup
    • Stir in the yeast and wait until you see it begin to get bubbly and foamy on the surface. This takes about 15 minutes. (see photos above of this step.)
      1 packet dry active yeast (8g)
    • Add the eggs, spelt flour and all-purpose flour and salt. Place the bread hook on the stand mixer and turn on low. Run the mixer for 15 minutes and you'll see the dough go from rough and sticky looking to a nice soft homogenous ball of dough. Turn the mixer off and cover the top of the mixing bowl with a towel and wait for the dough to rise until doubled in size. (This can take anywhere from an hour to a hour and a half but it's more important to go by eye than by time.)
      2 cups whole grain spelt flour, 2 cups all purpose flour, 2 teaspoon unrefined sea salt, 2 large eggs

    For the Filling:

    • Cream together the sugar, softened unsalted butter, cinnamon, nutmeg, orange zest and orange juice until smooth. Mixture should be room temperature when you are ready to spread it out on the dough.
      ¾ cup coconut sugar, ½ cup softened unsalted butter , 2 tablespoon ground cinnamon , ¾ teaspoon ground nutmeg , zest from one small orange , 1 tablespoon orange juice 
    • Turn the risen dough out onto a lightly floured work surface. Roll into a rectangle approximately 16 inches high by 20 inches wide.
    • Spread the sugar and cinnamon filling evenly over the rolled out dough.
    • To create cinnamon buns in the traditional shape: Roll up your rectangular sheet of dough from the long edge into a tight log. Cut into approximately 12 evenly sized rolls.
    • To create cinnamon buns in the braided style (as seen in the photos): Begin with your 16 inch high by 20 inch wide rectangle of dough. Fold up the bottom edge to meet the middle of the dough. Now fold down the top edge even with the new bottom edge. Trim off the rough edges with a sharp knife or bench scraper. Cut strips from top to bottom that are approximately 2 ½ inches wide. You should be able to get 10-12 strips. Take each individual strip and leaving an inch of dough at the top, make two cuts to create three sections of dough for braiding. Braid the three strands and then roll from the top down into a bun shape.
    • Place buns in a 9x13 inch baking dish or 12 inch round cast iron pan.
    • Preheat the oven to 350 degrees F. Place the baking dish on the top of the oven as the oven preheats and allow the rolls to rise for at least 20 minutes.
    • Bake the rolls for 25-30 minutes.

    For the Icing:

    • Beat the softened cream cheese, softened butter, honey and orange zest together until light and fluffy. When the rolls come out of the oven, spoon the icing over the buns. Enjoy!
      ½ cup unsalted butter, 4 oz cream cheese, 2 or 3 tablespoon honey, 1 orange zest from one small orange

    Video

    https://lifearoundthetable.ca/wp-content/uploads/2021/05/Healthy-Cinnamon-Buns-Go-Widescreen-on-em-V2.2.mp4

    Notes

    • If you're using salted butter instead of unsalted butter, decrease the amount of added salt to the dough.
    • Ensure that you're using fresh dry active yeast that hasn't expired.
    • Measure the flour carefully and accurately. The best way to do this is to spoon the flour into your measuring cup and level it off with the back of a knife.
    • For recipes that use yeast, it’s more important to go by eye than by time.   If the recipe says it takes one hour for the dough to double in size and an hour has gone by and your dough hasn’t risen much,  just give it more time.  If your house is a bit colder,  you could try setting the bowl in a warmer spot.    A trick I sometimes use is to heat the oven to 200 degrees and then crack the door open slightly.  I set my bowl of dough on the top of the oven so it can catch the rising heat. 
    • I recommend splurging on organic oranges when you’re using the zest for a recipe. 
    • Allow the cinnamon buns to cool slightly before spreading the icing. This prevents the icing from melting and resulting in a messy presentation.
    • Make Ahead Option: If you plan to serve fresh cinnamon buns for breakfast, you can do most of the preparation the evening before.  Just follow all the steps up to when the buns are shaped and placed in a baking dish.  Cover the pan and pop them in the fridge. The next morning,  preheat the oven to 350F.   Place the covered baking dish on top of the oven for half an hour to 45 minutes to allow the cinnamon buns to warm up and rise to double their size.  Bake as instructed in the recipe.

    Nutrition

    Serving: 62.85gCalories: 485kcalCarbohydrates: 64.9gProtein: 8.1gFat: 24.9gSaturated Fat: 15.6gCholesterol: 64mgSodium: 6681mgPotassium: 256mgFiber: 12.7gSugar: 24.6gCalcium: 229mgIron: 4mg
    Tried this recipe?Let us know how it was!

    If you make this recipe please leave a comment and give this recipe a rating! I aim to respond to every single comment. I am so grateful when you trust me and try one of my recipe creations in your own kitchen. I love to hear how it went!  Let’s connect on Instagram and tag me in your food pics!

    ‘Til next time,

    Christy

    Intentional Hospitality

    May 11, 2021 · 4 Comments

    8 Tips To Help People Feel More At Home

    I have these experiences at people’s homes where I feel so at ease and so well taken care of and it almost seems effortless. When I have that experience, I like to pay attention to what these “experts” in practicing hospitality offer as a way of making people feel welcome.  It can be hard to put your finger on what it is that makes you feel so welcome and comfortable.  What is the X factor?  The secret to good hospitality?  I have brainstormed some ideas that I have either observed in someone else as they exercise their gift of hospitality or tips that I have found helpful myself.  Here is my list! Please share in the comments about a time when you experienced a warm welcome and what your host did to make you feel that way.

    Tip #1 Provide A Small Toy Box for Young Children

    Do you have friends or family that have young children? An idea I love is to keep a small box with toys and a few books that you can easily pull out when people with young children come to visit.   As you welcome the children in this way, you also help their parents have a more relaxing visit.  The parents will be so grateful! New toys are a novelty to children, allowing their parents a few moments of peace to sit back and relax on your couch with a cup of coffee.

    Tip #2 Be Prepared to Host Friends with Food Allergies

    Do you have friends or family with food allergies or dietary preferences? Examples of this include people who are dairy or gluten intolerant or those who have chosen a vegetarian or vegan lifestyle.  I strive to be prepared in the event that someone with special dietary needs comes to visit.  A close friend of mine has a dairy intolerance so I try to have a few prepared dinners in the freezer that are dairy free.  Typically I have a few containers of chana masala available. When this friend drops by unexpectedly for dinner, I can take the container out of the freezer and warm it up.  I enjoy being able to take care of my friend this way even if I had a different dinner planned that night for the rest of the family.

    Tip #3 Ask New Guests If They Have Dietary Restrictions

    On a similar note, it is a good idea to ask new guests if they have any dietary restrictions before they come over for the first time.  That way you can prepare to make a meal that your guests can enjoy. This also helps your guest avoid the awkwardness of having to bring up their dietary preferences and the feeling that they may be inconveniencing you. You may need to do some leg work here to prepare your recipe book ahead of time with some great gluten free, vegan and vegetarian recipes. My Peanut Butter Swirl Black Bean Brownies recipe is my go to for this kind of situation. 

    Tip #4 Let Your Guests Help Out

    Experience has taught me that people feel more at ease and at home in your space if you ask them to help out with simple hosting tasks rather than wait on them hand and foot. I ask friends to help set the table or quickly slice up some lemon for our ice waters and you can really feel that it cuts down the formality and awkwardness. 

    Tip #5 Be Truly Attentive

    If you’re really hoping for a technology, social media or phone free dinner party, you as the host can lead by example and set your phone away for the night.  Your phone can distract you from really listening to your guests more than you realize. An essential aspect of hospitality is truly being attentive by tuning in and listening carefully to your guests as they share their stories and what is on their minds.

    Tip #6 This One Room Should Always Be Clean for Guests

    If we feel our homes need to be perfectly tidy and spotlessly clean before having people over, we may never invite guests.  People feel more at home when we can put perfection aside.  However, my tip regarding cleaning the house is to always make sure your bathrooms are presentable.   When I am home with my three children and life is crazy, I still prioritize keeping the bathroom tidy and clean.  This is one room that should be clean for guests!   Also, make sure the bathroom is well stocked with clean guest towels, hand soap and toilet paper so guests don’t have to feel awkward in asking!

    Tip #7 Anticipate Your Guests' needs.

    Anticipate your guests’ needs. This is a skill I’m trying to develop. Some ideas are to provide water as soon as they arrive, offer coffee or other refreshments and letting new guests know where the bathroom is at the beginning of the visit. These courtesies are all good examples of what I mean by anticipating needs.

    Tip #8 Get Intentional -- Make a List

    I suggest you make a short list of friends, family, neighbours or strangers that you would like to invite over to your home in the next 3-6 months.  Then choose someone to invite and make it a goal to set a date as soon as possible.  Prioritizing hospitality in your home does take some planning and forethought especially for those people that you haven’t seen in a while or those you’ve never had to your home before. Let’s turn our good intentions into action. I encourage you to invite someone today!

    “Hospitality is the key to new ideas, new friends, new possibilities. What we take into our lives changes us. Without new people and new ideas, we are imprisoned inside ourselves.”
    – Joan D Chittister

    Follow me on Instagram for more hospitality inspiration @lifearoundthetable.ca

    The Best Children's Picture Books (Part 1)

    May 6, 2021 · 4 Comments

    Toddler with a picture book.
    Book cover of The Tiger Who Came to Tea by Judith Kerr

    The Tiger Who Came to Tea by Judith Kerr 

    “Sophie opened the door, and there was a big, furry, stripy tiger. The tiger said, “Excuse me, but I’m very hungry. Do you think I could have tea with you?” Sophie’s mummy said, “Of course, come in.” 

    This is a story about a friendly tiger who stops in for tea time and eats everything in sight!  He clears out the pantry, the fridge and even drinks all the water in the tap before he thanks them and goes on his way. Sophie’s daddy comes home from work and seeing that there is no food left in the house he suggests they go out to a cafe for a treat. The next day Sophie and her mummy go out to the shops to stock up on groceries and they make sure to purchase a tin of tiger food in case the tiger ever comes to visit again. 

    Book cover of Hairy Maclary from Donaldson's Dairy

    Hairy Maclary from Donaldson’s Dairy by Lynley Dodd 

    “Out of the gate and off for a walk went Hairy Maclary from Donaldson’s Dairy…” 

    The dog, Hairy Maclary, goes on a walk down the road and is joined one at a time by other doggy friends with silly names like “Hercules Morse” who’s as big as a horse! Or his friend “Schnitzel von Krumm” who has a very low tum. The creative names and seeing the trouble the dogs get into makes this a fun read! 

    Book cover of Miss Rumphius

    Miss Rumphius by Barbara Cooney

    This story follows the life adventures of a woman named Alice (or Miss Rumphius) as she travels the world, works in a library and eventually settles in a small cottage by the sea.

    “Alice would say, ‘When I grow up, I too will go to faraway places, and when I grow old, I too will live beside the sea.’  ‘That is all very well, little Alice,’ said her grandfather, ‘but there is a third thing you must do.’  ‘What is that?’ asked Alice. ‘You must do something to make the world more beautiful,’  said her grandfather. ‘All right,’ said Alice. But she did not know what that could be.”

    As she grows older and wiser, Alice remembers her grandfather’s words and she ponders how she will make the world more beautiful. This delightful story prompts you to ask that same question in your own life.

    Book cover of The Story Book Knight

    The Storybook Knight by Helen & Thomas Docherty

    “Leo was a gentle knight in thought and word and deed. While other knights liked fighting, Leo liked to sit and read. He was kind to every creature. He wouldn’t hurt a fly. When Mom and Dad said, ‘Knights must FIGHT!’ he couldn’t quite see why.” 

    Leo the mouse and his faithful horse Ned venture out on a quest to tame an enormous red dragon. On the way they meet a snarling griffin and a hungry troll and Leo convinces them not to fight him but to listen to a story instead. When he arrives at the town that’s been destroyed by the dragon he is also armed with “the most amazing book with loads of dragons in it” and the Dragon is intrigued. We love the rhymes and rhythm in this book. It’s a lot of fun to do different voices for the griffin, troll and dragon along with, of course, a squeaky voice for Leo.

    Book cover for Up in the Garden Down in The Dirt

    Up in the Garden and Down in the Dirt by Kate Messner

    “Up in the garden, we snap brittle stalks, scoop rustly armfuls, and wheel away weeds for the chickens. While they squabble and scratch, we spread compost over the soil. Down in the dirt, pill bugs chew through last year’s leaves. I give a gentle poke. They roll up tight and hide in plated suits of armor, roly-poly round.”

    The word choices in this book are perfect! Every word feels carefully chosen, creating an immersive story. I love books that connect children to nature and give them language for what they’re encountering out in their own backyards.

    Book cover of Corduroy

    Corduroy by Don Freeman

    “Corduroy is a bear who once lived in the toy department of a big store. Day after day he waited with all the other animals and dolls for somebody to come along and take him home.” 

    This childhood classic was published back in 1968.  The story of Corduroy builds on that sneaking suspicion children enjoy that their stuffed animals really are alive and have adventures of their own after nightfall.  I love this book for keeping that childlike hope alive. Corduroy is an adorable character and children love seeing him find his forever home with his new friend Lisa.

    Book cover of The Magical Garden of Claude Monet

    The Magical Garden of Claude Monet by Laurence Anholt

    “I wish we had a garden” said Julie…”As soon as I have finished this painting,” said Julie’s mother, “I’ll take you on a journey to the most wonderful garden in the world. It belongs to my old friend, the painter, Claude Monet.” 

    The first time I read this book to my oldest son he looked at me and said “Wow, that was a beautiful book”.   I think he summed it up perfectly.   Laurence Anholt models his illustrations in his book after Monet’s style.  Laurence Anholt has written and illustrated a whole artist series like this for children including Van Gogh, Leonardo Davinci and Picasso.  Anholt’s Artists series is a wonderful introduction for young children to influential artists.

    Book cover of Treasury of Jillian Jiggs

    Jillian Jiggs by Phoebe Gilman

    "'Jillian, Jillian, Jillian Jiggs! It looks like your room has been lived in by pigs!’  ‘Later.  I promise. As soon as I’m through, I’ll clean up my room. I promise. I do.’

    Now, Jillian meant every word that she said, but later the promise flew out of her head. When Rachel and Peter started to shout, Jillian had to, just had to go out.” 

    I grew up reading Jillian Jiggs so she has a really special place in my heart. Jillian has an unrivalled imagination and she makes a glorious mess of her bedroom in no time at all. My favourite detail in the illustrations is how her little sister tags along for all the fun.

    More Picture Books

    • First Picture Books for Baby
    • The Best Picture Books (Part 2)
    • The Best Picture Books (Part 3)

    Poetry Posts

    • Winter and Christmas Poems for Children
    • The Best Poems to Share with Young Children
    • Poems Young Children Love

    What is your favourite picture book? Please share in the comments below!

    All photos are taken from Amazon.com.

    Meal Time Prayers and Blessings

    May 2, 2021 · Leave a Comment

    For Young Children

    This was the first mealtime prayer I introduced to my toddler. I’ve said these words so many times and I can picture his pudgy little hands folded over his plastic plate of lunch food as clear as day as we said these words: 

    Thank you for the world so sweet.

    Thank you for the food we eat.

    Thank you for the birds that sing.

    Thank you, God, for everything.

    Amen.

    -
    E. Rutter Leatham


    As my children got a little older we transitioned to this prayer.  We say it every evening before dinner: 

    To God who gives our daily bread 

    A thankful song we’ll raise 

    And pray that He who sends our food 

    May fill our hearts with praise

    -
    Thomas Tallis

    Below is a collection of other prayers that I have collected from books and blogs and friends that I love so much. Pick your favourite!

    Bread is a lovely thing to eat. 

    God bless the barley and the wheat, 

    A lovely thing to breathe is air, 

    God bless the sunshine ev’rywhere.

    The earth is a lovely place to know, 

    God bless the folks that come and go. 

    Alive is a lovely thing to be. 

    Giver of life, we say, ‘Bless Thee!’ 

    -
    Colin Price

    “Father, round this table, here to pray

    First, we praise you for the day,

    For our family and our friends.

    Gifts of grace that heaven lends

    Living water, daily bread,

    Countless blessings our God sends.

    Thank you, Lord, for them all

    For the big ones and the small

    When we’re happy, when we’re sad

    On the good days and the bad

    We are thankful, we are glad.

    Amen.”

    God our Father, Lord and Saviour

    Thank you for your love and favour

    Bless this food and drink we pray

    And all who share with us today

    -
    Unknown

    We thank you Lord

    For the food before us

    The shelter around us

    The family beside us

    And the love between us

    Amen

    -
    Unknown

    (to the tune of the Superman Theme)

    Thank you Lord for giving us food!

    Thank you Lord for giving us food!

    For the friends we meet, and the food we eat!

    Thank you Lord, for giving us food!

    Amen

    -
    Unknown

    (to the tune of Frere Jacques)

    God our Father, God our Father

    Once Again, Once again

    We would ask a blessing, we would ask a blessing,

    Amen, Amen

    -
    Unknown

    God is great, God is good.

    Let us thank Him for our food.

    By His hand must all be fed

    Give us Lord our daily bread.

    -
    Unknown

    - For the Whole Family -

    May this meal serve to remind those who share its pleasures

    Of the goodness and the hope that infuses all creation

    (Amen)

    -
    Every Moment Holy

    Thou that hast given so much to me,

    Give one thing more ---a grateful heart;

    Not thankful when it pleaseth me,

    As if thy blessings had spare days,

    But such a heart whose pulse may be.

    Thy praise.

    -
    George Herbert

    Where two or more of us are gathered, O Lord,

    There you have promised to be.

    And here we are.

    And so, here are You.

    (Amen)

    -
    Every Moment Holy

    Even as we hunger for the tastes

    and textures and aromas of

    This meal now graciously spread before us,

    We pray you would also daily increase

    Our deep hunger for your words and your truth,

    That our own words

    And choices

    And actions

    This week would be shaped

    By your gracious revelation

    Feed us, O Bread of Life.

    Amen

    -
    Every Moment Holy

    For your tender care displayed

    In the food and friends now before us,

    We offer you our praise

    (Amen)

    -
    Every Moment Holy

    And so now we bow our heads in thanks,

    Gratefully receiving from Your great hand

    The provision of this meal,

    And the still greater provisions

    Of your mercy, your compassion,

    Your grace, your love.

    (Amen)

    -
    Every Moment Holy

    For health and strength and daily bread

    We praise thy name Oh Lord

    Hallelujah, Amen

    -
    Traditional

    May God bless our daily bread

    So that our souls with life be fed.

    (Amen)

    -
    Unknown

    Blessed be thou Lord, God of the Universe

    Who brings forth bread from the Earth

    And makes glad the hearts of men.

    Amen

    -
    Hebrew blessing

    We break this bread together with hearts aware

    Not bread alone, but God’s life and love we share

    -
    A. C. Hartwood

    For this new morning with its light,

    For rest and shelter of the night,

    For health and food, for love and friends,

    For everything His goodness sends,

    Father in heaven, we thank Thee.

    -
    William Bennett

    For the golden gourds, for the fruit on the trees

    For the harvested corn and the sap from maple trees

    For grains and nuts and berries

    For honey from the hive

    We give our thanks to the Earth

    For all that it provides

    -
    Meagan Rose Wilson

    If I didn’t include one of your favourite meal time prayers please leave a comment below to share it!

    Spelt Chocolate Chunk Cookies

    Apr 11, 2021 · 11 Comments

    Close up spelt cookie with melted chocolate chips and finishing salt on top, broken in two.

    If you need a healthier alternative to traditional chocolate chip cookies, look no further than these naturally sweetened Spelt Flour Chocolate Chunk Cookies! They are chewy, flavorful and delightfully chocolatey with soft centers and crispy edges. These cookies taste delicious and feel indulgent all while being made with healthier ingredients like coconut sugar and nutrient-rich spelt flour. I know you’re going to love them!

    A broken in two spelt chocolate cookie with melting chocolate chunks on top.

    If you love baking with spelt flour, try out my Spelt Cinnamon Buns, Spelt Pie Crust, Spelt Banana Bread and Spelt Flour Pancakes.

    Keep reading for the full recipe and expert tips to ensure your cookies come out perfectly every time!

    [feast_advanced_jump_to]

    Why You'll Love This Recipe

    • Spelt flour lends a nutty and complex flavor to cookies making them extra delicious!
    • Makes 18-20 cookies, just enough for a small gathering.
    • Make the cookie dough ahead of time and freeze the dough balls so you can have freshly baked cookies anytime!
    • Made with coconut sugar instead of refined white sugar.
    • Can be made ahead of time. The dough requires at least 2-3 hours of chilling before baking.
    • Semi sweet baker's chocolate and optional flaky salt make these cookies feel like bakery quality!

    Ingredients

    Ingredients to make spelt cookies in mixing bowls and pinch bowls on a marble countertop.
    • Spelt flour - I used whole grain spelt flour.
    • Baking soda
    • Unrefined sea salt - my favorite brand is Maison Orphee.
    • Unsalted butter - you melt the butter in this recipe so you don't need to worry about it being room temperature.
    • Coconut sugar - or swap for brown sugar if you prefer.
    • Eggs - choose large size! Use the left over egg whites in my sugar free granola recipe.
    • Vanilla extract - pick the real stuff if you can!
    • Semi-sweet baker's chocolate - or pick your favorite dark chocolate bar.

    See the recipe card below for a full list of ingredients and measurements.

    Substitutions & Variations

    • Chocolate: You can skip the chopped semi sweet bakers chocolate and do chocolate chips instead!
    • Sugar: Coconut sugar can be replaced with an equal amount of brown sugar.
    • Add-ins: Try chopped nuts, chopped dates, dried cranberries, raisins, candied ginger or shredded coconut for added texture and flavor.
    • Spices: You can add spices like cinnamon, nutmeg, or cardamom to the dough for a hint of spice.
    • Add a teaspoon of espresso powder for extra flavor! It's delicious!

    I have not experimented with any other substitutions or alterations for this recipe. If you decide to make any changes by adding or substituting ingredients, I would love it if you could share your results with us by leaving a comment below.

    How To Make Spelt Flour Cookies

    Here are the step-by-step instructions to make this recipe.

    Step 1: Combine dry ingredients.

    In a medium-sized bowl, mix together the spelt flour, baking soda, and fine sea salt.

    Pouring sea salt into a mixing bowl of spelt flour and baking soda.

    Step 2: Combine wet ingredients.
    Gently melt the unsalted butter in a saucepan on the stove.

    In a separate medium-sized bowl, whisk together the melted butter and coconut sugar.

    Add the egg and egg yolks one at a time, whisking until well combined. Stir in the vanilla extract.

    Whisking egg into chocolately wet ingredients.

    Step 3: Chop the chocolate and combine wet and dry ingredients.

    Roughly chop the semi-sweet chocolate, reserving a small amount for topping the cookies before baking.

    Add the dry ingredients to the wet ingredients and stir until just combined. Then, fold in the roughly chopped chocolate (excluding the reserved amount).

    Chocolate chunks falling into spelt cookie dough from small mixing bowl.

    Step 4: Chill the dough and preheat the oven.


    Cover the bowl with the dough and chill in the fridge for 2-3 hours.

    When ready to bake, preheat the oven to 375 degrees F. Line a baking sheet with parchment paper.

    Final cookie dough with wooden spoon in it for mixing.

    Step 5: Roll the cookie dough balls and bake.

    Roll the chilled cookie dough into level 2-tbsp size balls and place them on the prepared baking sheet. Leave space between the dough balls to allow for spreading.

    Top each cookie dough ball with a few pieces of the reserved chopped chocolate.

    Bake the cookies for 8-10 minutes, or until the edges are lightly golden. (They take exactly 10 mins in my oven).

    Rolled cookie dough balls on a baking sheet lined with parchment paper.

    Step 6: Top with flaky salt.

    For a beautiful presentation of the cookies: tap the baking sheet a few times when the cookies first come out of the oven to deflate them and top with flaky salt and enjoy!

    Baked spelt chocolate chunk cookie with fine sea salt sprinkled on top.

    Expert Tips

    • Measure the flour carefully and accurately. The best way to do this is to spoon the flour into your measuring cup and level it off with the back of a knife.
    • If you're using salted butter instead of unsalted butter then decrease the amount of added salt to the dough.
    • Use high-quality chocolate and pure vanilla extract. It makes a big difference in flavor!
    • Chill the dough for an adequate amount of time. I recommend a minimum of two hour.
    • Take note that the oven temperature for this recipe is 375 degrees F.
    • For a beautiful presentation of the cookies: tap the baking sheet a few times when the cookies first come out of the oven to deflate them and top with flaky salt.
    • For perfectly round cookies: place a round cookie cutter (or large drinking glass) that is slightly bigger than the cookies over each individual cookie while they're still warm and move the cookie around in a circular motion until the sides of the cookie are perfectly rounded.

    Recipe FAQs

    Why is spelt flour better for you?  

    Spelt is an ancient grain that hasn’t undergone the level of hybridization of modern wheat. Spelt has higher amounts of protein and fibre and provides significant amounts of important nutrients like manganese, niacin, copper and phosphorus.  Some people who struggle to digest common wheat find spelt to be highly digestible. One reason for that could be that the gluten in spelt is water-soluble whereas the gluten in common wheat is not.

    Is spelt flour gluten free?

    No, spelt is not a gluten-free flour. It is not suitable for individuals with Celiac disease. It may be tolerated by individuals with mild gluten intolerance because it contains less gluten than modern wheat. Spelt is considered to be easier to digest than modern wheat for most people.

    Coconut sugar vs. white sugar 

    Coconut sugar is rich in nutrients such as B vitamins, iron and zinc whereas refined white sugar is stripped of nutrients. Keep in mind, although coconut sugar is a superior choice, it is still sugar and should be used in moderation.

    Baked spelt chocolate chunk cookie with fine sea salt sprinkled on top and melted chocolate around.

    Storage

    Room Temperature

    Store the cookies in an airtight container at room temperature for up to 5 days.

    Freezer

    Freeze the baked cookies in an air tight container for up to 3 months. Or form the cookie dough into balls, place on a cookie sheet and freeze for an hour. Then place in a freezer safe bag and freeze for up to 3 months. When ready to bake, preheat the oven, place the cookies on a cookie sheet and bake as directed, adding a couple of minutes to the baking time.

    More Healthy Cookie Recipes

    • Date Sweetened Chocolate Chip Cookies
    • Close up of a barley chocolate chip cookie with finishing salt on top on a table of the cookies.
      Barley Flour Cookies
    • Healthy Chocolate Haystack Cookies
    • Einkorn Flour Chocolate Chip Cookies

    Did you make this recipe? Let me know!
    Leave a review or comment below!

    Recipe

    Close up spelt cookie with melted chocolate chips and finishing salt on top.

    Spelt Chocolate Chunk Cookies

    Christy Faber
    This is one of my favorite cookie recipes! They are chewy and delightfully chocolatey. These cookies taste delicious and feel indulgent all while being made with healthier ingredients like coconut sugar and spelt flour. I know you’re going to love them!
    5 from 5 votes
    Print Recipe Pin Recipe SaveSaved!
    Prep Time 15 minutes mins
    Cook Time 10 minutes mins
    Set in the fridge 1 hour hr
    Total Time 1 hour hr 25 minutes mins
    Course Snack
    Cuisine American
    Servings 14 cookies
    Calories 186 kcal

    Ingredients
      

    Dry Ingredients

    • 1 ½ cups spelt flour whole grain
    • ½ teaspoon baking soda
    • ½ teaspoon fine sea salt

    Wet Ingredients

    • ½ cup unsalted butter
    • 1 cup coconut sugar or brown sugar
    • 1 large egg
    • 2 large egg yolks
    • 1 teaspoon vanilla extract
    • 6 oz semi-sweet baker's chocolate reserve some for topping the cookies

    Optional

    • sprinkle of flaky sea salt after baking

    Instructions
     

    • In a medium sized bowl, combine dry ingredients and mix well.
    • Gently melt butter in a saucepan on the stove.
    • Combine the melted butter and coconut sugar in a medium sized bowl and whisk together.
    • Add one egg and two egg yolks one at a time and whisk until well combined.
    • Stir in vanilla extract.
    • Roughly chop the semi-sweet chocolate.
    • Set aside a small amount of chopped chocolate for topping the cookies before baking.
    • Add the dry ingredients to the wet ingredients and stir until just combined.
    • Stir in roughly chopped semi-sweet chocolate, except the amount you reserved for topping the cookies.
    • Cover your bowl and chill the dough in the fridge for 2-3 hours.
    • When you’re ready to bake, preheat the oven to 375 degrees F.
    • Roll cookie dough balls into 2-tbsp size portions. You can fit 6 cookies to a sheet as they will spread as they bake.
    • Top each cookie dough ball with a few pieces of reserved chopped chocolate.
    • Bake cookies for 8-10 minutes. (They take exactly 10 mins in my oven)
    • Tap baking sheets lightly when the cookies come out of the oven to deflate them slightly.
    • Sprinkle with flaky salt.
    • Let cool and enjoy! (Makes 18-20 cookies)

    Notes

      • If you're using salted butter instead of unsalted butter, decrease the amount of added salt to the dough.
      • Chill the dough for an adequate amount of time.  I recommend a minimum of two hours.
      • For a beautiful presentation of the cookies: tap the baking sheet a few times when the cookies first come out of the oven to deflate them and top with flaky salt.
      • For perfectly round cookies: place a round cookie cutter (or large drinking glass) that is bigger than the cookies over each individual cookie while they're still warm and move the cookie around in a circular motion until the sides of the cookie are perfectly rounded.
      • If you don't have spelt flour or coconut sugar you can substitute for all-purpose flour and brown sugar. 

    Nutrition

    Serving: 24gCalories: 186kcalCarbohydrates: 25.3gProtein: 3.2gFat: 8.9gSaturated Fat: 5.2gCholesterol: 57mgSodium: 106mgPotassium: 68mgFiber: 1.8gSugar: 15.8gCalcium: 12mgIron: 1mg
    Tried this recipe?Let us know how it was!

    If you make this recipe please leave a comment and give this recipe a rating! I aim to respond to every single comment. I am so grateful when you trust me and try one of my recipe creations in your own kitchen. I love to hear how it went!  Let’s connect on Instagram and tag me in your food pics!

    ‘Til next time,

    Christy

    Peanut Butter Swirl Black Bean Brownies

    Apr 11, 2021 · 23 Comments

    These Peanut Butter Swirl Black Bean Brownies combine the richness of chocolate, the creaminess of peanut butter and the unexpected addition of nutrient and fiber packed black beans into one delicious treat! They are so fudgy and so delicious. The texture can’t be beaten! They seriously are like fudge. (speaking of fudge! Try my Healthy Chocolate Peppermint Fudge)

    Single square, black bean brownie standing up in a pan of brownies laying flat.

    This recipe is gluten-free and sweetened with only maple syrup. (Oh! And so are these Healthy Chocolate Haystack Cookies)  Black Bean Brownies are among my all-time favourite comfort foods. Don’t knock ‘em ‘til you try ‘em!

    If you have guests coming, whip up a batch of these incredibly healthy brownies and let your guests know upon arrival that you made this treat, especially for them. “Help yourself anytime!”

    [feast_advanced_jump_to]

    Why You'll Love This Recipe

    • They're naturally and lightly sweetened with maple syrup.
    • Surprisingly nutritious with the addition of black beans, providing fiber and protein.
    • Super fudgy texture!
    • These brownies are a perfect way to introduce healthier ingredients to picky eaters because the beans are undetectable!
    • This is a great recipe to have in your back pocket when you’re welcoming guests who have dietary restrictions.
    • They're dairy-free. (Just like my Chocolate Mint Fudge recipe!)
    • And gluten-free.
    • Easily converted to a vegan recipe. Just omit the eggs and use dairy-free chocolate chips!

    Ingredients

    Ingredients to make peanut butter black bean brownies in pinch bowls, measuring cups and mixing bowls on a marble counter top.
    • Rolled oats - also known as old fashioned oats.
    • Cocoa powder - choose unsweetened.
    • Sea salt - I choose an unrefined grey salt like one by Maison Orphee for the extra minerals it provides.
    • Baking powder
    • Black beans - drained and rinsed.
    • Pure maple syrup
    • Coconut oil
    • Vanilla extract - choose pure vanilla if you can, it makes a big difference. I have made my own which makes it more cost effective.
    • Egg yolks - these are actually entirely optional! I added them to this recipe because I really believe in the nutritional powerhouse of egg yolks but they can be omitted.
    • Chocolate chips - choose dairy free or sugar free chips if desired.
    • Peanut butter - well stirred.

    See the recipe card below for a full list of ingredients and measurements.

    Substitutions & Variations

    • You can experiment with switching the peanut butter for any nut or seed butter. Try sunflower seed butter or tahini or almond butter next time!
    • Swap the maple syrup for honey if that's what you have on hand.  
    • Nuts: Add some crunch and flavor by mixing in chopped nuts like walnuts, pecans, or almonds into the batter.
    • Add a sprinkle of flaky salt on the brownies when they come out of the oven for some crunch and flavor enhancement.
    • Swirl Variations: Instead of peanut butter, experiment with other swirl options like almond butter, chocolate hazelnut spread, softened cream cheese or seedless raspberry jam for a fruity twist.
    • You can totally omit the egg yolks if desired. I just added them for a nutritional boost but they aren't necessary.

    I have not experimented with any other substitutions or alterations for this recipe. If you decide to make any changes by adding or substituting ingredients, I would love it if you could share your results with us by leaving a comment below.

    How To Make Black Bean Brownies

    Here are the step-by-step instructions to make this recipe.

    Step 1: Preheat and Prep.

    Preheat the oven to 350°F.  Prepare an 8x8 pan by either greasing it or lining it with parchment paper. Add oats to a blender or food processor. Pulse until you have a smooth flour-like consistency.

    Oats blended to a flour-like consistency on a plate.

    Step 2: Blend ingredients.

    In the blender, add together the black beans (drained), brewed coffee, maple syrup, melted coconut oil, 2 egg yolks, and vanilla extract. Blend until quite smooth.

    Add the oat flour you just made with salt, baking powder and cocoa powder to the blender and blend thoroughly.

    All ingredients blended in a blender.

    Step 3: Add the batter to a pan.

    Pour the brownie batter into a 8x8 brownie pan prepped with parchment paper. Stir in the chocolate chips with a spoon and smooth out the top.

    Parchment paper lined pan with black bean brownie mix poured inside.

    Step 4: Add the peanut butter swirl topping.

    In a separate small bowl, stir together peanut butter, maple syrup, and a pinch of sea salt. Make 9 small dollops of the peanut mixture on the top of your brownie batter.

    Nine scoops of peanut butter dropped on top of brownie mix to be swirled around.

    Step 5: Create the swirl.

    With the end of a chopstick or a similar kitchen tool swirl the peanut butter through the brownie batter to create a beautiful swirl pattern.

    Swirled peanut butter on top of black bean brownie mix inside a 8x8 pan.

    Step 6: Bake.

    Bake in a 350 degree F oven for 20 minutes and allow to cool completely then transfer to the fridge to cool and set. Cut into 16 squares and enjoy!

    Cutting into baked and cooled black bean brownies on parchment paper.

    Expert Tips

    • Make sure to thoroughly drain and rinse the black beans to remove any excess liquid.
    • After blending the black beans you should see no lumps of black beans whatsoever. Keep blending until smooth and you only see flecks of the beans throughout.
    • If you don’t have a blender, you can use a food processor and combine all ingredients together (except chocolate chips and the peanut butter swirl).  I do find, however, that a blender gives a much better final texture to the brownies.
    • Let the brownies cool completely. They will cut much cleaner after being cooled in the fridge for 20 minutes.
    • I always keep these brownies in the fridge, I prefer the texture when they’re cold.
    • You can serve these brownies with a dollop of whipped cream for an elevated version of this healthy dessert.

    Recipe FAQs

    Can I make this recipe gluten free?

    Yes! Just ensure that the brand of oats that you’re using is certified gluten free.

    Can I make this recipe vegan and dairy free?

    Yes! You can actually omit the egg yolks. Just ensure that you are using dairy free chocolate chips.

    Can I make this recipe without the peanut butter swirl?

    Yes, of course you can omit the peanut swirl! If you’re doing so because of a peanut allergy you could replace the swirl with sunflower seed butter or tahini or almond butter etc.

    Can black bean brownies be frozen?

    Yes, I have frozen black bean brownies many times and it doesn’t effect the flavour or texture.

    Close up of a single brownie separated from brownies.

    Storage

    Fridge

    Store the brownies in an air tight container in the fridge and enjoy within 5 days. You can store them on the counter well covered for a few days but I prefer the firmer texture of the brownies when they're directly out of the fridge.

    Freezer

    These brownies freeze really well! Once they're totally cool and cut into squares you can transfer them to a freezer safe bag and freeze for up to 3 months.

    More Chocolate Recipes You'll Love

    • stack of fudgy oat flour brownies on a white board.
      Oat Flour Brownies
    • Date Sweetened Chocolate Chip Cookies
    • Gluten-Free Buckwheat Flour Brownies
    • Healthy Chocolate Pudding

    Did you make this recipe? Let me know!
    Leave a review or comment below!

    Recipe

    A single brownie with a bite out of it sitting separated from the rest of brownies on parchment paper.

    Peanut Butter Swirl Black Bean Brownies

    Christy Faber
    Peanut Butter and Chocolate Black Bean Brownies are fudgy and delicious. This recipe is gluten-free, sweetened with only maple syrup and can be easily adjusted to be vegan or dairy-free.
    5 from 11 votes
    Print Recipe Pin Recipe SaveSaved!
    Prep Time 20 minutes mins
    Cook Time 20 minutes mins
    Course Snack
    Cuisine American
    Servings 12 Brownies
    Calories 287 kcal

    Equipment

    • Blender

    Ingredients
      

    Dry Ingredients

    • ½ cup rolled oats (gluten free, if desired) 
    • 4 tablespoon unsweetened cocoa powder
    • ½ teaspoon sea salt
    • ½ teaspoon baking powder 

    Wet Ingredients

    • 1 and a ½ cups canned black beans (19 oz can)
    • 1 tablespoon brewed coffee (optional)
    • ½ cup pure maple syrup
    • ½ cup melted coconut oil
    • 2 egg yolks  (optional)
    • 1 teaspoon pure vanilla extract
    • ⅓ cup chocolate chips (dairy free if desired)

    Peanut Swirl

    • 4 tablespoon smooth peanut butter
    • 2 tablespoon maple syrup
    • 1 pinch salt

    Instructions
     

    • Preheat the oven to 350°F.  Prepare an 8x8 pan by either greasing it or lining it with parchment paper.
    • Add oats to a blender or food processor. Pulse until you have a smooth flour-like consistency. Remove from the blender.
    • In the blender, add together the black beans (drained), brewed coffee, maple syrup, melted coconut oil, 2 egg yolks, and vanilla extract. Blend until quite smooth.
    • Add the oat flour you just made, salt, baking powder and cocoa powder to the blender and blend again.
    • Add the batter to the brownie pan, stir in chocolate chips with a spoon and smooth out the top.
    • In a separate small bowl, stir together peanut butter, maple syrup, and a pinch of sea salt.
    • Make 9 small dollops of the peanut mixture on the top of your brownie batter.
    • With the end of a chopstick or a similar kitchen tool swirl the peanut butter through the brownie batter to create a beautiful swirl pattern.
    • Bake for 20 minutes and allow to cool completely.

    Notes

    Make sure to thoroughly drain and rinse the black beans to remove any excess liquid.
    After blending the black beans you should see no lumps of black beans whatsoever. Keep blending until smooth and you only see flecks of the beans throughout.
    If you don’t have a blender, you can use a food processor and combine all ingredients together (except chocolate chips and the peanut butter swirl).  I do find, however, that a blender gives a much better final texture to the brownies.
    Let the brownies cool completely. They will cut much cleaner after being cooled in the fridge for 20 minutes.
    I always keep these brownies in the fridge, I prefer the texture when they’re cold.

    Nutrition

    Serving: 17.398507335gCalories: 287kcalCarbohydrates: 35.6gProtein: 7.7gFat: 14gSaturated Fat: 9.7gCholesterol: 1mgSodium: 110mgPotassium: 513mgFiber: 5.1gSugar: 15.2gCalcium: 65mgIron: 2mg
    Tried this recipe?Let us know how it was!

    If you make this recipe please leave a comment and give this recipe a rating! I aim to respond to every single comment. I am so grateful when you trust me and try one of my recipe creations in your own kitchen. I love to hear how it went!  Let’s connect on Instagram and tag me in your food pics!

    ‘Til next time,

    Christy

    Healthy Chocolate Haystack Cookies

    Apr 10, 2021 · 19 Comments

    Indulge in the nostalgia of your childhood with these Healthy Chocolate Haystack Cookies - the new and improved version of the classic no-bake treat you remember from the 80s and 90s. These cookies are not only satisfying and chocolatey, but they're also quick and easy to make when you need a snack in a hurry.

    Chocolate Haystack Cookie styled on a wooden board with other cookies, cocoa powder and a small wooden spoon.

    When I got married, my mom passed along several family recipes. One of my favourites from childhood was Chocolate Haystack cookies, originally my Grandma's recipe.

    I soon realized that with 2 cups of sugar, the original recipe was too sweet for my liking. Determined to enjoy this beloved treat with my own children, I decided to experiment with the recipe to find a healthier and more balanced version. After some trial and error, I discovered that the addition of wholesome ingredients like ground flaxseed and maple syrup provides a delicious flavor without the need for excess sugar.

    These Healthy Chocolate Haystack Cookies are now the perfect balance of sweetness and chocolatey goodness. And the best part? They're free of gluten and refined sugars. Now, when I make these cookies with my own children, I feel proud to be passing on a tradition that not only tastes great but also nourishes our bodies.

    These Haystack Cookies are just one of the many healthy and delicious cookie recipes available on my blog. If you're looking for more sweet treats that are free from refined sugars, be sure to check out some of my other recipes, including Coconut Flour Oatmeal Cookies, Spelt Flour Chocolate Chip Cookies, Sunbutter Oatmeal Cookies, and Gluten Free Crinkle Cookies.

    [feast_advanced_jump_to]

    Why You'll Love This Recipe

    • quick and easy to make - no baking required!
    • the perfect recipe for older kids to make on their own!
    • gluten free and free from refined sugars
    • healthy twist on a classic childhood treat
    • wholesome ingredients like unsweetened shredded coconut, rolled oats and ground flaxseed
    • perfect for a quick and satisfying snack

    Ingredients

    The ingredients you will need to make Healthy Chocolate Haystack Cookies.
    • Unsweetened Shredded Coconut - Provides a rich, coconutty flavor and texture. It's also a great source of healthy fats and fiber, making these cookies filling and satisfying.
    • Rolled Oats - choose certified gluten free if that's required.
    • Ground Flaxseed - boosts the nutritional value of the haystacks and helps to bind the cookies together.
    • Sea Salt - choose an unrefined grey sea salt for added minerals and flavor
    • Pure Maple Syrup - my favourite natural sweetener, high in anti-oxidants and rich in nutrients
    • Unsweetened Cocoa Powder - provides a rich, chocolatey flavor without added sugar. Cocoa powder is also high in antioxidants and is a good source of magnesium.
    • Melted Coconut Oil - provides healthy fats and adds a subtle coconut flavor to the cookies. It also helps to bind the ingredients together.
    • Heavy Cream - 35% or swap for non dairy coconut cream if you prefer.
    • Pure Vanilla Extract - splurge for the real stuff!

    See the recipe card below for a full list of ingredients and measurements.

    Substitutions & Variations

    • Add in other flavors like cinnamon, instant espresso powder or orange zest for a fun twist.
    • Add in dried fruit like cranberries, apricots, or cherries.
    • For a fun presentation, shape the cookies into different shapes like hearts or stars with the help of cookie cutters.
    • Experiment with different extracts like peppermint or almond for unique flavor combinations.
    • To make the cookies vegan, use non-dairy coconut cream instead of heavy cream.
    • Omit the flaxseed and replace with chia seeds or hemp hearts if that's what you have on hand!
    • These cookies make a good lactation cookie for the breastfeeding mom because of the oats and flax seed. You could also add Nutritional or Brewer's yeast to enhance the benefits of this recipe as a lactation cookie.
    • For a nutty flavor, replace some or all of the shredded coconut with chopped nuts like almonds, pecans, or walnuts.

    I have not experimented with any other substitutions or alterations for this recipe. If you decide to make any changes by adding or substituting ingredients, I would love it if you could share your results with us by leaving a comment below.

    How To Make Haystacks

    Here are the step-by-step instructions to make this recipe.

    Step 1: Prepare the Dry Ingredients

    In a large mixing bowl, combine shredded coconut, rolled oats, and flaxseed. Mix the ingredients thoroughly.

    Dry ingredients for haystack cookies in a mixing bowl.

    Step 2: Prepare the Wet Ingredients

    In a small saucepan, melt the coconut oil over medium heat, stirring constantly. Once melted, remove the saucepan from the heat and add salt, maple syrup, cocoa powder, heavy cream, and vanilla extract to the melted coconut oil. Mix well until all ingredients are fully combined.

    Pouring maple syrup into a sauce pan.

    Step 3: Combine Wet and Dry Ingredients

    Pour the wet ingredients over the dry ingredients, mixing well until fully combined.

    Pouring wet ingredients into dry ingredients in a mixing bowl on a wooden board.

    Step 4: Shape the Cookies

    Line a cookie sheet with wax paper. Using a spoon, scoop out 3 tablespoons of the mixture and shape it into a mound. Repeat this process with the remaining mixture, spacing the mounds evenly on the cookie sheet.

    Scooping haystack mixture onto a baking sheet with a tablespoon measuring spoon.

    Step 5: Chill the Cookies

    Place the cookie sheet in the fridge for several hours or in the freezer for 30 minutes to allow the cookies to set. Enjoy!

    A focused picture of a haystack cookie on a cooking tray with other haystack cookies blurred in the background.

    Expert Tips

    • Use unsweetened shredded coconut and unsweetened cocoa powder to control the sweetness level of the cookies.
    • Make sure the coconut oil is melted and cooled slightly before mixing it with the other wet ingredients.
    • Line the cookie sheet with wax paper or parchment paper to prevent the cookies from sticking to the cookie sheet.
    • Store the cookies in an airtight container in the fridge or freezer to keep them fresh and to prevent them from drying out.
    • Use a cookie scoop or spoon to portion the mixture evenly and shape them into mounds.
    Are haystack cookies gluten free?

    Yes, this recipe is gluten-free as it uses rolled oats instead of wheat flour. Be sure to purchase certified gluten free oats which aren't processed in a facility where they could come in contact with gluten.

    Can I use honey instead of maple syrup?

    Yes, you can use honey as a substitute for maple syrup in this recipe.

    Can I freeze haystack cookies?

    Yes, haystack cookies can be stored in the freezer for up to 3 months in an airtight container or freezer-safe bag.

    What are the health benefits of flaxseeds? 

    Flaxseeds are a good source of dietary fiber, protein, and omega-3 fatty acids. Additionally, flaxseeds may also have anti-inflammatory and antioxidant properties.

    Chocolate haystack cookies in a bowl staged on a wooden board.

    Storage

    Refrigerator

    Store your chocolate coconut haystack cookies in an airtight container in the fridge to keep them fresh and chewy. Enjoy them within a week.

    Freezer

    If you want to keep your haystack cookies for longer, you can store them in the freezer. Place them in an airtight container or freezer bag and freeze for up to 3 months. When ready to eat, thaw the cookies on the counter for 20 minutes or enjoy them cold like I do.

    More Recipes You'll Love

    • Peas and Pancetta
    • Marinated Veggie Salad
    • Balsamic Green Beans with Crispy Bread Crumbs
    • Kale Parmesan Farro Soup

    Did you make this recipe? Let me know!
    Leave a review or comment below!

    Recipe

    Healthy Chocolate Haystack Cookies

    Christy Faber
    Indulge in the nostalgia of your childhood with these Healthy Chocolate Haystack Cookies - the new and improved version of the classic no-bake treat. These cookies are not only satisfying and chocolatey, but they're also quick and easy to make when you need a snack in a hurry.
    5 from 12 votes
    Print Recipe Pin Recipe SaveSaved!
    Prep Time 20 minutes mins
    Cook Time 0 minutes mins
    Setting in the freezer 30 minutes mins
    Total Time 50 minutes mins
    Course Snack
    Cuisine American
    Servings 24 Cookies
    Calories 133 kcal

    Ingredients
      

    Dry Ingredients

    • 3 cups unsweetened shredded coconut
    • 2 cups rolled oats
    • 2 tablespoon ground flaxseed

    Wet Ingredients

    • ½ teaspoon sea salt
    • ½ cup pure maple syrup
    • ½ cup unsweetened cocoa powder
    • ½ cup melted coconut oil
    • ½ cup heavy cream or coconut cream
    • ½ teaspoon vanilla extract

    Instructions
     

    • In a large bowl, combine unsweetened shredded coconut, rolled oats and ground flaxseed.
    • Mix well to combine.
    • In a small saucepan, melt the melted coconut oil and then remove from heat.
    • Mix in sea salt, pure maple syrup, unsweetened cocoa powder, heavy cream and vanilla extract to the melted coconut oil.
    • Add the wet ingredients to the dry ingredients.
    • Mix well to combine.
    • Line a cookie sheet with wax paper. Scoop up 3 tablespoon size dollops and shape into a mound.
    • Place the cookie sheet in the fridge for several hours or into the freezer for 30 minutes to allow the cookies to set.
    • Store cookies in an airtight container in the fridge. (Makes about 24 cookies)

    Video

    https://lifearoundthetable.ca/wp-content/uploads/2021/04/Chocolate-Haystack-Cookies.mp4

    Notes

    Tips for Making The Best Haystack Cookies: 
    • Use unsweetened shredded coconut and unsweetened cocoa powder to control the sweetness level of the cookies.
    • Line the cookie sheet with wax paper or parchment paper to prevent the cookies from sticking to the cookie sheet.
    • Use a cookie scoop or spoon to portion the mixture evenly and shape them into mounds.

    Nutrition

    Serving: 17.2gCalories: 133kcalCarbohydrates: 11.8gProtein: 1.8gFat: 9.7gSaturated Fat: 7.7gCholesterol: 3mgSodium: 5mgPotassium: 108mgFiber: 2.3gSugar: 4.6gCalcium: 12mgIron: 2mg
    Tried this recipe?Let us know how it was!

    If you make this recipe please leave a comment and give this recipe a rating! I aim to respond to every single comment. I am so grateful when you trust me and try one of my recipe creations in your own kitchen. I love to hear how it went!  Let’s connect on Instagram and tag me in your food pics!

    ‘Til next time,

    Christy

    • « Go to Previous Page
    • Page 1
    • Interim pages omitted …
    • Page 3
    • Page 4
    • Page 5

    Primary Sidebar

    Welcome,

    I’m Christy

    a happy wife and mother to three boys, a nutritionist, a food lover and a Canadian. Creating and experimenting in the kitchen is my idea of an afternoon well spent. To me, a clean kitchen is an empty canvas of possibility and that means my kitchen never stays clean for long. My dream is that one or more of the recipes I share here will inspire you, perhaps even becoming a cherished family favourite.

    READ MORE >

    Appetizers and Sides

    • Apple and Bacon Tart with Crispy Fried Sage
    • Marinated Veggie Salad
    • Bruschetta Loaded White Bean Hummus
    • Pear and Blue Cheese Endive Boats Appetizer
    • Carrot Ribbon Salad with Arugula
    • Crunchy Quinoa and Lentil Salad

    Soups

    • Kale Parmesan Farro Soup
    • Cabbage Roll Soup
    • Creamy Carrot and Parsnip Soup
    • One-Pot Beef and Farro Soup
    • Cozy Autumn Wild Rice Soup
    • Cauliflower Sausage Soup

    Most Popular

    • Gluten-Free Buckwheat Flour Brownies
    • Five coconut flour oatmeal cookies stacked on top of each other on a cooling rack with others around.
      Healthy Coconut Flour Oatmeal Cookies
    • Strawberry cottage cheese smoothie pouring into a glass out of a blender cup on a staged tabletop.
      Strawberry Cottage Cheese Smoothie
    • Date Sweetened Chocolate Chip Cookies
    • Custard Oats with Mixed Berry Compote
    • Green, dessert bowl full of Cottage Cheese Lemon Mousse on a wooden board with a handle spooning a scoop out.
      Cottage Cheese Lemon Mousse

    As featured in

    Naturally Sweetened

    • Healthy Chocolate Pudding
    • stack of fudgy oat flour brownies on a white board.
      Oat Flour Brownies
    • Peanut Butter Swirl Black Bean Brownies
    • a bowl of date paste topped with flaky salt on a countertop with a few medjool dates beside the bowl.
      Date Paste
    • Super Nourishing Custard Drink
    • Coffee Panna Cotta

    Follow For More Recipes

    • Instagram
    • Facebook
    • Pinterest
    • Home
    • Recipe Index
    • Fall Favorites
    • About Me
    • eBooks
    • Subscribe

    Copyright © 2026 Life Around The Table | Accessibility | Privacy policy


    Rate This Recipe

    Your vote:


    A rating is required
    A name is required
    An email is required