• Skip to primary navigation
  • Skip to main content
  • Skip to primary sidebar
Life Around The Table
  • Home
  • Recipe Index
  • Fall Favorites
  • About Me
  • eBooks
  • Subscribe
menu icon
go to homepage
  • Home
  • Recipe Index
  • Fall Favorites
  • About Me
  • eBooks
  • Subscribe
    • Email
    • Facebook
    • Instagram
    • Pinterest
  • subscribe
    search icon
    Homepage link
    • Home
    • Recipe Index
    • Fall Favorites
    • About Me
    • eBooks
    • Subscribe
    • Email
    • Facebook
    • Instagram
    • Pinterest
  • ×
    Home » Recipes

    Blog

    Apple Mousse

    Feb 8, 2023 · 13 Comments

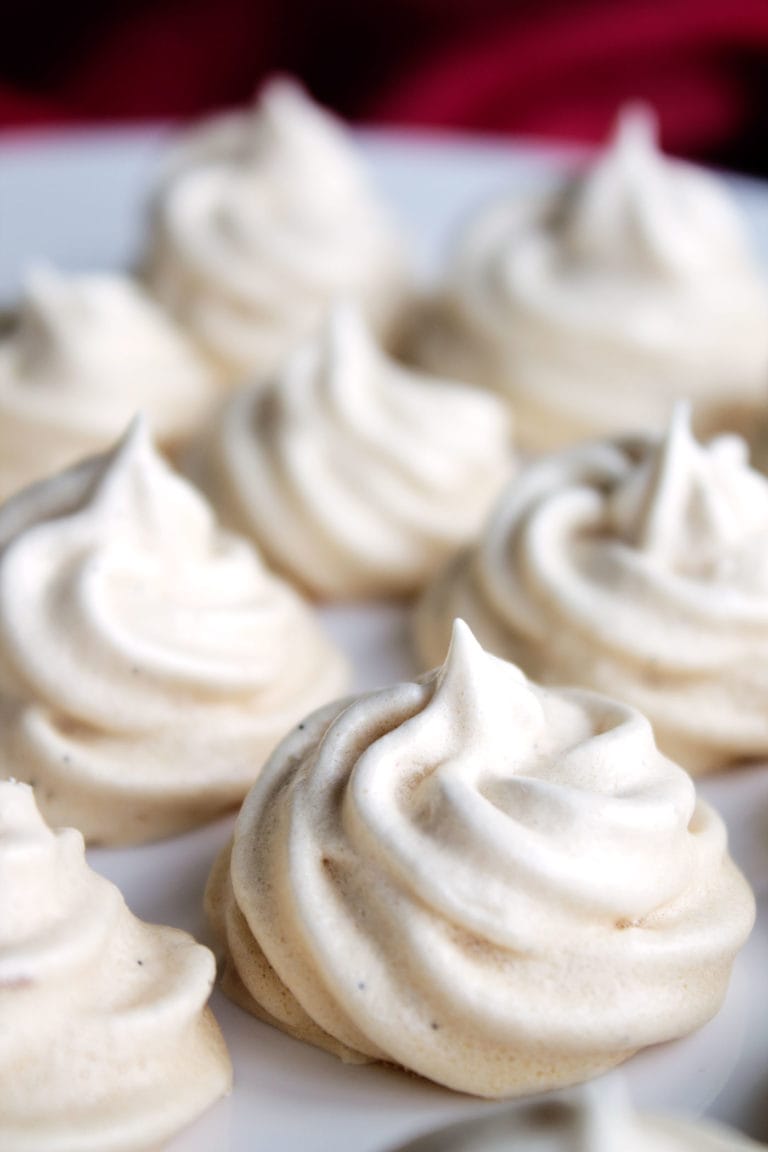
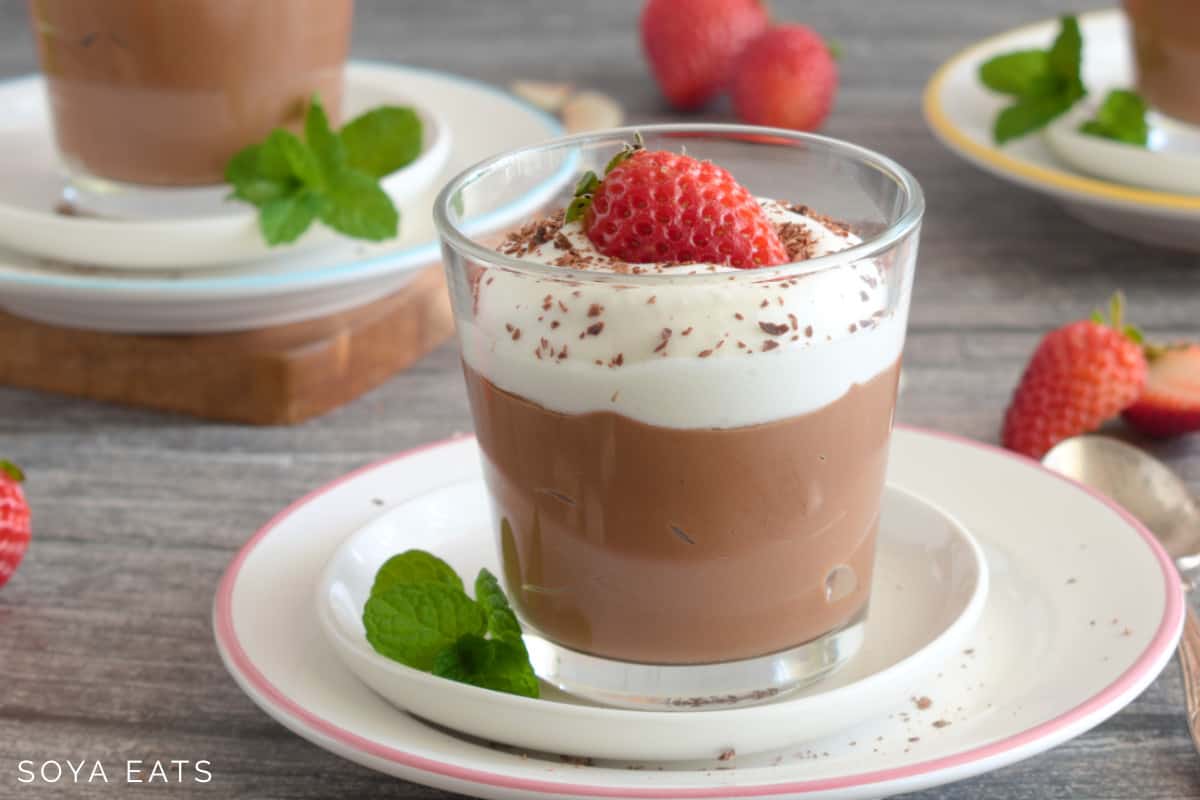
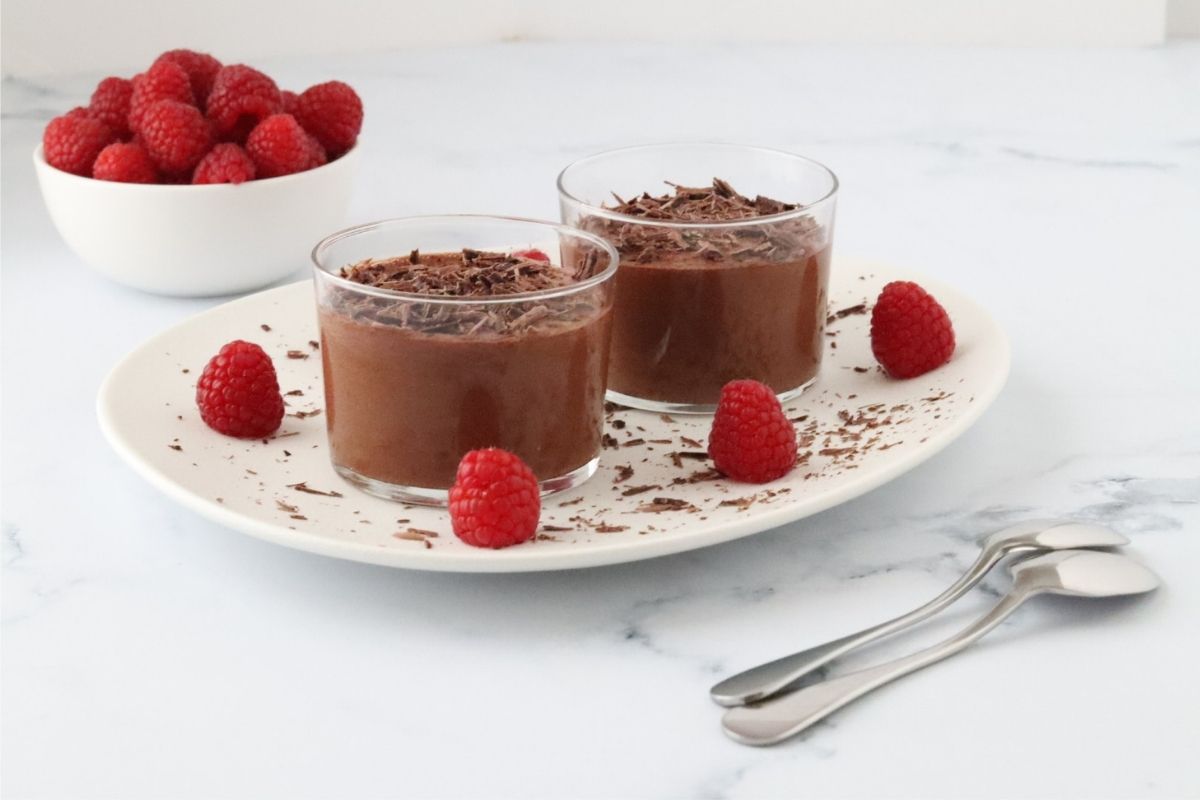
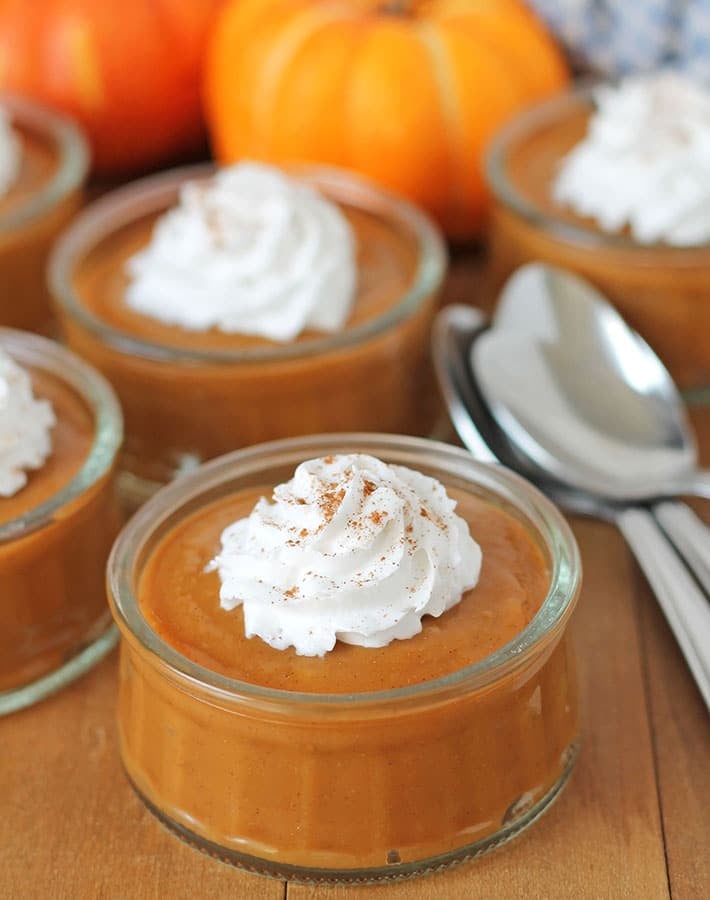
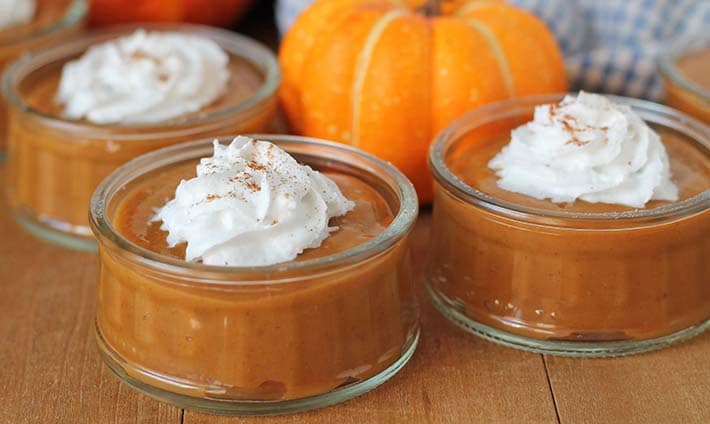
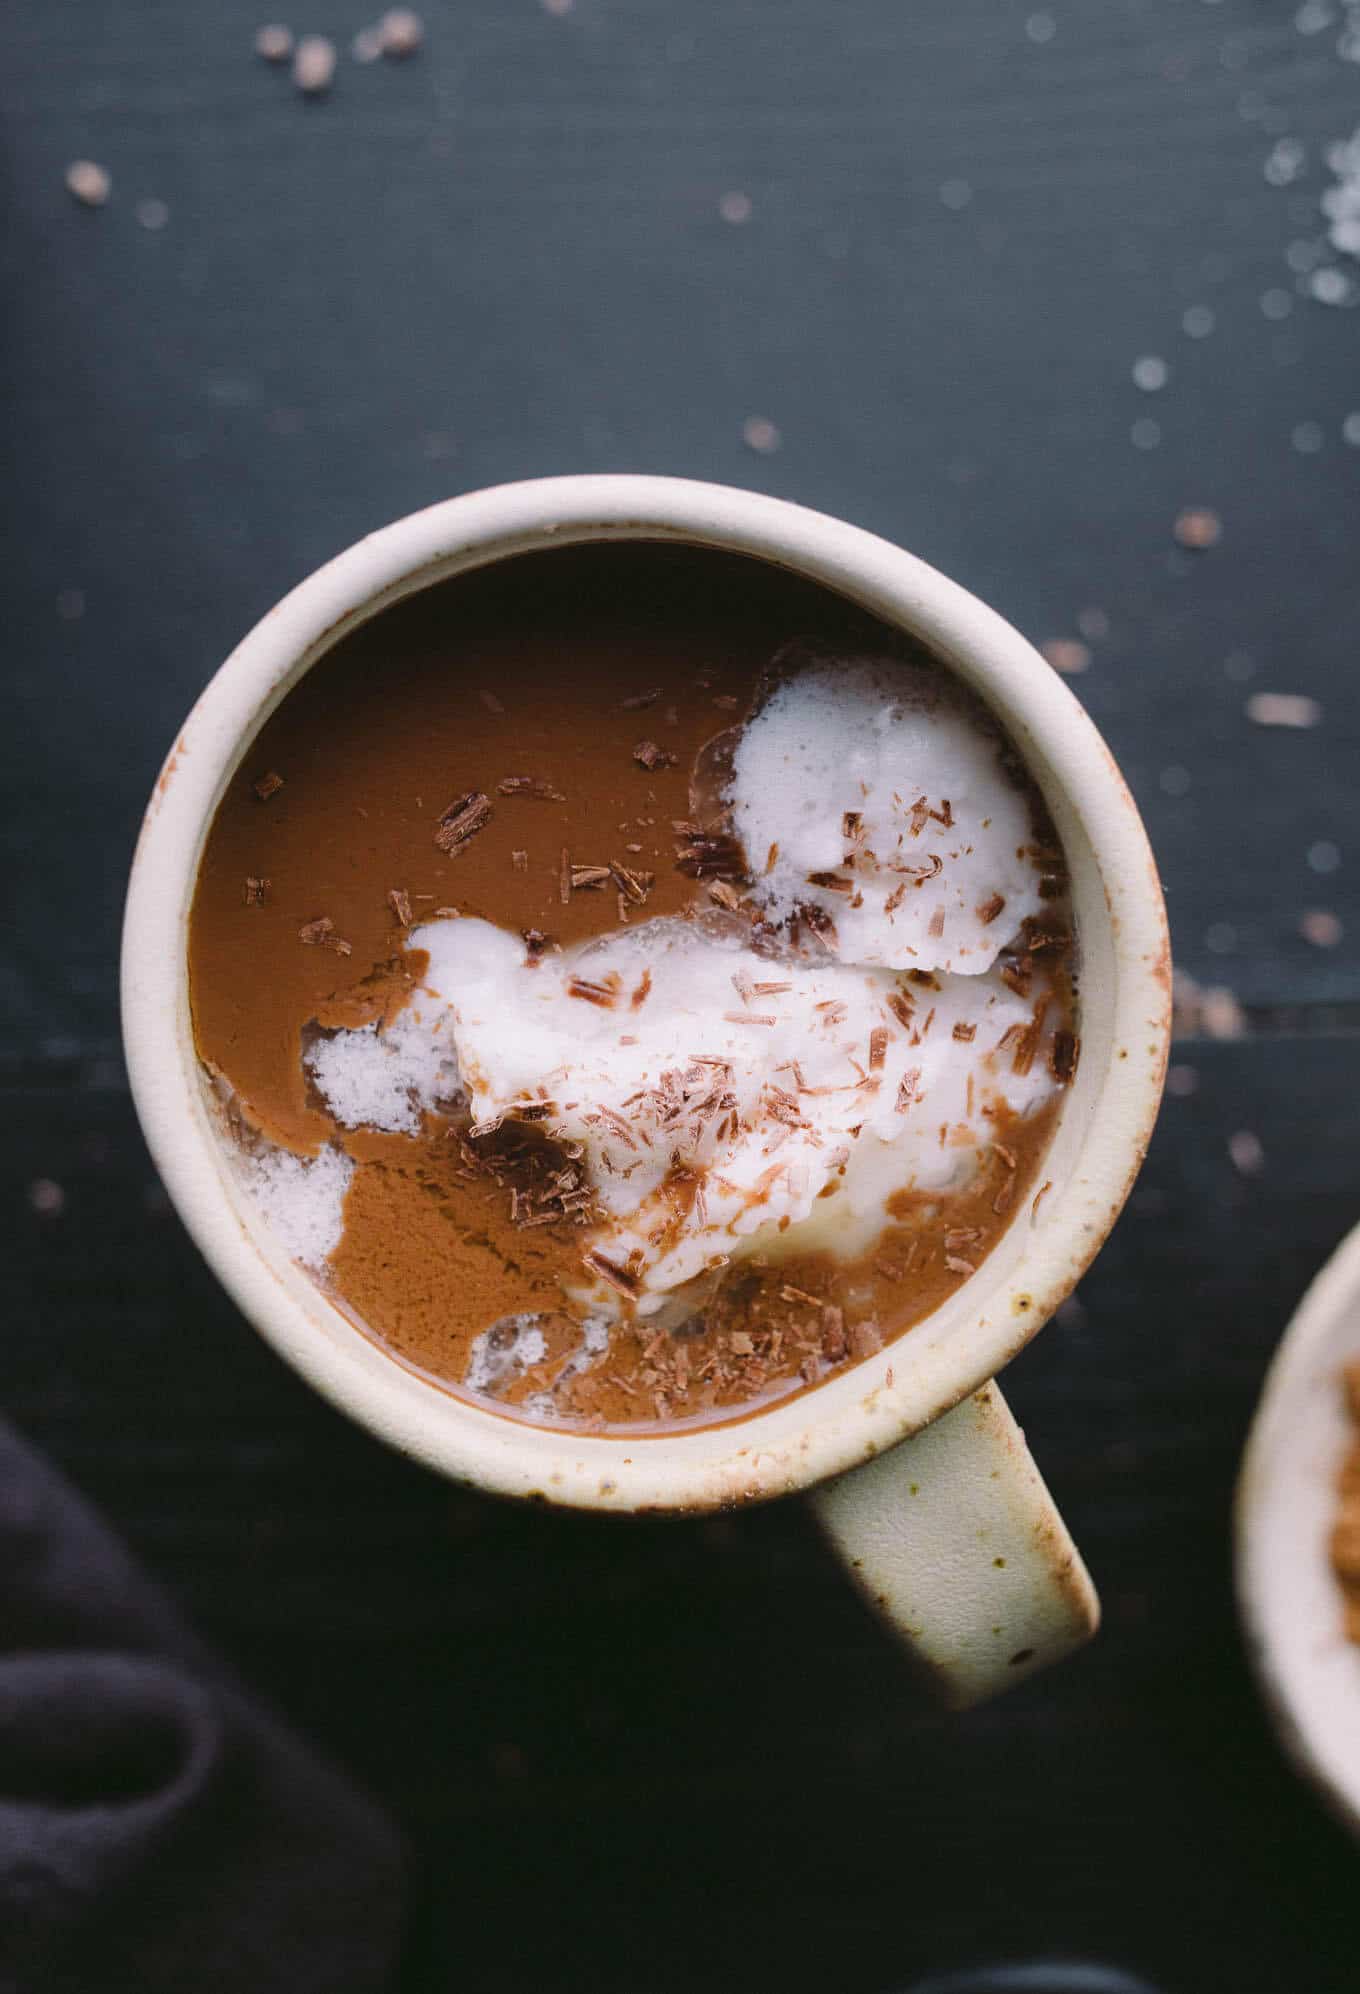
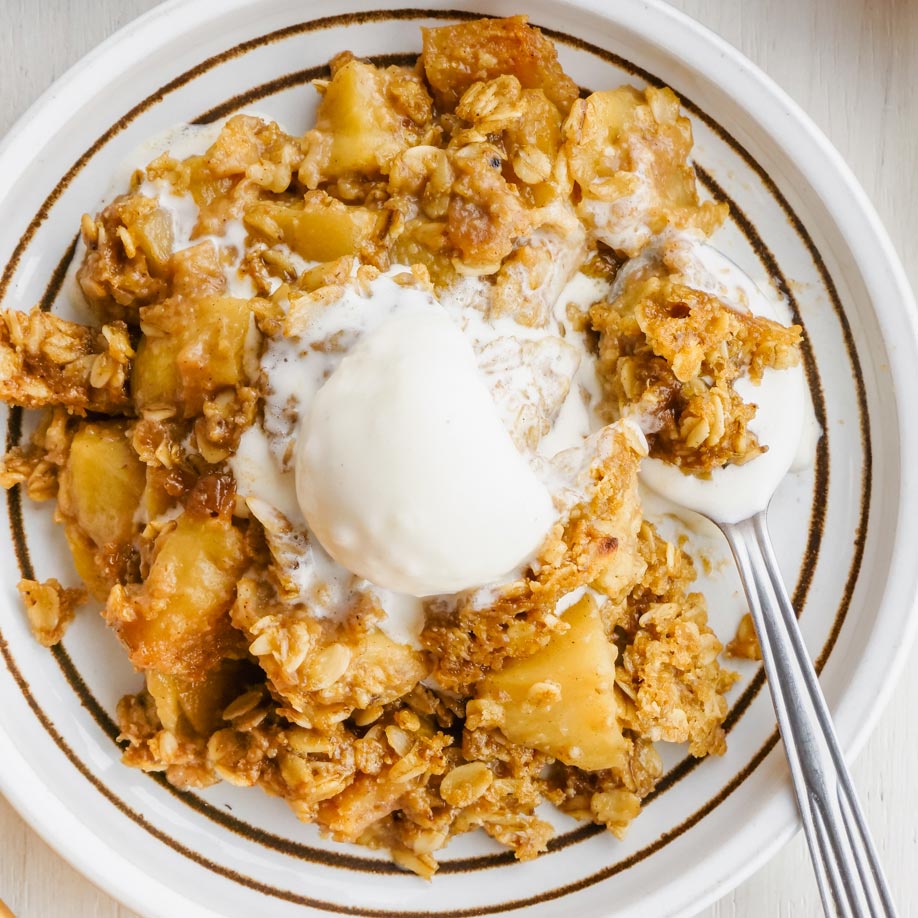
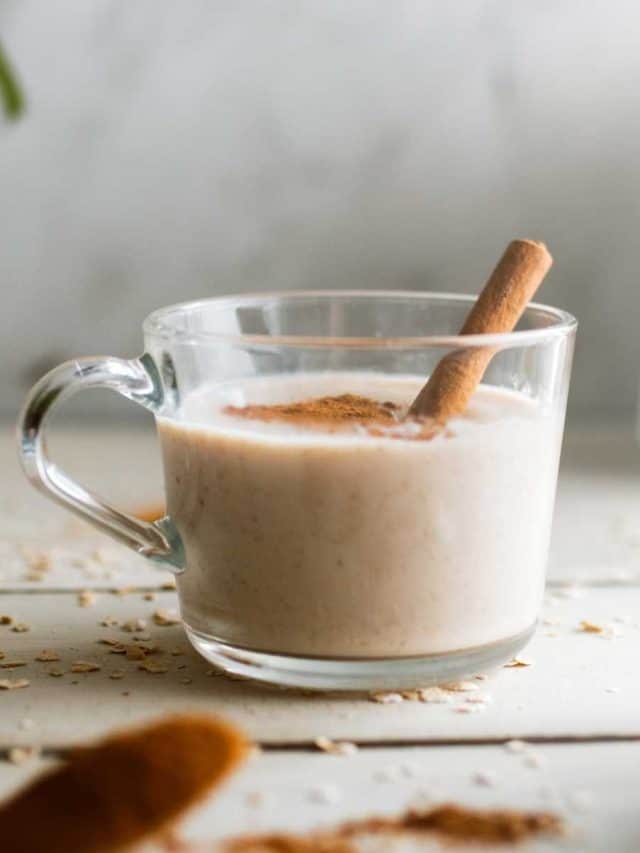
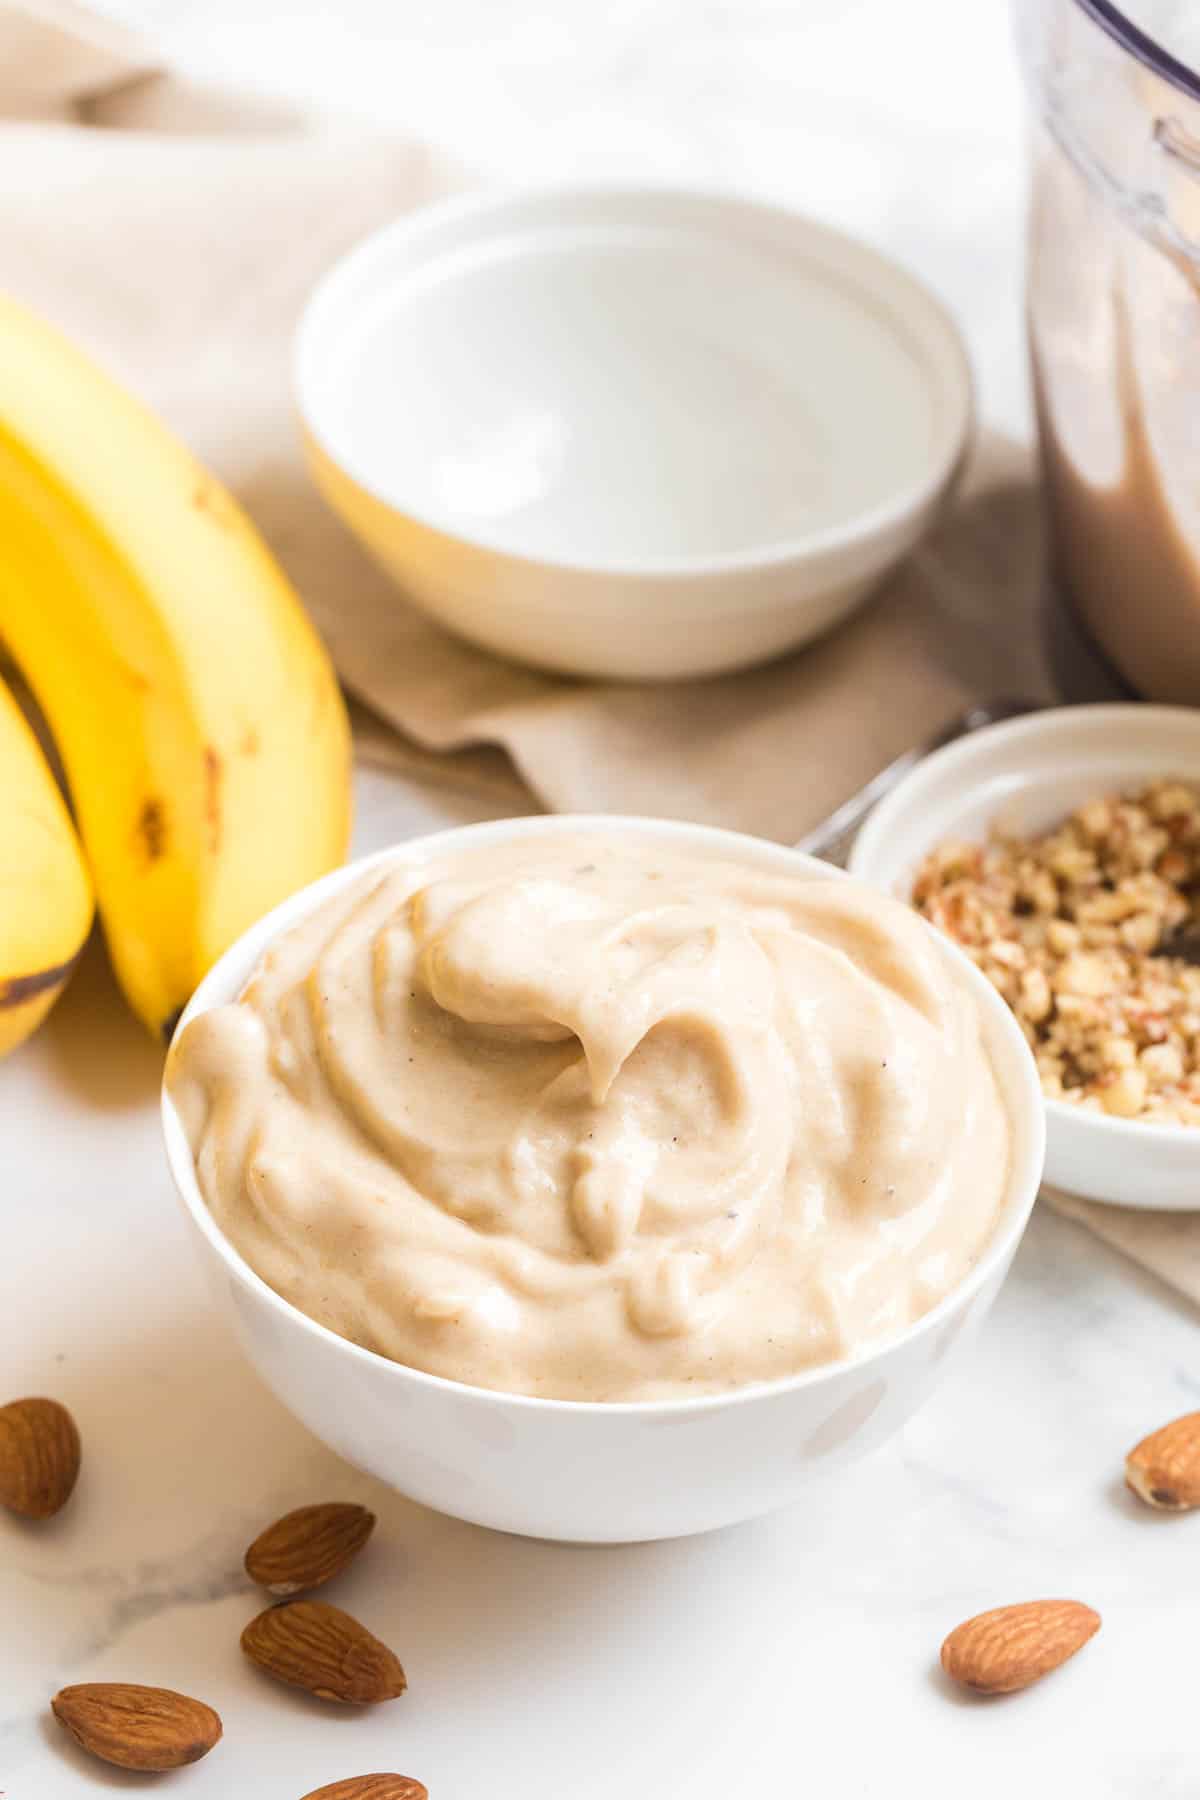
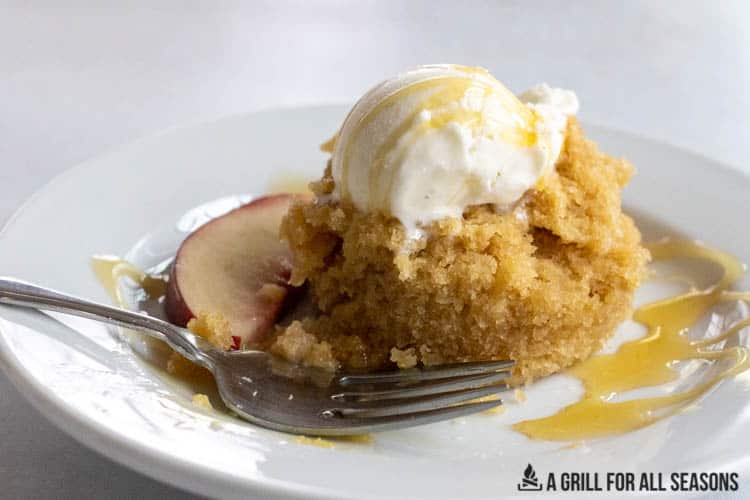
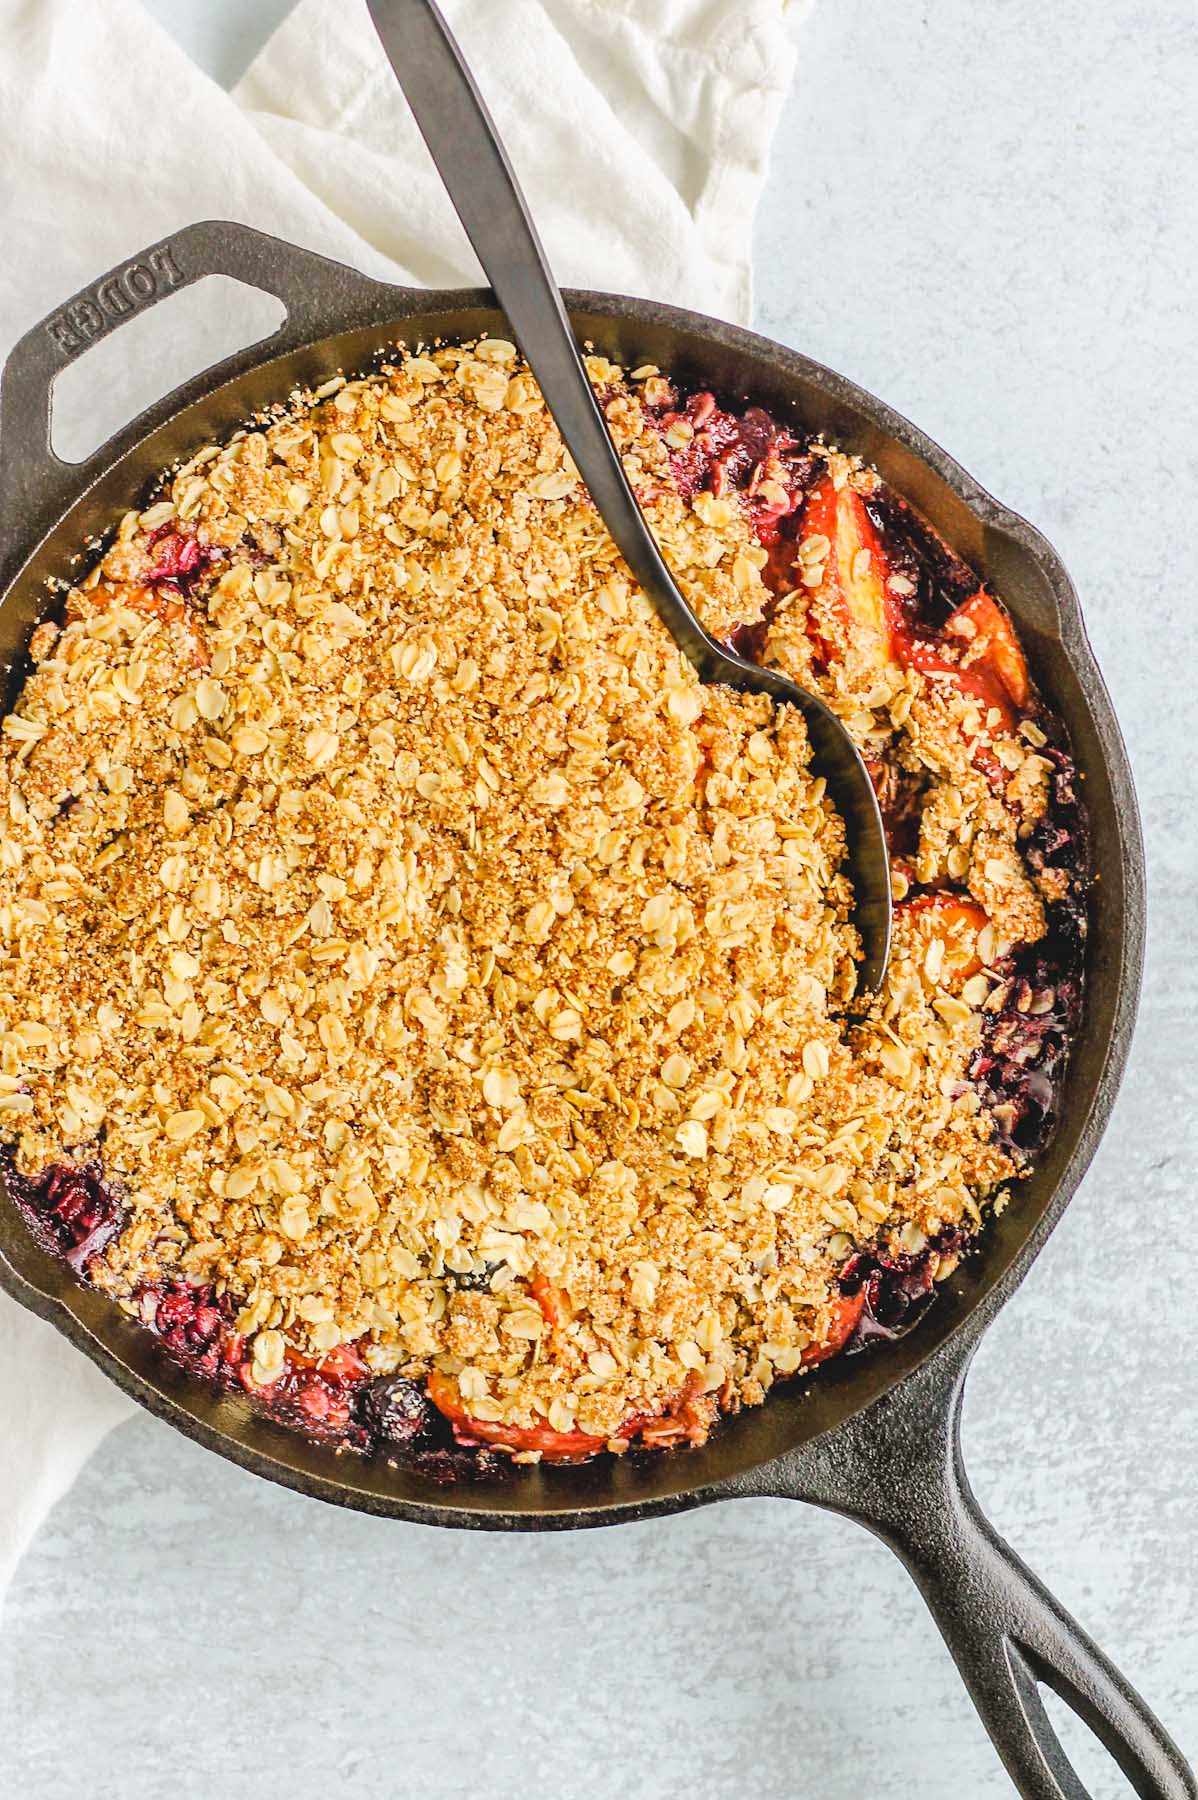
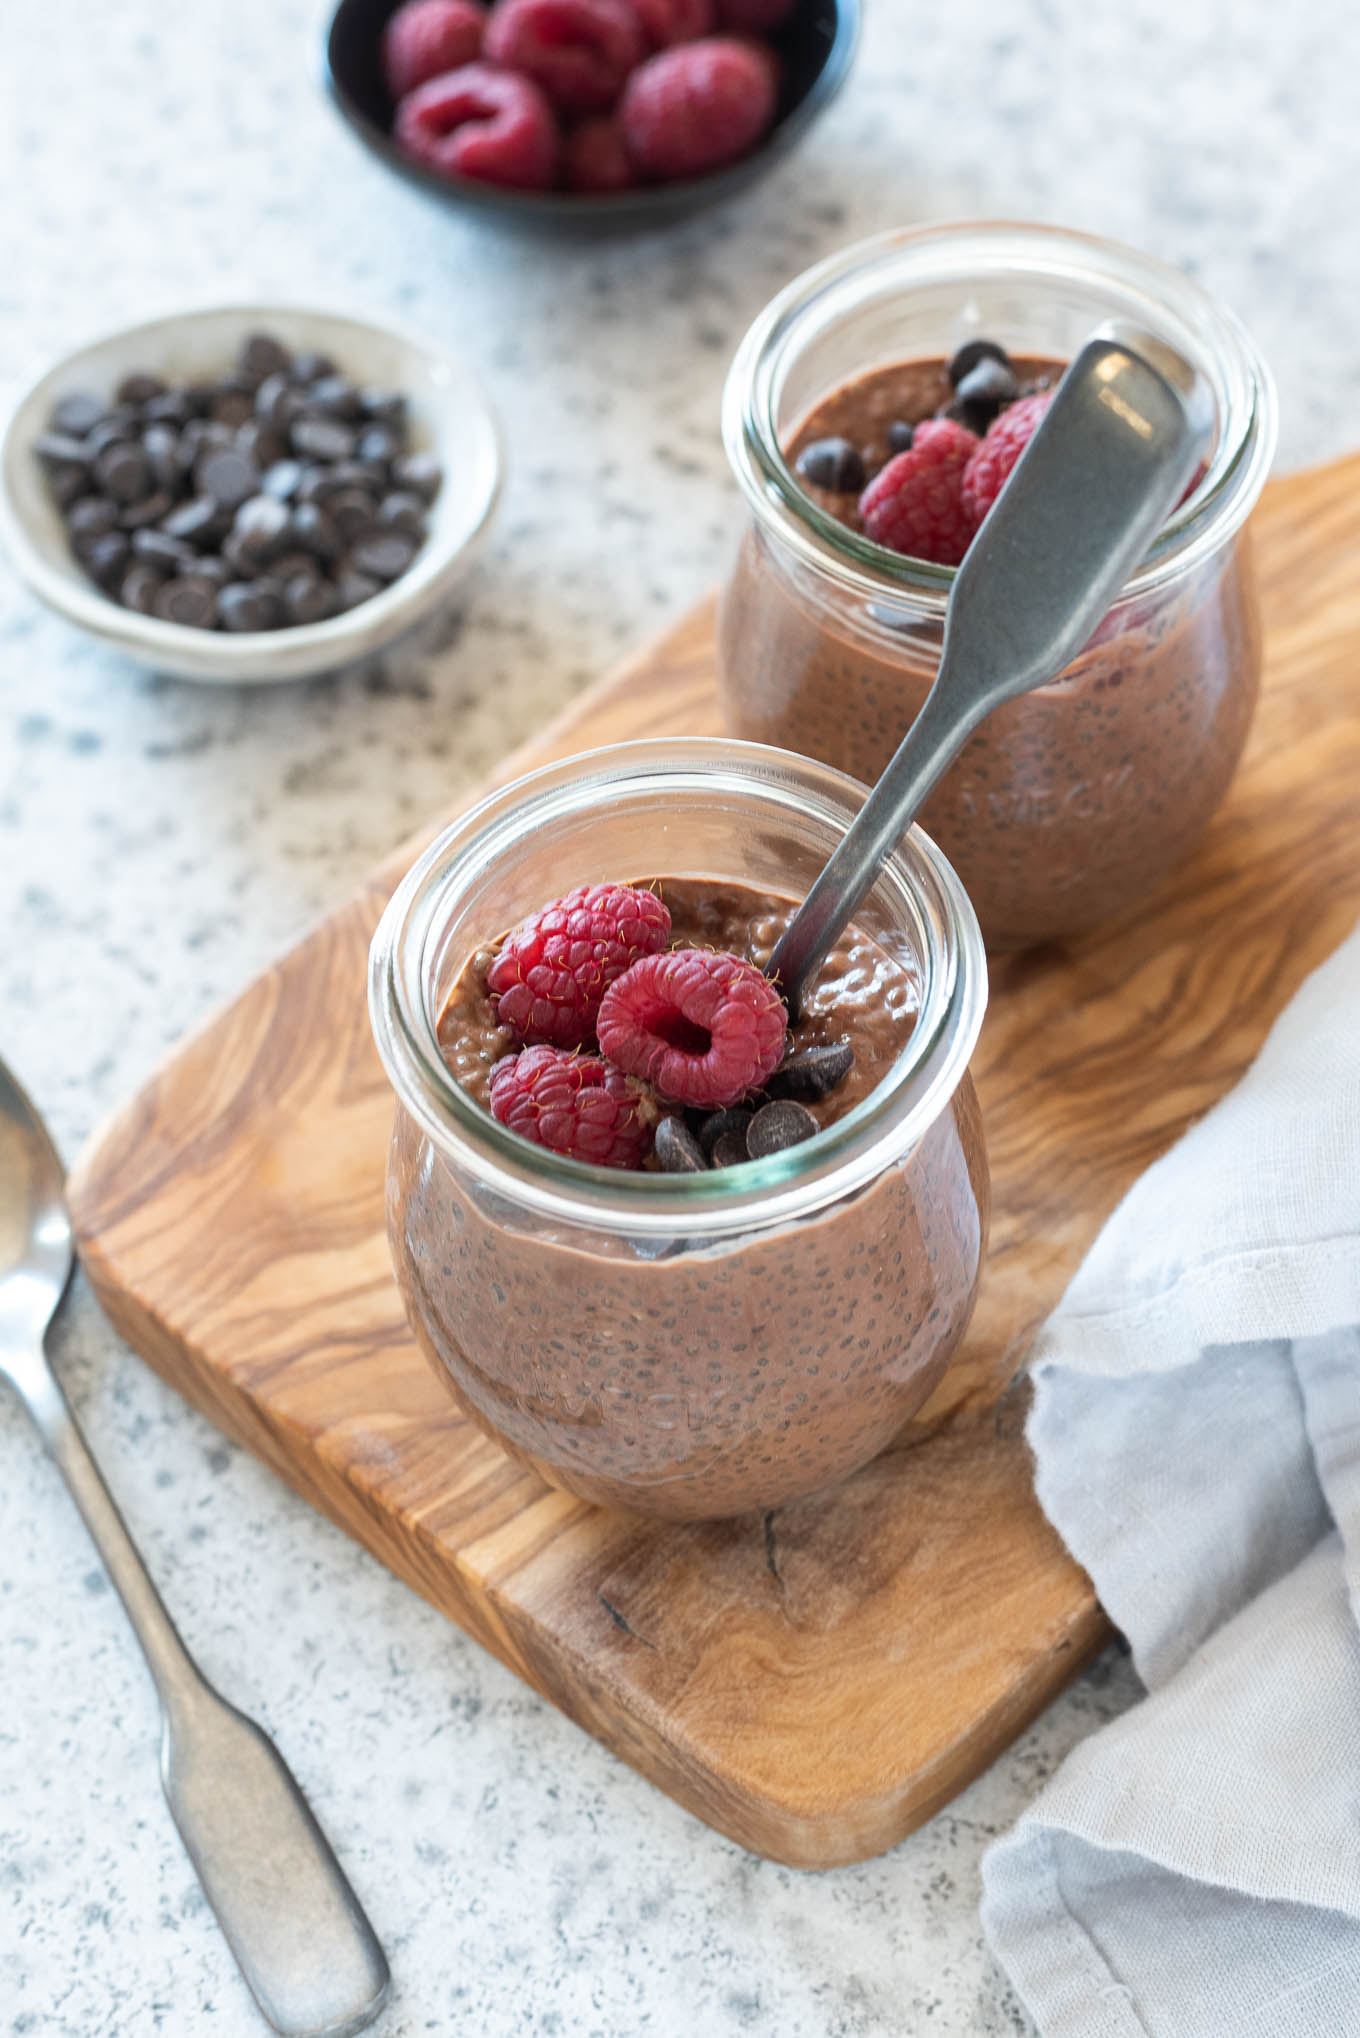
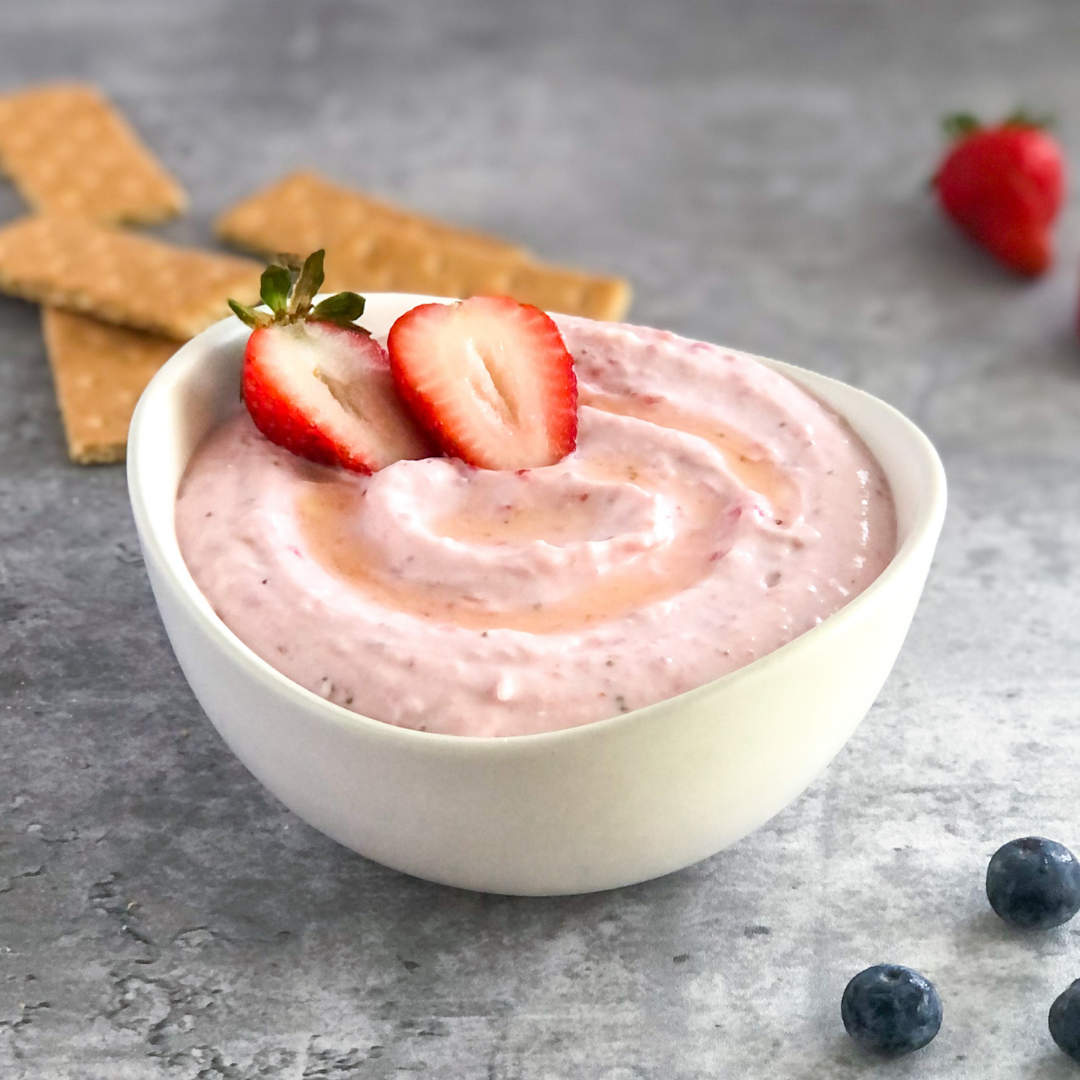
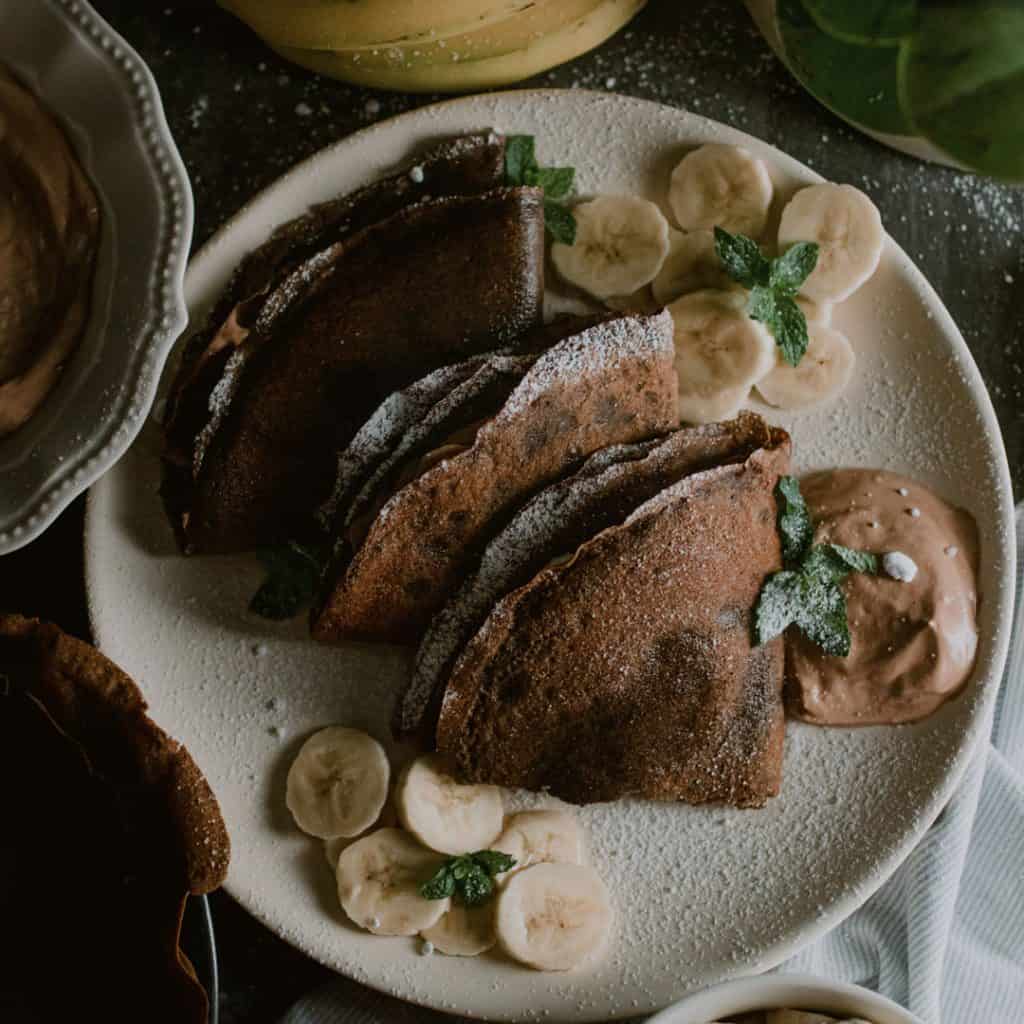
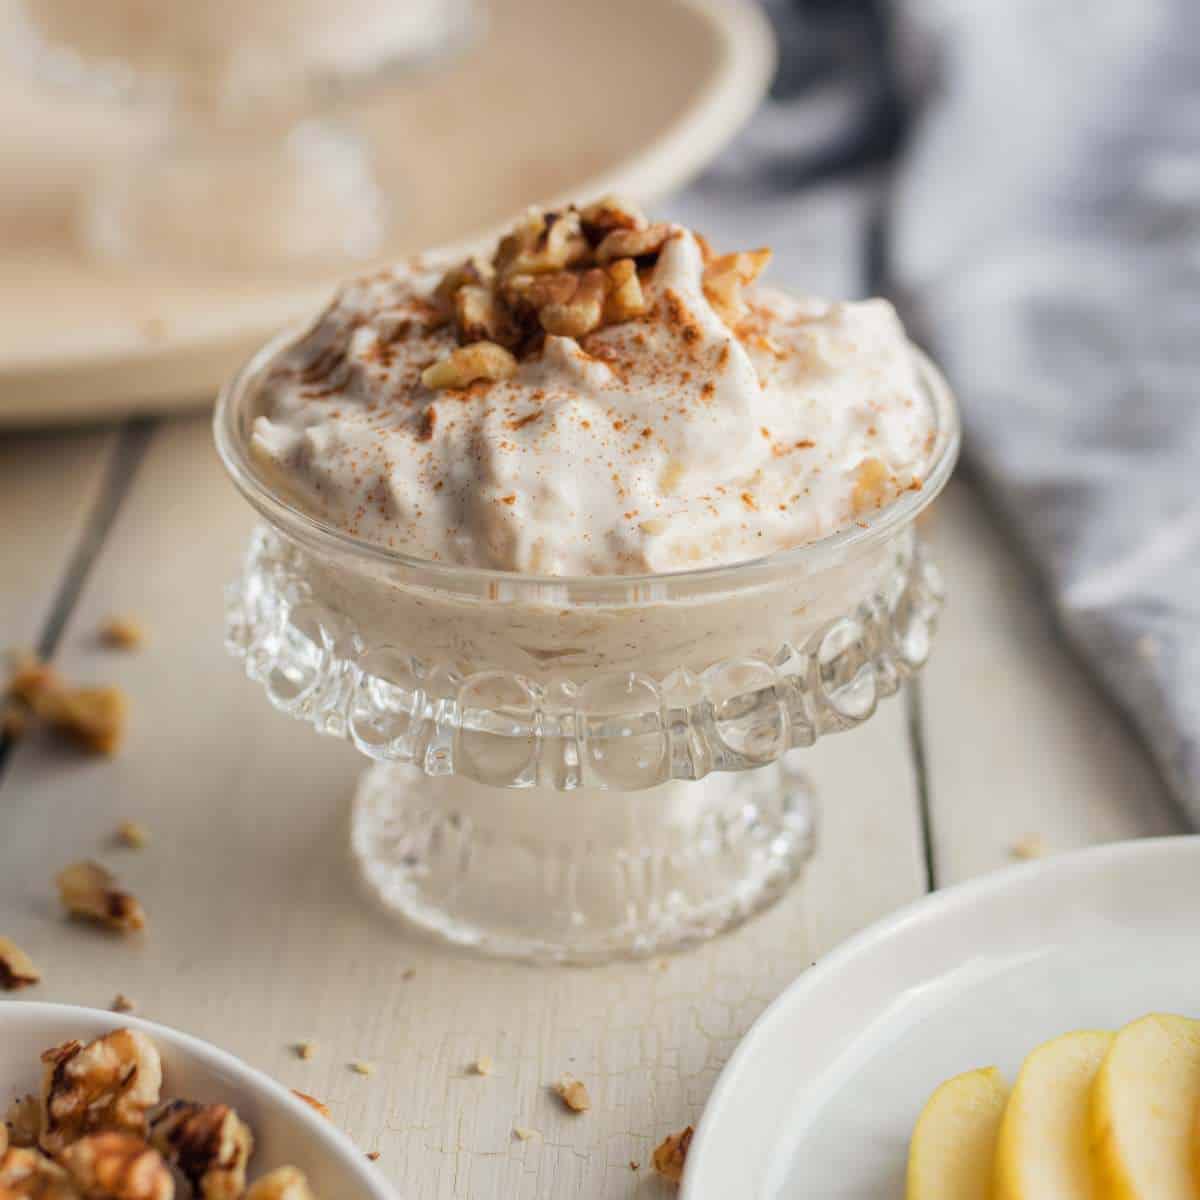
    Introducing a delightful treat for apple lovers! Apple Cinnamon Mousse can be enjoyed any time of day or as an elegant, light and refreshing way to end a meal. The best part is that you can assemble this dessert in just 15 minutes!

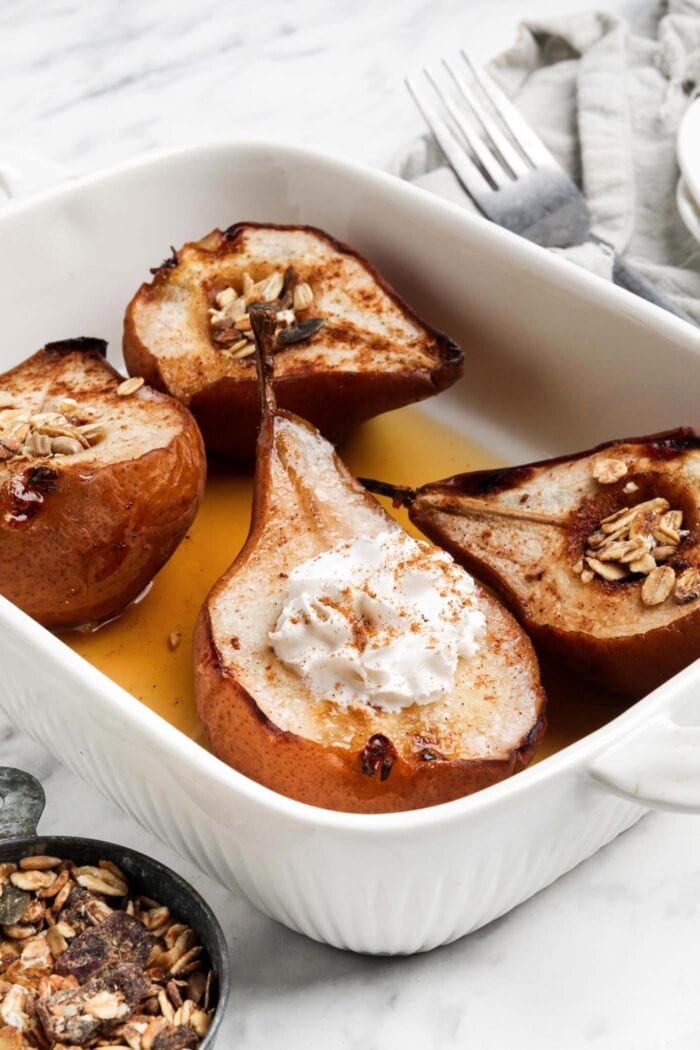
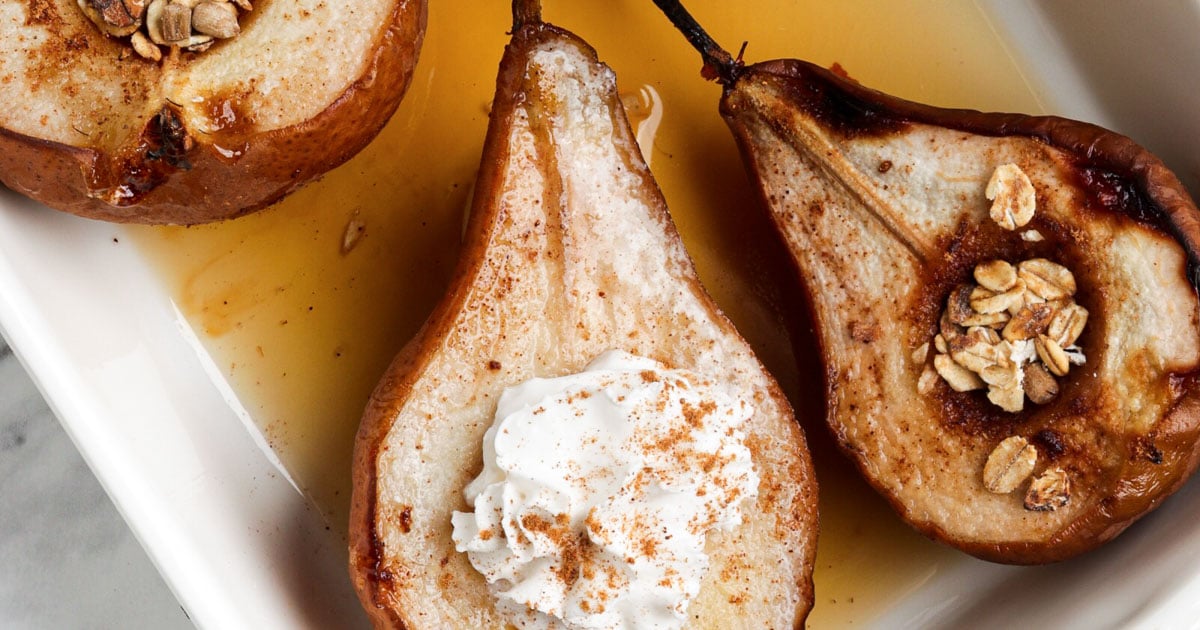
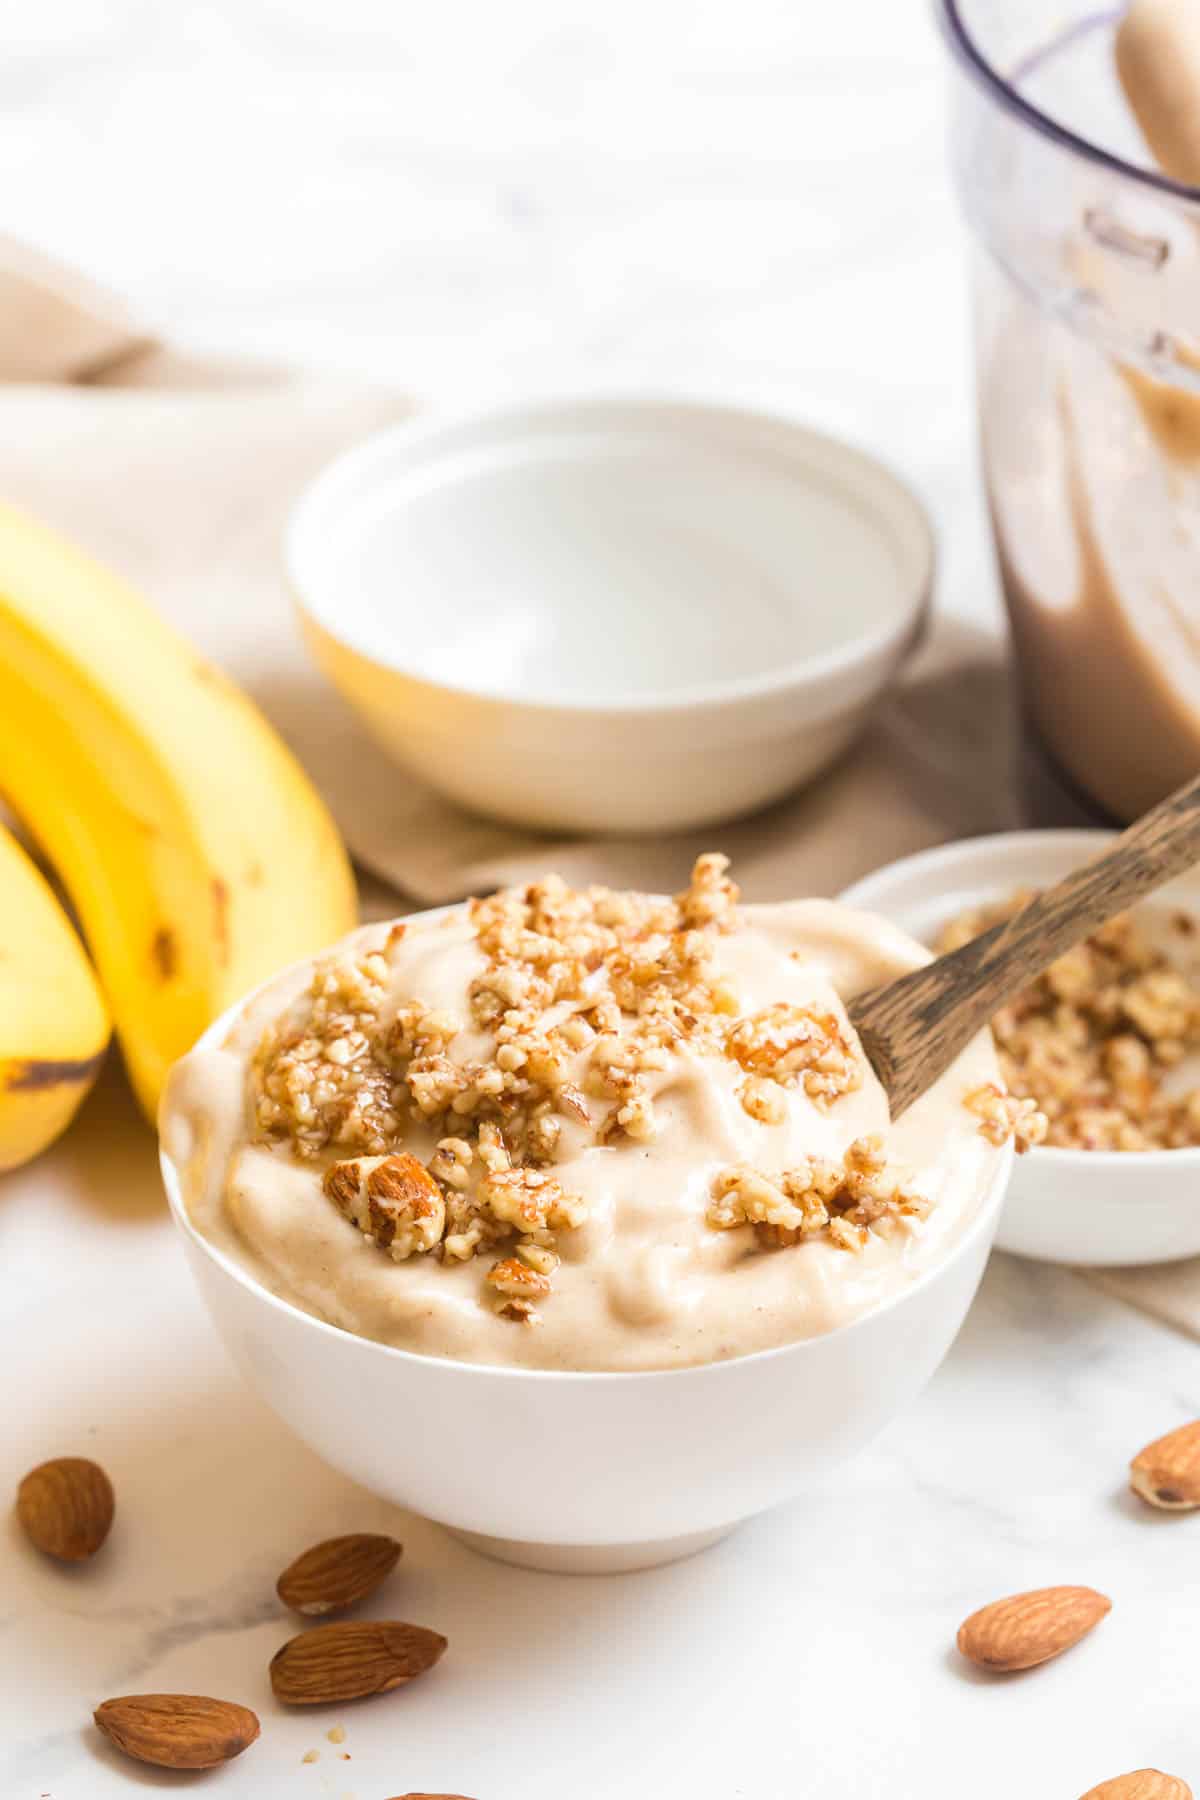
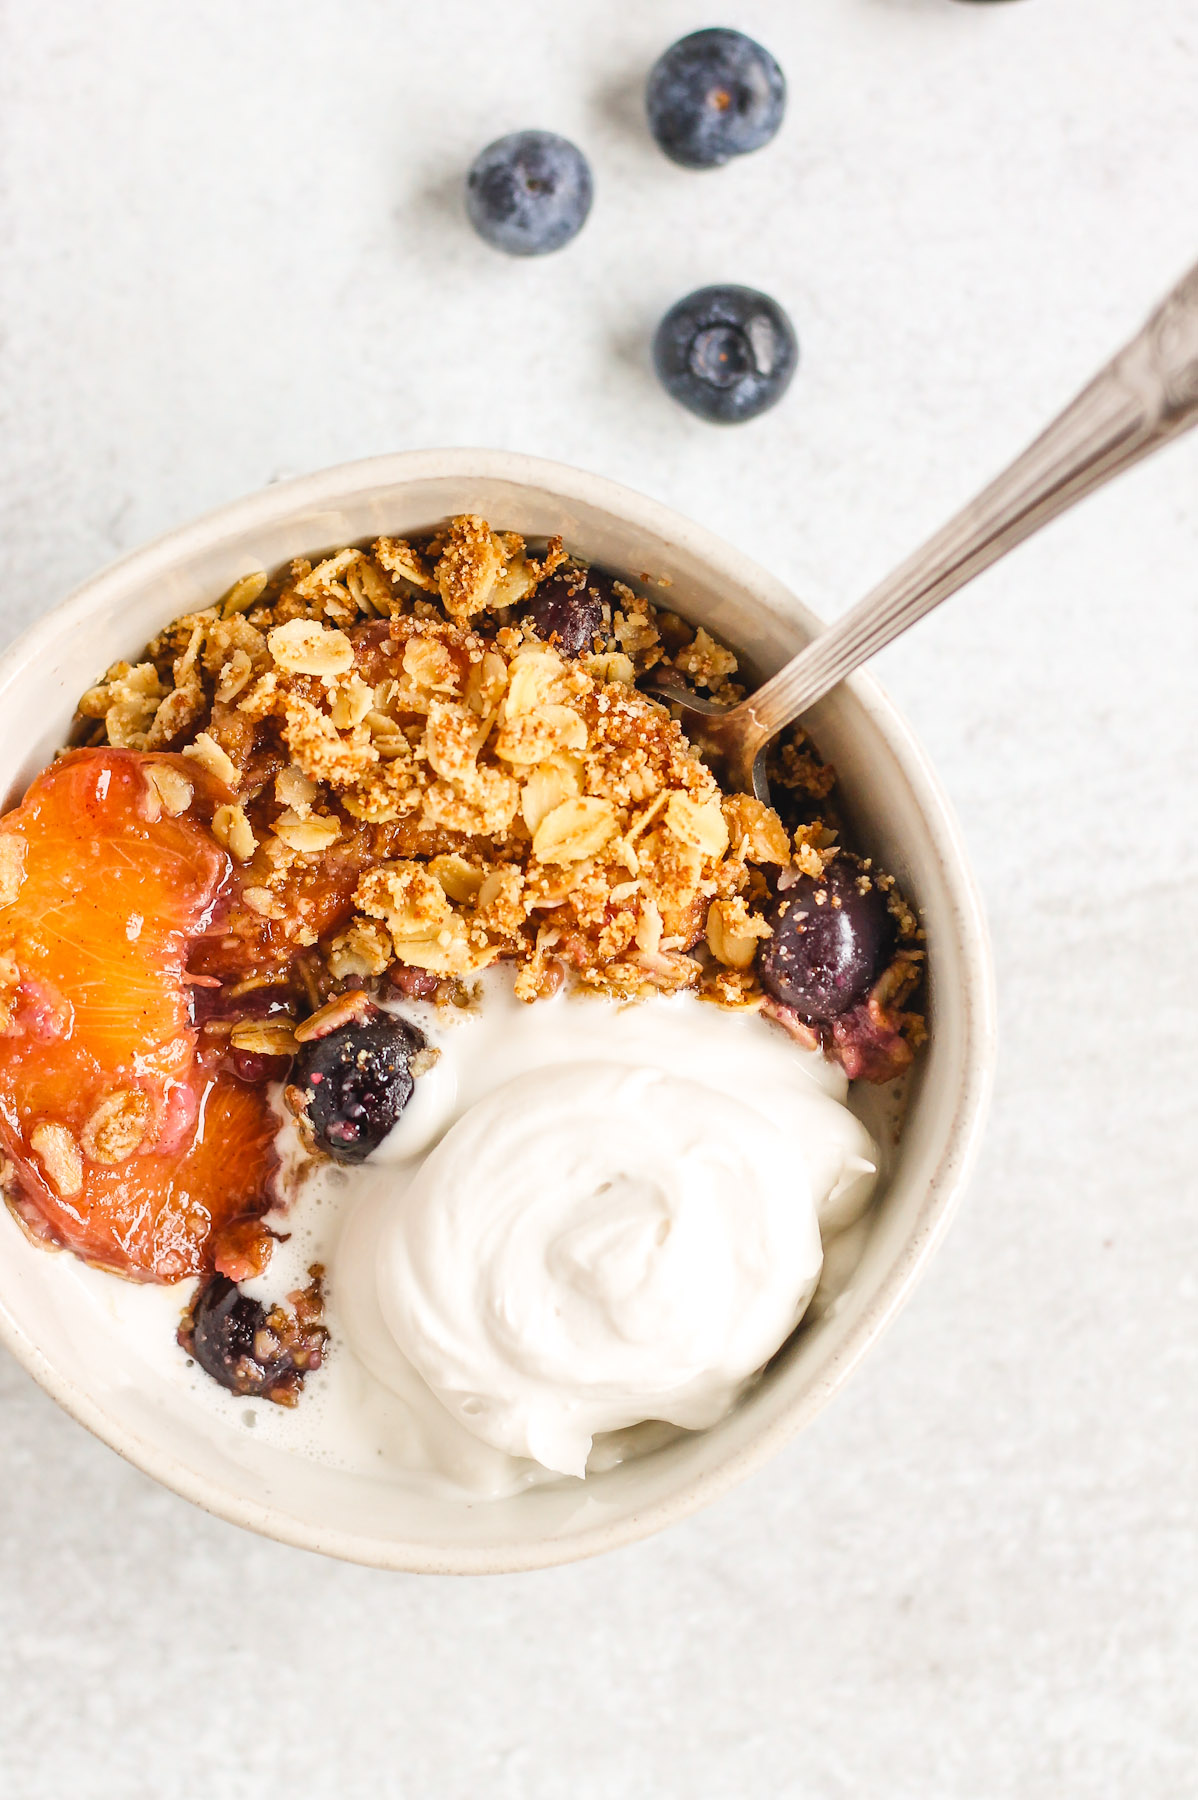
    Serve topped with granola, or garnish the mousse cups with fresh berries or crushed walnuts and a sprinkle of cinnamon.

    Apple Mousse topped with chopped walnut and cinnamon in an elegant glass dessert dish.

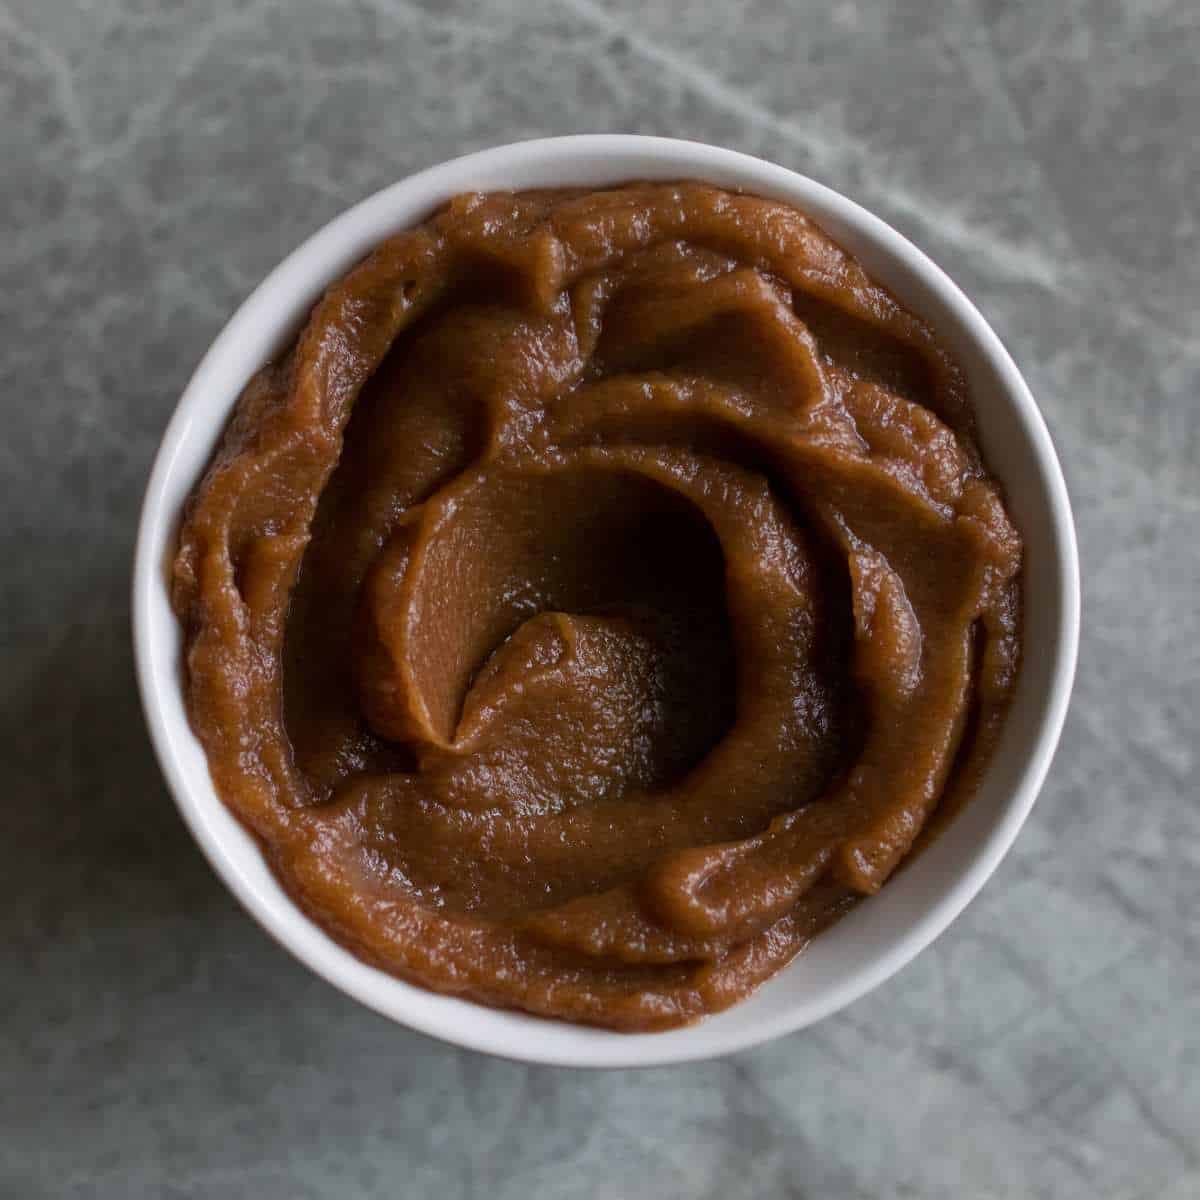
    The cinnamon mousse is lightly sweetened with maple syrup but if you prefer you could swap the maple syrup for an unsweetened apple butter. That way this dessert would be sweetened entirely by fruit. You can prepare this dessert ahead of time and let it set in the fridge, making it an ideal dessert for entertaining or for meal prep.

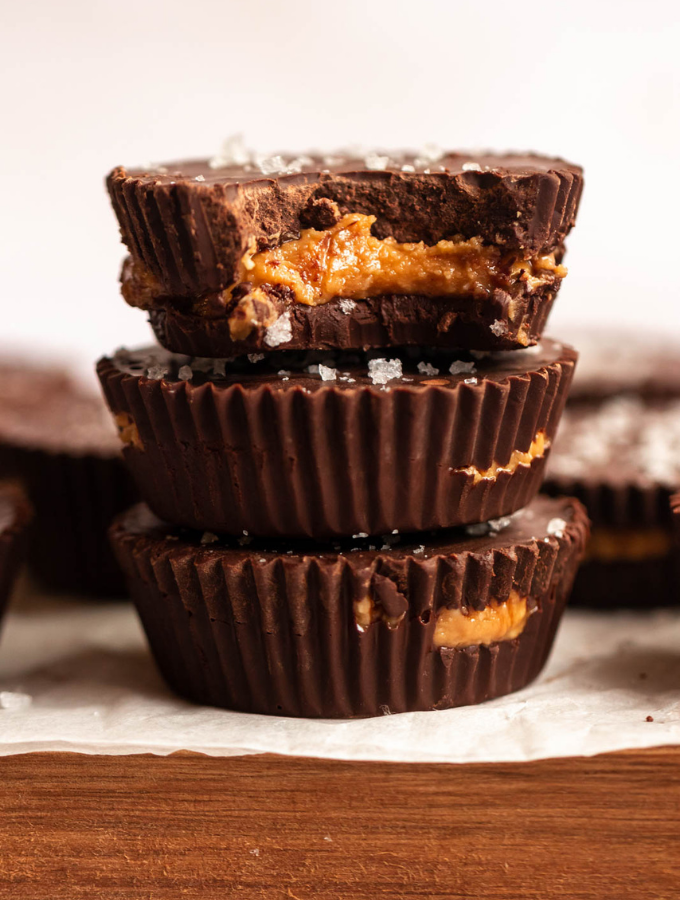
    I have a lot of chocolate recipes on the blog. I am a huge chocolate fan and especially a huge chocolate and peanut butter fan but I am slowly adding more fruit-forward dishes to the blog. My 6-year-old son doesn't like chocolate or peanut butter so it's pushing me to expand my own taste preferences as well!

    [feast_advanced_jump_to]

    Why You'll Love This Recipe

    • A refreshing and light dessert option.
    • No bake!
    • The Greek yogurt in this recipe provides approx. 15 grams of protein.
    • Can be prepped in as little as 15 minutes.
    • Can be easily customized by using either pure maple syrup or unsweetened apple butter as a sweetener, allowing you to adjust the level of sweetness to your preference.
    • Can be made ahead of time and refrigerated, making it a convenient dessert for entertaining or meal prep.

    Ingredients

    Ingredients to make Apple Mousse in mixing bowls, pinch bowls and measuring cups around a whole apple.
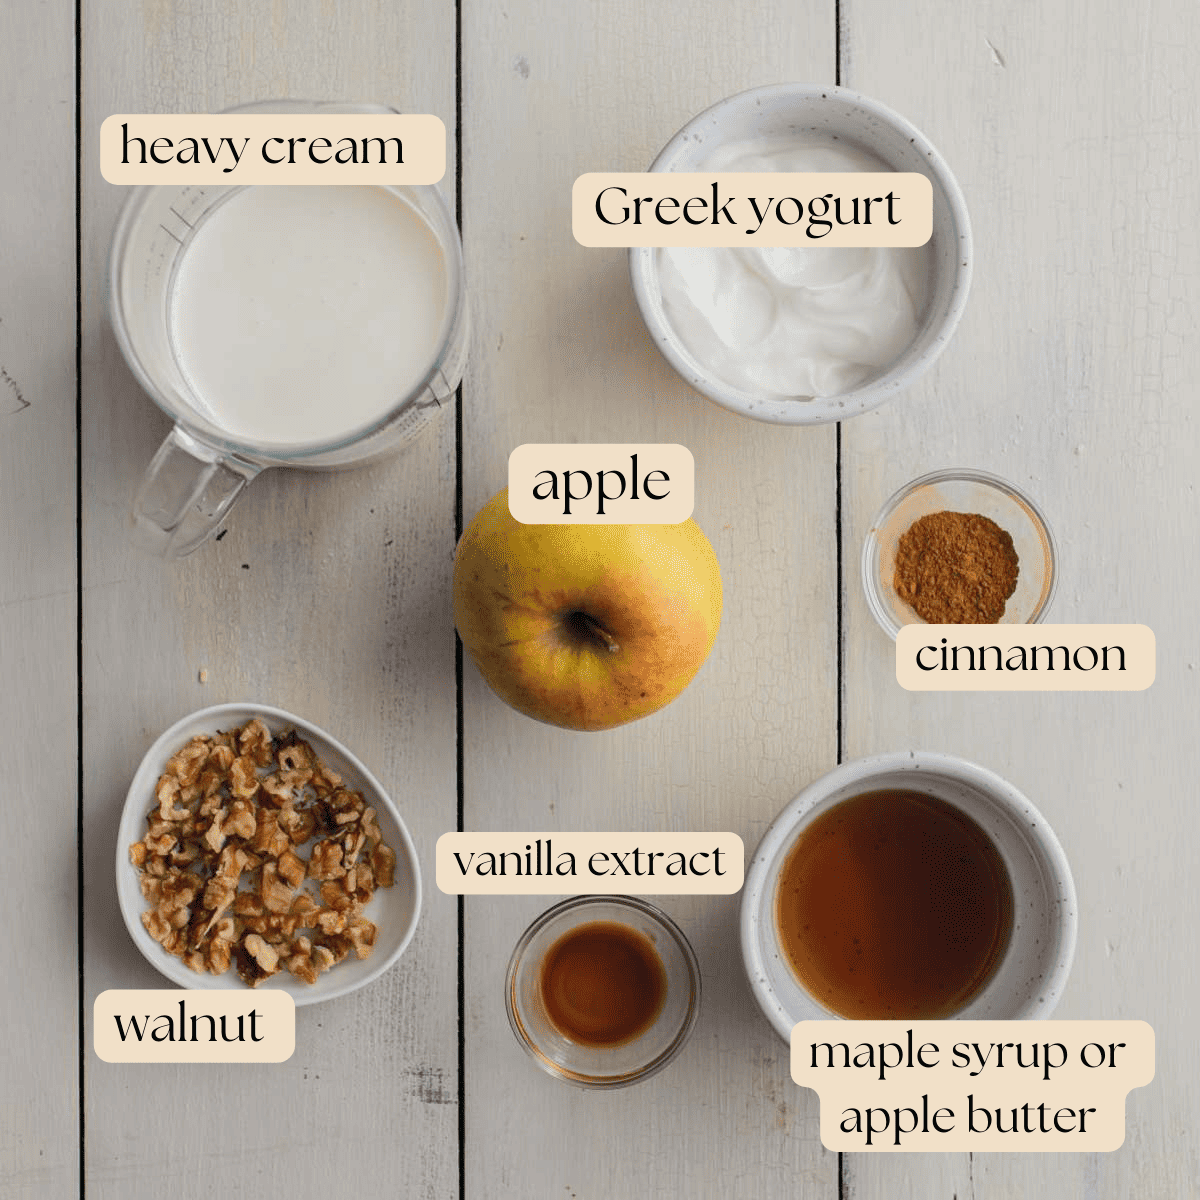
    • Greek yogurt - you can choose any fat percentage of Greek yogurt. I go for 2%.
    • Maple syrup - choose pure maple syrup or honey or swap for an unsweetened apple butter.
    • Grated apple - I choose to leave the skin on but you can peel the apple prior to grating if you prefer. You can choose any apple for this recipe, red, or green, whatever you prefer, or want to try.
    • Cinnamon - I recommend Ceylon cinnamon which has the most health benefits.
    • Pure vanilla extract.
    • Heavy cream - 35%.
    • Walnuts - optional for a crunchy topping.

    See the recipe card below for a full list of ingredients and measurements.

    Substitutions & Variations

    • swap the cinnamon for chai spice or pumpkin pie spice
    • omit the cinnamon entirely for a lighter flavor
    • add in a swirl of jam or fresh fruit
    • try adding some lemon zest and a touch of lemon juice
    • for a different texture try dicing the apple very finely instead of grating them
    • experiment with using different varieties of apples to control the sweetness.
    • top with crushed pecans or hazelnuts
    • add a tablespoon or two of any nut or seed butter when you're mixing up the greek yogurt
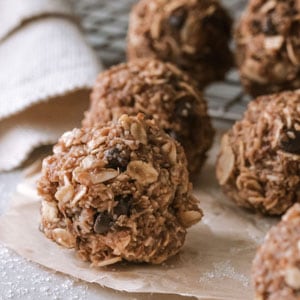
    • pair with other treats like granola, fresh berries, or a dollop of whipped cream.

    I have not experimented with any other substitutions or alterations for this recipe. If you decide to make any changes by adding or substituting ingredients, I would love it if you could share your results with us by leaving a comment below.

    How To Make Apple Mousse

    Here are the step-by-step instructions to make this recipe.

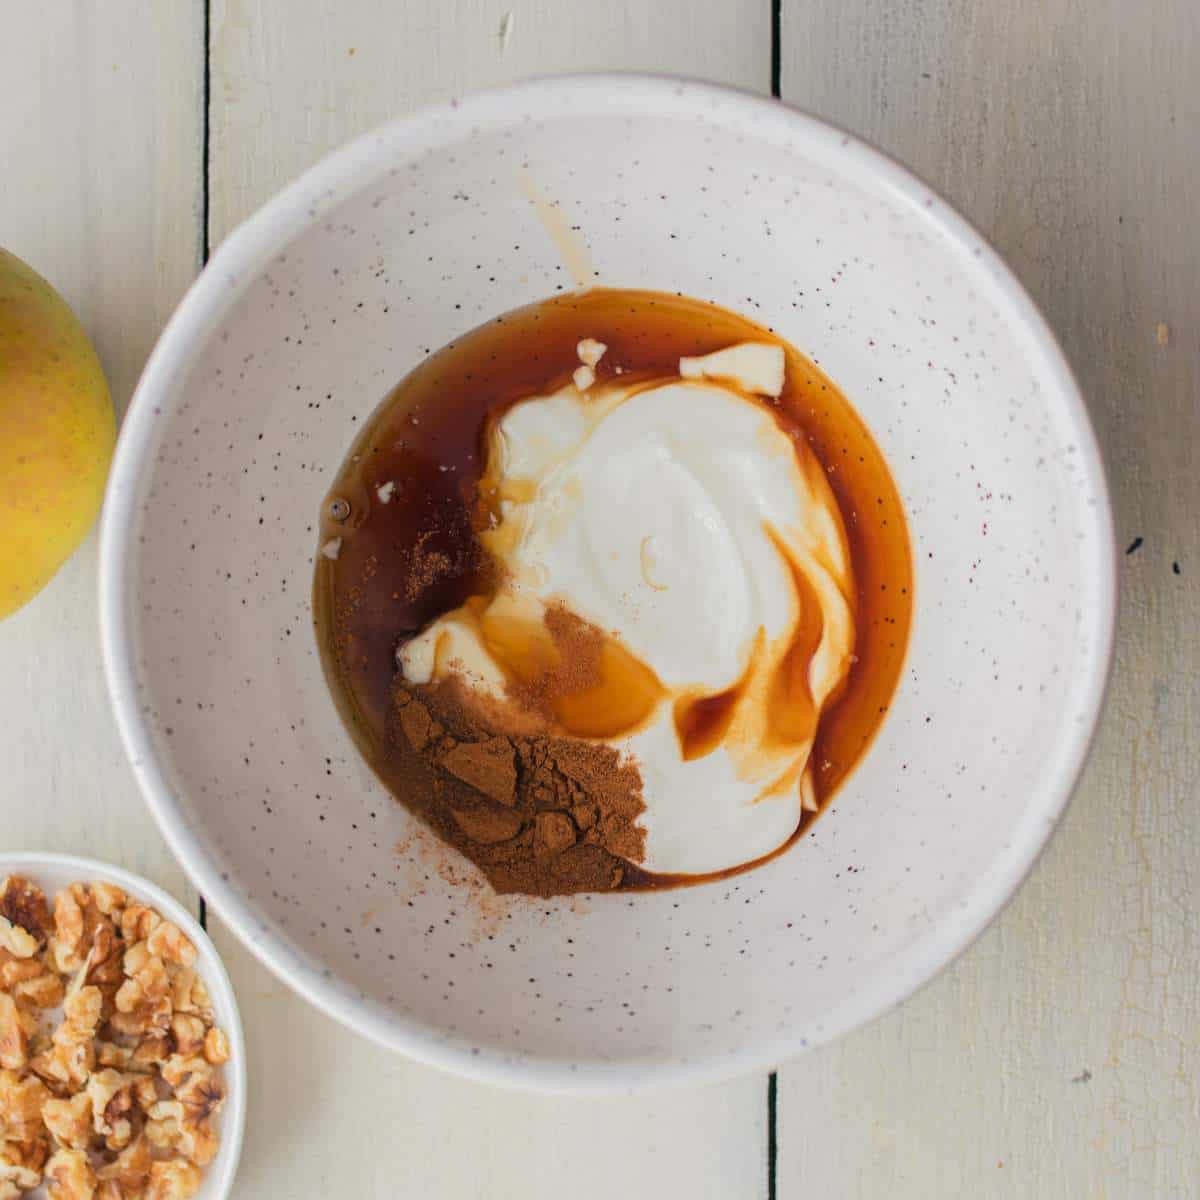
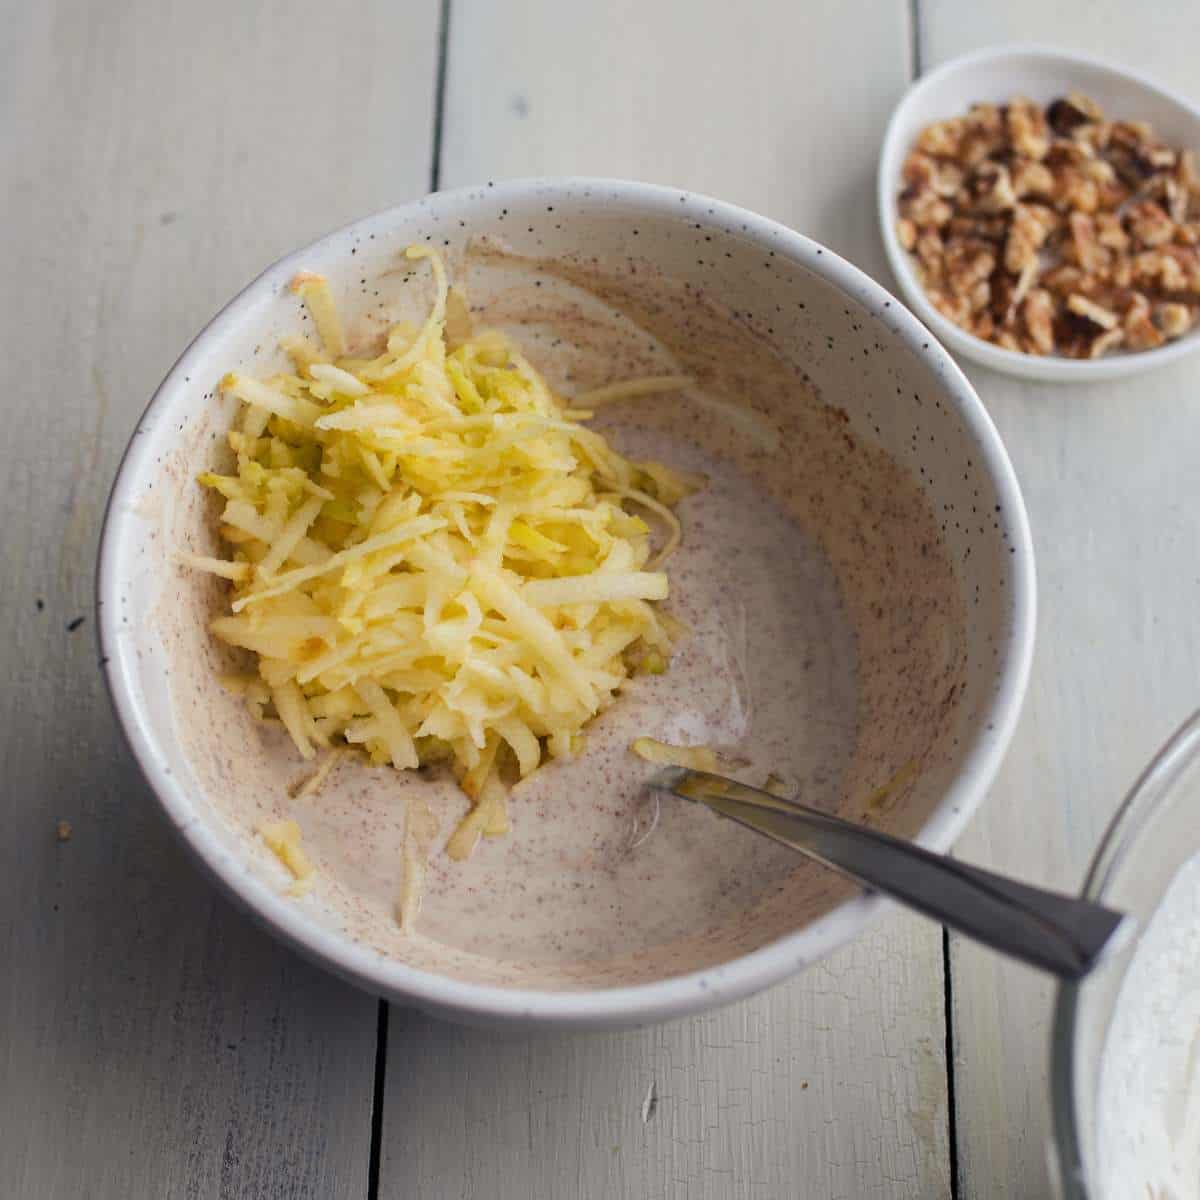
    Step 1: Create yogurt and cinnamon mix.

    In a small bowl mix together Greek yogurt, maple syrup, cinnamon and pure vanilla.

    Optional first step: If you want a thicker mousse, place the Greek yogurt in a strainer lined with cheesecloth over a bowl and refrigerate overnight to drain off excess whey.

    Greek yogurt, maple syrup, cinnamon and pure vanilla, ready to be mixed together in a bowl,

    Step 2: Grate Apple

    Grate apple using the coarse grating side of a box grater. Add grated apple and stir thoroughly.

    Grated apple on top of yogurt mix in a mixing bowl with a spoon in it.

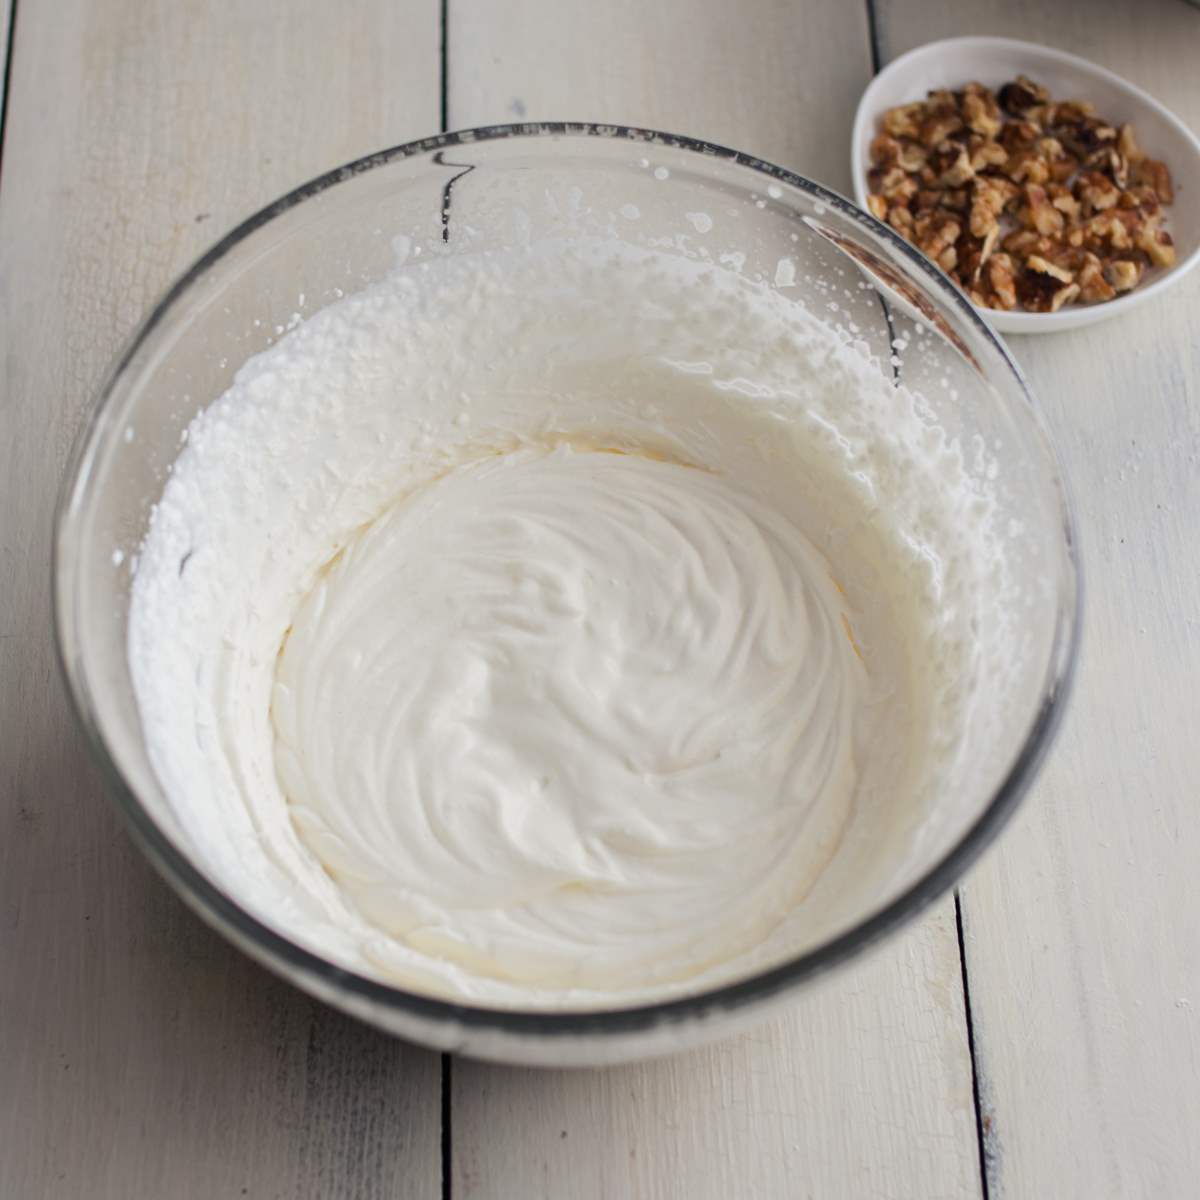
    Step 3: Whip the cream.

    In a separate medium-sized bowl, whip up heavy cream until it has soft peaks.

    Whipped cream in a clear mixing bowl on a wooden board.

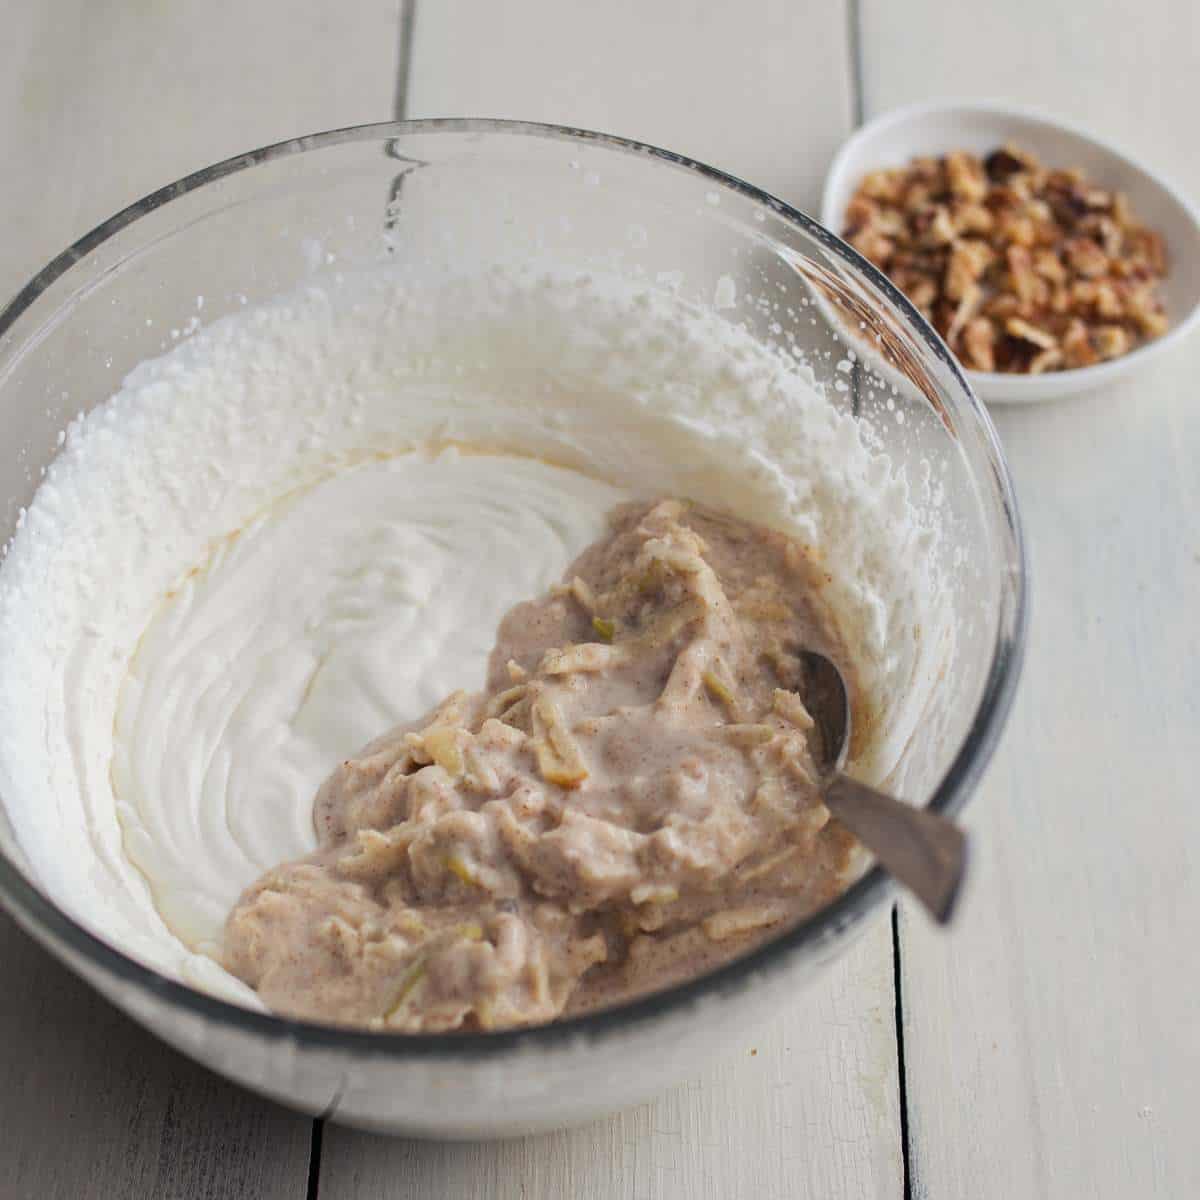
    Step 4: Fold together.

    Gently fold the Greek yogurt mixture into the whipped cream until well combined but don't overmix.

    Greek yogurt mixture sitting on top of whipping cream in a clear bowl, ready to be mixed together.

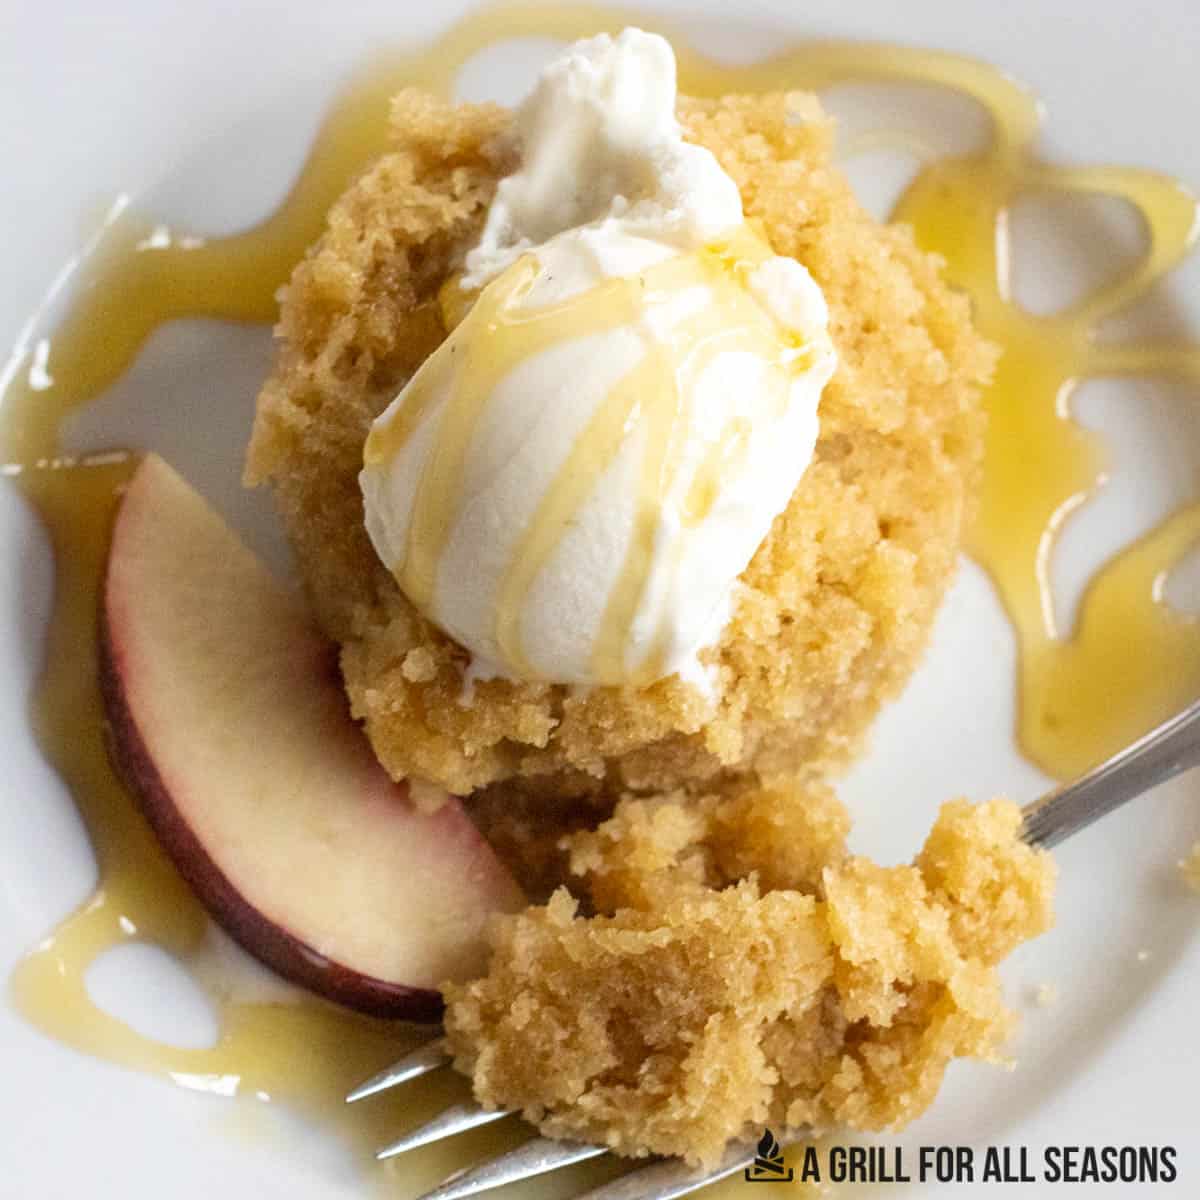
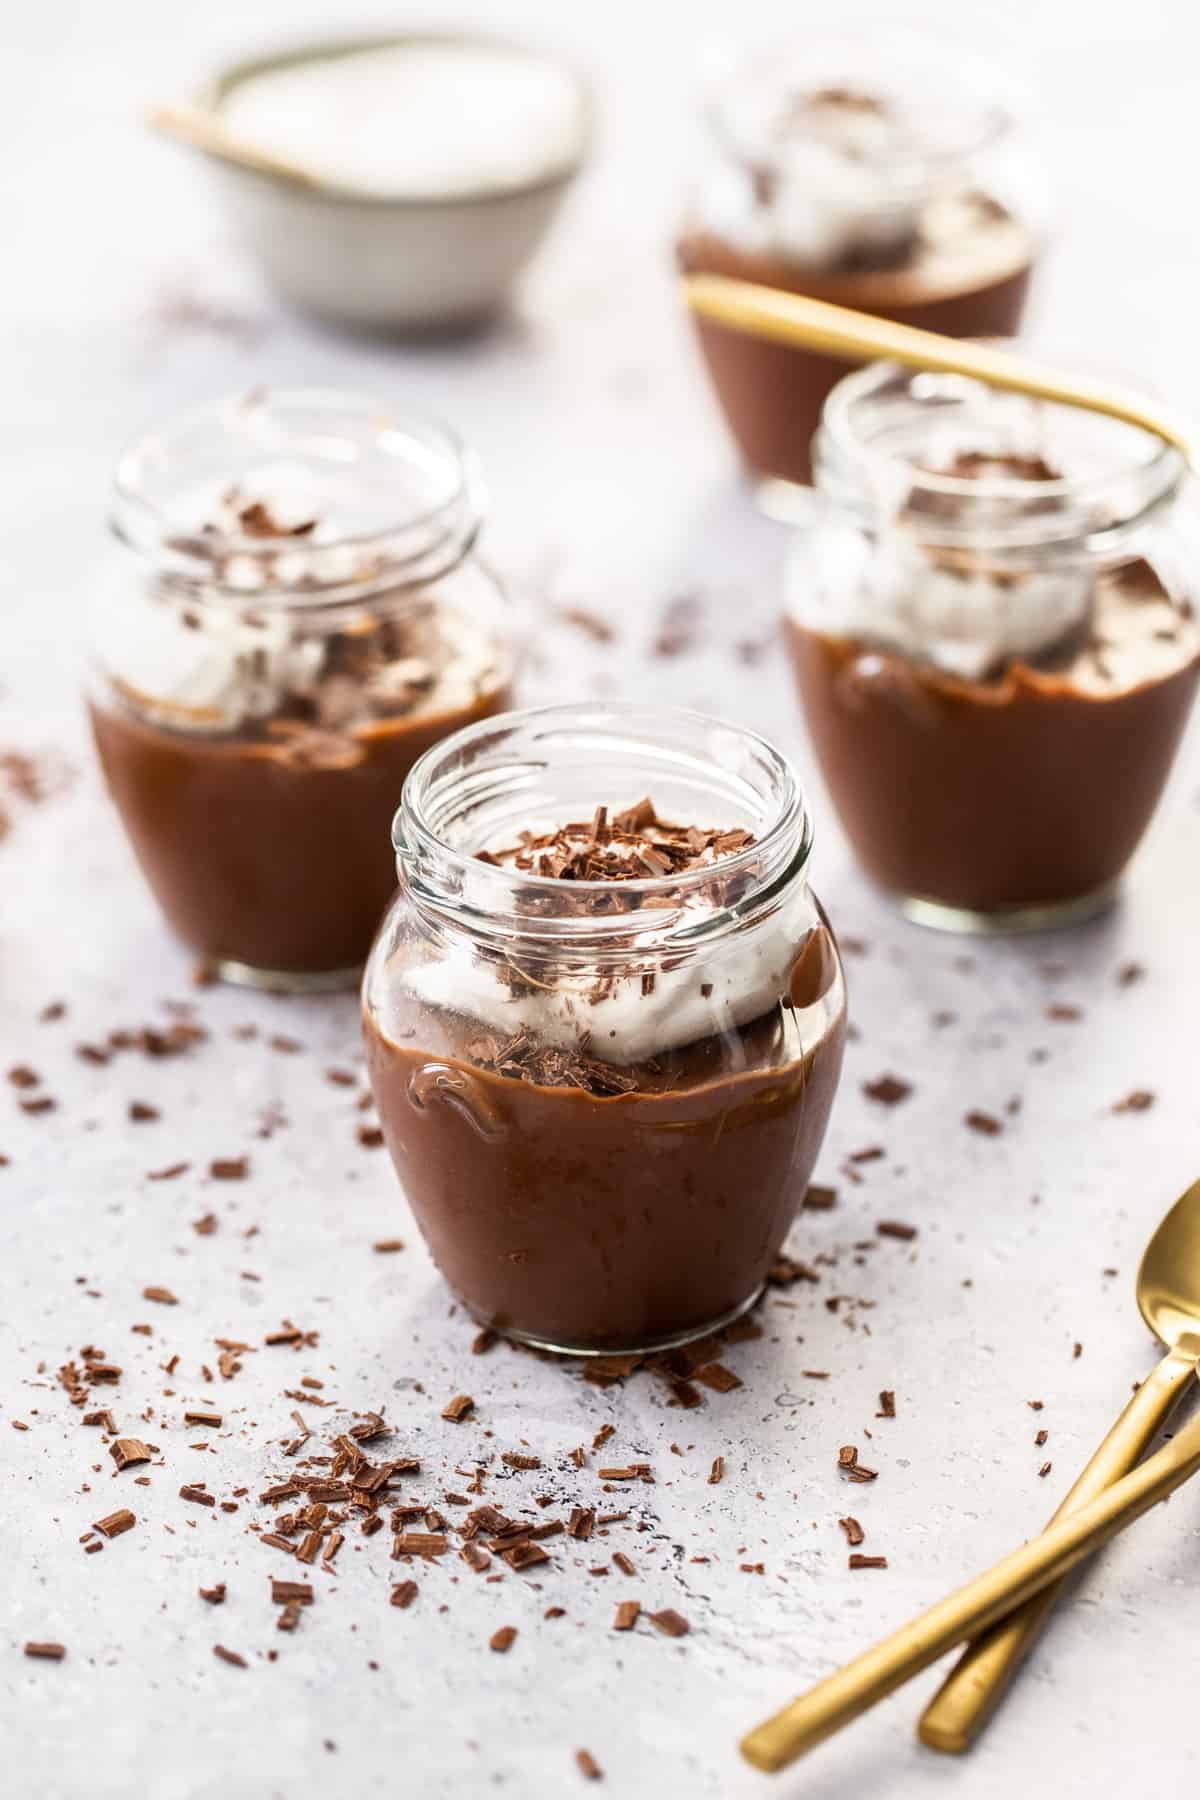
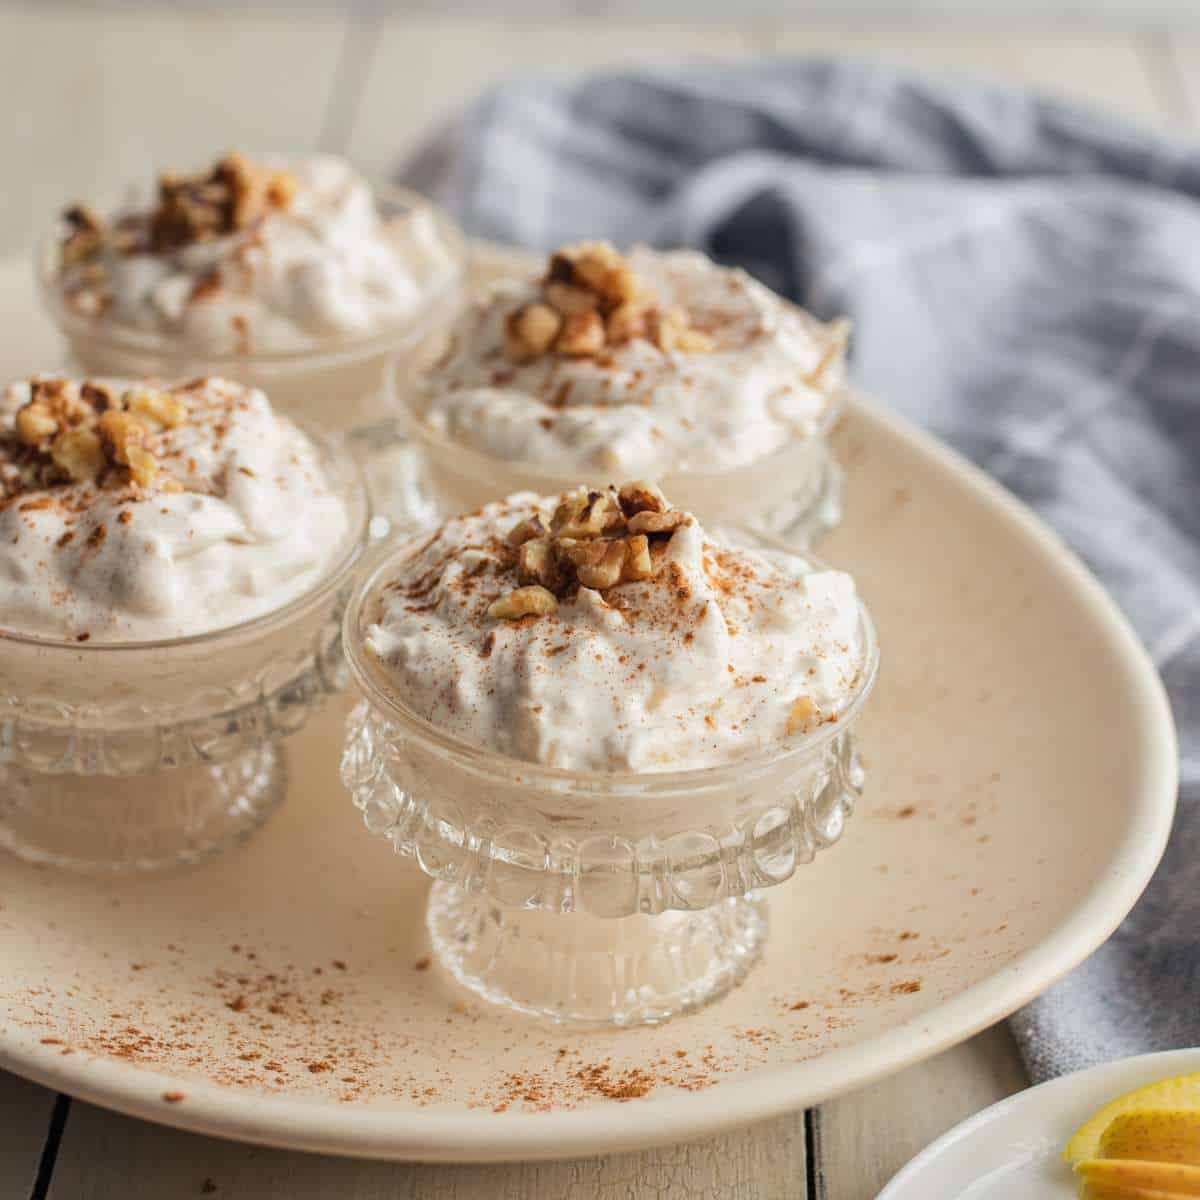
    Step 5: Transfer to small bowls and chill.

    Transfer the mixture into small dessert bowls. Top with crushed walnuts and a sprinkle of cinnamon and allow the dessert to set in the fridge for a minimum of 30 minutes. Enjoy!

    Four small dessert bowls of apple mousse on a plate garnished with cinnamon and chopped walnut.

    Expert Tips

    • If you want a thicker mousse, place the Greek yogurt in a strainer lined with cheesecloth over a bowl and refrigerate overnight to drain off excess whey.
    • Look for cream with simple ingredients. Cream shouldn't have stabilizers and extra additives. Many brands of cream do contain extras to prolong its shelf life. For this dessert, I highly recommend splurging on pure organic cream.
    • I like including the apple skin when I grate up the apple but you can remove it if you prefer. If using the skin I recommend an organic apple.
    • I like using Golden Delicious or Honey Crisp apples in this dessert but if you prefer a more tart apple, I recommend choosing Granny Smith or Pink Lady.

    Recipe FAQs

    Can I make Greek yogurt at home using plain yogurt?

    You can make Greek yogurt at home! Simply line a mesh strainer with a few layers of cheesecloth and add plain yogurt. Place in the fridge and allow it to sit for a minimum of 2 hours. The whey will drain from the yogurt and you will be left with thick Greek yogurt.

    Which apples are the sweetest?

    Some apple varieties are sweeter than others. Some examples of sweet apples are Fuji, Gala, Golden Delicious and the ever so popular Honey Crisp.

    Which apples are the most tart?

    Some apple varieties are more tart than others. Some examples of tart apples are green apples like Granny Smith or Pink Lady.

    A spoonful of Apple Mousse topped with chopped walnut and cinnamon scooped out of an elegant glass dessert dish.

    Storage

    Fridge

    To keep your mousse fresh, store it in an airtight container in the refrigerator. Enjoy within 2-3 days.

    More Recipes You'll Love

    • A spoon sitting inside a scooped out bit of Earl Grey Panna Cotta inside an ornate tea cup.
      Earl Grey Panna Cotta
    • a spoonful of cottage cheese ice cream held above of a bowl of cottage cheese ice cream to show the soft serve texture of the ice cream.
      Blended Cottage Cheese Ice Cream
    • Healthy Chocolate Pudding
    • Homemade Strawberry Mint Ice Cream

    Did you make this recipe? Let me know!
    Leave a review or comment below!

    Recipe

    Cinnamon Apple Mousse

    Christy Faber
    Apple Cinnamon Mousse is an elegant, light and refreshing way to end a meal. You can assemble this dessert in 15 minutes and have a cold and crisp dessert to serve to guests with minimal effort.
    5 from 12 votes
    Print Recipe Pin Recipe SaveSaved!
    Prep Time 15 minutes mins
    Chill Time 30 minutes mins
    Total Time 45 minutes mins
    Course Dessert
    Cuisine French
    Servings 4 people
    Calories 325 kcal

    Ingredients
      

    • ½ cup Greek yogurt
    • 2 ½ tbsp pure maple syrup (OR swap for unsweetened apple butter)
    • 1 cup grated apple optional: grate with skin on
    • ½ tsp ground cinnamon
    • ½ teaspoon pure vanilla extract
    • ¾ cup heavy cream

    Topping

    • 2 tbsp walnuts crushed
    • sprinkle of cinnamon

    Instructions
     

    • In a small bowl, mix together Greek yogurt, maple syrup, cinnamon and pure vanilla.
    • Add grated apple and stir thoroughly.
    • In a separate medium-sized bowl, whip up heavy cream until it reaches soft peaks.
    • Gently fold the Greek yogurt mixture into the whipped cream until well combined but don't overmix.
    • Transfer the mixture into small dessert bowls. Top with crushed walnuts and a sprinkle of cinnamon and allow the dessert to set in the fridge for a minimum of 30 minutes. Enjoy!

    Notes

      • If you want a thicker mousse, place the Greek yogurt in a strainer lined with cheesecloth over a bowl and refrigerate overnight to drain off excess whey.
      • Look for cream with simple ingredients. Cream shouldn't have stabilizers and extra additives.  Many brands of cream do contain extras to prolong its shelf life.  For this dessert, I highly recommend splurging on pure organic cream.
      • I like including the apple skin when I grate up the apple but you can remove it if you prefer.  If using the skin I recommend an organic apple.
      • I like using Golden Delicious or Honey Crisp apples in this dessert but if you prefer a more tart apple, I recommend choosing Granny Smith or Pink Lady.

    Nutrition

    Serving: 42gCalories: 325kcalCarbohydrates: 26.2gProtein: 24.6gFat: 13.8gSaturated Fat: 7.3gCholesterol: 51mgSodium: 110mgPotassium: 323mgFiber: 1.6gSugar: 20.4gCalcium: 276mgIron: 1mg
    Tried this recipe?Let us know how it was!

    If you make this recipe please leave a comment and give this recipe a rating! I aim to respond to every single comment. I am so grateful when you trust me and try one of my recipe creations in your own kitchen. I love to hear how it went!  Let’s connect on Instagram and tag me in your food pics!

    ‘Til next time,

    Christy

    Date Sweetened Chocolate Chip Cookies

    Feb 7, 2023 · 39 Comments

    Date-sweetened cookies are refined sugar-free, soft, chewy and deserving of a place on your go-to cookie recipe list! They will have you asking, “How are these only sweetened with fruit?”

    These delicious cookies are lightly sweetened and nutrient-packed-- a perfect option for a hearty breakfast cookie. Make a few batches at one time so you can stock your freezer with a healthy grab-and-go breakfast option.

    Chocolate chip cookies with melted chocolate drizzled on top.

    I love using dates in baking or to bring sweetness to many different foods such as marinades or smoothies.  Dates have many health benefits. They are a high source of potassium, magnesium and vitamin B6. They are also full of antioxidants, high in fibre and a good source of iron.

    You’re going to love these cookies and feel so good about sharing them with your friends and family. Enjoy!

    If you're looking for more delicious and wholesome treats that are entirely sweetened by fruit visit my recipes for: Caramel Date Paste, Date Sweetened Chocolate Pudding, Tahini Stuffed Dates, Chocolate Covered Pineapple and Cottage Cheese Banana Ice Cream.

    [feast_advanced_jump_to]

    Why You'll Love This Recipe

    • It's sweetened entirely with fruit!
    • Delicious as a breakfast cookie especially if you add some nuts or hemp hearts to boost the protein content.
    • These cookies freeze well, so you can always have some available.
    • Ideal for meal prep for a quick wholesome snack all week long.
    • Kid-friendly!
    • These cookies are packed with dates! Dates are high in fiber, rich in antioxidants and a good source of iron.

    Ingredients

    All ingredients to make date sweetened chocolate chip cookies in mixing bowls, pinch bowls and measuring cups on a wooden table.
    • Butter
    • Medjool dates - be sure to take the pits out!
    • Eggs – use large eggs for this recipe 
    • Vanilla extract – it’s worth it to invest in pure vanilla or make your own
    • All-purpose flour – you can also sub for spelt flour
    • Baking soda
    • Salt – I love to use unrefined grey salt for extra minerals and flavor 
    • Ground cinnamon – I recommend Ceylon cinnamon also known as "true" cinnamon
    • Oats – use large flake rolled oats, sometimes called “old fashioned” oats 
    • Chocolate chips - to keep sugar content lower in these cookies you can purchase chocolate chips sweetened with stevia or dates if desired.

    See the recipe card below for a full list of ingredients and measurements.

    Substitutions & Variations

    • Instead of chocolate chips, you can experiment with dried fruits like raisins, cranberries, chopped dates, chopped dried apricots or candied ginger. These options will add natural sweetness to the cookies.
    • Consider adding texture to the cookies by the addition of shredded coconut, crushed pretzels or even a sprinkle of flaky salt.
    • Or add various nuts, like chopped pecans or walnuts.
    • Swap the chocolate chips for chopped dark chocolate.
    • Try stuffing or topping with homemade Nutella.
    • Swap the all-purpose flour for spelt flour if you prefer.
    • You can use other date varieties such as Deglet Noor instead of Medjool.

    I have not experimented with any other substitutions or alterations for this recipe. If you decide to make any changes by adding or substituting ingredients, I would love it if you could share your results with us by leaving a comment below.

    How To Make Date Sweetened Cookies

    Here are the step-by-step instructions to make this recipe.

    Step 1: Pit the dates and preheat the oven.

    Remove the pits from the dates. Use a small knife to make a lengthwise slit along one side of the date and pull the seed out.

    Preheat your oven to 350 degrees F.

    Dates, pitted, in a measuring cup.

    Step 2: Blend the wet ingredients.

    In a food processor or blender, blitz together the butter, egg, vanilla and dates until smooth and creamy.

    Butter, egg, vanilla and dates in a blender.

    Step 3: Mix the dry ingredients.

    In a separate bowl, whisk together the dry ingredients including the rolled oats.

    Rolled oats being poured into the other dry ingredients.

    Step 4: Combine wet and dry ingredients.

    Add the wet ingredients to the dry ingredients and stir until well incorporated.

    Blended wet ingredients pouring into dry ingredients.

    Step 5: Add chocolate chips.

    Add the chocolate chips and stir until just combined.

    Chocolate chips sitting on top cookie dough in a mixing bowl.

    Step 6: Bake the Cookies

    Roll about 2 level tablespoons of dough for each cookie. Press the cookie dough down and shape into desired round cookie shape as these cookies don't spread much. Add a few chocolate chips to the top of each cookie for appearance if desired. (If your dough seems soft, chill for 30 minutes before rolling your cookies.)

    Bake in a 350 degree F oven for approximately 8 minutes. Allow cookies to cool and enjoy!

    Formed, uncooked, chocolate chip cookie on a parchment paper lined baking sheet.

    Expert Tips

    • If your dates are too firm, soak them in warm water for 10 minutes to soften them before using. the water thoroughly and pat dry before adding them to the blender.
    • When blending the wet ingredients with the dates, blend for at least 30 seconds and ensure a really creamy consistency. There shouldn't be pieces of dates visible when it's fully blended.
    • Chilling the dough: If your dough seems too soft or sticky to handle, refrigerate it for about 30 minutes before rolling the cookies.
    • Use a tablespoon measure to portion the dough into uniform sizes. This ensures that the cookies bake evenly and have a consistent shape.

    Recipe FAQs

    Are dates processed with sugar?

    No. Dates grow on date palm trees and are dried and harvested before being brought to market. Nowhere in the process is sugar added.

    Are dates a high source of sugar?

    Yes. Dates are high in natural sugars and are also loaded with other nutrients such as iron and antioxidants.

    How do I soften dates for baking?

    If your dates are too firm, you can soften them by soaking them in warm water for about 10-15 minutes. Drain the water fully before using the dates in your recipe.

    Date sweetened chocolate chip cookie close up, sitting on a wooden table surrounded by raw dates and cookies.

    Storage

    Fridge

    Once the cookies have completely cooled, place them in an airtight container and store in the fridge for up to 1 week. Enjoy the cookies chilled (like I do!) or bring them to room temperature before eating.

    Freezer

    Allow the cookies to cool completely after baking. Place them in a freezer-safe bag. Store the cookies in the freezer for up to 3 months. Thaw the desired amount of cookies at room temperature before enjoying.

    More Healthy Recipes You'll Love

    • Peanut Butter Swirl Black Bean Brownies
    • Healthy Oat Flour Banana Pancakes
    • Homemade Tahini Hot Chocolate
    • Green, dessert bowl full of Cottage Cheese Lemon Mousse on a wooden board with a handle spooning a scoop out.
      Cottage Cheese Lemon Mousse

    Did you make this recipe? Let me know!
    Leave a review or comment below!

    Recipe

    Date Sweetened Cookies

    Christy Faber
    These delicious cookies are lightly sweetened and nutrient-packed-- a perfect option for a hearty breakfast cookie. They will have you asking, “How are these only sweetened with fruit?”
    5 from 27 votes
    Print Recipe Pin Recipe SaveSaved!
    Prep Time 16 minutes mins
    Cook Time 8 minutes mins
    Total Time 24 minutes mins
    Course Breakfast, Snack
    Cuisine American
    Servings 12 cookies
    Calories 174 kcal

    Ingredients
      

    • ½ cup melted butter
    • 1 cup pitted medjool dates, lightly packed (10-12 dates)
    • 1 large egg
    • 1 ½ tsp pure vanilla extract
    • ½ cup all-purpose flour
    • ½ tsp baking soda
    • ¼ tsp salt
    • ½ tsp ground cinnamon
    • 1 cup rolled oats
    • ½ cup semi sweet chocolate chips or sugar free chips if desired

    Instructions
     

    • Remove the pits from the dates. In a food processor or blender, blitz together the butter, egg, vanilla and pitted dates until smooth and creamy.
    • In a separate bowl, whisk together the dry ingredients including the rolled oats.
    • Slowly add the dry ingredients to the wet ingredients, stirring until incorporated. Add chocolate chips and stir until just combined.
    • Preheat your oven to 350 degrees F. If your dough seems soft, chill for 30 minutes before rolling your cookies.
    • Roll about 2 tablespoon of dough for each cookie. Press the cookie dough down and shape into desired round cookie shape as these cookies don't spread much. Add a few chocolate chips to the top of each cookie for appearance if desired. Bake for approximately 8 minutes. Enjoy!
    • Note: I especially enjoy these cookies after they've been chilled in the fridge.

    Notes

    • If your dates are too firm, soak them in warm water for 10 minutes to soften them before using. Drain the water thoroughly and pat dry before adding them to the blender.
    • When blending the wet ingredients with the dates, blend for at least 30 seconds and ensure a really creamy consistency. There shouldn't be pieces of dates visible when it's fully blended.
    • Chilling the dough: If your dough seems too soft or sticky to handle, refrigerate it for about 30 minutes before rolling the cookies.
    • Use a tablespoon measure to portion the dough into uniform sizes. This ensures that the cookies bake evenly and have a consistent shape.

    Nutrition

    Calories: 174kcalCarbohydrates: 21.5gProtein: 2.6gFat: 9.3gCholesterol: 36mgSodium: 165mgPotassium: 136mgSugar: 11gCalcium: 16mgIron: 1mg
    Tried this recipe?Let us know how it was!

    If you make this recipe please leave a comment and give this recipe a rating! I aim to respond to every single comment. I am so grateful when you trust me and try one of my recipe creations in your own kitchen. I love to hear how it went!  Let’s connect on Instagram and tag me in your food pics!

    ‘Til next time,

    Christy

    Chocolate Covered Pineapple

    Feb 6, 2023 · Leave a Comment

    Chocolate covered pineapples with shredded coconut on a plate.

    Chocolate Covered Pineapple is a refreshing way to add some tropical sweetness and sunny flavour to your day! Juicy pineapple pairs so well with rich dark chocolate.

    This extremely simple 3 ingredient recipe is perfect for a child's birthday or backyard party and honestly, it has really brightened up some dreary February days for me. Chocolate dipped pineapple is sure to be a party pleaser whenever you serve it!

    Chocolate covered pineapple dipped in shredded coconut on candy apples sticks laid on a baking sheet.

    Serve topped with shredded coconut for an extra tropical feel or with crushed almonds. For some variety, you could also cut the pineapple into rings and dip one side of the pineapple slice in chocolate for a fun donut shape.

    For more chocolate recipes view my recipes for Chocolate Covered Cranberries, Chocolate Peppermint Crinkle Cookies, Healthy Chocolate Pudding, Tahini Hot Chocolate.

    [feast_advanced_jump_to]

    Why You'll Love This Recipe

    • A super healthy dessert!
    • A perfect summer time treat.
    • Kid-friendly!
    • Makes a great addition to a charcuterie board or party menu
    • Refreshing and tropical
    • Easy to make (and kids love to help!)
    • If you buy naturally sweetened chocolate then this recipe is entirely sweetened by fruit
    • Gluten-free
    • Dairy-free if you choose dairy free chocolate

    Ingredients

    Ingredients for chocolate covered pineapple in bowls and laid out on a wooden board.
    • Pineapple - choose a ripe one! I purchase pineapple that is already cored and peeled at the store.
    • Baker's chocolate - I choose semi-sweet baker's chocolate but you could use dark if you prefer. It doesn't work to melt chocolate chips for this recipe because the stabilizers in chocolate chips don't allow them to melt down smoothly enough.
    • Unsweetened shredded coconut - you can choose any topping or just omit it if you want to keep it simple.

    See the recipe card below for a full list of ingredients and measurements.

    Substitutions & Variations

    • Chocolate: You can opt for milk chocolate or dark chocolate instead of semi-sweet. It would also be very beautiful to dip the pineapple wedges in semi-sweet chocolate and do a drizzle of melted milk chocolate or white chocolate.
    • You can purchase chocolate that is sweetened entirely with dates or stevia if you want a sugar free dessert.
    • Swap the shredded coconut out for other toppings such as sprinkles, crushed nuts, flaky salt, freeze dried raspberry powder, citrus zest or crushed pretzels.
    • Shapes: you could cut the pineapple into any preferred shape! I've seen round slices of pineapple dipped half way in chocolate so they look like fruit donuts!

    I have not experimented with any other substitutions or alterations for this recipe. If you decide to make any changes by adding or substituting ingredients, I would love it if you could share your results with us by leaving a comment below.

    How To Make Chocolate Covered Pineapple Pops

    Here are the step-by-step instructions to make this recipe.

    Step 1: Cut and skewer the pineapple wedges.

    Cut a ripe pineapple into wedges. Skewer them with either a popsicle stick or a "candy apples stick".

    A toddler tries to skewer a piece of pineapple in a bowl of pineapple slices.

    Step 2: Melt the chocolate.

    Blot the pineapple dry with a paper towel.

    Melt the baker's chocolate either in a double boiler on the stove or in the microwave. Add ½ teaspoon of melted coconut oil if the chocolate is too thick.

    Pineapple slices skewered with candy apple sticks.

    Step 3. Dip the pineapple in the chocolate.

    Dip the pineapple wedge into the melted chocolate and allow the excess chocolate to drip off.

    Lay the chocolate on a cookie sheet lined with parchment paper.

    Pineapple slice on a candy apple stick dipped into a bowl of melted chocolate.

    Step 4: Sprinkle with topping.

    Sprinkle with shredded coconut or topping of your choice before the chocolate firms up. Place in the fridge to allow the chocolate to harden.

    A hand holding two skewered chocolate covered pineapple slices.

    Expert Tips

    • Choose a high-quality chocolate for this recipe since it is such a main player!
    • Pat the pineapple pieces dry using a paper towel before dipping them into the melted chocolate. Excess moisture can prevent the chocolate from sticking to the pineapple.
    • Set aside a spare pineapple piece as you're chopping that you can use for testing purposes. Dip it into the chocolate first to check the consistency and adjust as needed before dipping the remaining pieces.
    • If you find that the chocolate is cooling and thickening too quickly, place the bowl of melted chocolate over a pan of warm water to maintain a workable consistency.
    • If the chocolate is too thick for dipping, you can add a small amount of coconut oil (about 1 teaspoon at a time) to the melted chocolate and stir until it reaches the perfecting dippable consistency.

    Recipe FAQs

    Can I use canned pineapple instead of fresh pineapple?

    Fresh pineapple is recommended for the best texture and flavor. Canned pineapple will be too watery for the chocolate to stick to it.

    Can I make chocolate covered pineapple ahead of time?

    Yes, chocolate covered pineapple can be made ahead of time. Store them in an airtight container in the refrigerator until ready to serve. Consume them within 1-2 days.

    Can I use chocolate chips instead of baker's chocolate?

    No, chocolate chips will not melt as smoothly as baker's chocolate so they are not ideal for this recipe.

    Chocolate covered pineapple on skewers sticking out of a jar of coffee beans.

    Storage

    Fridge

    Store the chocolate covered pineapple in an airtight container in the refrigerator. In my experience it's best to enjoy them within 1-2 days.

    More Recipes You'll Love

    • Buckwheat Flour Chocolate Banana Muffins
    • a spoonful of cottage cheese ice cream held above of a bowl of cottage cheese ice cream to show the soft serve texture of the ice cream.
      Blended Cottage Cheese Ice Cream
    • Peanut Butter Swirl Black Bean Brownies
    • Super Nourishing Custard Drink

    Did you make this recipe? Let me know!
    Leave a review or comment below!

    Recipe

    Chocolate covered pineapples with shredded coconut on a plate.

    Chocolate Covered Pineapple

    Christy Faber
    Chocolate Covered Pineapple is a refreshing way to add some tropical sweetness and sunny flavour to your day. This extremely simple 3 ingredient recipe is perfect for a child's birthday or backyard party.
    5 from 1 vote
    Print Recipe Pin Recipe SaveSaved!
    Prep Time 15 minutes mins
    Chill Time 30 minutes mins
    Total Time 45 minutes mins
    Course Appetizer, Dessert, Snack
    Cuisine American
    Servings 12 Pieces
    Calories 96 kcal

    Ingredients
      

    • 1 ripe pineapple cored and peeled
    • 8 oz semi sweet baker's chocolate or dark or sugar free chocolate
    • shredded unsweetened coconut for a decorative topping optional
    • ½ teaspoon coconut oil optional

    Instructions
     

    • Melt the baker's chocolate either in a double boiler on the stove or in the microwave. Add ½ teaspoon of melted coconut oil if the chocolate is too thick.
    • Cut a ripe pineapple into wedges. Skewer them with either a popsicle stick or a "candy apples stick".
    • Blot the pineapple dry with a paper towel and dip the pineapple wedge into the melted chocolate, allowing the excess chocolate to drop off.
    • Lay the chocolate on a cookie sheet lined with parchment paper. Sprinkle with shredded coconut or topping of your choice before the chocolate has time to set. Place in the fridge to allow the chocolate to harden.
    • Once the chocolate sets you can remove from the fridge and enjoy!

    Notes

      • Choose a high quality chocolate for this recipe since it is such a main player!
      • Pat the pineapple pieces dry using a paper towel before dipping them into the melted chocolate. Excess moisture can prevent the chocolate from sticking to the pineapple.
      • Set aside a spare pineapple piece as you're chopping that you can use for testing purposes. Dip it into the chocolate first to check the consistency and adjust as needed before dipping the remaining pieces.
      • If you find that the chocolate is cooling and thickening too quickly, place the bowl of melted chocolate over a pan of warm water to maintain a workable consistency.
      • If the chocolate is too thick for dipping, you can add a small amount of coconut oil (about 1 teaspoon at a time) to the melted chocolate and stir until it reaches the perfecting dippable consistency.
      • These will last one to two days in the fridge. 

    Nutrition

    Calories: 96kcalCarbohydrates: 12.2gFat: 5.6gSaturated Fat: 3.5gFiber: 1gSugar: 10.8g
    Tried this recipe?Let us know how it was!

    If you make this recipe please leave a comment and give this recipe a rating! I aim to respond to every single comment. I am so grateful when you trust me and try one of my recipe creations in your own kitchen. I love to hear how it went!  Let’s connect on Instagram and tag me in your food pics!

    ‘Til next time,

    Christy

    Cranberry Apple Buckwheat Salad

    Jan 31, 2023 · 3 Comments

    This healthy buckwheat salad has vibrant flavors with tart, sweet, and earthy notes. Upgrade your salad to a nutritious, hearty food characterized by the bright but complimentary combination of apples, cranberries, and buckwheat. Try pairing this salad with apple cider butternut squash soup for a truly balanced dinner.

    Cranberry Apple Buckwheat Salad is great for when apples are in season in the fall, as a dynamic meal for energy in the summer, or for the winter days of hibernation at home. Dress it with my Orange Ginger Vinaigrette for a touch of bright, citrusy sunshine!

    This salad is full of super nourishing foods. Buckwheat is an ancient grain high in protein and a good source of fiber. The addition of buckwheat groats upgrades this salad to make it more filling and energizing. As a gluten free grain, buckwheat is a superfood which gives many health benefits. Buckwheat can help promote weight loss, is a high source of energy, and contains all eight essential amino acids while still remaining easy to digest.

    Sunflower seeds are also a source of many vitamins which, along with cranberries, boost your immune system with zinc and selenium.

    The apples, celery, and green onion further support the light but full bodied depth of this nutritious salad. Some people have buckwheat groats for breakfast like an oatmeal, but in this salad they contribute a toasty flavor, making it a nutrient rich food! 

    Did You Know You Can Grind Uncooked Buckwheat Groats Into Flour?

    Buckwheat groats are the hulled seeds of a buckwheat plant. In their raw form, groats are often cooked and made into a variety of breakfast recipes. When cooked, the groats take on a nutty and earthy flavor and add so much to recipes like this salad. You can also take the groats and turn them into flour to use as a flour substitute, increasing the nutritional value of your baked goods. Buckwheat flour is also widely available in grocery stores.

    Try My Buckwheat Flour Recipes:  

    -Buckwheat Flour Brownies
    -Buckwheat Crepes
    -Buckwheat Flour Chocolate Muffins
    -Chocolate Buckwheat Crepes

    Frequently Asked Questions

    How to Cook Buckwheat Groats?

    Cooking buckwheat is a straightforward process. Rinse the buckwheat with water thoroughly. Add the buckwheat, water and salt to a pot and bring to a boil with the lid on. Lower the heat and let it simmer until tender, about 10 minutes. Let sit for 5 minutes and then fluff with a fork.

    Are Buckwheat Groats Gluten Free?

    Yes, buckwheat is naturally gluten-free. Surprisingly, buckwheat is closely related to the rhubarb plant. Buckwheat is not a grain at all!

    Can you Sprout Buckwheat Groats?

    You can! The buckwheat groats are placed in a mason jar with water and cared for every six hours. Within a day, they should sprout. See this recipe for detailed instructions.

    Do You Have to Soak Buckwheat Groats? 

    You don’t have to soak buckwheat groats, but it does reduce the cooking time. To soak the groats, set them in water for at least six hours (or leave them overnight!)

    Dressing Suggestions: 
    Add a zesty dressing to go with this salad! Here are some of my suggestions:

    • Orange Ginger Vinaigrette
    • Cranberry Salad Dressing
    • Simple Apple Cider Vinaigrette

    Tips for Making This Recipe

    • You can change some of the elements of this salad while maintaining the flavours and rich nutritious benefits. For example, you can try swapping the spinach with another salad green such as kale, rainbow chard, or arugula. Or swap the celery for cucumber or raw zucchini.
    • Try taking your own spin on this salad by adding your own touch. A light cheese such as feta or mozzarella would add another flavor to the salad. Experiment with adding other nutritious nuts or seeds you have in your pantry, such as hemp seeds, chia, or roasted pistachios. You can try other additions of roasted vegetables such as beets, pumpkin, sweet potato or carrot.

    More Recipes to Enjoy

    • A close up shot of a stack of date cookies.
      Date Cookies
    • Chili Lime Sunflower Seed Dip
    • Lemon Orzo Chicken Soup
    • Carrot Ribbon Salad with Arugula

    Buckwheat Groat Salad

    Cranberry Apple Buckwheat Salad

    Christy Faber
    This healthy buckwheat salad has vibrant flavors wih tart, sweet, and earthy notes. This salad is great for when apples are in season in the fall, as a dynamic meal for energy in the summer, or for the winter days of hibernation at home. 
    5 from 1 vote
    Print Recipe Pin Recipe SaveSaved!

    Ingredients
      

    Cooking Buckwheat Groats

    • 1 ¼ cup water
    • 1 cup raw buckwheat groats
    • pinch of salt or add a bouillon cube for flavor

    Assemble The Salad

    • 1 stalk celery finely diced
    • 1 stalk green onion finely chopped
    • 2 small apples chopped
    • 2 tbsp raw sunflower seeds
    • ¼ cup unsweetened dried cranberries
    • 2 cups baby spinach

    Instructions
     

    Cook Buckwheat Groats

    • There are various methods for cooking buckwheat groats. If you have a tried and true method then definitely use it! I'll share what works for me:
    • Rinse the buckwheat well in a strainer under cold water. (This is a very important step.)
    • Add the rinsed buckwheat, water and salt to a medium sized pot.
    • Bring to a boil over medium-heat. Add a tight fitting lid and lower the heat. Allow the buckwheat to simmer with the lid on for 7-10 minutes. Remove from the heat when the liquid is absorbed.
    • Allow the buckwheat to stand for 5 minutes and then fluff with a fork. Allow the buckwheat to cool down before adding to the salad.
    • Note: I have had success with rinsing my buckwheat groats after cooking if they come out too clumped together. I rinse and then lay out on a kitchen towel to allow them to dry a bit.

    Assemble The Salad

    • Finely chop the celery, apple and green onion.
    • Assemble all the salad ingredients in a large bowl or platter and toss to combine. Add the dressing of your choice and enjoy!
    • Note: I dress this salad simply with a drizzle of olive oil, splash of apple cider vinegar and a few shakes of herbamare seasoning and it's delicious!
    Tried this recipe?Let us know how it was!

    If you make this recipe please leave a comment and give this recipe a rating! I aim to respond to every single comment. I am so grateful when you trust me and try one of my recipe creations in your own kitchen. I love to hear how it went!  Let’s connect on Instagram and tag me in your food pics!

    ‘Til next time,

    Christy

    Chocolate Covered Cranberries

    Jan 29, 2023 · 13 Comments

    Chocolate lovers rejoice! Chocolate Covered Cranberries are an elegant bite-sized snack that everyone will want to try! These little dark chocolate-coated treats have big flavour and they couldn’t be more simple to make. 

    The combination of tart fresh cranberries enrobed in sweet chocolate is a unique flavour experience. The best part is when you take a bite the cranberry pops in your mouth and you’re met with a sour burst of flavour. It definitely makes you want to eat another and another and another. 

    A hand reaching into a bowl of chocolate covered cranberries.
    A baking tray with countless chocolate covered cranberries on it.
    chocolate covered cranberries served in a bowl.

    Why You’ll Love This Recipe

    • Only requires two ingredients!
    • A way to use up extra cranberries. I know I always have some left over after baking Cranberry Orange Bread!
    • Kids Love to help! Dipping the cranberries in chocolate is a fun baking task to do together.
    • This recipe is a great alternative for sugary candies and chocolates especially around the holidays when we’re overloaded with sweet options.
    • Chocolate Covered Cranberries would be a very elegant element to add to a charcuterie board.
    • Great for a holiday party spread.
    • A healthy treat option for Valentine’s Day with a nice pop of red!
    • Makes a lovely homemade gift.
    Ingredients for chocolate covered cranberries: choclate and fresh cranberries.

    More Chocolatey Treats:

    • Chocolate Buckwheat Muffins
    • Haystack Cookies
    • Date Pudding
    • Oat Flour Brownies
    • Green Smoothie Chocolate Muffins

    A note on chocolate: I recommend using dark bakers chocolate or a chocolate brand that is free from refined sugar such as Hu Kitchen.

    Half and whole chocolate covered cranberries served in a parchment paper lined bowl.

    Recipe Steps

    Recipe step 1, use a fork to dip cranberries into chocolate.

    Melt the chocolate either in a double boiler on the stove or in the microwave.

    Dip the cranberries in the chocolate one at a time using a fork, allowing the excess chocolate to drip off.

    Recipe step 2, put the chocolate-coated cranberries on a parchment paper lined baking try.

    Place the cranberries on a parchment lined baking sheet and place in the fridge until the chocolate sets.

    Recipe step 3, put the chocolate covered cranberries in the fridge to set.

    Enjoy!

    Chocolate covered cranberries in a heart shape bowl.

    Tips for Making Chocolate Dipped Cranberries

    • You can use milk chocolate, semi-sweet, dark or even white chocolate. Whatever is your preference. You can even make some beautiful designs by dipping the cranberries in dark chocolate and then adding a drizzle of white chocolate.
    • You can also experiment with dipping dried cranberries (or craisins) in chocolate for a much sweeter and chewier snack.

    More Recipes to Enjoy

    Peanut Butter Swirl Black Bean Brownies

    These peanut butter swirl black bean brownies are so fudgy and so delicious. The texture can’t be beaten! They seriously are like fudge.

    Buckwheat Flour Brownies

    These gluten-free buckwheat flour brownies are fudgy and chocolatey. They really call for a tall glass of ice-cold milk.

    Date Sweetened Pudding

    Enjoy this smooth and creamy Chocolate Pudding in a fancy dish as an elegant dessert or serve it up as a healthy snack. Although this pudding tastes rich and decadent, it is actually very good for you.

    Save This Recipe To Pinterest

    Chocolate Covered Cranberries

    Small bowl full of chocolate covered cranberries.

    Chocolate Covered Cranberries

    Christy Faber
    Chocolate lovers, rejoice! Chocolate Covered Cranberries are an elegant bite sized snack that everyone will want to try! These little chocolate coated treats have big flavour and they couldn’t be more simple to make. 
    5 from 10 votes
    Print Recipe Pin Recipe SaveSaved!
    Prep Time 15 minutes mins
    Chill Time 30 minutes mins
    Total Time 45 minutes mins
    Course Appetizer, Dessert, Snack
    Cuisine American
    Servings 6
    Calories 234 kcal

    Ingredients
      

    • 2 cups fresh cranberries
    • 8 oz dark baker's chocolate or semi-sweet baker's chocolate, or chocolate free of refined sugar

    Instructions
     

    • Melt the chocolate either in a double boiler on the stove or in the microwave. Add ½ teaspoon of coconut oil if the chocolate is too thick.
    • Dip the cranberries in the chocolate one at a time using a fork, allowing the excess chocolate to drip off.
    • Place the cranberries on a parchment lined baking sheet and place in the fridge until the chocolate sets. This will take a minimum of half an hour.
    • Store in the fridge in an airtight container. Enjoy within 1-2 weeks.

    Nutrition

    Calories: 234kcal
    Tried this recipe?Let us know how it was!

    If you make this recipe please leave a comment and give this recipe a rating! I aim to respond to every single comment. I am so grateful when you trust me and try one of my recipe creations in your own kitchen. I love to hear how it went!  Let’s connect on Instagram and tag me in your food pics!

    ‘Til next time,

    Christy

    Healthy Chocolate Pudding

    Jan 25, 2023 · 3 Comments

    Enjoy this secretly Healthy Chocolate Pudding that tastes rich and decadent but is actually very good for you! This pudding is refined sugar-free and it gets all of its natural sweetness solely from fruit! The star ingredient is the highly nutritious Medjool date. Dates have a rich but subtle caramel flavor which enhances the deep rich flavor of chocolate.

    Using Medjool dates instead of sugar is an excellent way to boost the nutritional benefit of Chocolate Pudding.

    A spoon of chocolate pudding leaving a small dessert dish of pudding.

    Serve this fruit-sweetened pudding in a fancy dish as an elegant dessert or serve it up simply as a healthy snack.

    Pudding and mousse are among my favorite desserts. When Geoff and I were first married, we started a Valentine's tradition of making and enjoying a mousse together. That experience served me well as I created this nutritious and delicious chocolate pudding. I hope you enjoy it too!

    For more naturally sweetened treats visit: Oat Flour Brownies, Black Bean Brownies, Sunbutter Cookies and Healthy Lemon Mousse.

    What Makes This Chocolate Pudding Healthy?

    • The combination of Medjool dates, egg yolks and unsweetened cocoa powder make this pudding not only a treat but an extremely nutritious one.
    • Medjool dates contain a significant amount of potassium, beta-carotene as well as many other vitamins and minerals. In addition, Medjool dates are high in fiber and provide natural energy.
    • Egg yolks are rich in vitamins and essential nutrients including calcium, phosphorus and zinc. They are a good source of omega-3 fatty acids and unsaturated fats which are not made by the body and must be obtained in our diets.
    • Cocoa powder is rich in polyphenols (which are naturally occurring antioxidants) and flavanols.
    [feast_advanced_jump_to]

    Why You'll Love This Recipe

    • Naturally sweetened with Medjool dates (just like my Healthy Chocolate Mint Fudge)
    • Wholesome ingredients and nutritionally rich
    • Contains the nutritional benefits of egg yolks
    • Dairy free!
    • Only 6 ingredients!

    Ingredients

    The 6 ingredients to make chocolate pudding in dishes on a countertop.
    • Egg yolks- Egg yolks add nutritional benefit to this recipe but you can omit them if you prefer.
    • Medjool dates - or swap for Deglet Noor dates you just want dates with a soft and creamy texture.
    • Coconut milk
    • Cocoa powder - choose high quality unsweetened cocoa powder.
    • Salt - salt adds flavor and balances the sweetness of this pudding.
    • Vanilla extract - vanilla helps enhance the chocolate flavor.

    See the recipe card below for a full list of ingredients and measurements.

    Substitutions & Variations

    • Coconut Milk: If you cannot use coconut milk, you can substitute it with whole milk or other non-dairy milk alternatives like almond milk, cashew milk, or oat milk.
    • Egg Yolks: If you prefer you can omit the egg yolks from this recipe and the pudding will still set. I called for egg yolks in this recipe for the added nutrition.
    • If you are feeling creative, try your own flavor add-ins such as lemon or orange zest, peppermint extract, almond extract, or miso paste. Adding some espresso powder would also enhance the depth of the chocolate flavor.
    • Use your imagination and add a garnish or topping to your Chocolate Pudding. Try some shaved dark chocolate or chocolate curls, a sprinkling of chopped nuts, granola or coconut and goji berries.

    I have not experimented with any other substitutions or alterations for this recipe. If you decide to make any changes by adding or substituting ingredients, I would love it if you could share your results with us by leaving a comment below.

    How To Make Healthy Chocolate Pudding

    Here are the step-by-step instructions to make this recipe.

    Step 1: Pit the dates.

    Remove the pits from the dates.

    Date pits on a small plate beside a measuring cup of Medjool dates.

    Step 2: Blend dates and coconut milk.

    Blend pitted dates and coconut milk together. Keep blending until the mixture is very smooth.

    A blender, mixing dates and coconut milk together.

    Step 3: Heat the coconut milk mixture.

    In a medium-sized pot on the stove, heat coconut milk and date mixture, cocoa powder and salt.

    Pouring cocoa powder into a sauce pan of other ingredients.

    Step 4: Whisk egg yolks.

    Add egg yolks to a medium sized bowl and whisk.

    Whisked egg yolk in a mixing bowl.

    Step 5: Temper the egg yolks with the chocolatey coconut milk mixture.

    Once this mixture is warm, add about ⅓ cup slowly (drop by drop) into the whisked egg yolks. This step tempers the egg yolks so they don't cook when you add them back into the pot of milk.

    Slowly adding chocolate mixture into a mixing bowl of whisked egg yolks with a spoon.

    Step 6: Heat the pudding until it thickens and transfer to serving bowls.

    Add the tempered egg yolk mixture back into the pot. Stir constantly on medium-low heat until the mixture thickens. This should take 3-5 minutes.


    Remove pot from the heat and stir in the pure vanilla extract. Transfer to a bowl or serving dishes.

    Chocolate pudding in a small glass dessert dish.

    Step 7: Chill the pudding and top with chocolate curls and enjoy!

    Chill in the refrigerator for at least 2 hours. Top with chocolate curls if desired and enjoy!

    Chocolate shavings garnishing chocolate pudding in a small dessert dish.

    Expert Tips

    • Choose fresh and soft Medjool dates for the best natural sweetness and texture in the pudding.
    • When tempering the egg yolks, slowly add about ⅓ cup of the warm coconut milk mixture drop by drop into the whisked egg yolks. This prevents the eggs from scrambling and ensures a smooth consistency.
    • Stir the mixture constantly on medium-low heat once the egg yolk mixture is added back to the pot.
    • If you prefer a sweeter pudding, you can add a touch of natural sweetener like honey or maple syrup. However, taste the pudding before adding any sweetener, as the dates should already provide lots of sweetness.

    Recipe FAQs

    Why are dates an amazing alternative to white sugar?

    White sugar adds empty calories while dates are rich in vitamins, minerals and anti-oxidants. Dates also have a lower glycemic index than sugar and so will not result in blood sugar spikes the way white sugar does.

    What can I do with the leftover egg whites?

    Try making a meringue base with the pudding as a filling topped with whipped cream. Or make my delicious healthy granola which uses egg whites in the recipe.

    Can I use a different type of dates for this recipe?

    Yes, you can use other varieties of dates, but Medjool dates are recommended for their natural sweetness and creamy texture, I have also used Deglet Noor dates for this recipe with success.

    What can I do if my pudding turns out too thick?

    If the pudding becomes overly thick, you can whisk in a small amount of coconut milk or a milk alternative to achieve the desired consistency. Remember it will continue to thicken up as it cools.

    Is chocolate pudding healthy to eat?

    It depends on the recipe and ingredients used. A healthy chocolate pudding recipe uses natural sweeteners and dark chocolate to avoid common unhealthy ingredients in puddings, making it a healthier alternative to traditional chocolate puddings. However, like all desserts, it should be enjoyed in moderation as part of a balanced diet.

    Chocolate shavings garnishing chocolate pudding in a small dessert dish on a staged table.

    Storage

    Fridge

    This pudding will stay fresh in the refrigerator for about 3-4 days if stored in an airtight container.

    More Recipes You'll Love

    • a spoonful of cottage cheese ice cream held above of a bowl of cottage cheese ice cream to show the soft serve texture of the ice cream.
      Blended Cottage Cheese Ice Cream
    • a bowl of date paste topped with flaky salt on a countertop with a few medjool dates beside the bowl.
      Date Paste
    • Tahini Stuffed Chocolate Covered Dates
    • A spoon sitting inside a scooped out bit of Earl Grey Panna Cotta inside an ornate tea cup.
      Earl Grey Panna Cotta

    Did you make this recipe? Let me know!
    Leave a review or comment below!

    Recipe

    Healthy Chocolate Pudding Sweetened with Dates

    Christy Faber
    Enjoy this secretly Healthy Chocolate Pudding that tastes rich and decadent but is actually very good for you! This pudding is refined sugar free and it gets all of its natural sweetness solely from fruit!
    5 from 2 votes
    Print Recipe Pin Recipe SaveSaved!
    Prep Time 20 minutes mins
    Chill Time 2 hours hrs
    Total Time 2 hours hrs 20 minutes mins
    Course Breakfast, Dessert, Snack
    Cuisine American
    Servings 4 people
    Calories 445 kcal

    Ingredients
      

    • 4 egg yolks from large eggs
    • 1 cup pitted Medjool dates (or 10-12 dates)
    • 14 oz can of unsweetened full-fat coconut milk
    • ⅓ cup unsweetened cocoa powder
    • ⅛ teaspoon salt
    • 1 teaspoon pure vanilla extract

    Instructions
     

    • Remove the pits from the dates. Blend pitted dates and coconut milk together.
    • Add egg yolks to a medium sized bowl and whisk.
    • In a medium sized pot on the stove, heat coconut milk and date mixture, cocoa powder and salt.
    • Once this mixture is warm, add about ⅓ cup slowly (drop by drop) into the whisked egg yolks. This step tempers the egg yolks so they don't cook when you add them back into the pot of milk.
    • Add the tempered egg yolk mixture back into the pot. Stir constantly on medium-low heat until the mixture thickens. This should take 3-5 minutes.
    • Remove pot from the heat and stir in the pure vanilla extract. Transfer to a bowl or serving dishes. Chill in the refrigerator for at least 2 hours. Top with chocolate curls if desired and enjoy!

    Notes

    • Choose fresh and soft Medjool dates for the best natural sweetness and texture in the pudding.
    • When tempering the egg yolks, slowly add about ⅓ cup of the warm coconut milk mixture drop by drop into the whisked egg yolks. This prevents the eggs from scrambling and ensures a smooth consistency.
    • Stir the mixture constantly on medium-low heat once the egg yolk mixture is added back to the pot.
    • If you prefer a sweeter pudding, you can add a touch of natural sweetener like honey or maple syrup. However, taste the pudding before adding any sweetener, as the dates should already provide lots of sweetness.

    Nutrition

    Serving: 57.67gCalories: 445kcalCarbohydrates: 43.3gProtein: 11.1gFat: 29.8gSaturated Fat: 23.1gCholesterol: 186mgSodium: 87mgFiber: 8.1gSugar: 32.2gCalcium: 69mgIron: 4mg
    Tried this recipe?Let us know how it was!

    If you make this recipe please leave a comment and give this recipe a rating! I aim to respond to every single comment. I am so grateful when you trust me and try one of my recipe creations in your own kitchen. I love to hear how it went!  Let’s connect on Instagram and tag me in your food pics!

    ‘Til next time,

    Christy

    15+ Cookies Sweetened with Coconut Sugar

    Jan 25, 2023 · Leave a Comment

    an overhead shot showing some date cookies on a cooling rack and some on a white plate.

    Here is a list of delicious cookies that use coconut sugar as the only sweetener!  In addition to being naturally sweetened, many of these healthy recipes are also gluten free and/or vegan. Some call for alternative flours such as almond flour, chickpea flour or spelt flour or unique ingredients like aquafaba. 

    These recipes are perfect for anyone looking to enjoy some cookies without any refined sugars!   

    Cookies are one of my favorite treats! I love making them and I also love eating them. I’m always on a mission to make healthier cookies that are still incredibly delicious. For another option, check out my coconut flour oatmeal cookies. 

    More Naturally Sweetened Recipes: 

    • Cottage Cheese Ice Cream (banana)
    • Date Paste (Medjool dates)
    • Peanut Butter Black Bean Brownies (maple syrup)
    • Chocolate Haystack Cookies (maple syrup)
    • Healthy Chocolate Pudding (dates)
    Spelt Chocolate Chunk Cookies on cutting board.

    Benefits of Coconut Sugar: 

    Coconut sugar is a healthier alternative to refined sugar. Coconut sugar retains many of the nutrients that are present in the original coconut palm. It has a lower glycemic index than sugar cane, and it's rich in minerals like iron, zinc, potassium and magnesium. 

    Coconut sugar contains inulin which is a soluble fiber that is considered a prebiotic because good bacteria in the gut can feed on it. The other benefit of inulin is that soluble fiber helps to slow glucose absorption which may be the main reason that coconut sugar has a lower glycemic index than refined white sugar. 

    What Does Coconut Sugar Taste Like? 

    First of all, coconut sugar doesn’t taste like coconut at all. Coconut sugar has a rich caramel flavor that's very similar to brown sugar making it an excellent choice for those who want to eat healthier without sacrificing taste! Coconut sugar's deep molasses flavor compliments cakes, cookies and other baked goods well. We are huge fans of coconut sugar in my house. My husband and kids sprinkle it on their peanut butter toast in place of honey. I love to use coconut sugar in baking as its versatility works well in almost any recipe that calls for sugar.

    How Is Coconut Sugar Made? 

    Coconut sugar is a natural sweetener produced by the sap of cut flower buds on the coconut palm. The flowers are tapped and the sweet sap collected and dried. It's one of the most popular natural sweeteners in the world.

    Retraining Your Taste Buds: 

    Now that you’re aware of the delicious taste and health benefits of coconut sugar, I also want to mention that coconut sugar is still something to be eaten in moderation. Although it’s a healthier alternative to refined sugar, it is still sugar. 

    When I am creating a new recipe, I have two primary goals. The first is to sweeten the recipe naturally to replace the empty calories of refined sugar with a nutritious and delicious alternative. I also adjust the level of sweetness in my baked goods in order to retrain our taste buds to enjoy treats that aren’t overly sweet. 

    As you bake with coconut sugar, I encourage you to become mindful of how much sugar you put into recipes. Ask yourself, “Would I enjoy this just as much if it was a little less sweet?” 

    To keep blood sugar levels more balanced, enjoy your treats along with protein, fiber or healthy fats on the side. (For example, have a cookie with a few slices of cheese on the side.)

    I’m excited to enjoy the sweet treats in life whole heartedly and also mindfully. I hope you’ll join me! 

    More Naturally Sweet Round Ups:

    • Desserts Sweetened Only With Fruit
    • Naturally Sweet Desserts
    • Nourishing Hot Drinks

    Enjoy browsing this post! I had so much fun curating it. There are so many delicious looking recipes and I know they'll be great additions to your recipe book. 

    Coconut Sugar Cookies


    Vegan Peanut Butter Cookies

    3 Ingredient Vegan Peanut Butter Cookies
    These soft and chewy 3-ingredient vegan peanut butter cookies are easy to make in 1 bowl! Gluten-free, refined sugar-free and no added oil.
    Check out this recipe
    3 Ingredient Vegan Peanut Butter Cookies

    Spelt Chocolate Chunk Cookies

    Healthy Spelt Chocolate Chunk Cookies (Naturally Sweetened)
    Spelt chocolate chunk cookies are chocolatey and feel indulgent but are made with healthy ingredients like coconut sugar and spelt flour.
    Check out this recipe
    Healthy Spelt Chocolate Chunk Cookies (Naturally Sweetened)

    Sunflower Seed Butter Cookies

    Sunflower Seed Butter Oatmeal Cookies
    Sunflower Seed Butter Oatmeal Cookies are soft & chewy. They are packed with nutritious ingredients: rolled oats, ground flaxseed & more.
    Check out this recipe
    Sunflower Seed Butter Oatmeal Cookies

    Double Chocolate Chip Cookies

    Gluten-Free Double Chocolate Chip Cookies
    These easy gluten-free double chocolate chip cookies are made in just one bowl! They are so soft, chewy, and can easily become dairy-free.
    Check out this recipe
    Gluten-Free Double Chocolate Chip Cookies

    Vegan Molasses Cookies

    Vegan Molasses Cookies
    These vegan molasses cookies are made with coconut oil and applesauce for a super soft, chewy texture. The ginger molasses flavor is so good!
    Check out this recipe
    Vegan Molasses Cookies

    Vegan Gluten-Free Triple Chocolate Cookies

    Vegan Gluten-Free Triple Chocolate Cookies
    These vegan gluten-free chocolate cookies are packed with triple chocolate! They have crispy edges and a soft chewy center.
    Check out this recipe
    Vegan Gluten-Free Triple Chocolate Cookies

    Gluten Free Biscotti

    Gluten Free Biscotti
    Gluten Free Biscotti are easy to make and so tasty! These crispy and crunchy biscotti are extra delicious when dunked in an espresso.
    Check out this recipe
    Gluten Free Biscotti

    Vegan Chickpea Flour Chocolate Chip Cookies

    Vegan Chickpea Flour Chocolate Chip Cookies
    Enjoy these melt-in-your mouth chickpea flour chocolate chip cookies alone or topped with sea salt for a sweet and salty combo.
    Check out this recipe
    Vegan Chickpea Flour Chocolate Chip Cookies

    Zucchini Chocolate Chip Cookies

    Zucchini Chocolate Chip Cookies
    Gluten Free Zucchini Chocolate Chip Cookies are the perfect quick breakfast, snack or dessert. Made with oats, zucchini, chocolate and nuts.
    Check out this recipe
    Zucchini Chocolate Chip Cookies

    Chocolate Chip Oat Flour Cookies

    Chocolate Chip Oat Flour Cookies
    With no eggs or dairy, these irresistibly chewy chocolate chip oat flour cookies are a tasty vegan and gluten-free treat.
    Check out this recipe
    Chocolate Chip Oat Flour Cookies

    Flourless Chocolate Chip Cookies

    Flourless Chocolate Chip Cookies
    These Flourless Almond Chocolate Chip Cookies taste so good, you won’t notice they are healthier. They are easily made with only six pantry staple ingredients.
    Check out this recipe
    Flourless Chocolate Chip Cookies

    Almond Flour Peanut Butter Cookies

    Almond Flour Peanut Butter Cookies
    Almond flour peanut butter cookies are healthy, but they still have the perfect soft and chewy texture. They’re gluten-free and low-carb, too!
    Check out this recipe
    Almond Flour Peanut Butter Cookies

    Perfect Paleo Chocolate Chip Cookies

    Perfect Paleo Chocolate Chip Cookies
    These paleo chocolate chip cookies are thick, chewy and have the perfect texture.
    Check out this recipe
    Perfect Paleo Chocolate Chip Cookies

    Strawberry Lemon Cookies

    Strawberry Lemon Cookies
    These paleo Strawberry Lemon Cookies are made with almond flour, coconut flour, & coconut sugar. Tart lemon cookies are filled with delicious dried strawberries.
    Check out this recipe
    Strawberry Lemon Cookies

    Ingredient Peanut Butter Cookies

    2 Ingredient Peanut Butter Cookies
    These 2 ingredient peanut butter cookies are super simple to make and come together in 20 minutes. The perfect quick and easy coffe snack!
    Check out this recipe
    2 Ingredient Peanut Butter Cookies

    Healthy Peanut Butter Oatmeal Cookies

    Healthy Peanut Butter Oatmeal Cookies
    These delicious, soft, chewy, and gluten-free Healthy Peanut Butter Oatmeal Cookies are made with no flour and are also dairy-free!
    Check out this recipe
    Healthy Peanut Butter Oatmeal Cookies

    Date Paste

    Jan 12, 2023 · Leave a Comment

    a bowl of date paste topped with flaky salt on a countertop with a few medjool dates beside the bowl.

    Date Paste is a delicious all natural sweetener that reminds me of the taste of salted caramel. The smooth texture and deep flavor reminiscent of molasses is an excellent healthy alternative to sugar. In baking, the flavor is subtle and won't overwhelm the flavors of other ingredients. My favorite way to use Caramel Date Paste is as a spread for toast or to sweeten my morning bowl of oatmeal.

    a bowl of date paste topped with flaky salt on a countertop with a few medjool dates beside the bowl.

    Although Date Paste is also available in stores, it is very expensive. You can easily make your own at home and it will last in your fridge for two to three months and in your freezer for up to a year. Double or triple the recipe and have it on hand for the the next time you decide to bake something healthy and delicious.

    One of the healthy aspects of Date Paste is that it contains the pulp and fiber of the dates -- this is key for blood sugar control. This version also includes miso which is optional but highly recommended. White miso paste really enhances the caramel flavor of the dates adding depth with its bold and salty umami flavor. Miso is also packed with nutrients and probiotics. The combination makes this recipe not only nutritious but irresistible! 

    For more naturally sweet and wholesome treats, try my recipes for green smoothie chocolate muffins, oat flour brownies, chocolate peppermint date fudge or Greek yogurt apple mousse.

    [feast_advanced_jump_to]

    Why You'll Love This Recipe

    • Dates are a good source of fiber, iron, and antioxidants, making this paste a healthier alternative to traditional sweet spreads.
    • You can whip up a batch of caramel date paste in no time.
    • Save lots of money making your own at home.
    • Add a spoonful of caramel date paste to your smoothies, yogurt, or oatmeal to bring a touch of natural sweetness and rich caramel flavor to your everyday snacks.
    • Easily make multiple batches to stock your freezer.
    • Sweetened entirely with fruit!

    Ingredients

    Ingredients to make date paste in a mixing bowl, jar and pinch bowl.
    • Medjool dates- you can swap these for another variety of soft dates like Deglet Noor.
    • White miso paste- this is the secret ingredient that really brings out the salty and caramel flavors of the date paste. (If white miso is difficult to find in your area, you can still go ahead and make my date paste recipe. Just replace the miso with a pinch of salt.)
    • Water

    See the recipe card below for a full list of ingredients and measurements.

    More Date Recipes!

    • Tahini Stuffed Chocolate Covered Dates
    • A close up shot of a stack of date cookies.
      Date Cookies
    • Healthy Chocolate Pudding
    • Date Sweetened Chocolate Chip Cookies

    How To Use Date Paste

    • As a maple syrup swap on pancakes and waffles or as a filling for crepes
    • Sweeten drinks like lattes, tea, coffee, smoothies, milkshakes
    • Spread on toast or rolls
    • Filling for pastries
    • Mix into yogurt or oatmeal or chia pudding
    • Mix with nut butter of your choice for a deliciously sweet apple dip
    • Add as a sweet element to sauces, marinades and dressings
    • Use as a filling for thumbprint cookies or to sandwich oatmeal cookies together
    • Swirl into homemade ice cream
    • Use to sweeten your homemade nut milk or oat milk
    • use as a sugar substitute in your cinnamon roll filling
    • use as a sugar substitute in your baking.

    How To Make Date Paste

    Here are the step-by-step instructions to make this recipe.

    Step 1: Soak dates.

    Boil water.

    Pour boiling water over 2 cups of dates, just enough to cover. Allow the dates to soak for one hour.

    Reserve 1 ½ cups of the date water. Drain the dates.

    Hot water pouring from a kettle into a bowl of soaking medjool dates.

    Step 2: Blend all ingredients together until ultra smooth.

    Blend the dates in a blender or food processor with the miso paste and ¾ cup of the reserved liquid. Scrape down the sides of the blender and continue to blend until smooth.

    Add more liquid if necessary to achieve a smooth consistency.

    A spoonful of date paste held up above a bowl of date paste topped with flaky salt.

    Step 3: Transfer date paste into a jar.

    Pour into a clean jar and store in the fridge. Enjoy!

    a glass jar filled with date paste sitting on a table with the words date paste written on the jar and a few dates sitting on the table beside the jar.

    Expert Tips

    • Choose high-quality dates, such as Medjool dates, for the best flavor and texture. They tend to be softer and more caramel-like, making them ideal for date paste.
    • Double-check all date pits are removed.
    • While blending add additional liquid gradually, as needed, to achieve your desired consistency.
    • For additional flavor variations, consider adding a splash of vanilla extract, a pinch of cinnamon, or a sprinkle of flaky salt.

    Recipe FAQs

    Is date paste healthier than white sugar?

    Date paste is made from the whole fruit and so has the benefit of eating whole fruit as it still contains the pulp and fiber. White sugar adds empty calories while dates are rich in vitamins, minerals and antioxidants. Dates also have a lower glycemic index than sugar and so will not result in blood sugar spikes the way white sugar does. Because of the fiber in dates, their glycemic index is even lower than honey and maple syrup.

    What dates should I use for making date paste?

    I recommend using Medjool dates because of their soft texture and many health benefits.

    Why does this recipe call for white miso?

    Miso enhances the caramel flavor of the dates adding depth with its bold and salty umami flavor. Miso is also packed with nutrients and probiotics.

    a close up over head shot of date paste swirled in a white bowl.

    Storage

    Fridge

    Date paste can be stored in an air tight container in the refrigerator for up to 3 months.

    Freezer

    Date paste can be stored in an air tight container in the freezer for up to a year. Make a few batches and store for the future!

    More Recipes You'll Love

    • a spoonful of cottage cheese ice cream held above of a bowl of cottage cheese ice cream to show the soft serve texture of the ice cream.
      Blended Cottage Cheese Ice Cream
    • Peanut Butter Swirl Black Bean Brownies
    • Peanut Butter Oatmeal Energy Balls
    • Five coconut flour oatmeal cookies stacked on top of each other on a cooling rack with others around.
      Healthy Coconut Flour Oatmeal Cookies

    Did you make this recipe? Let me know!
    Leave a review or comment below!

    Recipe

    a bowl of date paste topped with flaky salt on a countertop with a few medjool dates beside the bowl.

    Date Paste

    Christy Faber
    Date Paste is a delicious all natural sweetener that reminds me of the taste of salted caramel. The smooth texture and deep flavor reminiscent of molasses is an excellent healthy alternative to sugar in baked goods. In baking, the flavor is subtle and won't overwhelm other ingredients.
    5 from 1 vote
    Print Recipe Pin Recipe SaveSaved!
    Prep Time 15 minutes mins
    Soak time 1 hour hr
    Total Time 1 hour hr 15 minutes mins
    Course Breakfast, Snack
    Cuisine American
    Servings 5 people
    Calories 208 kcal

    Ingredients
      

    • 2 cups Medjool dates lightly packed
    • 1 cup reserved water from soaking the dates (start by adding ¾ cup of reserved water and add more if desired)
    • 1 tablespoon white miso paste

    Instructions
     

    • Boil water.
    • Pour boiling water over 2 cups of dates, just enough to cover. Allow the dates to soak for one hour.
    • Reserve 1 ½ cup of the date water. Drain the dates.
    • Blend the dates in a blender or food processor with the miso paste and ¾ cup of the reserved liquid. Scrape down the sides of the blender and continue to blend until smooth.
    • Add more liquid if necessary to a achieve a smooth consistency.
    • Pour into a clean jar. Enjoy!

    Notes

    • Choose high-quality dates, such as Medjool dates, for the best flavor and texture. 
    • Double-check all date pits are removed.
    • While blending add additional liquid gradually, as needed, to achieve your desired consistency.
    • For additional flavor variations, consider adding a splash of vanilla extract, a pinch of cinnamon, or a sprinkle of flaky salt.

    Nutrition

    Calories: 208kcalCarbohydrates: 54.3gProtein: 2.1gFat: 0.5gSaturated Fat: 0.1gSodium: 130mgPotassium: 474mgFiber: 5.9gSugar: 45.3gCalcium: 30mgIron: 1mg
    Tried this recipe?Let us know how it was!

    If you make this recipe please leave a comment and give this recipe a rating! I aim to respond to every single comment. I am so grateful when you trust me and try one of my recipe creations in your own kitchen. I love to hear how it went!  Let’s connect on Instagram and tag me in your food pics!

    ‘Til next time,

    Christy

    Healthy Valentines Treats (Naturally Sweetened)

    Jan 11, 2023 · 1 Comment

    Celebrate Valentine's Day this year with beautiful, elegant and fun desserts and treats that are also sweetened naturally. I hope you're inspired to make one or more of these healthy recipes and enjoy them with your friends and family as you celebrate LOVE this February.

    My experience of Valentine's Day as a kid was so special (Thanks mom!) with simple treats and a celebratory breakfast with balloons. I'm excited to expand my Valentine's traditions with my three boys and include some of these healthy and lightly sweetened desserts. It is so fun to source these recipes and share them with you. I hope you enjoy!

    Chocolate Buckwheat Crepes make breakfast a special occasion!
    Perfect for dessert or just making breakfast a special occasion, these chocolate buckwheat crepes will put a smile on the faces of everyone around your table!

    Valentine's Day Desserts


    1 Strawberry Mint Ice Cream

    Strawberry Mint Ice Cream (sweetened with honey)
    Strawberry Mint Ice Cream is a treat that can be made with fresh or frozen strawberries. You will love the combination of mint & strawberry!
    Check out this recipe
    Strawberry Mint Ice Cream (sweetened with honey)

    2 Tahini Stuffed Dates

    Tahini Stuffed Chocolate Covered Dates (sweetened with dates and chocolate)
    Tahini Stuffed Chocolate Covered Dates are going to be your new favourite treat! When you bite into one you’ll think you’re eating a chocolate bar. Tahini stuffed dates are truly delicious. The nutty and slightly savoury flavour of tahini really balances the sweetness and caramel flavour of the Medj…
    Check out this recipe
    Tahini Stuffed Chocolate Covered Dates (sweetened with dates and chocolate)

    3 Buckwheat Crepes

    Buckwheat Crepes (sweetened with maple syrup)
    These buckwheat crepes are gluten-free and sweetened with maple syrup. In this crepe recipe, buckwheat flour replaces all-purpose flour.
    Check out this recipe
    Chocolate Buckwheat Crepes are the perfect gluten-free chocolate dessert crepe!

    4 Maple Vanilla Bean Meringue Cookies

    Maple Vanilla Bean Meringue Cookies (sweetened with maple syrup)
    These maple vanilla bean meringue cookies are completely paleo! Maple syrup replaces refined sugar to create these fluffy, irresistible cookies!
    Check out this recipe
    Maple Vanilla Bean Meringue Cookies (sweetened with maple syrup)

    5 Dark Chocolate Raspberry Truffles

    Dark Chocolate Raspberry Truffles (sweetened with honey)
    These deliciously decadent Dark Chocolate Raspberry Truffles are the perfect sweet treat for a special occasion, tea time or the Holidays.
    Check out this recipe
    Dark Chocolate Raspberry Truffles (sweetened with honey)

    6 No Bake Strawberry Cheesecake

    Healthy No Bake Strawberry Cheesecake (sweetened with maple syrup or honey)
    Healthy No Bake Strawberry Cheesecake with fresh or frozen strawberries is fluffy, easy, and lighter with healthy nutella crust!
    Check out this recipe
    Healthy No Bake Strawberry Cheesecake (sweetened with maple syrup or honey)

    7 Chocolate Dipped Strawberries

    Simple Chocolate Dipped Strawberries
    If you’re looking for the ultimate healthy treat, then these chocolate dipped strawberries should be first on your list!
    Check out this recipe
    Simple Chocolate Dipped Strawberries

    8 Almond Flour Chocolate Cake

    Almond Flour Chocolate Cake (sweetened with coconut sugar and maple syrup)
    This super easy one bowl Almond Flour Chocolate Cake is moist and delicious. The cake is also gluten free and made with healthier ingredients!
    Check out this recipe
    Almond Flour Chocolate Cake (sweetened with coconut sugar and maple syrup)

    9 Healthy Heart Shaped Sugar Cookies

    Gluten Free Heart Shaped Cut Out Sugar Cookies (sweetened with maple syrup)
    Gluten free vegan healthy recipe without refined sugar decorated with freeze dried strawberry powder
    Check out this recipe
    Gluten Free Heart Shaped Cut Out Sugar Cookies (sweetened with maple syrup)

    10 Tofu Chocolate Mousse

    Tofu Chocolate Mousse (sweetened with maple syrup)
    Tofu chocolate mousse is the perfect dessert if you are craving something rich and satisfying without the extra calories.
    Check out this recipe
    Tofu Chocolate Mousse (sweetened with maple syrup)

    11 Best Chocolate Fudge

    Best Chocolate Fudge Recipe (sweetened with dates)
    This sweet and gooey chocolate fudge recipe is made without condensed milk or sugar and is 100% guilt-free, vegan, easy to make and packed with nutrients!
    Check out this recipe
    Best Chocolate Fudge Recipe (sweetened with dates)

    12 Raspberry Popsicles

    Raspberry Popsicles (sweetened with maple syrup)
    These raspberry popsicles are bright, sweet and tangy. With just three ingredients and no refined sugar they are a great healthy ish treat for the whole family.
    Check out this recipe
    Raspberry Popsicles (sweetened with maple syrup)

    13 Dark Chocolate Raspberry Truffles

    Chocolate Raspberry Truffles (sweetened with maple syrup)
    Wow your loved ones with these Chocolate Raspberry Truffles with a Healthy Twist.
    Check out this recipe
    Chocolate Raspberry Truffles (sweetened with maple syrup)

    14 Healthy Dark Chocolate Bark

    Healthy Dark Chocolate Bark (dairy free)
    This healthy dark chocolate bark requires only 6 simple, real food ingredients and is ready in 15 minutes! It’s an easy and better-for-you treat!
    Check out this recipe
    Healthy Dark Chocolate Bark (dairy free)

    15 Healthy Almond Shortbread Heart Cookies

    Easy Healthy Almond Shortbread Heart Cookies (sweetened with maple syrup)
    These gluten-free Healthy Almond Shortbread Heart Cookies are made with only 5 simple plant-based ingredients. Perfect for Valentine’s Day!
    Check out this recipe
    Easy Healthy Almond Shortbread Heart Cookies (sweetened with maple syrup)

    16 Chocolate Berry Protein Crunchies

    No-Bake Chocolate Berry Protein Crunchies
    Consisting of complex carbs, healthy fats and extra protein, these No-Bake Dark Chocolate Berry Protein Crunchies are a wholesome treat for any time of the day.
    Check out this recipe
    No-Bake Chocolate Berry Protein Crunchies

    17 Chocolate Covered Valentine's Apples

    How to Make Chocolate Covered Apples
    Valentines Chocolate Covered Apples - delicious apples coated in yummy white chocolate for a sweet treat that is fun and easy to make!
    Check out this recipe
    How to Make Chocolate Covered Apples

    18 Dark Chocolate Aquafaba Mousse

    Fluffy Aquafaba Chocolate Mousse
    This 2 ingredient chocolate mousse recipe is quick and easy to make. Learn how to make dairy free, eggless, vegan French chocolate mousse using aquafaba.
    Check out this recipe
    Fluffy Aquafaba Chocolate Mousse

    19 Cranberry Mousse

    Cranberry Mousse (sweetened with honey)
    Creamy and indulgent, yet light and airy! Tart and sweet, and extremely delicious! It is our Refined Sugar Free Cranberry Mousse!
    Check out this recipe
    Cranberry Mousse (sweetened with honey)

    20 Burnt Basque Cheesecake

    Burnt Basque Cheesecake (sweetened with honey)
    Refined Sugar-Free Burnt Basque Cheesecake is light and airy, but creamy & silky smooth, with the caramelised top & subtle flavours of honey!
    Check out this recipe
    Burnt Basque Cheesecake (sweetened with honey)

    21 Vegan Blueberry Cheesecake

    Vegan Blueberry Cheesecake (sweetened with maple syrup and dates)
    This vegan blueberry cheesecake is so rich and creamy that you would never know it’s dairy free and a healthy no bake dessert.
    Check out this recipe
    Vegan Blueberry Cheesecake (sweetened with maple syrup and dates)

    22 Healthy Baked Pears

    Healthy Baked Pears (sweetened with maple syrup)
    These healthy baked pears with cinnamon and maple syrup make the perfect quick and easy dessert that tastes amazing and is sure to impress!
    Check out this recipe
    Healthy Baked Pears (sweetened with maple syrup)

    23 Cotton Candy Grape Sorbet

    Cotton Candy Grape Sorbet (sweetened with honey)
    This cotton candy grape sorbet has just 3 ingredients and only takes 5 minutes to make! It’s paleo, dairy free, and can be made vegan!
    Check out this recipe
    Cotton Candy Grape Sorbet (sweetened with honey)

    24 No Bake Vegan Cheesecake

    No-Bake Vegan Cheesecake (sweetened with maple syrup)
    This easy no-bake cheesecake features a delicious pecan crust and zesty lemon cheesecake filling made from cashews and coconut cream.
    Check out this recipe
    No-Bake Vegan Cheesecake (sweetened with maple syrup)

    Blended Cottage Cheese Ice Cream

    Jan 7, 2023 · 20 Comments

    a spoonful of cottage cheese ice cream held above of a bowl of cottage cheese ice cream to show the soft serve texture of the ice cream.

    Imagine a rich, creamy and delicious ice cream that is also healthy, naturally sweetened and high in protein! This Cottage Cheese Ice Cream is the perfect refreshing dessert or healthy evening snack. When blended, cottage cheese tastes remarkably like cream cheese, making a perfect blank canvas for the flavor combination of chocolate, peanut butter and banana.

    For more cottage cheese frozen treats try my Blueberry Cottage Cheese Popsicles and my Frozen Cottage Cheese Bark.

    a spoonful of cottage cheese ice cream held above of a bowl of cottage cheese ice cream to show the soft serve texture of the ice cream.

    Recently I have been going for a lot of long walks and I also wanted to increase my protein intake to keep up with all that exercise. Cottage cheese was the perfect option for that except for one thing: I prefer smooth, creamy textures like pudding and mousse and I was very unsure about the texture of cottage cheese. I decided to blend the cottage cheese with a little maple syrup and I had the perfect high protein snack. This inspired me to imagine where else I could add the smooth texture of blended cottage cheese and this ice cream recipe was the result!

    Have fun experimenting with this recipe by trying your own add-ins. Try frozen fruit, chopped nuts, jam, vanilla extract, lemon zest and more!

    For more naturally sweetened treats visit my posts for Date Sweetened Cookies, Buckwheat Brownies, Tahini Stuffed Dates and Rice Cake Chocolate Bars.

    Health Benefits of Cottage Cheese

    Cottage cheese is rich in high-quality protein while still being relatively low in calories, especially compared to other dairy products. It contains many essential nutrients (many of which are essential for bone health) like calcium and phosphorus. Cottage cheese also provides some probiotic benefit to improve gut health. For me, I find it is a delicious and easy way to get my protein intake up fast! (Health information sourced from Healthline)

    More Cottage Cheese Recipes: Cottage Cheese Lemon Mousse, High Protein Quiche, Strawberry Cottage Cheese Smoothie, Cottage Cheese Dill Pickle Dip as well as resource with 40+ High Protein Cottage Cheese Recipes.

    [feast_advanced_jump_to]

    Why You'll Love This Recipe

    • Naturally sweet
    • You can have ice cream for breakfast! (OR try my Apple Cinnamon Cottage Cheese Breakfast Bowl)
    • Kid friendly!
    • No-bake recipe
    • No churning or ice cream machine required!
    • Easy to customize the flavors
    • A delicious high protein dessert (just like my cinnamon apple mousse!)

    Ingredients

    Ingredients to make cottage cheese ice cream in bowls, pinch bowls and resting on a marble countertop.
    • Banana - if you use an extra ripe banana then you can skip the maple syrup entirely and have a delicious ice cream treat that is sweetened entirely by fruit.
    • Cottage cheese - I recommend 2% milk fat cottage cheese for a creamier ice cream.

    See the recipe card below for a full list of ingredients and measurements.

    Substitutions & Variations

    • Milk: you can swap for any dairy free milk alternative (like Homemade Pumpkin Seed Milk.)
    • Peanut Butter: swap for powdered peanut butter for a higher protein option. Or any of your favorite nut butters like almond butter, cashew butter or sunflower seed butter. (If you're a big peanut butter fan you'll love my Peanut Butter Black Bean Brownies)
    • Banana: Consider swapping with a Medjool date or two. To further reduce the sugar content swap the banana for strawberries or blueberries.
    • Maple syrup: Can be swapped for honey or coconut sugar.
    • Toppings and Mix-ins: sprinkles, mini chocolate chips, chopped peanuts, sliced strawberries or bananas or Homemade Sugar Free Granola.
    • To Increase the Protein Content: consider adding a tablespoon of your favorite protein powder

    I have not experimented with any other substitutions or alterations for this recipe. If you decide to make any changes by adding or substituting ingredients, I would love it if you could share your results with us by leaving a comment below.

    How To Make Cottage Cheese Ice Cream

    Here are the step-by-step instructions to make this recipe.

    Step 1: Blend all ingredients (except milk) and freeze.

    Add all the ingredients except the milk into your blender. Blend until combined and smooth.

    Divide this mixture into an ice cube tray and freeze well.

    a bowl full of frozen cubes of cottage cheese ice cream in before being blended.

    Step 2: Blend the frozen cubes with just enough milk to get the blender moving.

    When mixture is frozen and you are ready to eat the ice cream, add back into the blender. Add the milk and blend to a soft serve ice cream consistency. Add a little more milk but only if needed to get the blender going. 

    cottage cheese ice cream being scooped into green glass bowls from the blender.

    Step 3: Serve and enjoy!

    That's it! You have turned high protein cottage cheese into a smooth and creamy soft serve ice cream. Enjoy!

    An overhead shot showing a bowl of cottage cheese on the left and a bowl of cottage cheese ice cream on the right.

    Expert Tips

    • Choose full fat cottage cheese because it will result in a creamier texture.
    • Use well ripened banana in this recipe for maximum flavor and sweetness.
    • Pour the blended mixture into ice cube trays and freeze well. Blend from frozen with just enough milk to allow the blender to work well. The ice cream will be a soft serve consistency. Enjoy immediately.
    • This recipe makes one serving. Double or triple to serve more people or to have ready it in the freezer for another time.
    • If your ice cream turns out too soft after blending, you can add it to a freezer safe container and freeze for about an hour or so until it's a nice scoopable consistency.

    Recipe FAQs

    How much protein does this recipe contain?

    One cup of cottage cheese is approximately 30 grams of protein and the addition of peanut butter adds another 4 grams of protein.

    Can I make a larger batch and store it for later?

    You can definitely make a large batch so that you can have cottage cheese ice cream any time! I recommend that you freeze the mixture into ice cube trays and then store the ice cubes in freezer safe bags. Blend up the cubes with a little milk any time you'd like a treat!

    How do I make my cottage cheese less salty?


    You have two options to decrease the salty flavor present in cottage cheese. The first option involves rinsing the cottage cheese under cold running water in a fine-mesh strainer. Or as an alternative you can balance the flavor by incorporating more sweetener to counteract the saltiness.

     A bowl of creamy cottage cheese ice cream beside a bunch of bananas and another bowl of plain cottage cheese.

    More Naturally Sweet Recipes

    • Homemade Strawberry Mint Ice Cream
    • A spoon sitting inside a scooped out bit of Earl Grey Panna Cotta inside an ornate tea cup.
      Earl Grey Panna Cotta
    • Apple Mousse
    • Chia Seed Lemonade

    If you tried this Cottage Cheese Ice Cream or any other recipe on my website, please leave a 🌟 star rating and let me know how it went in the 📝 comments below. I love hearing from you!

    More Cottage Cheese Recipes

    • 23+ Cottage Cheese Desserts
    • 30+ Cottage Cheese Recipes for Breakfast
    • 10+ Cottage Cheese Ice Cream Recipes
    • Vegetarian Stroganoff

    Recipe

    a spoonful of cottage cheese ice cream held above of a bowl of cottage cheese ice cream to show the soft serve texture of the ice cream.

    Cottage Cheese Ice Cream

    Christy Faber
    Imagine a rich, creamy and delicious ice cream that is also healthy, naturally sweetened and high in protein! This Cottage Cheese Ice Cream is the perfect refreshing dessert or healthy evening snack.
    5 from 12 votes
    Print Recipe Pin Recipe SaveSaved!
    Prep Time 10 minutes mins
    Freeze Time 4 hours hrs
    Total Time 4 hours hrs 10 minutes mins
    Course Dessert
    Cuisine American
    Servings 1 person
    Calories 1101 kcal

    Ingredients
      

    • 1 cup cottage cheese
    • 1 teaspoon unsweetened cocoa powder
    • 1 tablespoon peanut butter
    • 1 tablespoon maple syrup optional
    • ½ overripe banana, fresh or frozen

    Blend

    • 3 tablespoon milk (or enough to get blender going)

    Instructions
     

    • Add all the ingredients except the milk into your blender. Blend until combined and smooth.
      1 cup cottage cheese, 1 teaspoon unsweetened cocoa powder, 1 tablespoon peanut butter, 1 tablespoon maple syrup, ½ overripe banana, fresh or frozen
    • Divide this mixture into an ice cube tray and freeze well.
    • When mixture is frozen and you are ready to eat the ice cream, add back into the blender. Add the milk and blend to a soft serve ice cream consistency. Add a little more milk only if needed to get the blender going. Enjoy!
      3 tablespoon milk (or enough to get blender going)

    Notes

    • Choose full fat cottage cheese because it will result in a creamier texture.
    • Use well ripened banana in this recipe for maximum flavor and sweetness.
    • Pour the blended mixture into ice cube trays and freeze well. Blend from frozen with just enough milk to allow the blender to work well. The ice cream will be a soft serve consistency. Enjoy immediately.
    • This recipe makes one serving. Double or triple to serve more people or to have ready it in the freezer for another time.
    • If your ice cream turns out too soft after blending, you can add it to a freezer safe container and freeze for about an hour or so until it's a nice scoopable consistency.

    Nutrition

    Serving: 142.6872gCalories: 1101kcalCarbohydrates: 103.8gProtein: 68.7gFat: 72.3gSaturated Fat: 23.7gCholesterol: 33mgSodium: 1028mgPotassium: 2620mgFiber: 40.4gSugar: 31.1gCalcium: 559mgIron: 24mg
    Tried this recipe?Let us know how it was!

    If you make this recipe please leave a comment and give this recipe a rating! I aim to respond to every single comment. I am so grateful when you trust me and try one of my recipe creations in your own kitchen. I love to hear how it went!  Let’s connect on Instagram and tag me in your food pics!

    ‘Til next time,

    Christy

    Date Cookies

    Dec 13, 2022 · Leave a Comment

    A close up shot of a stack of date cookies.


    If you're a fan of oatmeal raisin cookies, you'll love these soft and chewy Oatmeal Date Cookies with a healthier twist. They're packed with hearty oats, crunchy pecans, and the natural sweetness of dates. They're freezer-friendly and customizable and as nutritious as they are delicious!

    Two date cookies stacked on top of each other on a small serving plate on a staged table with pecan halves around.

    My three boys devoured these wholesome cookies and I felt good so about what they were eating. You could also add a tablespoon or two of Brewer's yeast to add even more nutrition, making these the perfect lactation cookie.

    For more nourishing and delicious snacks try my Matcha Tea Cookies, Chocolate Haystack Cookies, Date Sweetened Cookies and Rice Cake Chocolate Bars.

    [feast_advanced_jump_to]

    Why You'll Love This Recipe

    • Packed with nutritious ingredients
    • Kid friendly! (Just like my Rice Cake Chocolate Bars!)
    • Naturally sweetened
    • Freezer friendly
    • Recipe makes over 2 dozen cookies!
    • Make the cookie dough ahead of time and freeze the dough balls so you can have freshly baked cookies anytime!

    Ingredients

    Ingredients for date cookies in bowls and pinch bowls on a marble countertop.
    • Sugar - I've tested this recipe with both brown sugar and coconut sugar with success.
    • Oats - choose large flake or "old fashioned"
    • Pecans - or swap for walnuts if you prefer!
    • Molasses - choose "fancy" or light molasses
    • Medjool dates - or Deglet Noor dates would also work well in this case.

    See the recipe card below for a full list of ingredients and measurements.

    Substitutions & Variations

    • Pecans: Instead of pecans, try using chopped almonds, walnuts, pistachios, or macadamia nuts for flavor variation.
    • Dates: Swap out Medjool dates with alternatives like Deglet Noor dates or Barhi dates.
    • Peanut Butter Cookies: For a flavorful variation, replace half of the butter called for in the recipe with creamy peanut butter.
    • Lactation Cookie: You could also add a tablespoon or two of Brewer's yeast to add even more nutrition, making these the perfect lactation cookie.

    I have not experimented with any other substitutions or alterations for this recipe. If you decide to make any changes by adding or substituting ingredients, I would love it if you could share your results with us by leaving a comment below.

    How To Make Chewy Oatmeal Date Cookies

    Here are the step-by-step instructions to make this recipe.

    Step 1: Mix the wet ingredients.

    In a large mixing bowl, cream together the room temperature butter and sugar until thoroughly combined.

    Add the room temperature eggs one at a time, beating well after each addition.

    Add the molasses and vanilla, combining well.

    a shot down into a mixing bowl with brown sugar and butter.

    Step 2: Whisk together the dry ingredients and combine wet and dry ingredients.

    In a separate bowl, whisk together the dry ingredients, including the rolled oats, until evenly mixed.

    Add the dry ingredients to the wet ingredients and stir until just combined.

    Gently fold in the chopped dates and pecans. Do not overmix.

    an overhead shot of a mixing bowl combining the wet and dry ingredients.

    Step 3: Preheat oven and chill the dough. Shape the cookie dough balls.

    Preheat your oven to 350°F (175°C). If your dough seems soft, chill for 30 minutes before rolling your cookies.

    Using about 3 tablespoons of dough for each cookie, roll the dough into balls and place them on a baking sheet lined with parchment paper. Add a few chopped dates to the top of each cookie for appearance if desired.

    an overhead shot of the raw cookie dough balls on a cookie sheet.

    Step 4: Bake the cookies.

    Bake the cookies in the preheated oven for 12 to 15 minutes, or until they are lightly golden around the edges but still slightly soft in the centre. (It takes closer to 12 minutes in my oven.) Enjoy! (This recipe makes about 24-26 cookies.)

    a shot of date oatmeal cookies on a cooling rack.

    Expert Tips

    • Measure the flour carefully and accurately. The best way to do this is to spoon the flour into your measuring cup and level it off with the back of a knife.
    • Use light or "fancy" molasses. It's best for cookies.
    • Make sure your butter and eggs are at room temperature.
    • Purchase plump, moist dates. If the dates you have are slightly dry, you can soak them in warm water for a few minutes to rehydrate them before chopping and adding to the dough. Just be sure to remove all excess water.
    • If the finished dough is soft, chill for 30 minutes before rolling into balls.
    • Add a few bits of dates to the top of the cookies before baking for a finishing touch.
    • Keep a close eye on the cookies as they bake, especially towards the end of the baking time. Remove them from the oven when the edges are lightly golden brown for soft, chewy cookies.
    • For perfectly round cookies: place a round cookie cutter (or large drinking glass) that is slightly bigger than the cookies over each individual cookie while they're still warm and move the cookie around in a circular motion until the sides of the cookie are perfectly rounded.

    Recipe FAQs

    Are dates good for you?

    Dates are a natural sweetener and can often replace refined sugar in a recipe. They are high in fibre and antioxidants and contain a small amount of protein. 100 g of dates contain 7 grams of fibre and 2 grams of protein. They also contain significant amounts of potassium, copper, manganese and magnesium along with a small amount of iron.

    How should I store these cookies?

    Store the completely cooled cookies in an airtight container on the counter for 3-4 days or in the freezer for 2-3 months.

    Can I use other types of dates in this recipe?

    While Medjool dates are a popular choice for baking due to their rich, caramel-like flavor and soft texture, there are other varieties of dates you can experiment with in this recipe like Deglet Noor dates and Barhi dates.

    Can I omit the nuts from the recipe?

    Yes, you can omit the pecans if you have allergies or prefer nut-free cookies. You can replace them with additional chopped dates or other mix-ins like chocolate chips or dried cranberries.

    an overhead shot of a hand holding up a cookie above the cooling rack.

    More Healthy Snacks You'll Love

    • Peanut Butter Swirl Black Bean Brownies
    • Five coconut flour oatmeal cookies stacked on top of each other on a cooling rack with others around.
      Healthy Coconut Flour Oatmeal Cookies
    • Gluten-Free Buckwheat Flour Brownies
    • Chocolate Peppermint Crinkle Cookies

    If you tried this Date Cookies or any other recipe on my website, please leave a 🌟 star rating and let me know how it went in the 📝 comments below. I love hearing from you!

    Recipe

    A close up shot of a stack of date cookies.

    Date Cookies

    Christy Faber
    If you're a fan of oatmeal raisin cookies, you'll love these soft and chewy Oatmeal Date Cookies with a healthier twist. They're packed with hearty oats, crunchy pecans, and the natural sweetness of dates. They're freezer-friendly and customizable and as nutritious as they are delicious!
    5 from 2 votes
    Print Recipe Pin Recipe SaveSaved!
    Prep Time 20 minutes mins
    Cook Time 10 minutes mins
    Resting Time 30 minutes mins
    Total Time 1 hour hr
    Course Snack
    Cuisine American
    Servings 26 cookies
    Calories 184 kcal

    Ingredients
      

    • 1 cup butter room temperature
    • 1 cup coconut sugar or brown sugar
    • 2 tablespoon molasses
    • 2 large eggs room temperature
    • 1 teaspoon vanilla extract
    • 2 cups all-purpose flour
    • ½ teaspoon baking soda
    • ½ teaspoon salt
    • ½ teaspoon ground cinnamon
    • 2 cups rolled oats
    • 1 ½ cups dates chopped
    • 1 cup pecans chopped

    Instructions
     

    • In a large mixing bowl, cream together the room temperature butter and sugar until thoroughly combined.
    • Add the room temperature eggs one at a time, beating well after each addition.
    • Add the molasses and vanilla, combining well.
    • In a separate bowl, whisk together the dry ingredients, including the rolled oats, until evenly mixed.
    • Add the dry ingredients to the wet ingredients and stir until just combined.
    • Gently fold in the chopped dates and pecans. Do not overmix.
    • Preheat your oven to 350°F (175°C). If your dough seems soft, chill for 30 minutes before rolling your cookies.
    • Using about 3 tablespoons of dough for each cookie, roll the dough into balls and place them on a baking sheet lined with parchment paper. Add a few chopped dates to the top of each cookie for appearance if desired.
    • Bake the cookies in the preheated oven for 12 to 15 minutes, or until they are lightly golden around the edges but still slightly soft in the centre. (It takes closer to 12 minutes in my oven.)
      Enjoy! (This recipe makes about 24-26 cookies.)

    Notes

    • Measure the flour carefully and accurately. The best way to do this is to spoon the flour into your measuring cup and level it off with the back of a knife.
    • Use light or "fancy" molasses. It's best for cookies.
    • Make sure your butter and eggs are at room temperature.
    • Purchase plump, moist dates. If the dates you have are slightly dry, you can soak them in warm water for a few minutes to rehydrate them before chopping and adding to the dough. Just be sure to remove all excess water.
    • If the finished dough is soft, chill for 30 minutes before rolling into balls.
    • Add a few bits of dates to the top of the cookies before baking for a finishing touch.
    • Keep a close eye on the cookies as they bake, especially towards the end of the baking time. Remove them from the oven when the edges are lightly golden brown for soft, chewy cookies.
    • For perfectly round cookies: place a round cookie cutter (or large drinking glass) that is slightly bigger than the cookies over each individual cookie while they're still warm and move the cookie around in a circular motion until the sides of the cookie are perfectly rounded.

    Nutrition

    Serving: 49gCalories: 184kcalCarbohydrates: 24.15gProtein: 3.57gFat: 11.2gSaturated Fat: 5.032gPolyunsaturated Fat: 1.397gMonounsaturated Fat: 3.924gTrans Fat: 0.286gCholesterol: 66mgSodium: 134mgPotassium: 160mgFiber: 2.4gSugar: 10.64gVitamin A: 258IUVitamin C: 0.1mgCalcium: 21mgIron: 1.31mg
    Tried this recipe?Let us know how it was!

    If you make this recipe please leave a comment and give this recipe a rating! I aim to respond to every single comment. I am so grateful when you trust me and try one of my recipe creations in your own kitchen. I love to hear how it went!  Let’s connect on Instagram and tag me in your food pics!

    ‘Til next time,

    Christy

    Healthy Pumpkin Desserts (all naturally sweetened)

    Nov 15, 2022 · Leave a Comment

    a slice of pumpkin pecan pie bar on a blue plate and a fork beside.

    Enjoy the tastes and aromas of fall baking with these delicious and nutritious pumpkin recipes I have gathered for you. Each recipe is naturally sweetened with ingredients such as maple syrup, dates, coconut sugar, bananas and honey. I love seeing the creativity of other cooks as they prioritize healthy ingredients, beautiful baked goods and delicious flavours. I hope you enjoy browsing through these recipes I have curated for you and find the next pumpkin dessert you want to try!

    Healthy Pumpkin Desserts


    1 Pumpkin Pie Pecan Bars

    Pumpkin Pie Pecan Bars with Streusel Topping (sweetened with coconut sugar and maple syrup)
    Pumpkin Pie Pecan Bars taste exactly like pumpkin pie but with a satisfying crunch of crushed pecans and delicious streusel topping.
    Check out this recipe
    Pumpkin Pie Pecan Bars with Streusel Topping (sweetened with coconut sugar and maple syrup)

    2 Healthy Pumpkin Balls

    Pumpkin Balls (sweetened with dates)
    These pumpkin energy balls are a healthy snack perfect for when those pumpkin pie cravings kick in! Vegan, gluten-free and paleo.
    Check out this recipe
    Pumpkin Balls (sweetened with dates)

    3 Healthy Pumpkin Banana Muffins

    Healthy Pumpkin Banana Muffins (sweetened with banana and maple syrup)
    Pumpkin banana muffins combine the best of both worlds - pumpkin and banana bread! These moist and fluffy muffins are super easy to make in less than 30 minutes and are naturally gluten free.
    Check out this recipe
    Healthy Pumpkin Banana Muffins (sweetened with banana and maple syrup)

    4 Pumpkin Banana Bread

    Vegan Pumpkin Banana Bread (sweetened with banana and coconut sugar)
    This Vegan Pumpkin Banana Bread includes a couple of simple ingredients and is very quick and easy to make. It’s the perfect fall breakfast!
    Check out this recipe
    Vegan Pumpkin Banana Bread (sweetened with banana and coconut sugar)

    5 Healthy Pumpkin Pie

    Healthy Pumpkin Pie (sweetened with maple syrup)
    Healthy pumpkin pie recipe is a delicious lower-sugar, lower-fat homemade dessert with no condensed milk or unrefined sugars.
    Check out this recipe
    Healthy Pumpkin Pie (sweetened with maple syrup)

    6 Vegan Pumpkin Brownies

    Vegan Pumpkin Brownies (sweetened with maple syrup)
    These healthy, fudgy vegan pumpkin brownies are refined sugar-free and low fat making them the perfect healthier brownies.
    Check out this recipe
    Vegan Pumpkin Brownies (sweetened with maple syrup)

    7 Healthy Pumpkin Cookies

    Vegan Pumpkin Cookies (Gluten-Free) (sweetened with maple syrup)
    These vegan pumpkin cookies are healthy, gluten-free and make a delicious breakfast or treat! Lightly spiced and full of chocolate chips.
    Check out this recipe
    Vegan Pumpkin Cookies (Gluten-Free) (sweetened with maple syrup)

    8 Gingersnap Pumpkin Cream Tart

    Vegan Gingersnap Pumpkin Cream Tart
    This Gingersnap Pumpkin Cream Tart is healthy, vegan, and gluten-free, but tastes indulgent. It’s the perfect make-ahead Thanksgiving treat!
    Check out this recipe
    Vegan Gingersnap Pumpkin Cream Tart

    9 Pumpkin Crumble Bars

    No Bake Pumpkin Crumble Bars (sweetened with dates)
    No Bake Pumpkin Crumble Bars will be your new favorite fall treat! A handful of ingredients along with everyone’s favorite: pumpkin, and ready in minutes!
    Check out this recipe
    No Bake Pumpkin Crumble Bars (sweetened with dates)

    10 Pumpkin Breakfast Cookies

    Pumpkin Chocolate Breakfast Cookies (sweetened with honey)
    Make delicious pumpkin and chocolate breakfast cookies in under 30 minutes. They’re so healthy, you can eat them for breakfast!
    Check out this recipe
    Pumpkin Chocolate Breakfast Cookies (sweetened with honey)

    11 Paleo Pumpkin Pecan Pie Bars

    Paleo Pumpkin Pecan Pie Bars (sweetened with coconut sugar & maple syrup)
    These Paleo Pumpkin Pecan Pie Bars are the best of both worlds with a paleo shortbread like crust, a pumpkin custard filling, and a gooey and sweet pecan pie topping.
    Check out this recipe
    Paleo Pumpkin Pecan Pie Bars (sweetened with coconut sugar & maple syrup)

    12 Pumpkin Pudding

    Pumpkin Pudding (sweetened with coconut sugar)
    This vegan pumpkin pudding recipe is going to quickly become a new fall favourite!
    Check out this recipe
    Pumpkin Pudding (sweetened with coconut sugar)

    13 Healthy Pumpkin Oatmeal Cookies

    Healthy Pumpkin Cookies (sweetened with maple syrup)
    Healthy Pumpkin Cookies are soft and chewy with crisp exterior! Wholesome ingredients, naturally sweetened, and packed with fall flavor.
    Check out this recipe
    Healthy Pumpkin Cookies (sweetened with maple syrup)

    14 Pumpkin Protein Balls

    Pumpkin Protein Balls (sweetened with honey)
    No bake pumpkin protein are super easy to make in under 10 minutes. Made with 6 simple ingredients like pumpkin puree, oats, with protein powder and vanilla and naturally sweetened with maple syrup.
    Check out this recipe
    Pumpkin Protein Balls (sweetened with honey)

    15 Pumpkin Banana Bread

    Pumpkin Banana Bread (sweetened with coconut sugar)
    Make this vegan Pumpkin Banana Bread at home homemade banana pumpkin for healthy breakfast. It’s a treat for all special occasions!
    Check out this recipe
    Pumpkin Banana Bread (sweetened with coconut sugar)

    Chocolate Peanut Butter Rice Cake Bars

    Nov 15, 2022 · 1 Comment

    Rice Cakes bars are only as good as what you top them with. So let’s shoot straight for the stars and cover them in chocolate and peanut butter! This makes sense to you, right!? Chocolate brings out the best in almost everything!!

    You will love the texture that rice cakes bring to this treat. This is an EASY and healthy treat to pull off anytime, even last minute when you stick them in the freezer to cool. Perfect to have waiting for your kids after school or to serve to guests with a cup of tea. (Just like my buckwheat flour brownies.) I think you’re really going to love having this easy, fail-proof recipe in your repertoire. And the best part? It’s choose your own adventure with toppings! 

    Now— I’m going to suggest sprinkling them with pumpkin seeds, sunflower seeds, shredded coconut and cranberries. This looks beautiful and inviting and also adds to the nutritional profile. OR you can sprinkle the top with leftover chopped up Halloween candy.

    The toppings can be whatever you have. Use your imagination! Sour gummies are especially fun and delicious on top! If you’re making them for a friend who really values a healthy snack then sprinkle goji or golden berries and crushed pistachios instead of the seeds to create a healthy decadent treat. This would be a lovely and mature upgrade for a pop of colour that is rich in antioxidants. 

    Kids and Husband approved, never let your rice cakes go stale again! 

    More Healthy Snacks: 

    • Healthy Chocolate Haystack Cookies
    • Peppermint Chocolate Crinkle Cookies
    • Oat Flour Brownies
    • Oat Flour Buckwheat Muffins 
    • Chocolate Covered Dates
    • Cottage Cheese Ice Cream

    Swaps and Substitutions

    Try swapping the peanut butter for any other nut or seed butter like almond butter, tahini, or cashew butter!

    More Topping Ideas:

    • freeze-dried fruit
    • flaky salt
    • pretzels
    • various nuts and seeds like: pistachios, macadamia nuts, brazil nuts, chia seeds, sesame seeds, cashews, pecans etc
    • add dates or raisins or apricots
    • crushed candy cane
    • marshmallows
    • goji berries
    • cacao nibs

    Recipe Steps

    Melt chocolate and coconut oil on the stove top using a double boiler or bowl placed over a pot. Place the chocolate and coconut oil in the top of your double boiler or heatproof bowl. Heat a few inches of water to a simmer in the bottom pot. Make sure the top pot or bowl is not touching the hot water. You want the steam to melt the chocolate. Stir until you have a smooth creamy mixture. Remove from the heat.

    In a large mixing bowl, break up 5 rice cakes into smaller pieces. Add the peanut butter, melted chocolate and a pinch of salt. Stir to mix well, coating all the rice cake pieces.

    Transfer this mixture to a lightly greased 8x8 pan. Spread the mixture out evenly and press down lightly to smooth out the top. 

    Sprinkle with the toppings of your choice.

    Put the pan in the fridge to cool and fully set. When cool, you can either break up into pieces like chocolate bark or cut into squares. Enjoy!

    Tips for Making Rice Cake Chocolate Bars

    • grease the pan or line with parchment so the bars will come out easily.

    More Recipes to Enjoy

    Peanut Butter Swirl Black Bean Brownies

    These peanut butter swirl black bean brownies are so fudgy and so delicious. The texture can’t be beaten! They seriously are like fudge.

    Buckwheat Flour Brownies

    These gluten-free buckwheat flour brownies are fudgy and chocolatey. They really call for a tall glass of ice-cold milk.

    Chocolate Peanut Butter Rice Cake Bars

    Peanut Butter Chocolate Rice Cake Bars

    Christy Faber
    Rice Cakes are only as good as what you top them with. So let’s shoot straight for the stars and cover them in chocolate! This is an EASY and healthy treat to pull off anytime, even last minute if you stick them in the freezer to cool. Perfect to have waiting for your kids after school or to serve to guests with a cup of tea.
    5 from 1 vote
    Print Recipe Pin Recipe SaveSaved!
    Prep Time 15 minutes mins
    Cooling Time 10 minutes mins
    Total Time 25 minutes mins
    Course Dessert, Snack
    Cuisine American
    Servings 12 people
    Calories 199 kcal

    Ingredients
      

    • 1 ½ cups chocolate chips
    • 1 ½ tbsp coconut oil
    • ⅓ cup peanut butter
    • 4 rice cakes unflavored
    • pinch of salt

    Suggested Toppings

    • 1 tbsp pumpkin seeds
    • 1 tbsp shredded coconut
    • 1 tbsp dried cranberries
    • 1 tbsp sunflower seeds

    Instructions
     

    • Melt chocolate and coconut oil on the stove top using a double boiler or bowl placed over a pot. Place the chocolate and coconut oil in the top of your double boiler or heatproof bowl. Heat a few inches of water to a simmer in the bottom pot. Make sure the top pot or bowl is not touching the hot water. You want the steam to melt the chocolate. Stir until you have a smooth creamy mixture. Remove from the heat.
    • In a large mixing bowl, break up 5 rice cakes into smaller pieces. Add the peanut butter, melted chocolate and a pinch of salt. Stir to mix well, coating all the rice cake pieces.
    • Transfer this mixture to a lightly greased 8x8 pan. Spread the mixture out evenly and press down lightly to smooth out the top. 
      Sprinkle with the toppings of your choice.
    • Put the pan in the fridge to cool and fully set. When cool, you can either break up into pieces like chocolate bark or cut into squares. Enjoy!

    Nutrition

    Calories: 199kcal
    Tried this recipe?Let us know how it was!

    If you make this recipe please leave a comment and give this recipe a rating! I aim to respond to every single comment. I am so grateful when you trust me and try one of my recipe creations in your own kitchen. I love to hear how it went!  Let’s connect on Instagram and tag me in your food pics!

    ‘Til next time,

    Christy

    Gingerbread Bundt Cake with Cream Cheese Frosting

    Nov 8, 2022 · 3 Comments

    This Old Fashioned Gingerbread Bundt Cake with Orange Cream Cheese Frosting is the perfect festive dessert for the holiday season.  Fill your home with the old-fashioned fragrance of Christmas- ginger, cinnamon and cloves.  The beautiful addition of frosted cranberries on top makes this cake an elegant addition to your holiday table.

    Gingerbread bundt cake elevated on a glass cake stand with frosting and frosted cranberries on top.

    My version of gingerbread cake is inspired by a cake I often enjoyed at my friend Bekah’s house when we were kids.  I often slept over at her house from Saturday night to Sunday morning before going to church together.  Her mom, Kathryn, would often serve a gingerbread cake for a special Sunday morning breakfast. 

    The recipe was one she had inherited from her granny and the tradition included pouring heavy cream on top.  No surprise that we would dig right in!

    I decided to make my cake in a Bundt pan as a simple way to create a beautiful presentation.  I knew that an orange cream cheese icing would be a delicious complement to this spicy, aromatic cake.  The frosted cranberries are the literal “topping on the cake!”  If you prefer a simpler presentation, replace the cream cheese frosting with a dusting of powdered sugar.  So pretty!

    I hope my Gingerbread Bundt Cake with Orange Cream Cheese Icing will become a part of your family’s holiday tradition, or enjoy it anytime, including at breakfast doused in heavy cream!

    Discover a variety of holiday-inspired recipes: Candy Cane Thumbprint Cookies, Pumpkin Pie Pecan Bars, Chai Tea Ice Cream, Comforting Custard Drink.

    [feast_advanced_jump_to]

    Why You'll Love This Recipe

    • Fills your home with aromas of the holidays! (just like my Walnut and Date Scones)
    • This cake makes a beautiful Christmas table centerpiece.
    • The creamy citrus icing really compliments the warm spices in the cake.
    • This recipe is still incredibly delicious if you simplify the prep and skip the icing and the frosted cranberries.
    • Freezer-friendly! (Freeze the cake without the icing)
    • Comforting flavors (just like my Olive Oil Carrot Cake)

    Ingredients

    Ingredients to make gingerbread bundt cake in measuring spoons, pinch bowls, bowls and measuring cups.
    • Molasses - choose "light" or "fancy" molasses for baking.
    • Spices - if your cloves, cinnamon and ginger have been in your cupboard for a long time they may have lost a lot of their flavor. Invest in fresh spices for the most flavorful cake.
    • Butter - you can use salted or unsalted. If you use salted butter then decrease the amount of salt added to the recipe slightly.

    See the recipe card below for a full list of ingredients and measurements.

    How To Make Gingerbread Bundt Cake

    Here are the step-by-step instructions to make this recipe.

    Step 1: Whisk together the dry ingredients.

    Add the dry ingredients in a medium bowl and whisk together until thoroughly combined.

    Dry ingredients sitting in a mixing bowl with a wooden spoon beside, on a marble countertop.

    Step 2: Combine butter and sugar

    In a separate medium bowl, combine the melted butter and sugar. Beat for two minutes until well combined.

    Sugar sitting on top of melted butter in a ceramic mixing bowl on a countertop.

    Step 3: Add egg and molasses

    Add the egg and beat until combined. Blend in the molasses.

    All wet ingredients mixed together in a mixing bowl with bubbles on top.

    Step 4: Add dry ingredients and combine, then add hot water.

    Add the dry ingredients, mixing just until combined.

    Now add the hot water and mix the batter until it is smooth.

    Wet and dry ingredients combined by a Danish dough whisk in a ceramic mixing bowl.

    Step 5: Pour batter into bundt pan and bake.

    Pour the batter into a greased 10-cup bundt pan. Bake in a preheated 350-degree F oven for 40 minutes or until a cake tester comes out clean.

    Allow to cool for 10 to 20 minutes and then remove the cake from the pan onto a wire rack. Allow the cake to cool completely before icing.

    Cake batter prepped and sitting in a Bundt pan to be baked.

    Step 6: Make the cream cheese icing.

    Be sure your cream cheese is at room temperature.

    Combine the cream cheese and powdered sugar until smooth.

    Gradually add in the orange juice as you continue beating to achieve a smooth texture.

    Add the vanilla and orange zest and combine.

    Pour the icing over the top of the cake allowing it to drip down on either side.

    Frosting pouring over the top of the cake on a cooling rack on a baking sheet.

    Step 7: Make frosted cranberries and add them to the cake.

    First, make your simple syrup. Combine the ¼ cup sugar and ¼ cup water in a medium saucepan. Heat the syrup over medium heat, stirring constantly to dissolve the sugar. Do not bring to a boil.

    Add the cranberries to the simple syrup, stirring gently to coat.

    Using a slotted spoon, carefully remove the cranberries to a wire rack over a pan to catch the drippings.

    Wait for about an hour for the cranberries to dry and then roll them in the ⅓ cup sugar.

    Add the frosted cranberries to the top of the iced cake for a beautiful presentation.

    Candied cranberries sitting on top of finished gingerbread bundt cake on a glass cake stand.

    Expert Tips

    • Properly grease your Bundt pan: grease your pan well with coconut oil or vegetable oil and then dust with flour and tap out the excess. After baking, wait 10-20 minutes for the cake to cool before turning it out on a cooling rack.
    • Measure the flour carefully and accurately. The best way to do this is to spoon the flour into your measuring cup and level it off with the back of a knife.
    • When adding the dry ingredients to the wet ingredients, mix just until combined. Overmixing can result in a denser cake.
    • Be sure to add the hot water after you have combined the dry and wet ingredients. If you add the hot water directly to the wet ingredients you risk cooking the egg on contact.
    • Use a cake tester or toothpick to check for doneness. Insert it into the center of the cake; if it comes out with a few moist crumbs (not wet batter), the cake is done.
    • For the cream cheese icing, adjust the amount of orange juice to achieve your desired consistency. Add more juice for a thinner icing or more powdered sugar for a thicker one.
    • When decorating the top of the cake you can also add some fresh rosemary sprigs for a festive touch.
    • You can bake the cake a day in advance and store it, tightly wrapped, at room temperature. Add the icing and cranberries just before serving.

    Recipe FAQs

    What is the best way to prevent your cake from sticking to the Bundt pan?

    Choose a Bundt cake pan with a non-stick coating.  It is still important to grease your pan well.  Be sure to grease every nook and cranny.  Butter is not the best choice for greasing a Bundt pan as the milk solids may cause sticking. (I use coconut oil)  Sprinkle flour into the pan and tap the sides to distribute it evenly.  When the cake is finished baking, it is important to let it cool for 10 to 20 minutes.  Then invert your cake over a wire cooling rack.  Let cool completely before adding icing. 

    What molasses is best to use in a gingerbread cake?

    Choose fancy molasses for baking as opposed to blackstrap molasses which has gone through additional boiling in processing.  Fancy molasses is lighter and sweeter and is also known as cooking molasses.  Blackstrap molasses is more often used for savory recipes such as baked beans and barbecue sauce.

    What's the best way to store this cake?

    Any cake with a cream cheese frosting should be stored in the refrigerator.  You shouldn’t let it sit out any longer than two hours.  

    Can I make this cake in advance?

    Yes, you can make the cake in advance. Store it at room temperature in an airtight container for up to a day before adding the icing and cranberries.

    A slice of Gingerbread Bundt cake on a special dessert dish with the cake in the background.

    More Holiday Recipes

    • Chocolate Peppermint Crinkle Cookies
    • Gluten-Free Buckwheat Flour Brownies
    • Cozy Autumn Wild Rice Soup
    • Fudgy Chocolate Orange Pudding Cake

    If you tried this Gingerbread Bundt Cake or any other recipe on my website, please leave a 🌟 star rating and let me know how it went in the 📝 comments below. I love hearing from you!

    Recipe

    Gingerbread Bundt Cake with Orange Cream Cheese Frosting

    Christy Faber
    This Gingerbread Bundt Cake with Orange Cream Cheese Frosting is the perfect festive dessert for the holiday season. Fill your home with the old fashioned fragrance of Christmas- ginger, cinnamon and cloves. The beautiful addition of frosted cranberries on top make this cake an elegant addition to your holiday table.
    5 from 3 votes
    Print Recipe Pin Recipe SaveSaved!
    Prep Time 15 minutes mins
    Cook Time 40 minutes mins
    Cooling 15 minutes mins
    Total Time 1 hour hr 10 minutes mins
    Course Breakfast, Dessert, Snack
    Cuisine british
    Servings 12 pieces
    Calories 382 kcal

    Ingredients
      

    Gingerbread Cake

    • 2 ½ cup all purpose flour
    • 1 ½ teaspoon baking soda
    • ½ teaspoon salt
    • 1 teaspoon cinnamon
    • 1 teaspoon ginger
    • ½ teaspoon cloves
    • 1 cup hot water
    • ½ cup butter
    • ½ cup sugar
    • 1 large egg
    • 1 cup fancy molasses

    Frosting

    • 8 oz cream cheese room temperature
    • ¼ cup orange juice
    • orange zest from half an orange
    • 1 teaspoon vanilla extract
    • ¼ cup powdered sugar

    Frosted Cranberries

    • 1 ½ cup fresh cranberries
    • ¼ cup sugar for simple syrup
    • ¼ cup water
    • ⅓ cup sugar for rolling

    Instructions
     

    Gingerbread Cake

    • Combine the dry ingredients in a medium bowl.
    • Cream the melted butter and sugar together. Beat for two minutes until well combined.
    • Add the egg and beat until combined. Blend in the molasses.
    • Add the dry ingredients, mixing just until combined.
    • Now add the hot water and mix the batter until it is smooth.
    • Pour the batter into a greased 10 cup bundt pan. Bake in a preheated 350 degree F oven for 40 minutes or until a cake tester comes out clean.
    • Allow to cool for 10 to 20 minutes and then remove the cake from the pan onto a wire rack. Allow the cake to cool completely before icing.

    Orange Cream Cheese Frosting

    • Be sure your cream cheese is at room temperature.
    • Combine the cream cheese and powdered sugar until smooth.
    • Gradually add in the orange juice as you continue beating to achieve a smooth texture.
    • Add the vanilla and orange zest and combine.
    • Pour the icing over the top of the cake allowing it to drip down on either side.

    Frosted Cranberries

    • First, make your simple syrup. Combine the ¼ cup sugar and ¼ cup water in a medium saucepan. Heat the syrup over medium heat, stirring constantly to dissolve the sugar. Do not bring to a boil.
    • Add the cranberries to the simple syrup, stirring gently to coat.
    • Using a slotted spoon, carefully remove the cranberries to a wire rack over a pan to catch the drippings.
    • Wait for about an hour for the cranberries to dry and then roll them in the ⅓ cup sugar.
    • Add the frosted cranberries to the top of the iced cake for a beautiful presentation.
    • The cranberries will keep in the fridge for 2 to 3 days.

    Notes

    • Properly grease your Bundt pan: grease your pan well with coconut oil or vegetable oil and then dust with flour and tap out the excess. After baking, wait 10-20 minutes for the cake to cool before turning it out on a cooling rack.
    • Measure the flour carefully and accurately. The best way to do this is to spoon the flour into your measuring cup and level it off with the back of a knife.
    • When adding the dry ingredients to the wet ingredients, mix just until combined. Overmixing can result in a denser cake.
    • Be sure to add the hot water after you have combined the dry and wet ingredients. If you add the hot water directly to the wet ingredients you risk cooking the egg on contact.
    • Use a cake tester or toothpick to check for doneness. Insert it into the center of the cake; if it comes out with a few moist crumbs (not wet batter), the cake is done.
    • For the cream cheese icing, adjust the amount of orange juice to achieve your desired consistency. Add more juice for a thinner icing or more powdered sugar for a thicker one.
    • When decorating the top of the cake you can also add some fresh rosemary sprigs for a festive touch.
    • You can bake the cake a day in advance and store it, tightly wrapped, at room temperature. Add the icing and cranberries just before serving.

    Nutrition

    Serving: 49.51gCalories: 382kcalCarbohydrates: 57.5gProtein: 5.1gFat: 15gSaturated Fat: 9.2gCholesterol: 57mgSodium: 386mgPotassium: 96mgFiber: 1.4gSugar: 32gCalcium: 55mgIron: 3mg
    Tried this recipe?Let us know how it was!

    If you make this recipe please leave a comment and give this recipe a rating! I aim to respond to every single comment. I am so grateful when you trust me and try one of my recipe creations in your own kitchen. I love to hear how it went!  Let’s connect on Instagram and tag me in your food pics!

    ‘Til next time,

    Christy

    Olive Oil Carrot Cake

    Oct 31, 2022 · 9 Comments

    This Olive Oil Carrot Cake Loaf with its perfectly spiced batter has become a family favorite! The olive oil makes the loaf's crumb so tender and moist and adds a subtle fruity flavor. Choose a good quality olive oil if you can -- it makes a big difference! The cream cheese frosting is lightly sweetened and compliments the loaf perfectly but it is optional!

    Looking down on carrot cake loaf on a marble cutting board with two pieces sliced and leaning against the rest of the loaf.

    Carrot cake is a beloved classic that never goes out of style. It's a treat that's perfect for any occasion. It's the kind of dessert that you wouldn't be surprised to see at Easter, Thanksgiving, or Christmas gatherings. Or any other time of year for that matter! This is the ideal comfort dessert to serve with tea after dinner or for Sunday afternoon coffee time. I hope you enjoy your batch of this delicious year-round delight!

    Looking for more delicious cake and muffin recipes? Be sure to browse through my posts for Gingerbread Bundt Cake, Green Smoothie Muffins, Double Chocolate Banana Bread and Buckwheat Banana Muffins.

    [feast_advanced_jump_to]

    Why You'll Love This Recipe

    • This cake is lightly sweetened by coconut sugar (or brown sugar if you prefer). Carrots and crushed pineapple also add a natural sweetness to this cake.
    • It's so easy! You can enjoy all the flavors of a layered carrot cake without the extra steps.
    • Olive oil adds numerous health benefits to this loaf like healthy fats and antioxidants.
    • Olive oil's high smoke point and heat resistance make it a perfect choice for baking.
    • Olive oil also adds a unique flavor and a tender crumb to the cake.
    • The recipe can be easily doubled to make a second loaf to freeze for later. It never hurts to have an extra carrot cake loaf in the freezer for unexpected company!

    Ingredients

    Ingredients for olive oil carrot cake in mixing bowls, pinch bowls and measuring spoons on a countertop.
    • Olive Oil - choose a good quality one!
    • Coconut sugar - or swap with brown sugar
    • Eggs - choose large sized eggs
    • Crushed pineapple - or swap for apple sauce or mashed banana
    • Shredded carrot - you could swap for zucchini if that's what you have!
    • Lemon zest - optional but delicious!
    • All-purpose flour - swap for spelt flour if desired
    • Cinnamon, nutmeg, ginger
    • Baking soda, baking powder, salt - did you know that if your baking powder and baking soda are older than 3 months that it has started to lose its freshness and leavening power?

    See the recipe card below for a full list of ingredients and measurements.

    Substitutions & Variations

    • Nuts: Add chopped nuts such as pecans or walnuts to the batter for some crunch and extra flavor.
    • Dried Fruit: Try adding in golden raisins, dried cranberries, candied ginger or chopped dates.
    • Add some shredded coconut for an interesting textural component and flavor.
    • Try a splash of rum in the cream cheese frosting -- just for fun!
    • Carrots: swap carrots for zucchini for a different take on the cake.
    • Spices: Experiment with different spices such as cardamom, allspice, or cloves to add depth of flavor to the cake.
    • You can swap the icing sugar in the frosting for maple syrup. Use 2 tablespoon of maple syrup in the frosting recipe and keep in mind that the consistency will be thinner.

    I have not experimented with any other substitutions or alterations for this recipe. If you decide to make any changes by adding or substituting ingredients, I would love it if you could share your results with us by leaving a comment below.

    How To Make This Recipe

    Here are the step-by-step instructions to make this recipe.

    Step 1: Preheat/Prep and Mix Dry Ingredients

    Preheat the oven to 350 degrees F. Line a 5x8 inch loaf pan with parchment paper.

    In a large bowl, whisk together all-purpose flour, ground cinnamon, ground nutmeg, ground ginger, baking soda, baking powder, and sea salt until well combined.

    Dry ingredients in a mixing bowl.

    Step 2: Mix the Wet Ingredients

    In a separate bowl, whisk together olive oil, coconut sugar, eggs, crushed pineapple, shredded carrot, and the zest from one lemon (optional).

    Wet ingredients whisked together for olive oil carrot cake.

    Step 3. Combine the Wet and Dry Mixtures

    Pour the wet ingredients into the bowl with the dry ingredients. Mix until just combined, taking care not to over-mix.

    Grated carrot tossed into mixing bowl with wet and dry ingredient combined.

    Step 4: Bake the Loaf

    Transfer the batter to the prepared loaf pan. Bake in the preheated oven for 50-60 minutes, or until a cake tester or toothpick inserted into the center of the loaf comes out clean. Baking times may vary depending on your oven. Once fully baked, remove the loaf from the oven and let it cool completely.

    Baked carrot cake loaf in bread pan.

    Step 5. Make the Frosting

    While the cake cools, make the frosting. In a mixing bowl, beat room-temperature butter and room-temperature cream cheese until light and fluffy. Beat in powdered sugar (or maple syrup if using) and pure vanilla extract until well combined. Once the cake is fully cooled, top it with the cream cheese frosting. Slice and serve and enjoy!

    Cream cheese frosting on top of a carrot cake loaf on a marble cutting board.

    Expert Tips

    • Grate your carrots by hand with the fine side of a cheese grater or use a food processor to speed up the job!
    • Freeze your left over crushed pineapple from the can in ice cube trays for delicious additions to smoothies!
    • There is no need to remove excess water from the carrots, as the excess water will help keep the cake moist.
    • Lining your loaf pan with parchment paper will ensure the bottom of your cake does not stick to the cake pan.
    • Take care not to over bake the cake. Check the cake at the 50-minute mark, and then every few minutes after that until it is fully cooked. A toothpick inserted into the center should come out clean.
    • Ensure the butter and cream cheese are truly room temperature for the smoothest possible frosting.
    • Do not ice your cake too early; you want it to be completely cooled before adding the frosting. If frosting is added too soon, it will become runny and not stay on the top of the carrot cake.  
    • For a fancy presentation decorate the loaf with carrot ribbons, crushed walnuts and some lemon zest.

    Recipe FAQs

    How do I choose the best olive oil?

    When purchasing an olive oil choose one that says extra virgin olive oil. It is made from cold-pressed olives and has the most flavor and health benefits. It's best to purchase olive oil that's stored in dark glass bottles because olive oil is sensitive to light and heat. Lastly check the origin because the best olive oils come from Mediterranean countries.

    What does the olive oil in the recipe do?

    The olive oil creates a tender crumb and keeps the carrot cake nice and moist it also replaces butter or another similar fat that other cake recipes call for.

    Can you freeze this loaf?

    You can freeze this carrot cake after it is baked but before it is frosted. You want to ensure it is fully cooled before freezing it. Wrap it up in plastic wrap first, then place it in an air-tight bag or container. 

    How to grate carrot for carrot cake?

    You want to use the fine side of a cheese grater, and you want the carrot pieces to be small. 

    Why pineapple in carrot cake?

    Adding pineapple to the cake allows it to become more tender. It also adds some natural sweetness to the cake.

    Sliced carrot cake with cream cheese frosting on top.

    Storage

    Room Temperature

    If you're choosing not to ice the cake you can store it at room temperature. Wrap the cooled cake tightly in plastic wrap or aluminum foil. This will help to prevent air from getting in and drying out the cake.

    Refrigerator

    Because of the cream cheese in the icing you'll definitely want to store extra slices in the fridge. Place the cake in an airtight container. This will help to keep the cake fresh and moist for up to four days.

    More Recipes You'll Love

    • Apple Cheddar Scones
    • Pumpkin Pie Pecan Bars
    • Lemon Orzo Chicken Soup
    • No-Bake Carrot Cake Energy Balls

    Did you make this recipe? Let me know!
    Leave a review or comment below!

    Recipe

    Olive Oil Carrot Cake Loaf

    Christy Faber
    This Olive Oil Carrot Cake Loaf with its perfectly spiced batter is swiftly becoming a family favourite! The olive oil makes the crumb so tender and moist. Choose a good quality olive oil if you can -- it makes a big difference! The cream cheese frosting is lightly sweetened and compliments the loaf perfectly but it is optional!
    5 from 4 votes
    Print Recipe Pin Recipe SaveSaved!
    Prep Time 15 minutes mins
    Cook Time 55 minutes mins
    Total Time 1 hour hr 10 minutes mins
    Course Appetizer, Dessert
    Cuisine American
    Servings 15 slices
    Calories 256 kcal

    Ingredients
      

    Wet Ingredients

    • ½ cup olive oil
    • 1 cup coconut sugar (or brown sugar) lightly packed
    • 2 large eggs
    • ¼ cup crushed pineapple canned
    • 2 cups finely shredded carrot
    • zest from one lemon optional

    Dry Ingredients

    • 1 ¾ cups all-purpose flour
    • 1 ½ tsp ground cinnamon
    • ¼ tsp ground nutmeg
    • ¼ tsp ground ginger
    • 1 tsp baking soda
    • 1 tsp baking powder
    • ½ tsp sea salt

    Cream Cheese Frosting

    • ½ cup butter room temperature
    • ½ cup cream cheese room temperature
    • 5 tbsp powdered sugar or swap for maple syrup * see note
    • ½ tsp pure vanilla extract

    Instructions
     

    • Preheat the oven to 350 degrees F. Line a 5x8 loaf pan with parchment paper.
    • Combine all dry ingredients in a large bowl and whisk thoroughly.
    • Whisk together olive oil, sugar, eggs, crushed pineapple, lemon zest, and finely shredded carrot in a separate bowl.
    • Add the wet ingredient to the dry ingredient and mix until just combined, taking care not to over-mix.
    • Transfer to a 5x8 loaf pan lined with parchment and bake in a 350-degree oven for 50-60 minutes. (Baking times vary oven to oven. Insert a cake tester or tooth pick in the centre of the loaf and remove the loaf from the oven when the tester comes out clean)
    • Allow the loaf to fully cool.
    • To make the frosting: beat together room temperature cream cheese and room temperature butter until light and fluffy and then beat in the vanilla and icing sugar.
    • Top the cooled loaf with cream cheese icing and enjoy!

    Notes

      • Grate your carrots by hand with the fine side of a cheese grater or use a food processor to speed up the job!
      • There is no need to remove excess water from the carrots, as the excess water will help keep the cake moist.
      • Lining your loaf pan with parchment paper will ensure the bottom of your cake does not stick to the cake pan.
      • Take care not to over bake the cake. Check the cake at the 50-minute mark, and then every few minutes after that until it is fully cooked. A toothpick inserted into the center should come out clean.
      • Ensure the butter and cream cheese are truly room temperature for the smoothest possible frosting.
      • Do not ice your cake too early; you want it to be completely cooled before adding the frosting. 
    • * Swap the icing sugar in the frosting recipe for maple syrup for a naturally sweetened frosting. Use 2 tablespoon of maple syrup. Just keep in mind that the icing will be thinner and may not hold its shape as well. 

    Nutrition

    Calories: 256kcalCarbohydrates: 25.3gProtein: 3.1gFat: 16.4gSaturated Fat: 6.8gCholesterol: 50mgSodium: 89mgPotassium: 98mgFiber: 0.8gSugar: 13.1gCalcium: 27mgIron: 1mg
    Tried this recipe?Let us know how it was!

    If you make this recipe please leave a comment and give this recipe a rating! I aim to respond to every single comment. I am so grateful when you trust me and try one of my recipe creations in your own kitchen. I love to hear how it went!  Let’s connect on Instagram and tag me in your food pics!

    ‘Til next time,

    Christy

    Lemon Orzo Chicken Soup

    Sep 13, 2022 · 9 Comments

    Warm your body and soul with a comforting classic: Lemon Chicken Orzo Soup. This is a go-to recipe that makes it easy to get dinner on the table in just over 30 minutes. You'll love the creamy citrusy broth with tender chicken, perfectly cooked orzo pasta and the fresh taste of dill!

    Fresh dill sprinkled over lemon orzo soup on a staged countertop.

    Soup recipes are a kitchen essential— they're versatile, comforting, and perfect for easy meals. I enjoy making large batches for gatherings or family dinners, and having the leftovers for the next day's lunch. This Lemon Orzo Soup is a repeat-worthy addition to any recipe collection.

    For more creamy soups try my Autumn Wild Rice Soup and Cauliflower Sausage Soup.

    [feast_advanced_jump_to]

    Why You'll Love This Recipe

    • Bright and refreshing!
    • A delicious twist on classic chicken noodle soup
    • Ideal for days when you're feeling under the weather
    • A great go to recipe to use up a rotisserie chicken
    • Adaptable to be dairy free
    • Comes together in just over 30 minutes
    • Family friendly!
    • Nutrient packed (just like my Veggie Packed Lasagna Soup!)

    Substitutions & Variations

    • Dairy Free Option: I have made this soup successfully with coconut milk! I just swapped the dairy in this soup for two cans (800ml total) of coconut milk. Use olive oil for cooking the veggies rather than butter.
    • Gluten Free Option: Choose gluten free orzo pasta or swap the orzo for rice.
    • Rotisserie Chicken Hack: Consider using shredded rotisserie chicken for added convenience.
    • Add More Veggies: Add additional vegetables such as spinach or kale for extra color and nutrition.
    • Toppings: Try topping this soup with some freshly grated parmesan or crunchy croutons or a drizzle of olive oil.

    I have not experimented with any other substitutions or alterations for this recipe. If you decide to make any changes by adding or substituting ingredients, I would love it if you could share your results with us by leaving a comment below.

    How To Make Lemon Orzo Soup

    Here are the step-by-step instructions to make this recipe.

    Step 1: Chop and cook the vegetables.

    In a large pot, cook carrot, celery and onion in the melted butter over medium heat until the vegetables are tender. Add the minced garlic and stir well and cook for an additional few minutes.

    Tender vegetables in the bottom of a red Dutch oven on a countertop.

    Step 2: Add broth, chicken and herbs.

    Season with salt and pepper. Add chicken broth, oregano and celery seed, and chicken breasts.

    Oregano and celery seed sprinkled over soup mixture in a large pot sitting on a countertop.

    Step 3: Simmer and cook the orzo.

    Raise the heat slightly to allow soup to simmer, covered, for 20 minutes. Remove the chicken when fully cooked and shred and set aside. (Tip for shredding the chicken: use a hand held mixer for the fasted way to shred chicken ever).


    Add the orzo and cook for 8-10 minutes. Test a few pieces of the orzo to ensure it’s fully cooked before moving on to the next step.

    Shredded chicken in a ceramic mixing bowl with an electric hand mixer beside it.

    Step 4: Add shredded chicken, lemon and dairy.

    To finish the soup, add the shredded chicken back to the soup and add the zest of one lemon and lemon juice, whole milk and cream.

    Overhead view of creamy soup after all ingredients have been added.

    Step 5: Add dill and taste for seasoning.

    Add fresh dill—bring the soup back up the temp and season with more salt and pepper to taste and enjoy! 

    And try serving this soup with my Apple Cheddar Scones on the side!

    Fresh dill sprinkled over final soup mixture, ready to be brought up to temperature and served.

    Expert Tips

    • Before incorporating the dairy and adding the shredded chicken back to the soup, take a moment to test the orzo for doneness.
    • Cook the orzo just until it reaches an al dente texture. Overcooking can lead to a mushy consistency.
    • Choose fresh dill instead of dried -- it makes a huge difference in the flavour!
    • Once you've added the whole milk and light cream, be cautious not to bring the soup to a boil because this can cause the dairy to curdle.
    • Take your time to taste the soup and adjust for seasoning before serving.
    • Homemade chicken broth is highly recommended if you have it on hand!

    Recipe FAQs

    What is orzo?

    Orzo is known as the rice pasta, but it is not actually made from rice, it is a type of pasta that looks like rice and is made from grain, semolina, or white flour.

    Where is orzo located in the grocery store?

    You’ll find orzo in the pasta aisle next to your favorite spaghetti or bowties.

    How should I store this soup?

    Once the soup has fully cooled store it in an air tight container in the fridge for up to 4 days.

    Can I freeze this soup?

    Yes! You can easily freeze this soup. If you decide to freeze, I suggest freezing without the orzo pasta. Freezing can change the texture of the pasta. I recommend adding the orzo when reheating!

    Can I make this soup dairy free?

    I have made this soup successfully with coconut milk! I just swapped the dairy in this soup for two cans of coconut milk (800ml total).

    Lemon orzo chicken soup in a bowl on a staged table top, garnished with fresh dill.

    More Supper Recipes You'll Love

    • Apple Cider Butternut Squash Soup
    • Ground Beef and Mushroom Pot Pie
    • Pineapple Cinnamon Chili Recipe
    • Spinach, Sun-dried Tomato and Pesto Quiche

    If you tried this Lemon Chicken Orzo Soup or any other recipe on my website, please leave a 🌟 star rating and let me know how it went in the 📝 comments below. I love hearing from you!

    Recipe

    Lemon Chicken Orzo Soup

    Christy Faber
    Warm your body and soul with a comforting classic: Lemon Chicken Orzo Soup. This is a go-to recipe that makes it easy to get dinner on the table in just over 30 minutes. You'll love the creamy citrusy broth with tender chicken, perfectly cooked orzo pasta and the fresh taste of dill!
    5 from 7 votes
    Print Recipe Pin Recipe SaveSaved!
    Prep Time 10 minutes mins
    Cook Time 45 minutes mins
    Total Time 55 minutes mins
    Course Main Course
    Cuisine Italian
    Servings 6 people
    Calories 573 kcal

    Ingredients
      

    • 2 tablespoon butter
    • 2 cups carrots diced
    • 1 cup celery diced
    • 2 cups onion diced
    • 4 cloves garlic minced
    • salt & pepper
    • 4 cups chicken stock
    • 2 tsp oregano dried
    • ½ tsp celery seed
    • 2 boneless skinless chicken breasts
    • ½ cup dried orzo pasta
    • zest from one lemon
    • 3 ½ tbsp freshly squeezed lemon juice
    • 2 cups whole milk
    • 1 cup light cream
    • ⅓ cup fresh dill chopped

    Instructions
     

    • In a large pot, cook carrot, celery and onion in the melted butter over medium heat until the vegetables are tender.
      2 tablespoon butter, 2 cups carrots, 1 cup celery, 2 cups onion
    • Add the minced garlic and stir well and cook for an additional minute.
      4 cloves garlic
    • Season with salt and pepper. Add chicken broth, oregano and celery seed, and chicken breasts.
      salt & pepper, 4 cups chicken stock, 2 teaspoon oregano, ½ teaspoon celery seed, 2 boneless skinless chicken breasts
    • Raise the heat slightly to allow soup to simmer, covered, for 20 minutes. Remove the chicken when fully cooked and shred and set aside.
      ½ cup dried orzo pasta
    • Add the orzo and cook for 8-10 minutes. Test a few pieces of the orzo to ensure it’s fully cooked.
    • To finish the soup, add the shredded chicken back to the soup and add the zest of one lemon and lemon juice, whole milk, cream, and fresh dill— bring the soup back up to temp and season with more salt and pepper to taste and enjoy!
      zest from one lemon, 3 ½ tablespoon freshly squeezed lemon juice, ⅓ cup fresh dill, 2 cups whole milk, 1 cup light cream

    Notes

    • Before incorporating the dairy and adding the shredded chicken back to the soup, take a moment to test the orzo for doneness.
    • Cook the orzo just until it reaches an al dente texture. Overcooking can lead to a mushy consistency.
    • Choose fresh dill instead of dried -- it makes a huge difference in the flavour!
    • Once you've added the whole milk and light cream, be cautious not to bring the soup to a boil because this can cause the dairy to curdle.
    • Take your time to taste the soup and adjust for seasoning before serving.
    • Homemade chicken broth is highly recommended if you have it on hand!

    Nutrition

    Serving: 74.25gCalories: 573kcalCarbohydrates: 39.9gProtein: 18.9gFat: 41.7gSaturated Fat: 23.1gCholesterol: 129mgSodium: 520mgPotassium: 1087mgFiber: 17.3gSugar: 7.6gCalcium: 771mgIron: 19mg
    Tried this recipe?Let us know how it was!

    If you make this recipe please leave a comment and give this recipe a rating! I aim to respond to every single comment. I am so grateful when you trust me and try one of my recipe creations in your own kitchen. I love to hear how it went!  Let’s connect on Instagram and tag me in your food pics!

    ‘Til next time,

    Christy

    Nettle Tea Lemonade

    Sep 5, 2022 · 1 Comment

    Nettle Tea Lemonade is bright and refreshing and naturally sweetened with maple syrup. It tastes like lemonade with a hit of green tea flavour --the most delicious way to drink nettle leaf tea.

    I try to drink nettle tea regularly for its incredible health benefits but on its own nettle leaf is really lacking in the flavour department. When it stands alone nettle tea is bland and earthy but when it's used as the base for this delicious lemonade recipe it is absolutely delicious.

    If you want to be drinking nettle tea regularly I recommend brewing a big batch of tea and making a big jug of this lemonade recipe to sip throughout the week ahead.

    I love adding boosts of nutrition wherever I can into my meals, snacks or drinks and this is a great way to boost my summer beverage with minerals like iron and calcium and B vitamins.

    More Refreshing Drink Recipes: 

    • Chia Seed Lemonade
    • Lilac Lemonade
    • Matcha Tea Smoothie

    Frequently Asked Questions

    Does Nettle Tea Have Caffeine?

    Nettle tea is naturally caffeine free.

    Can You Drink Nettle Tea At Night?

    Yes! Nettle tea is not known to keep you up at night and contains no caffeine. It may even cause drowsiness so it may help some people to sleep.

    How Much Iron Is In Nettle Tea?

    According to Azure Standard one quart of nettle leaf infusion contains up to 15 milligrams of iron.

    Health Benefits of Nettle Tea

    • Nettle may reduce pain and inflammation associated with arthritis and other ailments.
    • Nettle tea has been shown to assist the body with blood sugar management.
    • Nettle provides a lot of polyphenols which are powerful compounds that work to prevent disease.
    • Nettle is also rich in antioxidants.
    • Nettle lessens the severity of allergy symptoms.
    • Nettle is rich in the following minerals: iron, calcium, magnesium, silicon, potassium and zinc.

      Health information sourced from healthline. As with any herbs be sure to consult your doctor before consuming them regularly.

    More Healthy Drink Recipes to Enjoy

    Atole de Avena

    Atole de Avena is a warm, comforting drink that is so versatile that it can be enjoyed as a snack, dessert or as a calming bedtime drink. It is surprisingly filling and only lightly sweetened with brown sugar or your choice of sweetener.

    Tahini Hot Chocolate

    Tahini Hot Chocolate is a thick, comforting hot drink with a truly underrated flavour combination: tahini and chocolate.


    Pour over coffee is a manual coffee brewing method. Pour over coffee can bring out the subtle notes in your coffee and start you on a new coffee journey to enjoying cafe-quality coffee at home, every day.
    The Hario V60 is my favourite dripper to use to make pour over coffee.

    Pour Over Coffee

    Pour over coffee can bring out the subtle notes in your coffee and start you on a new coffee journey to enjoying cafe-quality coffee at home, every day.

    Nettle Tea Lemonade

    Nettle Tea Lemonade

    Christy Faber
    Nettle Tea Lemonade is bright and refreshing and naturally sweetened with maple syrup. It tastes like lemonade with a hit of green tea flavour --the most delicious way to drink nettle tea. Drink nettle tea regularly for its incredible health benefits.
    5 from 1 vote
    Print Recipe Pin Recipe SaveSaved!
    Prep Time 10 minutes mins
    Course Drinks
    Cuisine American
    Servings 1 person
    Calories 60 kcal

    Ingredients
      

    • 1 tea bag nettle leaf organic
    • 1 ½ cup water
    • 5 ice cubes
    • pinch of salt
    • 2 tbsp fresh lemon juice
    • 1 tbsp pure maple syrup

    Instructions
     

    • Boil water and brew a cup of nettle tea and allow it to steep for 15-30 minutes and cool down to room temperature.
    • In a separate drinking glass, combine maple syrup, lemon juice, pinch of salt and stir well. Top with ice cubes
    • Add approximately 1 ½ cups of the room temperature nettle tea or whatever will fit in the glass. Stir and enjoy!

    Nutrition

    Calories: 60kcal
    Tried this recipe?Let us know how it was!

    If you make this recipe please leave a comment and give this recipe a rating! I aim to respond to every single comment. I am so grateful when you trust me and try one of my recipe creations in your own kitchen. I love to hear how it went!  Let’s connect on Instagram and tag me in your food pics!

    ‘Til next time,

    Christy

    23 Nourishing Hot Drinks

    Sep 4, 2022 · 1 Comment

    Here you’ll find a collection of comforting and nourishing hot drinks to enjoy in the colder months of the year. When autumn arrives I always crave spiced or warming drinks to enjoy especially in the evenings. I want to skip the overly sweet and sugar-laden drinks at cafes though and so here I have compiled a list of delicious drinks that are also naturally and lightly sweetened. Some of these recipes contain nourishing and supportive ingredients like maca, mushrooms like Lion's Mane and Reishi, dates, and turmeric.

    I hope you will find some inspiration and ideas for drink recipes for your next cozy night in. Browse this post like it’s a small cookbook curated with nourishment in mind. Enjoy!

    23 Nourishing Hot Drinks


    1 Tahini Hot Chocolate

    Healthy, Homemade Tahini Hot Chocolate
    Tahini Hot Chocolate is a thick, comforting hot drink you can make at home with a truly underrated flavour combination: Tahini and chocolate.
    Check out this recipe
    Healthy, Homemade Tahini Hot Chocolate

    2 Atole de Avena (comforting oatmeal drink)

    Atole De Avena (Comforting Gluten-Free Oatmeal Drink)
    Atole De Avena is a warm, comforting drink that is so versatile that it can be enjoyed as a snack, dessert or as a calming bedtime drink!
    Check out this recipe
    Atole De Avena (Comforting Gluten-Free Oatmeal Drink)

    3 Homemade Apple Cider

    Homemade Apple Cider
    Learn how to make homemade apple cider in a few easy steps!
    Check out this recipe
    Homemade Apple Cider

    4 Banana Coffee

    Quick and Delicious Banana Coffee
    This incredible drink is done in 5 minutes with just 3 simple ingredients: milk, coffee and banana.
    Check out this recipe
    Quick and Delicious Banana Coffee

    5 Turmeric Ginger Lemon Honey Tea

    Turmeric Ginger Cinnamon Lemon Honey Tea
    An easy turmeric ginger cinnamon tea with lemon and honey that is delicious, beautiful and good for you. Add milk to make Golden Milk!
    Check out this recipe
    Turmeric Ginger Cinnamon Lemon Honey Tea

    6 Mushroom Hot Chocolate

    Mushroom Hot Chocolate with Reishi and Lion’s Mane
    Mushroom hot chocolate is a treat that is perfect for a chilly day. Enjoy the benefits of medicinal mushrooms in this hot cocoa recipe!
    Check out this recipe
    Mushroom Hot Chocolate with Reishi and Lion’s Mane

    7 Flu Bomb Tea

    Flu Bomb Tea - An Immune Booster Drink
    Flu bomb - a lemon honey ginger garlic immune booster drink that makes a healthful cold & flu natural remedy that helps boost the immune system during the flu season.
    Check out this recipe
    Flu Bomb Tea - An Immune Booster Drink

    8 Protein Coffee

    How To Blend Protein Powder In Coffee
    Wondering if you can put protein powder in coffee? The answer is yes and it’s easier than you think with hot coffee and good protein powder!
    Check out this recipe
    How To Blend Protein Powder In Coffee

    9 Blue Matcha Latte

    Easy Blue Matcha Latte
    Promote relaxation and load up on antioxidants with a healthy blue matcha latte. This drink can be made with dairy or non dairy!
    Easy Blue Matcha Latte
    Easy Blue Matcha Latte

    10 Bone Broth

    All About Bone Broth: How To Make It, Tips and More
    Curious about bone broth? Learn how to make it, use it, helpful tips and much more! Includes recipe with Instant Pot, slow cooker and stovetop instructions.
    Check out this recipe
    All About Bone Broth: How To Make It, Tips and More

    11 Herbal Coffee

    Herbal Coffee
    Herbal Coffee - This Herbal Coffee is a decadent and delicious coffee substitute that has many added health benefits. It’s completely caffeine-free and can be enjoyed any time of day.
    Check out this recipe
    Herbal Coffee

    12 Cardamom Milk

    Cardamom Milk
    This cardamom milk is warming and cosy and perfect for a cold day! Made with just three ingredients, it’s quick and easy to make.
    Check out this recipe
    Cardamom Milk

    13 Chai Tea Latte

    Chai Tea Latte Recipe
    This Chai Tea Latte recipe will have you skipping the coffee stands (and saving some money in the process!) A low sugar, clean eating, dairy free latte!
    Check out this recipe
    Chai Tea Latte Recipe

    14 Honey Citrus Mint Tea

    Honey Citrus Mint Tea (Starbucks copycat recipe)
    Honey Citrus Mint Tea recipe, once a Starbucks secret menu item, can now be made easily at home with just a handful of real food ingredients and 10 minutes.
    Check out this recipe
    Honey Citrus Mint Tea (Starbucks copycat recipe)

    15 Golden Milk

    10 Minute Turmeric Golden Milk
    Wondering what’s all the hype with turmeric golden milk? Here is everything you need to know about golden milk and how you can make it in less than 10 minutes in your home.
    Check out this recipe
    10 Minute Turmeric Golden Milk

    16 Hot Spiced Vanilla Custard Milk

    Hot Spiced Vanilla Custard Milk
    This hot, nutrient-dense drink is how I both start and end my day. Hot spiced milk tastes like custard and is full of nutritious ingredients.
    Check out this recipe
    Hot Spiced Vanilla Custard Milk

    17 Avocado Hot Chocolate

    Avocado Hot Chocolate
    This is how to make avocado hot chocolate with only 5 ingredients. You’ll never want to go back to regular hot cocoa again! (Vegan Recipe)
    Check out this recipe
    Avocado Hot Chocolate

    18 Rose Hot Chocolate

    Rose Hot Chocolate
    My silky smooth rose hot chocolate is a real flavour explosion. Gently sweet, satisfying, and so easy to make! Includes a traditional paste base and expert tips.
    Check out this recipe
    Rose Hot Chocolate

    19 Almond Butter Date Latte

    Sweet and Spicy Almond Butter Date Latte
    This Sweet and Spicy Almond Butter Date Latte is a cozy hug in a mug! The perfect combination of sweet, spicy, and zingy!
    Check out this recipe
    Sweet and Spicy Almond Butter Date Latte

    20 Hemp Protein Mocha Latte

    Creamy Vegan Protein Mocha Latte
    Perk up your morning with this Creamy Vegan Protein Mocha Latte! Unlike most mocha lattes that are packed with sugar and dairy, this one is vegan, refined sugar-free, and packed with 15 grams of protein!
    Check out this recipe
    Creamy Vegan Protein Mocha Latte

    21 Maca Hot Chocolate

    Maca Hot Chocolate
    This superfood Maca Hot Chocolate combines cacao powder, maca powder, cinnamon, cayenne, sea salt, with almond milk and a touch of maple syrup to make for a rich and healthy hot drink. Gluten-free, vegan, refined sugar-free.
    Check out this recipe
    Maca Hot Chocolate

    22 Sea Buckthorn Tea with Cinnamon and Honey

    Sea Buckthorn Tea with Honey and Cinnamon
    Delicious metabolism-boosting sea buckthorn tea recipe made with just 3 ingredients will support your health and make your skin glow.
    Check out this recipe
    Sea Buckthorn Tea with Honey and Cinnamon

    23 Creamy Spiced Eggnog

    Creamy Vegan Spiced Eggnog
    This Creamy Vegan Spiced Eggnog is rich, sweet, and indulgent, just like a holiday beverage should be. Plus, it’s so simple to make and so satisfying.
    Check out this recipe
    Creamy Vegan Spiced Eggnog

    23 Desserts and Treats Sweetened Only with Fruit

    Sep 4, 2022 · 2 Comments

    Tahini stuffed dates coated in chocolate on a large serving dish on a table with ingredients around.

    Here you’ll find a collection of delicious naturally sweetened desserts. The best part is that these treats are sweetened only with fruit or fruit juices. Everything from dates, ripe bananas, applesauce, pineapple and apple juice. They are refined sugar free and still incredibly delicious!

    I prefer to bake with natural sweeteners such as coconut sugar or maple syrup over white refined sugar and I'm always on the hunt for recipes that are naturally sweetened. But I’m an even bigger fan of desserts that are naturally sweetened with fruit such as bananas, dates or applesauce. Because of the fibre in the fruit the natural sugars will not be digested so quickly. This helps to keep your blood sugar levels steady.

    Date bark with pretzel in a parchment paper lined metal loaf pan.

    Also, you can’t beat the flavour that dates or bananas, for example, lend to baked goods.

    I hope you will find some inspiration for your next healthy bake here. Browse this post like it’s a small cookbook curated with healthier baking in mind. Enjoy!

    22 + Desserts and Treats Sweetened with Fruit


    Four pieces of date bark stacked on top of each other on a parchment paper with the rest of the bark around.
    Date Bark (sweetened with dates)
    No-bake Peanut Butter Pretzel Crunch Date Bark is made with four ingredients, combining Medjool dates with rich chocolate & peanut butter.
    Peanut Butter Pretzel Crunch Date Bark
    a bowl of date paste topped with flaky salt on a countertop with a few medjool dates beside the bowl.
    Date Paste (sweetened with dates)
    Date Paste is a delicious all natural sweetener that reminds me of the taste of salted caramel. The smooth texture and deep flavour reminiscent of molasses is an excellent healthy alternative to sugar in baked goods.
    Salted Caramel Date Paste
    a spoonful of cottage cheese ice cream held above of a bowl of cottage cheese ice cream to show the soft serve texture of the ice cream.
    Blended Cottage Cheese Ice Cream (sweetened with overripe bananas)
    Imagine a rich, creamy and delicious ice cream that is also healthy, naturally sweetened and high in protein! This Cottage Cheese “Nice Cream” is the perfect refreshing dessert or healthy evening snack.
    Cottage Cheese Ice Cream
    Healthy Chocolate Peppermint Fudge (sweetened with dates)
    Melt-in-your-mouth Chocolate Peppermint Fudge is made with 5 healthy ingredients like coconut milk and Medjool dates for a natural sweetness.
    Peppermint Fudge
    Apple mousse with a spoonful coming out with cinnamon and chopped walnut on top, all on a staged wooden table.
    Apple Mousse (sweetened with apple butter)
    This easy to make Apple Mousse tastes fresh and delicious with hints of cinnamon and vanilla, and it’s sweetened with only maple syrup!
    Apple Cinnamon Mousse
    Chocolate dipped pineapple sticks in a mason jar of coffee beans.
    Chocolate Covered Pineapple with Coconut (Wedges or Rings)
    Chocolate Covered Pineapple is a 3 ingredient recipe that is sure to be a crowd-pleaser with juicy pineapple, delicious chocolate and coconut!
    Chocolate Covered Pineapple
    Tahini Stuffed Chocolate Covered Dates
    Tahini Stuffed Chocolate Covered Dates are going to be your new favourite treat! When you bite into one you’ll think you’re eating a chocolate bar. Tahini stuffed dates are truly delicious.
    Tahini Stuffed Chocolate Covered Dates (sweetened with dates)
    Cacao nib brownies in a glass container coated with different toppings.
    Healthy Cacao Nibs Brownie Bites (sweetened with bananas and dates)
    Raw Cacao Nibs Brownie Bites recipe are delicious, nutritious, and fudgy healthy snack packed with antioxidants, fiber, and unrefined sugar.

    Recipe: i Food Real
    Healthy Cacao Nibs Brownie Bites
    Pecan cream pill in a parchment paper lined metal pie plate showing smooth texture.
    Pecan Cream Pie
    This Pecan Cream Pie recipe is easy, requiring only 9 ingredients and incredibly delicious, made with coconut cream and naturally sweetened with dates.

    Recipe: Health My Lifestyle
    Vegan Pecan Cream Pie
    Five gingerbread date balls showing nutty texture on a weaved placemat with other date balls around.
    No-Bake Gingerbread Date Balls
    Gingerbread Date Balls are easy no-bake treats you can make in minutes, and can even be frozen ahead (for holiday DIY gifts)! Great for desserts or snacks!

    Recipe: Two Healthy Kitchens
    No-Bake Gingerbread Date Balls
    A banana coconut oatmeal cookie on a cooling rack with others around.
    Banana Coconut Oatmeal Cookies (sweetened with banana)
    5 Ingredient Banana Coconut Oatmeal Cookies are gluten free and contain no added sugar. These cookies are good enough to eat for breakfast!

    Recipe: Hello Frozen Bananas
    Banana Coconut Oatmeal Cookies
    Four pieces of pumpkin pie fudge stacked on each other with a small bite out of the first one showing it's gooey texture.
    Vegan Pumpkin Pie Fudge (sweetened with dates)
    The easiest and most amazing vegan fudge that tastes like pumpkin pie! Just 5 simple ingredients needed. Naturally sweetened, gluten-free.

    Recipe: Running On Real Food
    Pumpkin Pie Fudge
    Six lemon pie bars stacked on each other with lemon peel garnished on top, sitting on old newspaper.
    Lemon Pie Bars (sweetened with dates)
    These fresh and flavorful no-bake lemon pie bars are easy to make in minutes with just 4 everyday ingredients. Perfect for a quick, tasty snack or healthy dessert that tastes just like a lemon Larabar.

    Recipe: Running On Real Food
    Lemon Pie Bars
    Chocolate caramel tarts on a clay serving plate with shredded coconut on top of each.
    No-Bake Chocolate Caramel Tarts (sweetened with dates)
    These no-bake chocolate caramel tarts feature a walnut coconut crust and creamy caramel filling. Easy to make with 6 ingredients, vegan and gluten-free!

    Recipe: Running On Real Food
    No-Bake Chocolate Caramel Tarts
    15 chocolate fudge squares stacked up on a white dinner plate with finishing salt sprinkled on top.
    Best Chocolate Fudge (sweetened with dates)
    This sweet and gooey chocolate fudge recipe is made without condensed milk or sugar and is 100% guilt-free, vegan, easy to make and packed with nutrients!

    Recipe: Happy Kitchen Rocks
    Chocolate Fudge
    Two Almond Butter Lattes with chocolate shavings dropped on top in dipped clay mugs.
    Almond Butter Date Latte (sweetened with dates)
    This Sweet and Spicy Almond Butter Date Latte is a cozy hug in a mug! The perfect combination of sweet, spicy, and zingy!

    Recipe: Rainbow Plant Life
    Almond Butter Date Latte
    12 chocolate chip oatmeal cookies on a cooling rack on a ceramic countertop.
    Oatmeal Cookies (sweetened with bananas)
    Sugar Free Oatmeal Cookies are made with no refined sugar, flour or oil, just simple, good-for-you ingredients. These Healthy Banana Oatmeal Chocolate Chip Cookies are great for making and freezing for later, too!

    Recipe: Delightful E Made
    Oatmeal Cookies
    Six oatmeal cookies with chocolate chips in them on a wooden cutting block.
    Oatmeal Cookies (sweetened with applesauce)
    These Three Ingredient Oatmeal Cookies with applesauce are fast, easy, and delicious. These cookies make a great after-school snack or dessert that the whole family will love.

    Recipe: The Wooden Spoon Effect
    Oatmeal Cookies
    Six pieces of carrot cake with icing and finely chopped walnut garnish on a wooden cutting board with carrots in the background.
    Vegan Carrot Cake (sweetened with dates and apple sauce) *note: maple syrup in icing
    This easy vegan carrot cake is made healthier with rolled oats for an amazing gluten-free option without compromising flavor!

    Recipe: Health My Lifestyle
    Vegan Carrot Cake
    Chocolate Chip Banana Muffins (sweetened with bananas)
    These Chocolate Chip Banana Muffins are a perfect healthy snack, breakfast item or lunchbox treat - and the best Sugar-Free Muffins for kids and toddlers!

    Recipe: A Baking Journey
    Chocolate Chip Banana Muffins
    Four stacked tahini cups with a bite out of the top one showing their thin profile and date filled center.
    Salted Caramel Tahini Cups (sweetened with dates)
    Sweet and creamy, vegan salted date tahini cups that are easy to make with just 3 ingredients.

    Recipe: Running On Real Food
    Salted Caramel Tahini Cups
    Two mini blueberry muffins stacked on tissue paper on a stone cutting board.
    Blueberry Banana Muffins
    These soft baby led weaning blueberry muffins are sugar free, naturally sweetened with banana. They are popular with toddlers too, and are freezer friendly!

    Recipe: Mrs Jones' Kitchen
    Blueberry Banana Muffins
    Four carrot cake mini muffins with icing and carrot garnish on a plate.
    Healthy Carrot Cake (sweetened with pineapple & apple juice. **note: there is honey in the icing)
    Sugar free carrot cake made with apple juice concentrate and pineapple, plus a honey cream cheese frosting.

    Recipe: Dessert for Two
    Healthy Carrot Cake
    Three poached pears in a bowl with spiced juice and nut garnish on top.
    Spiced Poached Pears (sweetened with apple juice)
    These spiced poached pears are fragrant from spices, but made without alcohol and apple juice instead. Vegan and gluten-free dessert recipe.

    Recipe: Through the Fibro Fog
    Spiced Poached Pears
    Two scoops of strawberry banana ice cream with mini chocolate chips and a strawberry garnish.
    Strawberry Banana Nice Cream
    Creamy bananas, strawberries and a touch of almond milk make this the perfect summertime treat! Keep frozen bananas on hand and you can make this in 5 minutes!
    Recipe: Natural Deets
    Strawberry Banana Nice Cream
    Six chocolate iced brownies with flower garnish on parchment paper.
    No Bake Brownies (sweetened with dates. **note: does call for maple syrup in the frosting)
    Fudgy no-bake brownies using only 5 ingredients. Topped with a rich chocolate avocado frosting and are vegan, sugar-free and gluten-free!

    Recipe: Rainbow Nourishments
    No Bake Brownies
    A loaf of banana bread half sliced on parchment paper on a round wooden serving dish on a staged table top with coffee and a book.
    Vegan Banana Bread (sweetened with bananas)
    Easy, healthy and delicious Vegan Banana Bread that you can make every day. Using ripe bananas guarantees the perfect sweetness of this recipe. No need to add sugar or any other sweetener.

    Recipe: Nourish Plate
    Vegan Banana Bread
    Chocolate covered pecan brownie bites with a walnut halve sitting on top of each.
    Pecan Brownie Bites (sweetened with dates)
    A whole food recipe that uses only 5 ingredients, these pecan chocolate brownie bites are no bake, gluten and grain free and easily made vegan.
    Recipe: Panaceas Pantry
    Pecan Chocolate Brownie Bites
    Focus on a centre chocolate covered ball with flower garnish on parchment paper among different types of chocolate covered balls.
    Nut Free Chocolate Bliss Balls (sweetened with dates)
    These nut free chocolate bliss balls are the perfect family friendly snack (and lunch box friendly). Packed full of seeds that support brain health.
    Recipe: Panaceas Pantry
    Nut Free Bliss Balls
    A bowl of nice cream with peanut butter and chocolate chips on top, on a staged countertop with a bowl of chocolate chips, a small bowl of peanut butter and a banana beside.
    Peanut Butter Banana Nice Cream (sweetened with banana)
    This peanut butter cup banana nice cream is a healthy summer treat, and uses only 3 simple ingredients!
    Recipe: The Live In Kitchen
    Banana Nice Cream
    Three mini brownie bites stacked on top of each other around other bites on a white marble countertop.
    Larabar Mini Brownie Bites (sweetened with dates)
    Larabar mini brownie bites are a great way to satisfy your sweet cravings while nourishing your body with wholesome ingredients! Only 6 simple ingredients and ready in 10 minutes.
    Recipe: The Live in Kitchen
    "Larabar" Bites
    Coffee nice cream in a metal baking pan with a scoop on top on a staged table top with coffee beans and chocolate chunks around.
    Coffee Nice Cream (sweetened with bananas and dates)
    If you’ve never tried Nice Cream you really HAVE TO! Especially if it is this mocha coffee banana nice cream, so refreshing and energising!
    Recipe: Healthy Little Cravings
    Coffee Nice Cream
    Two scoops of blueberry ice cream in a sugar cone held in someone's hand.
    Vegan Blueberry Ice Cream (sweetened with bananas)
    You’ll only need 2 ingredients for this vegan Blueberry Ice Cream. No churning and no ice cream machine needed. Say hello to your favorite new summer treat!
    Recipe: Elephantastic Vegan
    2 Ingredient Blueberry Nice Cream
    Applesauce in a small jar with an ornate spoon and lid beside.
    Unsweetened Applesauce
    How to make healthy, unprocessed applesauce at home. This recipe is easy and has no added sugar or sweeteners! It’s the healthiest way to enjoy this fruit staple in your family’s diet!
    Recipe: Our Plant Based World
    Applesauce

    Chia Seed Lemonade

    Aug 26, 2022 · 1 Comment

    Lemonade, Upgraded. Chia Seed Lemonade sometimes referred to as Chia Fresca, is a refreshing, bright drink that packs a hydrating health super punch!  Boba Tea made drinks with texture a fun trend—but this chia seed lemon drink delivers a hydrating gel texture that is more accessible to everyone. The delicious taste and many health benefits will have you making up a batch to share with everyone you know!

    Two glasses of chia seed lemonade with a plate of sliced lemons beside it.
    Pouring chia seed lemonade into a glass.

    I’ve been putting chia seeds in my kid's applesauce for years so that they can reap the health benefits, and they seem to enjoy the texture it gives! I’m so excited to share this simple and impactful drink recipe with you that the whole family will love.  You can mix this lemonade up quickly and it will deliver a tasty, hydrating and nourishing boost. It provides a hit of electrolytes to boot! 

    Let’s break down the magic! 

    List of ingredients required to make chia seed lemonade.

    Health Benefits of this Drink:

    Chia Seeds

    • Chia seeds absorb water quickly and can take up to 10 times their weight in liquid! This creates a fun gel-like texture and allows you to maximize your hydration.
    • With over 4 g of fibre in 1 tablespoon, these little seeds are a great source of fibre (specifically soluble fibre, which helps you feel full, helps with digestion, and helps you absorb the water more slowly) allowing for continuous absorption of the water even hours after you drink it! 
    • Chia seeds can be so helpful for digestion and can help improve the health of your BMs. This matters! A good indicator of health.
    • These tiny seeds also provide a source of antioxidants which help prevent cell damage caused by free radicals in the body. 
    • They also nourish your body with several important minerals, such as calcium, phosphorus, zinc, and copper.
    • Chia seeds are anti-inflammatory. Enjoying chia seeds regularly may also help to reduce inflammatory markers, which often indicate the presence of inflammatory disease.
    • These seeds have a good ratio of omega-3 to omega-6 fatty acids, and a high fibre and protein content. In fact they are what is called a complete protein, containing all nine essential amino acids. 

    Lemon

    • Lemons are high in Vitamin C which is an antioxidant that protects cells from damaging free radicals and is a vitamin known to strengthen the immune system to fight against the germs that cause the common cold and the flu.
    • Although lemon juice is very acidic, small amounts mixed with water can have an alkalizing effect when it's digested. Increasing alkalinity in your body is said to boost your overall health and reduce your risk of chronic disease. 
    • Lemons provide a potassium boost as well!

    Sea Salt

    • Sea Salt is rich in trace minerals —high-quality grey and pink sea salts typically contain 60 trace minerals or more! Look for a quality brand like Maison Orphée Grey Sea Salt
    • Sea salt contains many of the major electrolytes, like sodium, magnesium, calcium and potassium that are essential for good health. Perfect for a summer drink!

    Maple Syrup

    • Pure maple syrup is known to be high in antioxidants. Every teaspoon also offers nutrients like riboflavin, zinc, magnesium, calcium, and potassium.
    Close-up picture of chia seed lemonade.

    Frequently Asked Questions

    What are chia seeds?

    Salvia hispanica, a member of the mint family, is where we get chia seeds from. It was first enjoyed in Central America where the seed was a staple in the ancient Aztec diet.

    Do chia seeds contain protein?

    Yes, Chia seeds are a complete protein. Meaning they have all nine essential amino acids! 1 tablespoon of Chia seeds delivers 2 grams of protein, boasts of 4 grams of fibre and even contains omega 3 fatty acids too! 

    Are chia seeds gluten free?

    Yes, Good news! Chia Seeds are gluten free. 

    What do chia seeds taste like?

    Chia seeds have a mild nutty flavour that makes the seed very versatile. Because of how subtle they taste —chia seeds are able to be put in both sweet and savoury recipes. In raw form, the texture of the chia seed is crunchy and much like a poppy seed but in the case of our lemonade, the chia will have a gel like texture as one chia seed absorbs many times its own weight in liquid, so it's like a tiny sponge. 

    How do I store chia seeds?

    The best way to store flax and chia seeds—as with all nuts and seeds—is in a glass jar in the fridge. While keeping nuts and seeds at room temperature can be totally fine for a period of time, the longer they sit, the higher chance there is that they can go rancid. 

    Stirring chia seed lemonade in a glass.

    Try Other Flavours!

    • A slice of fresh ginger
    • A dash of cinnamon & cayenne pepper
    • A sprinkle of turmeric
    • Cold green tea instead of water
    • Add cucumbers 
    Two glasses of chia seed lemonade.

    More Drinks to Enjoy

    • Lilac Lemonade
    • Homemade Tahini Hot Chocolate
    • Coconut Milk Brazilian Limeade
    • Nettle Tea Lemonade

    Recipe

    Chia Seed Lemonade

    Christy Faber
    Lemonade, Upgraded. Sometimes referred to as Chia Fresca, this refreshing, bright drink packs a hydrating health super punch!
    5 from 1 vote
    Print Recipe Pin Recipe SaveSaved!
    Prep Time 5 minutes mins
    Course Drinks
    Cuisine American
    Servings 1 person
    Calories 208 kcal

    Ingredients
      

    • 2 tbsp freshly squeezed lemon juice
    • 1 tbsp pure maple syrup
    • 1 cup water
    • 5 ice cubes
    • 1 tsp chia seeds
    • pinch of quality sea salt
    • slices of lemon for garnish

    Instructions
     

    • Squeeze 2 tablespoon of fresh lemon juice and add to a regular size drinking glass.
    • Add maple syrup, sea salt and water to the same glass and stir well.
    • Add ice cubes and slices of lemon in the glass for garnish and top with chia seeds and stir well.
    • Allow the chia seeds to absorb water for a few minutes or drink immediately. Enjoy!

    Notes

    Note: adjust the lemonade to your taste. If it's too tart add more water or maple syrup. If it's not sweet enough add a bit more maple syrup etc. Enjoy! 

    Nutrition

    Calories: 208kcal
    Tried this recipe?Let us know how it was!

    If you make this recipe please leave a comment and give this recipe a rating! I aim to respond to every single comment. I am so grateful when you trust me and try one of my recipe creations in your own kitchen. I love to hear how it went!  Let’s connect on Instagram and tag me in your food pics!

    ‘Til next time,

    Christy

    44 Delicious Oat Flour Recipes

    Jul 22, 2022 · Leave a Comment

    Oat flour is my favourite naturally gluten free flour to bake with! I love the texture and flavour of oat flour and I find it's really easy to use. I had so much fun curating this list of delicious oat flour recipes. I hope this round up is a helpful resource and inspirational as you browse and pick a recipe that looks good to you.

    There's a treat for every occasion in this list. Enjoy!

    For more gluten free recipes check out my round-up of buckwheat flour recipes.

    How Do I Make Oat Flour At Home?

    To make oat flour, simply measure out the amount of oats you’d like to use and blitz them up finely in a blender. Continue to pulse the oats until you have a fine flour.  It’s very simple and a great way to save some money. You can make oat flour in small batches at home or you can turn a whole bag of oats into oat flour to have ready for future baking.

    Is Oat Flour Gluten Free?

    Oat flour is naturally gluten free. If you have a gluten allergy, it’s important to read labels and make sure the oat flour was manufactured in a certified gluten free facility that doesn’t also process products containing gluten. Most oat flour is certified gluten free.

    stack of fudgy oat flour brownies on a white board.

    Muffins & Quick Breads


    1 Buckwheat & Oat Flour Muffins

    Chocolate Banana Buckwheat Flour Muffins
    These Buckwheat Flour Chocolate Banana Muffins are nutritious, naturally gluten-free, made with wholesome ingredients (like buckwheat flour) AND they are incredibly chocolatey and delicious.
    Check out this recipe

    2 Apple Sauce Banana Bread

    Vegan Applesauce Banana Bread (sugar-free)
    Moist, fluffy, yet filling, you will love this amazing vegan applesauce banana bread! It is healthy and wholesome and is free from refined sugar.
    Check out this recipe
    Vegan Applesauce Banana Bread (sugar-free)

    3 Zucchini Apple Carrot Muffins

    Moist Zucchini Apple Carrot Muffins
    Packed with fruits and veggies, these zucchini apple carrot muffins are great as a breakfast or snack! They are moist, fluffy, yet incredibly hearty.
    Check out this recipe
    Moist Zucchini Apple Carrot Muffins

    4 Blueberry Oat Breakfast Bread

    Blueberry Oat Breakfast Bread
    A delicious hearty bread made with clean ingredients.
    Check out this recipe
    Blueberry Oat Breakfast Bread

    5 Four Ingredient Banana Bread

    4 Ingredient Banana Bread
    This vegan 4-Ingredient Banana Bread is loaded with ripe bananas, gooey peanut butter and melty chocolate chips. Oatmeal is used instead of regular flour to keep this banana bread gluten free!
    Check out this recipe
    4 Ingredient Banana Bread

    6 Gluten Free Apple Muffins

    Gluten Free Apple Muffins
    These gluten free apple muffins are perfect for the week’s meal prep. Perfect easy grab and go snacks for the road or an easy recess snack for the kids.
    Check out this recipe
    Gluten Free Apple Muffins

    7 Banana Oat Flour Lactation Muffins

    Banana Oat Lactation Muffins
    Moist banana oat lactation muffins made with healthy, whole ingredients without brewers yeast. Great for breakfast or as an anytime snack for new mums.
    Check out this recipe
    Banana Oat Lactation Muffins

    8 Bakery Style Blueberry Muffins

    Bakery-Style Gluten-Free Blueberry Muffins
    Plump, juicy blueberries dot these scrumptious bakery style gluten-free blueberry muffins that also happen to be dairy-free, vegan and egg-free.
    Check out this recipe
    Bakery-Style Gluten-Free Blueberry Muffins

    9 Oat Flour Banana Bread

    Peanut Butter and Chocolate Black Bean Brownies cut in a pan.
    Oat Flour Banana Bread
    This oat flour banana bread is quick, easy, healthy and delicious! It is made in one mixing bowl and has the best flavor.
    Check out this recipe
    Oat Flour Banana Bread

    10 Little Apple Oat Cakes

    Peanut Butter and Chocolate Black Bean Brownies cut in a pan.
    Little Apple Oat Cakes in Jars {gluten-free}
    Perfect for outings or making any meal special, this recipe for Little Apple Oat Cakes in Mason jars is a celebration of the fall season! Gluten-free.
    Check out this recipe
    Little Apple Oat Cakes in Jars {gluten-free}

    11 Pineapple Upside Down Cupcakes

    Peanut Butter and Chocolate Black Bean Brownies cut in a pan.
    Pineapple Upside Down Cupcakes
    Healthier Pineapple Upside Down Cupcakes that taste amazing. Made with hearty, healthy ingredients like oats, coconut & pineapple and NO oil or flour!
    Check out this recipe
    Pineapple Upside Down Cupcakes

    Cookies, Bars and Brownies


    12 Oat Flour Chocolate Chip Cookies

    Peanut Butter and Chocolate Black Bean Brownies cut in a pan.
    Oat Flour Chocolate Chip Cookies
    These flourless Oat Flour Chocolate Chip Cookies are super quick and easy to make with minimal chilling time. They are gluten-free friendly.
    Check out this recipe
    Oat Flour Chocolate Chip Cookies

    13 Oat Flour Monster Cookies

    Peanut Butter and Chocolate Black Bean Brownies cut in a pan.
    Gluten-Free Monster Cookies | Meaningful Eats
    Gluten-Free Monster Cookies! Chewy, rich and decadent. An easy, flourless cookie recipe you can load with your favorite treats.
    Check out this recipe
    Gluten-Free Monster Cookies | Meaningful Eats

    14 Vegan and Gluten Free Chocolate Chip Cookies

    Peanut Butter and Chocolate Black Bean Brownies cut in a pan.
    BEST Vegan Gluten Free Chocolate Chip Cookies (Oat flour!)
    This is truly THE best vegan gluten free chocolate chip cookies recipe you’ve ever had. Chewy, soft, molten, and made with JUST oat flour!
    Check out this recipe
    BEST Vegan Gluten Free Chocolate Chip Cookies (Oat flour!)

    15 Cardamom Oatmeal Cookies

    Peanut Butter and Chocolate Black Bean Brownies cut in a pan.
    Cardamom oatmeal cookies
    These cardamom oatmeal cookies combine oats, cardamon, ginger, pumpkin seeds, almond butter and maple syrup for a fun vegan sweet treat.
    Check out this recipe
    Cardamom oatmeal cookies

    16 Vegan Double Chocolate Chip Cookies

    Peanut Butter and Chocolate Black Bean Brownies cut in a pan.
    Vegan Double Chocolate Chip Cookies
    If deep, dark chocolate flavour is what you crave, then these vegan double chocolate chip cookies are a must-make for you! They're rich, gooey, and super easy to make, PLUS, they also happen to be gluten-free!
    Check out this recipe
    Vegan Double Chocolate Chip Cookies

    17 Oat Flour Chocolate Chip Cookies

    Peanut Butter and Chocolate Black Bean Brownies cut in a pan.
    Oat Flour Chocolate Chip Cookies
    Whip up a batch of these delicious Oat Flour Chocolate Chip Cookies, and you’ll have the tastiest gluten free cookies in just 20 minutes!
    Check out this recipe
    Oat Flour Chocolate Chip Cookies

    Breakfast Recipes - Pancakes & Waffles & More


    18 Chewy Oatmeal Raisin Cookies

    Peanut Butter and Chocolate Black Bean Brownies cut in a pan.
    Chewy Gluten-Free Oatmeal Raisin Cookies (Allergy-Free, Vegan)
    Your favorite “healthy” cookies, now gluten-free, allergy-free, & vegan! These Chewy Gluten-Free Oatmeal Raisin Cookies are an easy dessert recipe to bake!
    Check out this recipe
    Chewy Gluten-Free Oatmeal Raisin Cookies (Allergy-Free, Vegan)

    19 Healthy Oat Breakfast Cookies

    Unique Healthy Oatmeal Raisin Cookies—seriously good!
    Healthy oatmeal raisin cookies that are deliciously chewy with crispy edges and plenty of crunch to each bite—gluten-free, refined sugar-free, with nut-free, vegan-friendly options.
    Healthy Oat Breakfast Cookies
    Unique Healthy Oatmeal Raisin Cookies—seriously good!

    20 Chocolate Peppermint Crinkle Cookies

    Chocolate Peppermint Crinkle Cookies
    Gluten-free Chocolate Peppermint Crinkle Cookies are soft, fudgy and festive. Expect rich chocolate and strong peppermint flavours with every bite. These cookies are the perfect addition to a holiday cookie box.
    Check out this recipe

    21 Date Caramel Slice with Nuts Crumble

    Peanut Butter and Chocolate Black Bean Brownies cut in a pan.
    Vegan Date Caramel Slice with Nuts Crumble
    This irresistible vegan date caramel slice is a super easy way to make a traditional holiday staple. Plus, it makes your kitchen smell like a bakery!
    Check out this recipe
    Vegan Date Caramel Slice with Nuts Crumble

    22 Raw Twix Bars

    Peanut Butter and Chocolate Black Bean Brownies cut in a pan.
    Raw Twix Bars
    An almond & oat “biscuit” base, topped with sweet, luscious salted caramel and covered in raw chocolate. Soooo tasty, healthy and easy to make!
    Check out this recipe
    Raw Twix Bars

    23 Homemade No Bake Protein Bars

    Peanut Butter and Chocolate Black Bean Brownies cut in a pan.
    Homemade No Bake Protein Bars
    Save some cash and make your favorite peanut butter chocolate chip protein bar at home. This Copycat Perfect Bar Recipe is dairy and egg free.
    Check out this recipe
    Homemade No Bake Protein Bars

    24 Vegan Oat Flour Brownies

    Peanut Butter and Chocolate Black Bean Brownies cut in a pan.
    Vegan Oat Flour Brownies
    These easy vegan brownies are nut-free, oil-free, gluten-free and naturally sweetened with dates. Enjoy for a tasty, health-conscious treat! Just 7 simple ingredients needed.
    Check out this recipe
    Vegan Oat Flour Brownies

    25 Oat Flour Peanut Butter Brownies

    Oat Flour Brownies
    Oat Flour Brownies are chocolatey, fudgy and everything you want a brownie to be but with a healthy twist. These gluten-free peanut butter brownies are sweetened with maple syrup and topped with a delicious nut butter swirl.
    Check out this recipe

    26 Peanut Butter Swirl Black Bean Brownies

    Peanut Butter and Chocolate Black Bean Brownies cut in a pan.
    Peanut Butter and Chocolate Black Bean Brownies are fudgy and delicious. This recipe is gluten-free, sweetened with only maple syrup and can be vegan or dairy-free.
    Peanut Butter Swirl Black Bean Brownies
    Peanut Butter and Chocolate Black Bean Brownies are fudgy and delicious. This recipe is gluten-free, sweetened with only maple syrup and can be easily adjusted to be vegan or dairy-free.
    Check out this recipe
    A single brownie with a bite out of it sitting separated from the rest of brownies on parchment paper.

    27 Oat Flour Brownies

    Peanut Butter and Chocolate Black Bean Brownies cut in a pan.
    Easy Gluten-Free Oat Flour Brownies Recipe
    These gluten-free oat flour brownies are naturally sweetened, fully of rich dark chocolate, super fudgy and absolutely delicious!
    Check out this recipe
    Easy Gluten-Free Oat Flour Brownies Recipe

    Cakes & Mug Cakes & Other Desserts


    28 Vegan Vanilla Oat Flour Cake

    Peanut Butter and Chocolate Black Bean Brownies cut in a pan.
    Easy Vanilla Vegan Gluten Free Cake (Oat Flour only!)
    The only vanilla vegan gluten free cake recipe you’ll ever need! This super light and tender oat flour cake is full of sweet vanilla and baked to have the perfect crumb texture so that everyone will love this cake, vegan or not!.
    Check out this recipe
    Easy Vanilla Vegan Gluten Free Cake (Oat Flour only!)

    29 Vegan Chocolate Oat Flour Cake

    Peanut Butter and Chocolate Black Bean Brownies cut in a pan.
    Best Ever Vegan Gluten Free Chocolate Cake (Made with Oat flour!)
    Easy vegan gluten free chocolate cake is the ultimate chocolate cake recipe! Made with oat flour, naturally oil free, eggless, and dairy free!
    Check out this recipe
    Best Ever Vegan Gluten Free Chocolate Cake (Made with Oat flour!)

    30 Ginger Pear Oat Flour Coffee Cake

    Peanut Butter and Chocolate Black Bean Brownies cut in a pan.
    Ginger Pear Gluten Free Coffee Cake made with Oat Flour
    Ginger Pear Gluten Free Coffee Cake made with oat flour and yogurt, a pear filling and oat crumble. A healthier cake with all the flavor!
    Check out this recipe
    Ginger Pear Gluten Free Coffee Cake made with Oat Flour

    31 Funfetti Birthday Cake Truffles

    Peanut Butter and Chocolate Black Bean Brownies cut in a pan.
    Funfetti Birthday Cake Truffles (No Bake)
    These funfetti birthday cake truffles are made with almond butter and oat flour, with a classic vanilla flavor and plenty of sprinkles!
    Check out this recipe
    Funfetti Birthday Cake Truffles (No Bake)

    32 Healthy Chocolate Mug Cake

    Peanut Butter and Chocolate Black Bean Brownies cut in a pan.
    Healthy Chocolate Mug Cake
    Tastes delicious - even without refined sugars, gluten, or eggs!
    Check out this recipe
    Healthy Chocolate Mug Cake

    33 Gluten-free Apple Crisp

    Peanut Butter and Chocolate Black Bean Brownies cut in a pan.
    Gluten-free Apple Crisp
    Gluten-free apple crisp with a big layer of buttery oat and oat flour based topping! With a vegan and dairy-free option. If you’re looking for a gluten-free apple crisp recipe (without any specialty ingredients!) that’s every bit as delicious as the traditional version, this is the recipe for you
    Check out this recipe
    Gluten-free Apple Crisp

    34 Vegan Oat Flour Pie Crust

    Peanut Butter and Chocolate Black Bean Brownies cut in a pan.
    Easy Oat Flour Pie Crust Recipe (Vegan + Gluten Free)
    This is the easiest oat flour pie crust that’s perfect for both vegan and gluten free eaters! Just 5 simple ingredients and just oat flour!
    Check out this recipe
    Easy Oat Flour Pie Crust Recipe (Vegan + Gluten Free)

    Breakfast Recipes - Pancakes & Waffles & More


    35 Vegan Oat Flour Pancakes

    Peanut Butter and Chocolate Black Bean Brownies cut in a pan.
    Vegan Oat Flour Pancakes Without Banana
    These fluffy vegan oat flour pancakes are without flour or banana and make an easy, filling and delicious, gluten-free breakfast option.
    Check out this recipe
    Vegan Oat Flour Pancakes Without Banana

    36 Oat Flour Banana Pancakes

    a close up shot of the texture of oat flour banana pancakes.
    Oat Flour Banana Pancakes
    These Oat Flour Banana Pancakes are a super tasty and healthy way to start the day! Oat Flour Pancakes are made with simple wholesome ingredients. All the ingredients are mixed up in a blender making these pancakes quick and easy to make.
    Check out this recipe
    a close up shot of oat flour banana pancakes with a drizzle of maple cream cheese syrup and topped with bananas and pecans

    37 Oat Flour Buttermilk Pancakes

    Peanut Butter and Chocolate Black Bean Brownies cut in a pan.
    Oat Flour Buttermilk Pancakes (Gluten-Free)
    These light and fluffy buttermilk pancakes have a secret ingredient... oat flour! Gluten-free oat flour pancakes are healthy and delicious!
    Check out this recipe
    Oat Flour Buttermilk Pancakes (Gluten-Free)

    38 Zucchini Oat Flour Pancakes

    Peanut Butter and Chocolate Black Bean Brownies cut in a pan.
    Simple Zucchini Oat Flour Pancakes
    Sneak some extra veggies into these Zucchini Oat Flour Pancakes and enjoy pancakes with veggies for breakfast. Veggies for the win!
    Check out this recipe
    Simple Zucchini Oat Flour Pancakes

    39 Healthy Blueberry Pancakes

    Peanut Butter and Chocolate Black Bean Brownies cut in a pan.
    Healthy Blueberry Pancakes
    Looking for a healthy blueberry pancakes recipe? These blueberry oatmeal pancakes are delicious! Refined sugar free, grain free, gluten free!
    Check out this recipe
    Healthy Blueberry Pancakes

    40 Healthy Pumpkin Pancakes

    Peanut Butter and Chocolate Black Bean Brownies cut in a pan.
    Healthy Pumpkin Pancakes
    Looking for a healthy pumpkin pancakes recipe that actually tastes good? Look no further, these fluffy, delicious pumpkin spice pancakes have no refined sugar, flour or oil. Made with oats, real pumpkin and ingredients you can feel good about!
    Check out this recipe
    Healthy Pumpkin Pancakes

    41 Healthy Banana Waffles

    Peanut Butter and Chocolate Black Bean Brownies cut in a pan.
    Healthy Banana Waffles
    Banana Waffles are light, fluffy and packed with whole grain oat flour and the flavors of banana and warm cinnamon. They’re dairy and gluten-free for a healthy meal prep breakfast!
    Check out this recipe
    Healthy Banana Waffles

    42 Oat Flour Waffles

    Peanut Butter and Chocolate Black Bean Brownies cut in a pan.
    Oat Flour Waffles {Light & Crispy} - Meaningful Eats
    Light and crispy oat flour waffles! Made with whole-grain oat flour and other pantry staples. Delicious with maple syrup and butter!
    Check out this recipe
    Oat Flour Waffles {Light & Crispy} - Meaningful Eats

    43 Chocolate Donuts

    Peanut Butter and Chocolate Black Bean Brownies cut in a pan.
    Vegan Chocolate Donuts with Fresh Strawberry Glaze
    Easy vegan chocolate donuts dipped in a sweet pink glaze made with fresh strawberries. They’re rich in flavor, gluten free, oil free, and totally delicious!
    Check out this recipe
    Vegan Chocolate Donuts with Fresh Strawberry Glaze

    44 Atole de Avena
    (Comforting Oatmeal Drink)

    cropped-atole-de-avena-011.jpg
    Atole De Avena
    Atole De Avena, or oatmeal drink, is a variation of a traditional Mexican drink. This is a warm, comforting drink so versatile it can be enjoyed as a snack, dessert or as a calming bedtime drink. Atole De Avena is surprisingly filling and only lightly sweetened with coconut sugar or your choice of sweetener.
    Check out this recipe


    71 Refined Sugar Free Desserts (Naturally Sweetened)

    Jul 22, 2022 · Leave a Comment

    Here you'll find a collection of naturally sweetened desserts. These treats are sweetened with natural sweeteners such as honey, coconut sugar, maple syrup, dates, apricots, persimmon, banana and applesauce. They are refined sugar free and still incredibly delicious!

    Naturally Sweetened Desserts

    • Cookies
    • Ice Cream & Popsicles & Sorbet
    • Brownies & Bars
    • Cakes & Tarts & Pies
    • Crisps & Crumbles
    • Muffins & Quick Breads
    • Pudding
    • Energy Bites & Balls
    • Naturally Sweetened Treats

    I prefer to bake with natural sweeteners such as coconut sugar or maple syrup for a few reasons. The first reason is that natural sweeteners contain minerals and nutrients which help with digestion of the sugar whereas white refined sugar is totally devoid of nutrients. Therefore white sugar strips the body of nutrients just for its own assimilation.

    The second reason is you can't beat the flavour that that natural sweeteners such as honey lend to baked goods. I'm an even bigger fan of desserts that are naturally sweetened with fruit such as bananas, dates or applesauce. Because of the fibre in the fruit the natural sugars will not be digested so quickly. This helps to keep your blood sugar levels steady.

    I hope you will find some inspiration for your next healthy bake here. Browse this post like it's a small cookbook curated with healthier baking in mind. Enjoy!

    stack of fudgy oat flour brownies on a white board.

    Cookies


    1 Coconut Flour Oatmeal Cookies

    Coconut Flour Oatmeal Cookies (sweetened with maple syrup)
    These soft and chewy Coconut Flour Oatmeal Cookies have a great melt-in-your-mouth texture from the coconut flour. They are gluten free and naturally sweetened with only maple syrup and chocolate chips!
    Check out this recipe

    2 Healthy Chocolate Haystack Cookies

    Healthy Chocolate Haystacks Recipe
    Making Healthy Chocolate Haystack Cookies step 3: Line a cookie sheet with wax paper and add 3 tablespoon size dollops and shape into a mound. Place the cookie sheet in the fridge for several hours or into the freezer for 30 minutes. It is best to store these cookies in an airtight container in the fridge.
    Chocolate Haystack Cookies (sweetened with maple syrup)
    Indulge in the nostalgia of your childhood with these Healthy Chocolate Haystack Cookies - the new and improved version of the classic no-bake treat. These cookies are not only satisfying and chocolatey, but they're also quick and easy to make when you need a snack in a hurry.
    Check out this recipe

    3 Vegan Sprouted Oatmeal Chocolate Chip Cookies

    Vegan Sprouted Oatmeal Chocolate Chip Cookies (sweetened with coconut sugar)
    The gentle sweetness and perfect chewiness of these healthy sprouted oatmeal chocolate chip cookies will blow your mind!
    Check out this recipe
    Vegan Sprouted Oatmeal Chocolate Chip Cookies (sweetened with coconut sugar)

    4 Almond Flour Shortbread Cookies

    Vegan Almond Flour Shortbread Cookies (sweetened with maple syrup)
    Easy vegan almond flour shortbread cookies with only 3 ingredients! These vegan cookies are healthy, crispy, oil free yet rich and buttery.
    Check out this recipe
    Vegan Almond Flour Shortbread Cookies (sweetened with maple syrup)

    5 Healthy Chocolate Oatmeal Cookies

    Healthy Chocolate Oatmeal Cookies (sweetened with banana)
    Looking for healthy chocolate oatmeal cookies? These 6 ingredient chocolate oatmeal cookies are refined sugar free and just 6 ingredients!
    Check out this recipe
    Healthy Chocolate Oatmeal Cookies (sweetened with banana)

    6 Almond Flour Cookies with Chocolate Chips

    Almond Flour Cookies with Chocolate Chips (sweetened with maple syrup)
    Recipe for the best Almond Flour Shortbread Cookies. This gluten-free, paleo and vegan cookie recipe is the easiest one you could ever make. All you need is 6 ingredients, one bowl and 30 minutes (from start to finish.)
    Check out this recipe
    Almond Flour Cookies with Chocolate Chips (sweetened with maple syrup)

    7 Peanut Butter Cacao Nib Coconut Flour Cookies

    Peanut Butter Cacao Nib Coconut Flour Cookies (sweetened with coconut sugar & maple syrup)
    Are you looking for an alternative to chocolate chip cookies? These peanut butter coconut flour cookies are easy, healthy, delicious, require just one bowl and make a perfect recipe for trying out cacao (cocoa) nibs!
    Check out this recipe
    Peanut Butter Cacao Nib Coconut Flour Cookies (sweetened with coconut sugar & maple syrup)

    8 Coconut Sugar Cookies

    Coconut Sugar Cookies (sweetened with coconut sugar)
    Classic sugar cookie recipe made with coconut sugar. Buttery and delicious. 7 Ingredients and 30 minutes only.
    Check out this recipe
    Coconut Sugar Cookies (sweetened with coconut sugar)

    Ice Cream & Popsicles & Sorbet


    9 Strawberry Mint Ice Cream

    Strawberry Mint Ice Cream (sweetened with honey)
    Strawberry Mint Ice Cream is a treat that can be made with fresh or frozen strawberries. You will love the combination of mint & strawberry!
    Check out this recipe
    Strawberry Mint Ice Cream (sweetened with honey)

    10 Chai Tea Ice Cream

    Chai Tea Ice Cream (sweetened with honey)
    This Chai Tea Ice Cream is made with my absolute favourite tea: Bengal Spice Tea by Celestial Seasonings and is sweetened with honey.
    Check out this recipe
    Chai Tea Ice Cream (sweetened with honey)

    11 Peanut Butter Ice Cream

    Peanut Banana Ice cream (sweetened with banana)
    Ice cream is the most in our lives, but vegan options are not always easy to find. This 10 mins homemade Peanut Nicecream is delicious and satisfies ice cream craving healthfully!
    Check out this recipe
    Peanut Banana Ice cream (sweetened with banana)

    12 Coconut Popsicles

    Coconut Popsicles (sweetened with coconut sugar)
    These coconut popsicles are fresh, creamy and delicious. With just four ingredients and no refined sugar they are a vegan treat the whole family will love.
    Check out this recipe
    Coconut Popsicles (sweetened with coconut sugar)

    13 Vegan Chocolate Gelato

    Vegan Gelato (sweetened with coconut sugar and dates)
    This Vegan Gelato is insanely rich, creamy and easy to make! No-churn and it’s also paleo. It’s made with coconut cream or milk, but tastes just like traditional gelato with no coconut taste!
    Check out this recipe
    Vegan Gelato (sweetened with coconut sugar and dates)

    14 Watermelon Popsicles

    Juicy Watermelon Popsicles (sweetened with honey)
    These homemade watermelon popsicles are fresh and juicy, perfect for summer. You only have three ingredients and kids love these sweet treats
    Check out this recipe
    Juicy Watermelon Popsicles (sweetened with honey)

    15 Strawberry Orange Sorbet

    3 Ingredient Strawberry Orange Sorbet (sweetened with honey)
    Dessert doesn’t get much easier than this! Strawberry orange sorbet has only three ingredients and no processed sugar. It is a great refreshing treat without any guilt! Sorbet is a cold and flavorful
    Check out this recipe
    3 Ingredient Strawberry Orange Sorbet (sweetened with honey)

    16 Dairy Free Banana "Ice Cream"

    Dairy Free Banana “Ice Cream” (sweetened with maple syrup)
    This Dairy Free Banana Ice Cream is a delicious treat made with bananas, almond milk, maple syrup and almonds. Creamy, sweet and cold!
    Check out this recipe
    Dairy Free Banana “Ice Cream” (sweetened with maple syrup)

    17 Homemade Popsicles (5 delicious flavour options)

    Homemade Popsicles -5 different flavours
    With these easy homemade popsicle recipes, let’s take your tastebuds to popsicle heaven. These fruit popsicles are nutritiously packed and perfect for hot summer days.
    Check out this recipe
    Homemade Popsicles -5 different flavours

    18 Vegan Chocolate Milkshake

    Vegan Chocolate Milkshake (sweetened with dates)
    This vegan chocolate milkshake is a decadent frosty treat that’s made with healthy ingredients, naturally sweetened, and sneaks in a veggie!
    Check out this recipe
    Vegan Chocolate Milkshake (sweetened with dates)

    19 The Best Vegan Fudgesicles

    The Best Vegan Fudgesicles (sweetend with maple syrup)
    These ultra creamy Vegan Fudgesicles are 4 ingredient wonders created with a coconut milk and cocoa powder base. Gluten-free and refined sugar-free.
    Check out this recipe
    The Best Vegan Fudgesicles  (sweetend with maple syrup)

    Brownies & Bars


    20 Peanut Butter Oat Flour Brownies

    Oat Flour Brownies (sweetened with maple syrup)
    Oat Flour Brownies are chocolatey, fudgy & everything you want in a brownie but with a healthy twist.
    Check out this recipe
    Oat Flour Brownies  (sweetened with maple syrup)

    21 Black Bean Brownies

    Peanut Butter Swirl Black Bean Brownies (sweetened with maple syrup)
    Peanut Butter Swirl Black Bean Brownies are fudgy & delicious. Gluten-free, sweetened with only maple syrup (can be vegan, dairy-free)
    Check out this recipe
    Peanut Butter Swirl Black Bean Brownies (sweetened with maple syrup)

    22 Pumpkin Pie Pecan Bars

    Pumpkin Pie Pecan Bars (sweetened with maple syrup and coconut sugar)
    Pumpkin Pie Pecan Bars taste exactly like pumpkin pie but with a satisfying crunch of crushed pecans and delicious streusel topping.
    Check out this recipe
    Pumpkin Pie Pecan Bars (sweetened with maple syrup and coconut sugar)

    23 Chocolate Almond Butter Bars

    No Bake Chocolate Almond Butter Bars (sweetened with maple syrup)
    These no-bake chocolate almond butter bars are vegan and gluten-free. They are absolutely delicious and a great snack or dessert, with only 5 ingredients!
    Check out this recipe
    No Bake Chocolate Almond Butter Bars (sweetened with maple syrup)

    24 Peanut Butter and Jelly Dessert Bars

    Dessert bars stacked on a plate with a strawberry.
    Peanut Butter and Jelly Dessert Bars (sweetened with date paste)
    Peanut butter and jelly dessert bars take you back to childhood! Chickpeas, no sugar, whole grain flour. Delight inner child AND outer adult!
    Peanut Butter and Jelly Dessert Bars
    Peanut Butter and Jelly Dessert Bars (sweetened with date paste)

    25 Paleo Pecan Pie Bars

    Paleo Pecan Pie Bars (sweetened with maple syrup)
    Decadent maple syrup and sweet dates combine to make a smooth and creamy filling for these Paleo Pecan Pie Bars. Everyone loves this recipe!
    Check out this recipe
    Paleo Pecan Pie Bars (sweetened with maple syrup)

    26 Healthy Rice Crispy Treats

    Healthy Rice Crispy Treats (sweetened with dates)
    These delicious and healthy rice crispy treats are made with dates and peanut butter, and contain no marshmallows or refined sugars!
    Check out this recipe
    Healthy Rice Crispy Treats (sweetened with dates)

    27 Flourless Brownies

    Flourless Brownies (sweetened with dates and apricots)
    Flourless chocolate-rich brownies that are grain-free, gluten-free, refined sugar-free, nut-free, yet melts in your mouth like chocolate truffles—rich, fudgy, and delicious.
    Check out this recipe
    Flourless Brownies (sweetened with dates and apricots)

    Cakes & Tarts & Pies


    28 Vegan No Bake Mango Cheesecake

    Vegan No Bake Mango Cheesecake (sweetened with maple syrup and dates)
    This No Bake Mango Coconut Cheesecake is made without gelatine and eggs. It’s also vegan and the perfect sweet treat during mango season!
    Check out this recipe
    Vegan No Bake Mango Cheesecake (sweetened with maple syrup and dates)

    29 Berry Coconut Tarts

    Berry Coconut Tarts with Yogurt (sweetened with honey)
    These mini no bake coconut tarts are made with a honey graham cracker crust and Greek yogurt filling, topped with berries & toasted coconut.
    Check out this recipe
    Berry Coconut Tarts with Yogurt (sweetened with honey)

    30 Honey Mug Cake

    Honey Mug Cake (sweetened with honey)
    Just six simple ingredients for a sweet and delicious Honey Mug Cake. You can make this fantastic dessert in less than 5 minutes!
    Check out this recipe
    Honey Mug Cake (sweetened with honey)

    31 Vegan Pomegranate Chocolate Tart

    Vegan Pomegranate Chocolate Tart (sweetened with dates and maple syrup)
    An easy, no bake, 10 ingredient vegan pomegranate chocolate tart that would be delicious for a date night, Valentine’s Day, or holiday.
    Check out this recipe
    Vegan Pomegranate Chocolate Tart (sweetened with dates and maple syrup)

    32 Almond Flour Cake

    Easy Almond Flour Cake (sweetened with maple syrup or honey)
    Almond Flour Cake is moist and delicious with the flavors of lemon zest and vanilla. It’s gluten-free, dairy-free and paleo and it comes together in one bowl!
    Check out this recipe
    Easy Almond Flour Cake (sweetened with maple syrup or honey)

    33 Healthy Banana Cake

    Healthy Banana Cake (sweetened with coconut sugar and maple syrup)
    This Healthy Banana Cake with Yogurt Frosting is perfectly fluffy! It’s healthier with almond flour & naturally sweetened with coconut sugar.
    Check out this recipe
    Healthy Banana Cake (sweetened with coconut sugar and maple syrup)

    34 Apple Pie

    Mom’s Easy Vegan Apple Pie (sweetened with maple syrup)
    Mom’s Easy Vegan Apple Pie 🍏 A simply delicious homemade apple pie made with fresh apples, cinnamon, pure maple syrup, vegan butter and a splash of lemon juice baked in a light & flaky pastry crust.
    Check out this recipe
    Mom’s Easy Vegan Apple Pie (sweetened with maple syrup)

    35 Vegan Key Lime Pie

    Vegan Key Lime Pie (sweetened with maple syrup)
    This vegan key lime pie is an easy and healthier version of the well-known original. Made with whole food ingredients and minimal sweeteners.
    Check out this recipe
    Vegan Key Lime Pie (sweetened with maple syrup)

    36 Creamy Fig and Honey Mascarpone Tart

    Creamy Fig and Honey Mascarpone Tart (filling sweetened with honey)
    Creamy Fig and Honey Mascarpone Tart is a beautiful summer fruit tart with creamy lemon mascarpone filling and sweet sliced figs glazed in honey.
    Check out this recipe
    Creamy Fig and Honey Mascarpone Tart (filling sweetened with honey)

    37 Vegan Salted Chocolate Cream Tart

    Vegan Salted Chocolate Cream Tart (sweetened with dates)
    This no-bake vegan Salted Chocolate Cream Tart is one of the best desserts ever! It’s rich and creamy but wholesome and gluten-free.
    Check out this recipe
    Vegan Salted Chocolate Cream Tart (sweetened with dates)

    38 Flourless Vegan Chocolate Cake

    Flourless Vegan Chocolate Cake (sweetened with coconut sugar)
    This flourless vegan chocolate cake is perfectly fudgy, fluffy and indulgent. It’s easy, gluten free, oil free and can be refined sugar free!
    Check out this recipe
    Flourless Vegan Chocolate Cake (sweetened with coconut sugar)

    Crisps & Crumbles


    39 Gluten Free Peach Crisp with Blueberries

    Gluten-free Peach Crisp with Blueberries (sweetened with coconut sugar)
    This gluten-free peach crisp recipe with blueberries. It’s easy to make, naturally sweetened, and is the perfect dessert for summer!
    Check out this recipe
    Gluten-free Peach Crisp with Blueberries (sweetened with coconut sugar)

    40 Strawberry Rhubarb Baked Oatmeal

    Healthy Strawberry Rhubarb Baked Oatmeal (sweetened with honey and coconut sugar)
    If you love strawberry rhubarb then you are going to love this strawberry rhubarb baked oatmeal recipe. It’s a perfect summer breakfast meal prep idea.
    Check out this recipe
    Healthy Strawberry Rhubarb Baked Oatmeal (sweetened with honey and coconut sugar)

    41 Healthy Apple Crumble

    Healthy Apple Crumble (sweetened with maple syrup and coconut sugar)
    Made with wholesome ingredients, this healthy apple crumble is addictively delicious and easy to make! Naturally gluten-free & vegan!
    Check out this recipe
    Healthy Apple Crumble (sweetened with maple syrup and coconut sugar)

    Muffins & Quick Breads


    42 Double Chocolate Banana Bread

    Double Chocolate Banana Bread stacked on it's side on a cutting board.
    Banana bread for the chocolate lover! Satisfy those chocolate cravings and enjoy all the comfort that banana bread is famous for. This sweet quick bread is also really easy to mix up and can be made with brewed coffee, topped with banana cut in half or a dusting of coconut or brown sugar. For me chocolate chips are an absolute must in all banana breads! My Double Chocolate Banana Bread has a generous amount of chocolate chips and cocoa powder in the batter. It is sweetened with mostly maple syrup and bananas. You can choose whether you would like to use a healthier flour like spelt or just stick to all-purpose flour. Enjoy!
    Double Chocolate Banana Bread (sweetened with coconut sugar)
    Easy banana bread for the chocolate lover! Satisfy chocolate cravings and enjoy banana bread’s famous comfort!
    Check out this recipe
    cropped-Double-Chocolate-Banana-Bread-017.jpg

    43 Green Smoothie Chocolate Muffins

    A group of green smoothie muffins
    These healthy muffins have 2 cups of spinach in them!
    Green Smoothie Chocolate Muffins (sweetened with coconut sugar)
    You would never know these Green Smoothie Chocolate muffins have 2 cups of spinach in them! This recipe is the perfect way to sneak nutrient-dense greens into your life or into your children’s snacks. The chocolate flavour totally disguises the spinach.
    Check out this recipe
    A group of green smoothie muffins

    44 Healthy Peanut Butter Banana Bread

    Double Chocolate Banana Bread stacked on it's side on a cutting board.
    Healthy Peanut Butter Banana Bread (sweetened with maple syrup and bananas)
    This easy, delicious, and healthy peanut butter banana bread recipe has no refined sugar added! Simple ingredients pack big flavour with this baked treat.
    Check out this recipe
    Healthy Peanut Butter Banana Bread (sweetened with maple syrup and bananas)

    45 Healthy Almond Cupcakes

    Healthy Almond Cupcakes (sweetened with maple syrup)
    These Almond Cupcakes are gluten-free & paleo-friendly. They’re soft & fluffy, flavored with almond extract, & topped with Yogurt Frosting.
    Check out this recipe
    Healthy Almond Cupcakes (sweetened with maple syrup)

    46 Healthy Chocolate Chip Banana Bread

    Double Chocolate Banana Bread stacked on it's side on a cutting board.
    Healthy Chocolate Chip Banana Bread (sweetened with maple syrup and bananas)
    One bowl healthy chocolate chip banana bread or muffins. Gluten free, dairy free, refined sugar free, Paleo. Chocolate snack bread you feel good about eating or giving to your kids.
    Check out this recipe
    Healthy Chocolate Chip Banana Bread (sweetened with maple syrup and bananas)

    47 Healthy Blueberry Muffins

    Double Chocolate Banana Bread stacked on it's side on a cutting board.
    Healthy Gluten Free Blueberry Muffins (sweetened with maple syrup and applesauce)
    Healthy Gluten-Free Blueberry muffins are a great way to teach children that wholesome ingredients can still tase nice.
    Check out this recipe
    Healthy Gluten Free Blueberry Muffins (sweetened with maple syrup and applesauce)

    48 Whole Wheat Cinnamon Roll Donuts

    Double Chocolate Banana Bread stacked on it's side on a cutting board.
    Whole Wheat Cinnamon Roll Donuts (sweetened with coconut sugar)
    Cinnamon roll donuts are whole wheat, healthy, and covered with a cinnamon crumble and vanilla glaze. They’re perfect for a holiday brunch!
    Check out this recipe
    Whole Wheat Cinnamon Roll Donuts (sweetened with coconut sugar)

    49 Gluten Free Chocolate Zucchini Bread

    Double Chocolate Banana Bread stacked on it's side on a cutting board.
    Gluten Free Chocolate Zucchini Bread (sweetened with maple syrup)
    This gluten free chocolate zucchini bread recipe is super easy to make. This healthy recipe is also vegan and paleo compliant.
    Check out this recipe
    Gluten Free Chocolate Zucchini Bread (sweetened with maple syrup)

    Pudding


    50 Persimmon Chocolate Pudding

    Double Chocolate Banana Bread stacked on it's side on a cutting board.
    Healthy Persimmon Chocolate Pudding (sweetened with persimmon)
    Persimmon chocolate vegan pudding is a natural healthy vegan dessert using only 3 ingredients. No baking is required.
    Check out this recipe
    Healthy Persimmon Chocolate Pudding (sweetened with persimmon)

    51 Cinnamon Rice Pudding

    Double Chocolate Banana Bread stacked on it's side on a cutting board.
    The Best Vegan Rice Pudding (sweetened with maple syrup)
    The most delicious, easy, healthy vegan rice pudding made with maple syrup, non-dairy milk, cinnamon, vanilla and nutmeg!
    Check out this recipe
    The Best Vegan Rice Pudding (sweetened with maple syrup)

    52 Chocolate Chia Pudding

    Double Chocolate Banana Bread stacked on it's side on a cutting board.
    Chocolate Chia Pudding (sweetened with maple syrup)
    Chocolate Chia Pudding is creamy, chocolatey and indulgent with no refined sugar or dairy in sight! It’s a healthy vegan dessert, breakfast or snack that’s great for meal prep!
    Check out this recipe
    Chocolate Chia Pudding (sweetened with maple syrup)

    53 Vegan Chocolate Mousse

    Double Chocolate Banana Bread stacked on it's side on a cutting board.
    Vegan Chocolate Mousse (sweetened with maple syrup)
    Vegan Chocolate Mousse is incredibly delicious and takes minutes to prepare! Made with just five ingredients, this is a dessert for a chocolate lover.
    Check out this recipe
    Vegan Chocolate Mousse (sweetened with maple syrup)

    54 Turkish Fig Pudding

    Double Chocolate Banana Bread stacked on it's side on a cutting board.
    Turkish Fig Pudding (Incir Uyutmasi) (sweetened with figs)
    Turkish fig pudding (incir uyutmasi) is a healthy dessert made with only 2 ingredients without added sugar.
    Check out this recipe
    Turkish Fig Pudding (Incir Uyutmasi) (sweetened with figs)

    Energy Bites and Balls


    55 Bliss Balls with Peanut Butter and Dates

    Double Chocolate Banana Bread stacked on it's side on a cutting board.
    Easy Vegan Bliss Balls with Dates & Peanut Butter (sweetened with dates)
    These vegan bliss balls are here with 1 purpose only. To become your new go-to plant based snack. The healthy energy bites are easy, delicious and quick!
    Check out this recipe
    Easy Vegan Bliss Balls with Dates & Peanut Butter (sweetened with dates)

    56 Peanut Butter Oatmeal Energy Balls

    several peanut butter oatmeal energy balls arranged on parchment paper with chocolate chips
    These no-bake Peanut Butter Oatmeal Energy Balls are the perfect yummy treat. Nourishing and energizing, they provide fuel for a busy person.
    Peanut Butter Oatmeal Energy Balls (sweetened with maple syrup)
    These no-bake Peanut Butter Oatmeal Energy Balls are the perfect yummy treat. Nourishing and energizing, they provide fuel for a busy person.
    Check out this recipe
    several peanut butter oatmeal energy balls arranged on parchment paper with chocolate chips

    57 No Bake Carrot Cake Energy Balls

    Healthy No-Bake Carrot Cake Energy Balls (sweetened with maple syrup)
    No-bake Carrot Cake Energy Balls are very quick and easy to make. They’re an excellent way to eat more carrots apart from eating a salad!
    Check out this recipe
    Healthy No-Bake Carrot Cake Energy Balls (sweetened with maple syrup)

    58 Chocolate Hazelnut Balls

    Double Chocolate Banana Bread stacked on it's side on a cutting board.
    Chocolate Hazelnut Balls (sweetened with maple syrup)
    Chocolate hazelnut balls are easy, no-bake, and made in one bowl! These bliss balls are the perfect sweet treat for a snack or holiday party!
    Check out this recipe
    Chocolate Hazelnut Balls (sweetened with maple syrup)

    59 Vegan Chocolate Peanut Butter Energy Balls

    Double Chocolate Banana Bread stacked on it's side on a cutting board.
    Vegan Chocolate Peanut Butter Energy Balls (sweetened with dates)
    Naturally sweet, loaded with energy, these vegan chocolate peanut butter energy balls are delicious, healthy and perfect for a quick after-school snack.
    Check out this recipe
    Vegan Chocolate Peanut Butter Energy Balls (sweetened with dates)

    60 Coconut Date Bliss Balls

    Double Chocolate Banana Bread stacked on it's side on a cutting board.
    Coconut Date Bliss Balls Recipe (sweetened with dates)
    These coconut date bliss balls are nutritious and delicious. This recipe is no-bake and uses 5 simple ingredients. Perfect make-ahead treat!
    Check out this recipe
    Coconut Date Bliss Balls Recipe (sweetened with dates)

    More Naturally Sweetened Treats


    61 Tahini Stuffed Chocolate Covered Dates

    Tahini Stuffed Chocolate Covered Dates (sweetened with dates)
    Tahini Stuffed Chocolate Covered Dates are going to be your new favourite treat! When you bite into one you’ll think you’re eating a chocolate bar. Tahini stuffed dates are truly delicious. The nutty and slightly savoury flavour of tahini really balances the sweetness and caramel flavour of the Medj…
    Check out this recipe
    Tahini Stuffed Chocolate Covered Dates (sweetened with dates)

    62 Chocolate Fudge

    Double Chocolate Banana Bread stacked on it's side on a cutting board.
    Best Chocolate Fudge Recipe (sweetened with dates)
    This sweet and gooey chocolate fudge recipe is made without condensed milk or sugar and is 100% guilt-free, vegan, easy to make and packed with nutrients!
    Check out this recipe
    Best Chocolate Fudge Recipe (sweetened with dates)

    63 Honey Marshmallows

    Double Chocolate Banana Bread stacked on it's side on a cutting board.
    Jumbo Healthy Honey Marshmallows Recipe (sweetened with honey)
    This recipe for homemade honey marshmallows is as healthy as marshmallows can get! They are made without corn syrup or any refined sugar.
    Check out this recipe
    Jumbo Healthy Honey Marshmallows Recipe (sweetened with honey)

    64 Cinnamon and Ginger Granola

    Double Chocolate Banana Bread stacked on it's side on a cutting board.
    Egg White Granola Recipe (sugar free or optionally sweetened with maple syrup)
    This High Protein Granola recipe is completely sugar-free and ginger and cinnamon spiced. It’s easy to make! Only 20-minutes of prep!
    Check out this recipe
    Egg White Granola Recipe (sugar free or optionally sweetened with maple syrup)

    65 Chocolate Cream Cheese Crepe Filling

    Mixing bowl full of ingredients for chocolate cream cheese crepe filling.
    Using the same mixing bowl (and no need to clean it out), cream the softened cream cheese together with the maple syrup and salt. Mix in the melted, cooled chocolate. Gently fold the whipped cream into the cream cheese mixture until fully incorporated. Enjoy!
    Chocolate Cream Cheese Crepe Filling (sweetened with maple syrup)
    This Chocolate Cream Cheese Crepe Filling is a great way to make crepes special. Tastes like a light chocolate mousse with a creamy texture.
    Check out this recipe
    Mixing bowl full of ingredients for chocolate cream cheese crepe filling.

    66 Date Paste

    Double Chocolate Banana Bread stacked on it's side on a cutting board.
    Date Paste (sweetened with only dates)
    Date Paste is a delicious all natural sweetener that reminds me of the taste of salted caramel. The smooth texture and deep flavour reminiscent of molasses is an excellent healthy alternative to sugar in baked goods. In baking, the flavour is subtle and won’t overwhelm the flavours of other ingredie…
    Check out this recipe
    Date Paste (sweetened with only dates)

    67 Lemon Curd

    Double Chocolate Banana Bread stacked on it's side on a cutting board.
    Lemon Curd (sweetened with honey)
    Brighten up your mornings and desserts with this rich and creamy Paleo Lemon Curd. It is refined sugar and dairy-free, so you can skip the guilt!
    Check out this recipe
    Lemon Curd (sweetened with honey)

    68 Cardamom Apple Fritters

    Double Chocolate Banana Bread stacked on it's side on a cutting board.
    Cardamom Apple Fritters (sweetened with maple syrup)
    These cardamom apple fritters are the best comfort food dessert, with hints of spice and juicy warm apples. Vegan and low histamine recipe.
    Check out this recipe
    Cardamom Apple Fritters (sweetened with maple syrup)

    69 Strawberry Honey Mascarpone Dip

    Double Chocolate Banana Bread stacked on it's side on a cutting board.
    Honey Strawberry Mascarpone Dip (sweetened with honey)
    This creamy strawberry mascarpone dip is sweetened with honey, with a hint of tangy Greek yogurt flavor. Serve with graham crackers or fruit!
    Check out this recipe
    Honey Strawberry Mascarpone Dip (sweetened with honey)

    70 Healthy Peanut Butter Cups

    Double Chocolate Banana Bread stacked on it's side on a cutting board.
    Healthy Peanut Butter Cups (sweetened with maple syrup)
    These healthy peanut butter cups are made with only 5 ingredients, taste like Reese’s peanut butter cups, and will satisfy your sweet tooth.
    Check out this recipe
    Healthy Peanut Butter Cups (sweetened with maple syrup)

    71 Honey Roasted Pumpkin Seeds

    Double Chocolate Banana Bread stacked on it's side on a cutting board.
    Honey-Roasted Pumpkin Seeds (sweetened with honey)
    Honey Roasted Pumpkin Seeds are an easy recipe for perfectly roasted pumpkin seeds. They are oven-baked for a crispy, sweet, and salty snack.
    Check out this recipe
    Honey-Roasted Pumpkin Seeds (sweetened with honey)

    22 Incredible Buckwheat Flour Recipes

    Jul 21, 2022 · 1 Comment

    I really enjoyed curating this list of buckwheat flour recipes and I hope it's a helpful resource for your kitchen. Buckwheat is a delicious gluten free flour that adds a lovely depth of flavour and complexity to baked goods. Buckwheat flour is beginning to be used more often these days and I am seeing more and more recipes pop up with buckwheat flour added for it's delicious flavour or health benefits which I love to see!

    There are two types of buckwheat flour: light buckwheat flour (hulled buckwheat flour) or dark buckwheat flour (unhulled buckwheat flour). I try to specify for each recipe which flour is required.

    For more incredible gluten-free recipes check out my post featuring delicious oat flour recipes.

    What are the health benefits of buckwheat flour?

    Buckwheat flour is very nutritious! Buckwheat is higher in protein and fibre than all-purpose flour or even oat flour. 1 cup of buckwheat flour contains 15 grams of protein and 12 grams of fibre according to (Nutritional Value). It is a complete protein that contains all eight essential amino acids. It contains good amounts of potassium, magnesium and B vitamins. It’s naturally gluten-free and typically easier for most individuals to digest. 1 cup of buckwheat flour provides 75% of your daily recommended intake of magnesium, 69% of your recommended copper intake and 34% of your daily recommended intake of zinc. Amazing!

    Is buckwheat flour gluten free?

    Yes, buckwheat flour is gluten-free. Surprisingly, buckwheat is closely related to the rhubarb plant. Buckwheat is not a grain at all!

    Where can I buy buckwheat flour?

    Buckwheat flour can be purchased at most major grocery stores (typically found in the health or gluten-free section) I purchased “Bob’s Red Mill” Buckwheat flour at my local grocery store. If you can’t find it locally you could order it online from the Bob’s Red Mill website or find it at a specialty health food store.

    Buckwheat Flour and the Glycemic Index

    Buckwheat flour doesn’t affect blood sugar levels as much as all-purpose flour.  Buckwheat's Glycemic Index Score is low to medium at 40. Meanwhile, the Glycemic Index Score of all-purpose unbleached wheat flour is 85.

    What does buckwheat flour taste like?

    Buckwheat flour adds a subtle nutty and earthy flavour to baked goods. The flavour of buckwheat can be quite strong on its own so it’s typically paired with other flours or other tasty ingredients with strong flavours. Its earthy flavour compliments sweet baked goods well by providing a contrasting depth of flavour. Buckwheat pairs well with flavours like lemon, dark chocolate and spices like cinnamon.

    How should I store buckwheat flour?

    You can store buckwheat flour in a dark cupboard for several months. If you use it only occasionally, consider storing it in the fridge or freezer to prolong its shelf life.

    Crepes & Waffles & Pancakes


    1 Buckwheat Crepes

    Pinterest pin with graphic overlay saying, Gluten-Free Buckwheat Crepes.
    Buckwheat Crepes (dark buckwheat flour)
    These buckwheat crepes are naturally gluten-free and made with wholesome ingredients. They are naturally sweetened with maple syrup and can be enjoyed with various toppings and fillings.
    Check out this recipe

    2 Vegan Buckwheat Crepes

    Buckwheat crepe sitting on a place beside crepe making tools on a countertop.
    Vegan Buckwheat Crepes (dark buckwheat flour)
    Here is the traditional French savory buckwheat crepe recipe. An easy vegan and gluten free crepe recipe the whole family will enjoy.
    Check out this recipe

    3 Buckwheat & Almond Flour Crepes

    Gluten-Free Crêpes with Almond Flour (light or dark buckwheat flour)
    These Gluten-Free Crêpes are light and tender, featuring almond flour and buckwheat flour rather than traditional all-purpose flour.
    Check out this recipe
    Gluten-Free Crêpes with Almond Flour (light or dark buckwheat flour)

    4 Chocolate Buckwheat Flour Crepes

    These chocolate buckwheat crepes will put a smiles on everyone around your table faces!
    You can make chocolate buckwheat crepes and then add fun toppings!
    Chocolate Buckwheat Crepes (dark buckwheat flour)
    Introducing the perfect gluten free dessert crepe! These Chocolate Buckwheat Crepes are so easy to make. Have you ever made crepes before? If not, do not worry!  This blog post contains a video that walks you through it. Buckwheat flour lends a nutty flavour to these delicious crepes that really compliments the cinnamon and chocolate. I fill these Chocolate Buckwheat Crepes with a chocolatey cream cheese filling and bananas but you can fill them any way you like with options like: nutella, various fruits, jam, whipped cream, or peanut butter.
    Check out this recipe

    5 Light Buckwheat Flour Crepes

    Buckwheat Crepes (light buckwheat flour)
    An EASY, fool-proof recipe for making Buckwheat Crepes. These crepes are naturally gluten-free and dairy-free and delicious with all kinds of fillings!
    Check out this recipe
    Buckwheat Crepes (light buckwheat flour)

    6 Buckwheat Banana Pancakes

    Gluten Free Buckwheat Banana Pancakes (light buckwheat flour)
    If you are looking for a deliciously indulgent yet healthy breakfast idea, you will want to try these Gluten Free Buckwheat Banana Pancakes!
    Check out this recipe
    Gluten Free Buckwheat Banana Pancakes (light buckwheat flour)

    7 Vegan Buckwheat Pancakes

    Vegan Buckwheat Pancakes (dark buckwheat flour)
    An easy recipe for wholesome, fluffy, and delicious vegan buckwheat pancakes that’s naturally gluten-free and have no added sugar.
    Check out this recipe
    Vegan Buckwheat Pancakes (dark buckwheat flour)

    8 Chocolate Zucchini Pancakes with Blueberries

    Chocolate Zucchini Pancakes with Blueberries (light buckwheat flour)
    The greatest gluten-free vegan pancakes you’ll ever make. Chocolate zucchini pancakes with blueberries are a weekend essential of perfected breakfast bliss.
    Check out this recipe
    Chocolate Zucchini Pancakes with Blueberries (light buckwheat flour)

    9 Buckwheat Flour Waffles

    The Best 100% Buckwheat Waffles (light buckwheat flour)
    The BEST Buckwheat Waffles! These waffles are light, crispy and nutritious. They are naturally gluten-free and so easy to make!
    Check out this recipe
    The Best 100% Buckwheat Waffles (light buckwheat flour)

    Cakes & Brownies


    10 Buckwheat Flour Brownies

    Buckwheat Flour Brownies (dark buckwheat flour)
    These gluten-free buckwheat flour brownies are fudgy and chocolatey. They really call for a tall glass of ice cold milk. In the big wide world of brownie recipes, you have three texture options:  chewy, cakey or fudgy. These brownies are fudgy! In my opinion, fudgy really is the best brownie texture. This recipe is sweetened with only coconut sugar and semi-sweet chocolate chips.
    Check out this recipe

    11 Swedish Chocolate Sticky Cake

    Kladdkaka Recipe - Swedish Chocolate Sticky Cake (light buckwheat flour)
    This kladdkaka, also known as Swedish chocolate sticky cake, is amazingly gooey and delicious. This recipe includes a traditional (and whole wheat) option as well as a gluten-free, dairy-free and vegan version.
    Check out this recipe
    Kladdkaka Recipe - Swedish Chocolate Sticky Cake (light buckwheat flour)

    12 Buckwheat Flour Mug Cake

    Gluten-Free Vegan Chocolate Buckwheat Mug Cake (light buckwheat flour)
    This easy microwave Chocolate Buckwheat Mug Cake is gluten-free, vegan, and allergy-free! Under 90 seconds for a fully cooked and protein frosted mug cake!
    Check out this recipe
    Gluten-Free Vegan Chocolate Buckwheat Mug Cake (light buckwheat flour)

    13 Gluten Free Brownies

    Gluten-free Brownies (light buckwheat flour)
    The best gluten-free brownies! So fudgy, gooey, and incredibly easy to make. If you’re looking for truly delicious gluten-free brownies (that don’t taste GF), look no further. Not convinced? Check out the reviews! They can also be made with whole wheat for a non-GF version and are dairy-free. With a…
    Check out this recipe
    Gluten-free Brownies (light buckwheat flour)

    More Buckwheat Flour Treats


    14 Chocolate Banana Buckwheat Flour Muffins

    Chocolate Banana Buckwheat Flour Muffins (dark buckwheat flour)
    These Buckwheat Flour Chocolate Banana Muffins are nutritious, naturally gluten-free, made with wholesome ingredients (like buckwheat flour) AND they are incredibly chocolatey and delicious.
    Check out this recipe

    15 Buckwheat Flour Cinnamon Rolls

    Vegan Buckwheat Cinnamon Rolls (dark buckwheat flour)
    Super easy, fluffy and flavorful Gluten-Free Cinnamon Rolls made with Buckwheat Flour. Naturally egg-free. Vegan and dairy-free option included!
    Check out this recipe
    Vegan Buckwheat Cinnamon Rolls (dark buckwheat flour)

    16 Double Chocolate Buckwheat Flour Cookies

    Double Chocolate Buckwheat Flour Cookies
    “Brownies masquerading as cookies” describes these gluten free buckwheat chocolate cookies from the Alternative Baker cookbook. So I HAD to make them!
    Check out this recipe
    Double Chocolate Buckwheat Flour Cookies

    17 Vegan Buckwheat Flour Banana Bread

    Easy Buckwheat Flour Banana Bread (dark buckwheat flour)
    This buckwheat flour banana bread is super easy to make. A delicious way to use up some bananas. Perfect for breakfast, snack or dessert.
    Check out this recipe
    Easy Buckwheat Flour Banana Bread (dark buckwheat flour)

    18 One Bowl Buckwheat Flour Banana Bread

    Buckwheat Banana Bread (light buckwheat flour)
    I know, I know. Like the world really needs another banana bread recipe, right? But this banana bread recipe is tried and true in our house. First given to me by friend Patrick years ago,
    Check out this recipe
    Buckwheat Banana Bread (light buckwheat flour)

    19 Vegan Peach Cobbler

    Peach Cobbler with Buckwheat Flour (dark buckwheat flour)
    This easy and healthy gluten-free peach cobbler recipe is made with a blend of buckwheat and tapioca flours for a lovely flavor and texture that greatly complements juicy peaches for a heart-warming breakfast, brunch, or dessert! Refined sugar-free with a dairy-free + vegan option!
    Check out this recipe
    Peach Cobbler with Buckwheat Flour (dark buckwheat flour)

    Buckwheat Flour Breads

    20 Buckwheat Bread

    Buckwheat Bread (light buckwheat flour)
    You will be surprised at how delicious this buckwheat bread is! This vegan bread recipe come together quickly and requires no kneading.
    Check out this recipe
    Buckwheat Bread (light buckwheat flour)

    21 Buckwheat Pumpkin Cornbread

    Buckwheat Pumpkin Cornbread (light buckwheat flour)
    Take your cornbread to the next level by adding pumpkin and buckwheat! Buckwheat Pumpkin Cornbread is comfort food to warm every gluten-free and vegan soul!
    Check out this recipe
    Buckwheat Pumpkin Cornbread (light buckwheat flour)

    22 Buckwheat Flour English Muffins

    A buckwheat English muffin on a countertop.
    Buckwheat English Muffin Buns (light buckwheat flour)
    Simple buckwheat English muffin buns that are perfect to have on hand for any gluten-free vegan breakfast or dinner side.
    Check out this recipe
    Buckwheat English Muffin Buns (light buckwheat flour)

    24 Delicious Spelt Flour Recipes

    Jul 15, 2022 · 4 Comments

    Close up spelt cookie with melted chocolate chips and finishing salt on top.

    I am so excited to share these 24 delicious spelt flour recipes with you! I bake with spelt flour as much as possible and I love finding tried and true spelt recipes to add to my recipe repertoire.

    What are the health benefits of spelt flour?

    Spelt is an ancient grain that hasn’t undergone the level of hybridization of modern wheat. Spelt has higher amounts of protein and fibre and provides significant amounts of important nutrients like manganese, niacin, copper and phosphorus.

    Some individuals who struggle to digest common wheat find spelt to be highly digestible. One reason for that could be that the gluten in spelt is water-soluble whereas the gluten in common wheat is not.

    It is important to note that spelt is not a gluten-free flour. It is not suitable for individuals with Celiac disease. However, it may be tolerated by individuals with mild gluten intolerance because it contains less gluten than modern wheat.

    spelt flour pancakes with apple cinnamon topping and maple syrup sitting on a plate
    Spelt Chocolate Chunk Cookies on cutting board.
    Spelt Chocolate Chunk Cookies are chewy and delightfully chocolatey. These cookies taste delicious and feel indulgent all while being made with healthier ingredients like coconut sugar and spelt flour.

    Many bakers use spelt flour for it's delicious taste rather than its health benefits. It has a delicious subtle nutty flavour and you will enjoy the depth of flavour in your baked goods so much.

    Below you can find various recipes made with spelt flour including bread, cookies, muffins, breakfast foods, tasty treats and everything in between! Enjoy!

    Spelt Flour Treats


    1 Spelt Flour Pancakes

    stack of spelt pancakes topped with apple cinnamon topping with a drizzle of maple syrup
    Healthy Spelt Pancakes (using whole grain spelt flour)
    Spelt Flour Pancakes are a tasty and healthy way to start the day! Made with simple, wholesome ingredients, these pancakes are a delicious way to incorporate spelt flour in your recipe repertoire. I love how fluffy and tender they are.
    Check out this recipe
    spelt flour pancakes with apple cinnamon topping and maple syrup sitting on a plate

    2 Spelt Flour Chocolate Chip Cookies

    Spelt Chocolate Chunk Cookies on cutting board.
    Spelt Chocolate Chunk Cookies are chewy and delightfully chocolatey. These cookies taste delicious and feel indulgent all while being made with healthier ingredients like coconut sugar and spelt flour.
    Spelt Chocolate Chunk Cookies (using whole grain spelt flour)
    This is one of my favorite cookie recipes! They are chewy and delightfully chocolatey. These cookies taste delicious and feel indulgent all while being made with healthier ingredients like coconut sugar and spelt flour. I know you’re going to love them!
    Check out this recipe
    Close up spelt cookie with melted chocolate chips and finishing salt on top.

    3 Honey Spelt Cookies

    Honey Spelt Cookies (using whole grain spelt flour)
    These honey spelt cookies are sweet with a hint of spice and perfect as a fall snack or for the holidays. Vegan and low histamine recipe.
    Check out this recipe
    Honey Spelt Cookies (using whole grain spelt flour)

    4 Spelt Flour Pie Crust

    Spelt Flour Pie Crust (using white spelt flour)
    Spelt Flour Pie dough is surprisingly very easy to work with and this reliable recipe will produce a flaky crispy pie crust that will turn a beautiful golden brown colour as it bakes. This pie crust recipe is suitable for savoury or sweet pies.
    Check out this recipe

    5 Pistachio & Olive Oil Shortbread

    Rose, Pistachio & Olive Oil Shortbread (using white spelt flour)
    Paired with pistachios, these olive oil shortbread cookies have a Middle Eastern vibe to them but also a Christmassy feel and make wonderful Christmas gifts! The twist is that these shortbread cookies use olive oil in place
    Check out this recipe
    Rose, Pistachio & Olive Oil Shortbread (using white spelt flour)

    6 Spelt Flour Carrot Cake

    Healthy Vegan Carrot Cake (using white spelt flour)
    This vegan carrot cake is made with wholesome, unrefined ingredients. It tastes wonderful, is beautiful to look at and is fun to make too.
    Check out this recipe
    Healthy Vegan Carrot Cake (using white spelt flour)

    7 Spelt Flour Cinnamon Buns

    Healthy Cinnamon Buns in a dutch oven with icing.
    What is more comforting than a warm cinnamon bun freshly iced right out of the oven? These cinnamon buns are unique with the hint of orange in the filling and the icing. They are satisfying but not overly sweet and you still feel great after eating them. Don’t be intimidated by the unique way of braiding them. It’s actually super easy!
    Healthy Spelt Flour Cinnamon Buns (using whole grain spelt flour)
    This vegan carrot cake is made with wholesome, unrefined ingredients. It tastes wonderful, is beautiful to look at and is fun to make too.
    Check out this recipe

    8 Vegan Almond Butter Brownies

    Healthy Cinnamon Buns in a dutch oven with icing.
    What is more comforting than a warm cinnamon bun freshly iced right out of the oven? These cinnamon buns are unique with the hint of orange in the filling and the icing. They are satisfying but not overly sweet and you still feel great after eating them. Don’t be intimidated by the unique way of braiding them. It’s actually super easy!
    Vegan Almond Butter Brownies
    These Vegan Spelt Flour Almond Butter Brownies with Sea Salt are made with wholesome ingredients and are ready in less than an hour.
    Check out this recipe
    Vegan Almond Butter Brownies

    9 Homemade Speculaas Cookies

    Healthy Cinnamon Buns in a dutch oven with icing.
    What is more comforting than a warm cinnamon bun freshly iced right out of the oven? These cinnamon buns are unique with the hint of orange in the filling and the icing. They are satisfying but not overly sweet and you still feel great after eating them. Don’t be intimidated by the unique way of braiding them. It’s actually super easy!
    HOMEMADE SPECULAAS COOKIES
    This traditional homemade and simple Belgian/Dutch Speculoos (Speculaas, homemade Biscoff) cookie recipe creates delicious spiced cookies that will brighten your Holiday table!
    Check out this recipe
    HOMEMADE SPECULAAS COOKIES

    Muffins & Quick Breads


    10 Healthy Zucchini Muffins

    Easy Healthy Zucchini Muffins with Applesauce
    Healthy Zucchini Muffins are easy to make in one bowl, sweetened with applesauce, and maple syrup. Light, moist and fluffy!
    Check out this recipe
    Easy Healthy Zucchini Muffins with Applesauce

    11 Healthy Blueberry Banana Muffins

    Healthy Blueberry Banana Muffins
    Make these bakery style Healthy Blueberry Banana Muffins right at home! They’re moist and fluffy plus bursting with fresh blueberries!
    Check out this recipe
    Healthy Blueberry Banana Muffins

    12 Blueberry Spelt Scones

    Blueberry Spelt Scones
    A delicious Blueberry Spelt scones recipe made with spelt flour and sweetened with dates and honey. Great for breakfast or tea-time.
    Check out this recipe
    Blueberry Spelt Scones

    13 Pumpkin Date Bread

    Vegan Pumpkin Date Bread
    This delicious vegan pumpkin loaf is made with wholesome ingredients like spelt flour, pumpkin and coconut sugar. Enjoy warm with your favourite spread for a delicious Fall treat.
    Check out this recipe
    Vegan Pumpkin Date Bread

    14 Spelt Banana Bread For One

    Banana bread loaf on a cutting board with four slices resting against the remainder of the bread.
    Spelt Flour Banana Bread Recipe (Spelt Quick Bread)
    This spelt banana bread recipe is made in a mini loaf pan, just enough for one serving. Perfect for portion control or people who live alone!
    Spelt Banana Bread For One
    Spelt Flour Banana Bread Recipe (Spelt Quick Bread)

    15 Healthy Zucchini Banana Bread

    Healthy Zucchini Banana Bread
    Healthy Zucchini Banana Bread is moistened and sweetened with fruit and veggies.
    Check out this recipe
    Healthy Zucchini Banana Bread

    16 Double Chocolate Banana Bread

    Double Chocolate Banana Bread stacked on it's side on a cutting board.
    Banana bread for the chocolate lover! Satisfy those chocolate cravings and enjoy all the comfort that banana bread is famous for. This sweet quick bread is also really easy to mix up and can be made with brewed coffee, topped with banana cut in half or a dusting of coconut or brown sugar. For me chocolate chips are an absolute must in all banana breads! My Double Chocolate Banana Bread has a generous amount of chocolate chips and cocoa powder in the batter. It is sweetened with mostly maple syrup and bananas. You can choose whether you would like to use a healthier flour like spelt or just stick to all-purpose flour. Enjoy!
    Double Chocolate Banana Bread (using whole grain spelt flour)
    Banana bread for the chocolate lover! Satisfy those chocolate cravings and enjoy all the comfort that banana bread is famous for. 
    Check out this recipe

    17 Spelt Flour Banana Bread

    Spelt Banana Bread
    Simple & delicious Spelt Banana Bread made with just 7 ingredients. It’s healthy, whole-grain, naturally vegan & perfect for breakfast or snacking. Also comes with a great oil-free option!
    Check out this recipe
    Spelt Banana Bread

    Breads


    18 Yeast Free Spelt Bread

    Yeast-Free Spelt Bread
    A super easy, totally foolproof, quick Yeast-Free Spelt Bread that is ready from start to finish in a little over an hour. It’s rustic, full of nutty, hearty flavours and perfectly soft and fluffy inside!
    Check out this recipe
    Yeast-Free Spelt Bread

    19 Easy Spelt Focaccia

    Four pieces of spelt focaccia on parchment paper on a staged countertop.
    Spelt Focaccia (Easy No-Knead)
    Easy Spelt Focaccia is so simple to prepare, and you will have the satisfaction of knowing you have baked your own fresh bread!
    Spelt Focaccia
    Spelt Focaccia (Easy No-Knead)

    20 Whole Grain Spelt Rolls

    Whole Grain Vegan Spelt Rolls
    Fluffy vegan spelt rolls that are hearty, slightly sweet, and delicious. A perfect replacement regular rolls, these spelt buns will become a new favourite!
    Check out this recipe
    Whole Grain Vegan Spelt Rolls

    21 Quick Spelt Bread

    Quick Spelt Bread
    Quick and easy Spelt Bread with seeds recipe. Healthy rich in fibers and tasty, this bread recipe is a keeper!
    Check out this recipe
    Quick Spelt Bread

    22 Spelt Flour Pizza Dough

    Spelt Flour Pizza Dough
    Learn how to make pizza dough with spelt! This spelt flour pizza dough recipe is a delicious way to eat heart-healthy whole grains.
    Check out this recipe
    Spelt Flour Pizza Dough

    23 Thick-Crust Sicilian-Style Pizza (Vegan)

    Overhead view of pizza on a wooden peel showing traditional toppings.
    Best Sicilian-style thick-crust sheet pan pizza
    This Sicilian-style pizza dough is made by hand with healthy homemade toppings. It’s authentic, traditionally topped, and perfect for special occasions.
    Sicilian-Style Pizza
    Best Sicilian-style thick-crust sheet pan pizza

    24 Spelt Bread Loaf (No-Knead)

    Spelt Bread Loaf (No-Knead)
    No-Knead Spelt Bread Loaf is a simple recipe that contains just 6 ingredients, including water. Make this hearty, full of flavour bread.
    Check out this recipe
    Spelt Bread Loaf (No-Knead)

    Apple Cheddar Scones

    May 31, 2022 · 10 Comments

    Savor all the delicious flavors of fall with Apple Cheddar Savory Scones. Filled with the perfect balance of sweet and savory notes, these scones are rich with the flavors of crisp apples, sharp cheddar cheese, and earthy sage. Their tender, flaky texture and the herb and cheese flavors make them the perfect accompaniment to a comforting bowl of soup.

    Apple cheddar scone on a plate on a staged counter top.

    When you bite into the flaky, crumbly crust, you'll be met with a warm, soft inside that is absolutely delicious. There's nothing quite like a freshly baked scone, and they're even better when they're full of tart fall apples.

    Serve these scones with hot apple cider, a cup of chai tea, or pour-over coffee for the ultimate cozy experience. Personally, I love to enjoy them warm from the oven with a few slices of cheese, melty butter, and a drizzle of honey or a generous spread of spiced apple butter or caramel date paste.

    Or serve them for dinner alongside my Cauliflower and Sausage Soup or my Apple Cider Butternut Squash Soup.

    [feast_advanced_jump_to]

    Why You'll Love This Recipe

    • The scones are a great way to enjoy fall flavors.
    • Make ahead to simplify prep for guests.
    • The scones are topped with a light layer of egg wash, flaky salt, and fresh sage leaves for a beautiful presentation.
    • The perfect recipe to make after a classic fall outing of apple picking!
    • This recipe is surprisingly easy to make, even if you're not an experienced baker.
    • No need to roast the apple separately before baking.
    • Mix it up and enjoy these scones with various toppings: herbed butter, spiced apple butter, various jam flavors, marmalade, spicy honey, slices of cheese, spread of goat cheese etc.

    Ingredients

    Ingredients to make apple cheddar scones in bowls and pinch bowls on a marble counter top.
    • All purpose flour
    • Baking powder -It may seem like this recipe calls for a lot of baking powder! It's not a mistake, they really do need 2 tbsp. Scones benefit from a lot of baking powder to keep a tender and light texture.
    • Sea salt
    • Dried thyme, sage and celery seed - you can swap for fresh thyme and sage if you have it! Just double the amounts called for.
    • Butter - salted or unsalted is fine.
    • Whole milk - or sub for cream if you prefer.
    • Eggs - use large eggs!
    • Maple syrup - you can sub for any sweetener of your choice.
    • Apples - I like to use Granny Smith or whatever apple looks the best at the grocery store.
    • Sharp cheddar cheese - pick an ultra flavorful old cheddar!

    See the recipe card below for a full list of ingredients and measurements.

    Substitutions & Variations

    • Instead of sharp cheddar cheese, you can use other types of cheese like Gruyere, Swiss, or Smoked Gouda.
    • Instead of Granny Smith apples, you can use other varieties like Honeycrisp, Pink Lady, or Fuji apples.
    • If you want to experiment with flavors, you can try using different fruits altogether, such as diced pears or dried cranberries.
    • If you have lots of fresh herbs you can add that instead of dried. When swapping dried herbs for fresh herbs in a recipe like this I typically double the amounts.
    • If you prefer sweeter scones, you can add a sprinkle of coarse sugar on top before baking.
    • For a savory twist, you can add crispy cooked bacon bits or diced ham to the dough along with the cheese and apples.

    I have not experimented with any other substitutions or alterations for this recipe. If you decide to make any changes by adding or substituting ingredients, I would love it if you could share your results with us by leaving a comment below.

    How To Make Savory Apple Cheddar Scones

    Here are the step-by-step instructions to make this recipe.

    Step 1: Preheat and prepare the ingredients.

    Begin by preheating the oven to 400 degrees Fahrenheit. Cover two cookie sheets with parchment paper.

    Now it's time to prepare the ingredients. Peel and dice the apples and grate the cheese. Be sure to place the butter in the freezer if it’s not cold enough. Place the cheese and apples in the fridge until you're ready to use them.

    Cheese and apple on a plate ornate plate on a staged counter top.

    Step 2: Mix dry ingredients and cut in the butter.

    Using an electric stand mixer with a paddle attachment, mix together the flour, baking powder and salt in the bowl. Cut up your very cold butter into 2 inch cubes and add them to the mixer on low until the butter is broken down to the size of peas but no smaller.

    Handle showing texture of butter cut into dry ingredients.

    Step 3: Mix in the wet ingredients until just incorporated.

    In a separate small bowl, whisk together eggs, milk and maple syrup. Add the wet ingredients to the dry ingredients. Mix everything together until just combined and then add in the cheese and apples. Put the mixer on once again just to incorporate the cheese and apples but take care not to overmix at this stage. You don't want to lose the pockets of butter.

    Next, dump your dough onto a lightly floured cold counter. Knead it once or twice into a ball. Do not over-knead.

    Wet and dry ingredients mixed together to form a dough with cheddar and apple pieces showing.

    Step 4: Roll out the dough and cut out the scones.

    You will see visible pockets of butter in your dough. This is what you want! Flour a rolling pin and roll out the dough approximately 2 ½ inch thick. Cut the dough with a round cutting tool approx. 3 inches across. (A drinking glass works well for this step). Roll out your dough to cut more scones as needed. Then, arrange the scones on the two cookie sheets you prepared earlier.

    Dough rolled and cut out into disks on a staged counter top ready to go into the oven.

    Step 5: Brush with egg wash.

    Brush a light layer of whisked egg wash on each scone and top each one off with a pinch of flaky salt and a sage leaf.

    Brushing whisked egg onto disks of scone dough on a baking sheet.

    Step 6: Bake the scones.

    Place your scones in the oven to bake for 20-22 minutes. Turn the cookie sheet around in the oven after 10 minutes to achieve even browning when baking.

    Serve warm from the oven if you wish and enjoy!

    Baked apple cheddar scones with sage leaves on top on an ornate plate beside a wire cooling rack with more scones on it.

    Expert Tips

    • Keep your butter very cold. Consider popping the butter in the freezer 5-10 minutes before making the scones.
    • Keep your milk and eggs in the fridge until ready to use.
    • Turn the cookie sheet around in the oven after 10 minutes to achieve even browning.
    • Don't chop your apples too early or they'll start to turn brown.

    Recipe FAQs

    Can you freeze scones?

    Scones can easily be preserved with freezing. Let them cool completely before placing them in the freezer. Use airtight containers or resealable bags to keep them protected from freezer burn. Enjoy within 3 months.

    What to pair with scones?

    Enjoy scones with your favorite fresh fruit preserve or jam, fresh berries or apple butter. This will enhance the sweetness of your scone. Or if you're after a savory treat, top with cheese, herbs or some salted butter! Use your imagination and creativity and make some delicious flavor combinations!

    Which variety of apple should I choose?

    I like to use Granny Smith for this recipe but I love the tart flavor but you can choose any type of firmer apple! Honey Crisp apples would also be delicious in this recipe!

    Apple cheddar scones close up, stacked two high on an ornate plate.

    Storage

    Room Temperature

    If you plan to enjoy the scones within 1-2 days you can store at room temperature. Make sure to store them in an airtight container to maintain their freshness. If you need to store them for a longer period of time it's best to refrigerate them.

    More Recipes You'll Love

    • Pineapple Cinnamon Chili Recipe
    • Chili Lime Sunflower Seed Dip
    • Halloumi Stroganoff
    • A close up shot of a stack of date cookies.
      Date Cookies

    Did you make this recipe? Let me know!
    Leave a review or comment below!

    Recipe

    Apple Cheddar Scones

    Christy Faber
    Apple and Cheddar Scones with sage are crispy, buttery, and filled with a delicious flavour trio that delicately compliment one another. They are delicious paired with a hot bowl of soup or as a tasty mid afternoon snack with a cup of coffee. They even make the perfect way to start your day.
    5 from 10 votes
    Print Recipe Pin Recipe SaveSaved!
    Prep Time 20 minutes mins
    Cook Time 20 minutes mins
    Total Time 40 minutes mins
    Course Appetizer, Breakfast
    Cuisine scottish
    Servings 12 scones
    Calories 368 kcal

    Ingredients
      

    Dry Ingredients

    • 3 ¼ cup all-purpose flour
    • 2 tbsp baking powder
    • 3 tsp unrefined sea salt
    • 3 tsp each of dried thyme, sage and celery seed

    Wet Ingredients

    • 1 cup cold butter
    • ¼ cup cold whole milk
    • 3 large eggs
    • 2 tbsp pure maple syrup
    • 1 ½ cup granny smith apple peeled and diced small
    • 1 ½ cup sharp cheddar cheese grated

    To Top The Scones

    • 1 large egg whisked for an egg wash
    • 12 whole fresh sage leaves for decoration
    • flaky salt or coarse sugar

    Instructions
     

    • Begin by preheating the oven to 400 degrees Fahrenheit. Cover two cookie sheets with parchment paper.
    • Now it's time to prepare the ingredients. Peel and dice the apples and grate the cheese. Be sure to place the butter in the freezer if it’s not cold enough. Place the cheese and apples in the fridge until you're ready to use them.
    • Using an electric stand mixer with a paddle attachment, quickly mix together the flour, baking powder and salt in the bowl. Cut up your very cold butter into 2 inch cubes and add them to the mixer on low until the butter is broken down to the size of peas but no smaller.
    • In a separate small bowl, whisk together eggs, milk and maple syrup. Add the wet ingredients to the dry ingredients. Mix everything together until just combined and then add in the cheese and apples. Put the mixer on once again just to incorporate the cheese and apples but take care not to overmix at this stage.
    • Next, dump your dough onto a lightly floured cold counter. Knead it once or twice into a ball. Do not over knead.
    • You will see visible pockets of butter in your dough. This is what you want! Flour a rolling pin and roll out the dough approximately 2 ½ inch thick. Cut the dough with a round cutting tool approx. 3 inches across. (A drinking glass works well for this step). Roll out your dough to cut more scones as needed. Then, arrange the scones on the two cookie sheets you prepared earlier. Brush a light layer of whisked egg wash on each scone and top each one off with a pinch of flaky salt and a sage leaf.
    • Place your scones in the oven to bake for 20-22 minutes. Turn the cookie sheet around in the oven after 10 minutes to achieve even browning when baking.
    • Serve warm from the oven if you wish and enjoy!

    Notes

    • Keep your butter very cold. Consider popping the butter in the freezer 5-10 minutes before making the scones.
    • Keep your milk and eggs in the fridge until ready to use.
    • Turn the cookie sheet around in the oven after 10 minutes to achieve even browning.
    • Don't chop your apples too early or they'll start to turn brown.

    Nutrition

    Serving: 47.691998gCalories: 368kcalCarbohydrates: 33.6gProtein: 9.5gFat: 22.3gSaturated Fat: 13.4gCholesterol: 118mgSodium: 807mgPotassium: 373mgFiber: 1.7gSugar: 5.5gCalcium: 237mgIron: 2mg
    Tried this recipe?Let us know how it was!

    If you make this recipe please leave a comment and give this recipe a rating! I aim to respond to every single comment. I am so grateful when you trust me and try one of my recipe creations in your own kitchen. I love to hear how it went!  Let’s connect on Instagram and tag me in your food pics!

    ‘Til next time,

    Christy

    Lilac Lemonade

    May 29, 2022 · 3 Comments

    Lilac Lemonade is the perfect way to enjoy spring to the fullest. It is refreshing, thirst-quenching, floral and the perfect balance of tart and sweet. This drink makes a beautiful presentation in the glass with the pretty lilac ice cubes and bright yellow slices of lemon. The essence of spring in a cup!

    You may be surprised to learn that lilacs are completely edible. When the petals are left to be infused into a syrup, honey, water or in sugar, they impart a subtle floral flavour that in my opinion tastes just like the lovely fragrance of lilac.

    You know that spring has arrived in full force when lilac bushes are in full bloom. I love their fragrance and the memories I associate with it. I was romanced by lilacs even as a child. I would pick a blossom and carry it around with me as I played.

    My mom preserves the glory of late summer by freezing tubs and tubs of peaches and in a similar way, I will happily spend an hour or two carefully snipping off individual petals from a lilac bloom to extend the life of spring for as long as I can.

    lilac-lemonade-011

    The lilac syrup used in creating this lemonade recipe totally surprised me. I truly wasn’t sure what it would taste like. I left the petals to steep in the syrup overnight and the first thing I did in the morning was dip a spoon in the syrup to taste it. It looked lovely and had more flavour than I expected. I thought to myself, "I'm really on to something here!"

    More Drink Recipes:

    • Matcha Protein Smoothie
    • Tahini Hot Chocolate
    • Pour Over Coffee
    [feast_advanced_jump_to]

    Why You'll Love This Recipe

    • Beautiful presentation!
    • Customizable Sweetness: Adjust the lilac syrup and lemon juice to make it as sweet or tart as you prefer.
    • Kid friendly!
    • A great way to enjoy Spring!

    How To Make Lilac Lemonade

    Here are the step-by-step instructions to make this recipe.

    Step 1: Make lilac ice cubes.

    Plan ahead. If you wish to have lilac ice cubes for your lemonade, fill an ice cube tray with water and sprinkle snipped lilac petals over the tray. Press the petals down to submerge in the water and freeze.

    Step 2: Make lilac simple syrup.

    Thoroughly wash your lilac blooms to make sure they're free of any critters or dirt. With kitchen scissors, snip the individual petals, avoiding any stems or greenery. Measure out 4 cups of petals and add to a large mason jar.

    In a medium-sized saucepan, bring the water and sugar to a boil. Stir frequently so the sugar can dissolve and not stick to the bottom of the pot. Boil for 2 minutes and then remove from heat.

    Pour the hot syrup over the blossoms in the jar. Cover and let sit on the counter for at least 6 hours or preferably over night so that the flavour can be fully extracted into the syrup.

    After the mixture sits, strain the syrup through a sieve to remove all the petals. Now your syrup is ready to use! If you'll be storing it in the fridge, stir in some lemon juice to prolong the shelf life. Lilac syrup will keep in the fridge for about a month.

    Step 3: Add the lilac simple syrup to freshly squeezed lemon juice.

    Extract the juice from approximately 4-5 lemons until you have 1 ¼ cup of lemon juice.

    In a large glass pitcher, combine lemon juice, water and lilac syrup. Give the lemonade a stir and taste. Adjust now to your taste preference. If you like a sweeter lemonade, add more syrup or sugar. If you like it more tart, add some more lemon juice. If you find the flavour too strong, add a bit of water.

    Step 4: Add ice cubes and lemon slices and serve.

    Add a tray of ice cubes and a few slices of lemons for a beautiful presentation. Enjoy!

    Expert Tips

    • Pick the Right Blooms: Harvest lilacs when they’re fresh and fragrant, avoiding any that look wilted or brown.
    • Wash Thoroughly: Gently rinse the lilac blooms in cold water to remove any dirt, pollen, or bugs.
    • Freshly Squeezed Is Best: Use fresh lemons instead of bottled juice
    • Add a Sparkling Twist: Serve by mixing ⅓ sparkling water with ⅔ lilac lemonade directly in the glass for a fizzy, refreshing version.

    Recipe FAQs

    When are lilacs in bloom?

    This depends on a few factors including where you live, and the variety of lilac because there are early, mid and late blooming varieties. Lilacs bloom somewhere between the months of April and June and typically are in bloom for about two weeks.

    How long will the lilac syrup keep?

    Lilac syrup should be stored in the fridge and will keep for up to one month when it has a splash of lemon juice in it.

    Where can I find lilacs?

    If you don't have a lilac bush in your backyard, this is a great opportunity to make a friend in the neighbourhood. You could knock on a neighbour's door and tell them you hope to make some recipes with lilac petals and that you'd love to share your creations with them. You could also take this opportunity to consider planting a lilac bush in your own backyard. The world always needs more lilacs!

    How do I make lilac ice cubes?

    It's super simple. Wash your lilac petals thoroughly. Fill a tray with water and snip just the petals (avoid the stems) into the ice cube tray. Push the petals down slightly into the water so they're submerged and then freeze. I like to do several trays while I'm at it.

    Other Ways to Use Lilacs:

    • Lilac Honey
    • Lilac Sugar
    • Lilac Sugar Cookies
    • Lilac Ice Cream
    • As a Drizzle on a Lemon Loaf

    More Drink Recipes You'll Love

    • Kombucha Sorbet Floats
    • Blueberry Ginger Kombucha Refresher
    • Coconut Milk Brazilian Limeade
    • Chia Seed Lemonade

    If you tried Lilac Lemonade or any other recipe on my website, please leave a 🌟 star rating and let me know how it went in the 📝 comments below. I love hearing from you!

    Recipe

    Lilac Lemonade

    Christy Faber
    Lilac Lemonade is the perfect way to enjoy spring to the fullest. This lemonade is made from lilac syrup and freshly squeezed lemons! It is refreshing, floral and the perfect balance of tart and sweet. The essence of spring in a cup!
    5 from 1 vote
    Print Recipe Pin Recipe SaveSaved!
    Prep Time 10 minutes mins
    Total Time 10 minutes mins
    Course Drinks
    Cuisine American
    Servings 6 people
    Calories 262 kcal

    Ingredients
      

    To Make The Lilac Syrup

    • 4 cups lilac petals Be careful not to include any stems
    • 2 cups granulated sugar
    • 2 cups water
    • ½ tbsp lemon juice To prolong shelf life. (Not necessary if using right away.)

    To Make The Lilac Lemonade

    • 1 ¼ cups freshly squeezed lemon juice
    • 5 cups water
    • 1 cup lilac syrup
    • lilac ice cubes
    • slices of lemon

    Instructions
     

    For The Lilac Syrup

    • Thoroughly wash your lilac blooms to make sure they're free of any critters or dirt. With kitchen scissors, snip the individual petals, avoiding any stems or greenery. Measure out 4 cups of petals and add to a large mason jar.
    • In a medium-sized saucepan, bring the water and sugar to a boil. Stir frequently so the sugar can dissolve and not stick to the bottom of the pot. Boil for 2 minutes and then remove from heat.
    • Pour the hot syrup over the blossoms in the jar. Cover and let sit on the counter for at least 6 hours or preferably over night so that the flavour can be fully extracted into the syrup.
    • After the mixture sits, strain the syrup through a sieve to remove all the petals. Now your syrup is ready to use! If you'll be storing it in the fridge, stir in some lemon juice to prolong the shelf life. Lilac syrup will keep in the fridge for about a month.

    For The Lilac Lemonade

    • Plan ahead. If you wish to have lilac ice cubes for your lemonade, fill an ice cube tray with water and sprinkle snipped lilac petals over the tray. Press the petals down to submerge in the water and freeze.
    • Extract the juice from approximately 4-5 lemons until you have 1 ¼ cup of lemon juice.
    • In a large glass pitcher, combine lemon juice, water and lilac syrup. Give the lemonade a stir and taste. Adjust now to your taste preference. If you like a sweeter lemonade, add more syrup or sugar. If you like it more tart, add some more lemon juice. If you find the flavour too strong, add a bit of water.
    • Add a tray of ice cubes and a few slices of lemons for a beautiful presentation. Enjoy!

    Notes

    • Pick the Right Blooms: Harvest lilacs when they’re fresh and fragrant, avoiding any that look wilted or brown.
    • Wash Thoroughly: Gently rinse the lilac blooms in cold water to remove any dirt, pollen, or bugs.
    • Freshly Squeezed Is Best: Use fresh lemons instead of bottled juice
    • Add a Sparkling Twist: Serve by mixing ⅓ sparkling water with ⅔ lilac lemonade directly in the glass for a fizzy, refreshing version.

    Nutrition

    Calories: 262kcal
    Tried this recipe?Let us know how it was!

    If you make this recipe please leave a comment and give this recipe a rating! I aim to respond to every single comment. I am so grateful when you trust me and try one of my recipe creations in your own kitchen. I love to hear how it went!  Let’s connect on Instagram and tag me in your food pics!

    ‘Til next time,

    Christy

    Barley Flour Cookies

    May 27, 2022 · 7 Comments

    Close up of a barley chocolate chip cookie with finishing salt on top on a table of the cookies.

    Barley Flour Chocolate Chunk Cookies are soft and chewy with a deep nutty flavour. They're so much more than your average cookie. These wholesome cookies stay soft and are so delicious you won't know they're a healthier cookie. Extra melty chocolate and soft centres make these cookies irresistible. I hope you love them!

    Barley flour is really easy to bake with giving baked goods a texture remarkably similar to all-purpose flour. Barley flour is also very light in colour so baked goods using it look very similar to baked goods made with all-purpose flour. As a result, people won’t be suspicious that you made a healthier swap.

    Barley Flour Benefits

    • Barley flour is rich in fibre. 100 grams of barley flour contains 16 grams of fibre according to Healthline. This is significantly higher than all-purpose flour.
    • The type of fibre that barley flour contains is called beta-glucan which according to Healthline has been shown to lower LDL cholesterol levels and balance blood sugar. 
    • Barley flour retains more nutrients during processing than wheat.
    • Barley flour is rich in minerals including manganese, selenium, copper and zinc.
    • Barley flour contains less gluten than all-purpose flour which is beneficial for those who are sensitive to gluten but don’t have an allergy to gluten.

    More Healthy Cookie Recipes: 

    • Matcha Crinkle Cookies
    • Peppermint Chocolate Crinkle Cookies
    • Sunflower Seed Butter Cookies
    • Coconut Flour Oatmeal Cookies
    • Healthy Chocolate Haystack Cookies
    • Spelt Flour Chocolate Chip Cookies

    Frequently Asked Questions

    Is barley flour gluten free?

    Barley flour is not gluten free but it does contain less gluten than typical wheat flour.

    How should barley flour be stored?

    It's best to store barley flour in the fridge or even the freezer to prolong its shelf life. Barley flour has a short shelf life stored in a cupboard compared to other flours.

    Where do I buy barley flour?

    You should be able to find barley flour in specialty health food stores. I either purchase pearl barley and grind my own flour or I pick up barley flour from my local Indian grocers.

    How do I make barley flour?

    You can grind your own barley flour from pearl barley at home. Check out this blog post to learn more about making your own.

    Tips for Making Barley Flour Cookies

    • Make these cookies ahead of when you want to bake them. They require time in the fridge for the dough to be ready to roll into balls.
    • Store barley flour in the fridge to prolong its shelf life as it’s prone to going bad.
    • If you want melty chocolate puddles like the cookies shown in the photos, purchase a regular semi-sweet chocolate bar. If you want the chocolate to hold its shape a little more, use baker's chocolate.

    Some More Recipes to Try

    Peanut Butter Swirl Black Bean Brownies

    These peanut butter swirl black bean brownies are so fudgy and so delicious. The texture can’t be beaten! They seriously are like fudge.

    Buckwheat Flour Brownies

    These gluten-free buckwheat flour brownies are fudgy and chocolatey. They really call for a tall glass of ice-cold milk.

    Barley Flour Cookies

    Close up of a barley chocolate chip cookie with finishing salt on top on a table of the cookies.

    Barley Flour Cookies

    Christy Faber
    These wholesome cookies stay soft and are so delicious you won't know they're a healthier cookie. Extra melty chocolate and soft centres make these cookies irresistible. I hope you love them!
    5 from 3 votes
    Print Recipe Pin Recipe SaveSaved!
    Prep Time 15 minutes mins
    Cook Time 10 minutes mins
    Chill Time 1 hour hr
    Total Time 1 hour hr 25 minutes mins
    Course Snack
    Cuisine American
    Servings 14 cookies
    Calories 225 kcal

    Ingredients
      

    Dry Ingredients

    • 1 ½ cup barley flour
    • ½ tsp baking powder
    • ½ tsp fine sea salt

    Wet Ingredients

    • ½ cup softened unsalted butter
    • 1 cup brown sugar lightly packed
    • 1 large egg
    • 2 large egg yolks
    • 1 tsp pure vanilla extract
    • 5 oz semi sweet bakers chocolate or regular chocolate bar for chocolate puddles In the photos I used a semi sweet chocolate bar which is why the chocolate was more melty.

    Instructions
     

    • Combine flour, baking soda and salt in a small bowl and whisk well.
    • In a medium-sized bowl, cream together softened butter and brown sugar with a handheld mixer for several minutes until the butter and sugar mixture has turned lighter in colour and is smooth and fluffy looking.
    • Incorporate one room temperature egg, egg yolks and vanilla extract.
    • Add the dry ingredients to the wet ingredients and stir until just combined.
    • Roughly chop 5 oz of semi sweet chocolate. Set aside approximately 1 oz of the chocolate to use to top the cookie dough balls. Stir in 4 oz of the chopped chocolate to the dough and set the dough in the fridge for a minimum of 1 hour or until the next day.
    • When you’re ready to bake, preheat the oven to 350 degrees F. Prepare two cookie sheets with parchment.
    • Roll cookie dough into balls using approximately 1 ½ tablespoon of dough. Top the dough with 3-4 small pieces of your reserved chopped chocolate.
    • Bake for 8-10 minutes. (If you rolled your cookies into slightly larger balls, they will need to bake 10-12 minutes). When the cookies look almost set in the middle, remove them from the oven. Sprinkle with flaky salt if desired.

    Notes

    • Make these cookies ahead of when you want to bake them as they require time in the fridge for the dough to be ready to roll into balls.

    Nutrition

    Calories: 225kcal
    Tried this recipe?Let us know how it was!

    If you make this recipe please leave a comment and give this recipe a rating! I aim to respond to every single comment. I am so grateful when you trust me and try one of my recipe creations in your own kitchen. I love to hear how it went!  Let’s connect on Instagram and tag me in your food pics!

    ‘Til next time,

    Christy

    Ground Beef and Mushroom Pot Pie

    May 20, 2022 · Leave a Comment

    Rich and savoury ground beef and mushroom filling encased in a flaky, buttery pastry, Ground Beef and Mushroom Pot Pie takes comfort food to another level!

    This delicious and easy dinner will be your new go-to! With only 40 minutes of cooking time, it's super fast to make. The best part is that your entire family will love it!

    There's nothing quite like the first bite of a delicious family pot pie recipe, and this one never disappoints! Every time I cook this recipe, the anticipation is always the same. Everyone in my family loves this one. Before you know it, they're reaching for seconds… and thirds.

    Everyone will appreciate the depth of flavour in this Ground Beef and Mushroom Pie recipe! With classic seasonings like sage, thyme, and parsley paired with the sweet, woody flavor of cinnamon, you are bound to fall in love with this tasty dish!

    Prefer a healthier option? One simple swap is to use spelt flour in the pie crust. Spelt flour is a nutrient-rich alternative to all-purpose flour, and adds a delicious nutty flavor to the crust. Plus, it's so easy to work with. You won't even be able to tell the difference! So if you're looking for a healthy pot pie recipe, be sure to give my spelt flour crust a try.

    More Easy Supper Recipes: 

    • Cranberry Wild Rice Soup with Chicken
    • Pesto Quiche
    • Chana Masala
    • Lemon Orzo Soup
    • Apple Cider Butternut Squash Soup
    • Pineapple Cinnamon Chili
    [feast_advanced_jump_to]

    Why You'll Love This Recipe

    • Comfort food
    • Protein packed!
    • Make-Ahead Friendly: The filling can be prepared in advance, making it convenient for busy schedules.
    • Kid-Friendly: A savory pie that's simple and mild enough to win over picky eaters.
    • Budget-Friendly: Made with accessible, affordable ingredient.

    How To Make Ground Beef Pot Pie

    Here are the step-by-step instructions to make this recipe.

    Step 1: Prep pie dough and chop vegetables.

    Prepare your pie dough. (Try my spelt flour pie crust for a healthier alternative!)

    Begin by prepping your ingredients and dicing the onion and mushrooms.

    Step 2: Cook the onions, ground beef and mushrooms.

    In a medium-sized pan, cook the onion and ground beef until browned. Remove any excess fat.

    Add the mushrooms and cook for another minute or two. Remove from heat.

    Step 3: Add the spices and whisk the eggs.

    Add the spices, Dijon mustard, lemon juice, salt and pepper and set the beef aside to cool slightly. Taste the mixture now to adjust for seasonings.

    In a separate small bowl, whisk 5 large eggs. Add the chopped parsley, salt and pepper, and stir.

    Step 4: Roll out your pie dough.

    Prepare your pie plate and roll out the pie dough for top and bottom. Place the dough in the pie plate.

    Step 5: Stir in the eggs and then pour beef mixture into the pie plate.

    Stir the eggs into the beef mixture and mix thoroughly. Pour the filling into the pie plate.

    Step 6: Top with pie dough and crimp.

    Top with the other half of the rolled out pie dough. Crimp the edges and add a few vents to the top of the pie to allow steam to escape.

    Step 7: Bake.

    Cook in a 400 degree Fahrenheit oven for 35-40 minutes or until the crust is a beautiful golden brown. Check the pie after 20 minutes and rotate the pie dish so the crust will brown evenly. Allow the pie to sit for 10 minutes before slicing. Enjoy!

    Expert Tips

    • Prevent Spills: I recommend placing the pie plate on a cookie sheet to protect your oven from potential spills.
    • Adjust For Seasoning: Take time to taste the beef filling (before adding the egg yolks) to taste and adjust for salt and seasonings. This step will make all the difference.
    • Rotate While Baking: Check the pie halfway through baking and rotate it to ensure even browning.
    • Rest Before Slicing: Allow the pie to rest for 10-15 minutes after baking to let the filling set for cleaner slices.

    Recipe FAQs

    What should I serve with this meal?

    This pot pie recipe pairs exceptionally well with classic sides like smooth and buttery mashed potatoes or hassle back potatoes! Vegetables such as steamed and seasoned green beans or a green salad with a refreshing and bright dressing would be the perfect compliment.

    Can I freeze this recipe?

    This pot pie freezes very well, so you can always have one on hand for a quick meal! Cook the pie and allow it to fully cool. Wrap your Ground Beef and Mushroom Pie tightly in plastic wrap or aluminum foil to help to prevent freezer burn and to keep the crust from becoming soggy. Once it's wrapped, place the pie in the freezer and enjoy it within six months. When you're ready to eat, thaw the pie overnight in the refrigerator and then bake in a 350 degree Fahrenheit oven until heated through. Stock your freezer with this tasty meal—it'll be waiting for you whenever you need a little comfort in your life!

    Can I use store bought pie crust?

    If making your own pie crust is a bit intimidating for you right now, there's no shame in taking a shortcut and using store-bought crust. Sure– I'm a teeny bit biased because I love a tasty, homemade crust, but store-bought crust could be a great alternative for you if you are pressed for time.

    More Dinner Recipes You'll Love

    • Spinach, Sun-dried Tomato and Pesto Quiche
    • Spicy Sausage Pasta
    • Broccoli Goat Cheese Quiche
    • Mediterranean Orzo Salad with Grapes

    If you tried this Ground Beef Pot Pie or any other recipe on my website, please leave a 🌟 star rating and let me know how it went in the 📝 comments below. I love hearing from you!

    Recipe

    Ground Beef and Mushroom Pot Pie

    Christy Faber
    Rich and savory ground beef and mushroom filling encased in a flaky, buttery pastry,. Ground Beef and Mushroom Pot Pie takes comfort food to another level!
    5 from 1 vote
    Print Recipe Pin Recipe SaveSaved!
    Prep Time 25 minutes mins
    Cook Time 40 minutes mins
    Total Time 1 hour hr 5 minutes mins
    Course Main Course, Side Dish
    Cuisine American, british
    Servings 8 people
    Calories 271 kcal

    Ingredients
      

    Pie Dough

    • Choose your favourite pie dough recipe. Ensure the recipe you choose makes enough for a double crust.

    Pie Filling

    • 1 tbsp olive oil
    • 1 small onion diced
    • 1 lb lean ground beef
    • ½ lb cremini or white mushrooms diced (227 grams)
    • ½ tsp ground dried sage
    • 1 tsp dried thyme
    • ¾ tsp ground cinnamon
    • 3 tbsp smooth dijon mustard
    • 2 tbsp lemon juice
    • salt and pepper to taste
    • 5 large eggs
    • 3 tbsp fresh chopped parsley optional

    Instructions
     

    • Prepare your pie dough. (Try my spelt flour pie crust for a healthier alternative!)
    • Begin by prepping your ingredients and dicing the onion and mushrooms.
    • In a medium-sized pan, cook the onion and ground beef until browned. Remove any excess fat.
    • Add the mushrooms and cook for another minute or two. Remove from heat.
    • Add the spices, Dijon mustard, lemon juice, salt and pepper and set the beef aside to cool slightly. Taste the mixture now to adjust for seasonings.
    • In a separate small bowl, whisk 5 large eggs. Add the chopped parsley, salt and pepper, and stir.
    • Prepare your pie plate and roll out the pie dough for top and bottom. Place the dough in the pie plate.
    • Stir the eggs into the beef mixture and mix thoroughly. Pour the filling into the pie plate and top with the other half of the rolled out pie dough. Crimp the edges and add a few vents to the top of the pie to allow steam to escape.
    • Cook in a 400 degree Fahrenheit oven for 35-40 minutes or until the crust is a beautiful golden brown. Check the pie after 20 minutes and rotate the pie dish so the crust will brown evenly. Allow the pie to sit for 10 minutes before slicing. Enjoy!

    Notes

    • I recommend placing the pie plate on a cookie sheet to protect your oven from potential spills.
    • Take time to taste the beef filling (before adding the egg yolks) to taste and adjust for salt and seasonings. This step will make all the difference.
    • Rotate While Baking: Check the pie halfway through baking and rotate it to ensure even browning.
    • Rest Before Slicing: Allow the pie to rest for 10-15 minutes after baking to let the filling set for cleaner slices.

    Nutrition

    Calories: 271kcal
    Tried this recipe?Let us know how it was!

    If you make this recipe please leave a comment and give this recipe a rating! I aim to respond to every single comment. I am so grateful when you trust me and try one of my recipe creations in your own kitchen. I love to hear how it went!  Let’s connect on Instagram and tag me in your food pics!

    ‘Til next time,

    Christy

    Spelt Flour Pie Crust

    May 17, 2022 · 5 Comments

    Are you interested in a healthy upgrade to your pies? This Spelt Flour Pie Crust recipe is the perfect way to do that. Spelt flour pie dough is surprisingly very easy to work with and this reliable recipe will produce a flaky crispy pie crust that will turn a beautiful golden brown colour as it bakes. This pie crust recipe is suitable for savory or sweet pies.  If you’re not familiar with working with pastry there are a few simple guidelines to follow that will lead to success which I will share in this post. Don’t fear! You can do this.

    Why is spelt flour a healthier choice? Many people find spelt flour to be more digestible than modern wheat flours. That may be because spelt flour is an ancient grain that hasn’t undergone the hybridization that modern wheat has. Spelt flour does contain gluten but less of it. Some individuals with gluten sensitivities find that spelt flour can be incorporated into their diet without a problem. So cheers to enjoying more pie! 

    We love pie in our house, so much so that we have a savoury meat pie every year as part of our family Christmas celebrations. My favourite thing about pie is the contrasting texture of the crispy crust with the filling.

    I have three quiche recipes that go perfectly inside this pie crust recipe: Broccoli Goat Cheese Quiche, Cottage Cheese Quiche and Sun-dried Tomato Pesto Quiche. 

    [feast_advanced_jump_to]

    Why You'll Love This Recipe

    • Easy to Work With: The dough is forgiving and simple to roll out, even for beginners.
    • Customizable: Use it for a variety of pies, from savory chicken pot pie to sweet fruit pies.
    • Made with Light Spelt Flour: Adds a subtle nuttiness and nutrition.
    • Made Ahead: The dough can be made ahead and chilled until you’re ready to use it.

    Ingredients

    • An important note: This recipe requires light or all-purpose spelt flour not whole grain spelt flour so be sure to pick the right type when shopping. Also, keep an eye out for sprouted spelt flour. If you can find a sprouted spelt flour, it has even more nutrients and digestive benefits. 

    See the recipe card below for a full list of ingredients and measurements.

    How To Make Spelt Flour Pie Dough

    Here are the step-by-step instructions to make this recipe.

    Step 1: Mix the dry ingredients and add cold butter and lard.

    Note: this recipe makes enough pie dough for one 10 inch pie plate. If you’re making chicken pot pie where you need a double crust for top and bottom, then double this recipe. 

    In a large mixing bowl combine flour, salt and sugar and stir well to combine. Add very cold cubed butter and lard to the mixing bowl. 

    Step 2: Cut in the butter and lard.

    Cut the butter and lard into the flour using a pastry cutter or fork until the pieces are the sizes of large peas (some slightly larger pieces are okay).

    Step 3: Add water.

    Add a few tablespoon of ice water and begin to work the water through the flour with a fork. The dough will start to form large clusters. If you can squeeze the dough together with your hands and it stays, you have enough water. If it falls apart, add a bit more water but no more than a tablespoon at a time.

    Step 4: Lightly knead dough into a ball and chill.

    Turn the dough out onto the counter and give it a few light kneads to make it hold together in a ball. (Handle the dough as little as possible in this step.)

    Pat into a disc shape and cover with plastic wrap. Refrigerate for at least half an hour before rolling out. 

    Step 5: Roll out the dough.

    Take the dough out of the fridge and lightly flour your work surface and the top of the dough. Using a rolling pin, roll out a 12-13 inch circle. (You can check that your circle of pie dough is big enough for your pie plate by holding the pie plate upside down over the dough and ensuring there’s at least 1 inch of dough around the pie plate.)

    Step 6: Press the dough into the pie dish.

    Carefully transfer the dough into the pie dish. Without stretching the dough, carefully press the dough into the bottom and sides of the dish. Trim excess dough with a sharp knife or kitchen scissors.

    Step 7: Crimp the edges and chill before baking.

    Fold the edge of the pie dough underneath itself. Tuck and press with your thumbs and then crimp the edges.

    Note: if you’ve doubled this recipe, wait to crimp the dough until you’ve added the top crust. Also, if you have an upper crust be sure to add vents.

    Refrigerate the dough again for 15-30 minutes before adding filling and baking.

    Expert Tips

    • The most important tip: Keep everything cold. Really cold. Everything. In the book Art of the Pie the author, Kate McDermott gives this advice: “Keep everything chill, especially yourself.” I love that. Some expert pie makers really go the extra mile. They chill not only the water and the butter for the pie dough but also the mixing bowl, the flour itself and the pastry cutter. They even run their hands under ice cold water before handling the dough. Full disclosure, I don’t do this every time but I definitely go to this length if I’m making pie dough on a hot summer day. I’ll do whatever it takes for success. But no matter what the weather, ice cold water and super cold butter and lard is a must. 
    • As you incorporate the butter and lard you want to leave pockets of fat. Do not fully incorporate the butter into the dough. This is why you want the ingredients to be cold so that the fat will not just meld into the other ingredients. Some recipes will say to incorporate the butter until the remaining pieces are approximately pea sized but I like to go a little bigger than that. 
    • Add water, just a few tablespoons at a time. Use only as much water as necessary. You want just enough to hydrate the dough. You can test if you have added enough water by giving the dough a little squeeze. If it holds together, you have enough water. If it just crumbles apart again, then add another tablespoon of water. Stir together and test the dough again.
    • Be adaptable and trust your baker’s instinct. If you think that the butter is starting to get too soft, pop the dough into the fridge for a few minutes to chill. If you think the dough may be too dry, then add a touch more water. When you feel a little adjustment needs to be made, you're probably right! You can do this.
    • Allow the dough to chill in the fridge for a minimum of half an hour before rolling out.
    • Keep in mind that spelt flour dough is slightly more fragile than all-purpose flour pie dough because it contains less gluten, so be mindful when lifting the dough into the pie dish.
    • If you don’t own a pie plate, a 10 inch cast iron pan will work well!

    Recipe FAQs

    How do I know if I’ve added enough water to the dough?

    The dough should hold together when you squeeze it with your hand but not feel wet or sticky. Add water gradually, a tablespoon at a time.

    Can I make this dough ahead of time?

    Absolutely! Wrap the dough tightly in plastic wrap and refrigerate for up to 3 days or freeze for up to 3 months. Thaw in the refrigerator before rolling out.

    More Spelt Flour Recipes: 

    • Spelt Flour Chocolate Chunk Cookies
    • Spelt Flour Cinnamon Buns
    • 24 Delicious Spelt Flour Recipes
    • Spelt Flour Pancakes
    • Spelt Flour Banana Bread

    More Recipes You'll Love

    • Einkorn Flour Banana Bread
    • Gluten-Free Buckwheat Flour Brownies
    • Cranberry and Orange Cheesecake Cups
    • Pumpkin Pie Pecan Bars

    If you tried this Spelt Flour Pie Crust Recipe or any other recipe on my website, please leave a 🌟 star rating and let me know how it went in the 📝 comments below. I love hearing from you!

    Recipe

    Spelt Flour Pie Crust

    Christy Faber
    Spelt Flour Pie dough is surprisingly very easy to work with and this reliable recipe will produce a flaky crispy pie crust that will turn a beautiful golden brown colour as it bakes. This pie crust recipe is suitable for savoury or sweet pies.
    5 from 3 votes
    Print Recipe Pin Recipe SaveSaved!
    Prep Time 20 minutes mins
    Chill time 30 minutes mins
    Total Time 50 minutes mins
    Course Appetizer, Main Course, Side Dish
    Cuisine American
    Servings 8 people
    Calories 226 kcal

    Ingredients
      

    • 1 ½ cups light spelt flour
    • ¾ teaspoon sea salt
    • ½ tbsp sugar or coconut sugar
    • ⅓ cup cold unsalted butter (76 grams)
    • ¼ cup cold lard (57 grams)
    • ⅓ cup ice cold water add gradually, use more if needed

    Instructions
     

    • Note: this recipe makes enough pie dough for one 10 inch pie plate. If you’re making chicken pot pie where you need a double crust for top and bottom, then double this recipe. 

    Make Pie Dough

    • In a large mixing bowl combine flour, salt and sugar and stir well to combine.
    • Add very cold cubed butter and lard to the mixing bowl. Cut the butter and lard into the flour using a pastry cutter or fork until the pieces are the sizes of large peas (some slightly larger pieces are okay).
    • Add a few tablespoon of ice water and begin to work the water through the flour with a fork. The dough will start to form large clusters. If you can squeeze the dough together with your hands and it stays, you have enough water. If it falls apart, add a bit more water but no more than a tablespoon at a time.
    • Turn the dough out onto the counter and give it a few light kneads to make it hold together in a ball. (Handle the dough as little as possible in this step.)
    • Pat into a disc shape and cover with plastic wrap. Refrigerate for at least half an hour before rolling out. 

    Rolling Out the Dough

    • Take the dough out of the fridge and lightly flour your work surface and the top of the dough. Using a rolling pin, roll out a 12-13 inch circle. (You can check that your circle of pie dough is big enough for your pie plate by holding the pie plate upside down over the dough and ensuring there’s at least 1 inch of dough around the pie plate.)
    • Carefully transfer the dough into the pie dish. Without stretching the dough, carefully press the dough into the bottom and sides of the dish. Trim excess dough with a sharp knife or kitchen scissors.
    • Fold the edge of the pie dough underneath itself. Tuck and press with your thumbs and then crimp the edges.
    • Note: if you’ve doubled this recipe, wait to crimp the dough until you’ve added the top crust. Also, if you have an upper crust be sure to add vents.
    • Refrigerate the dough again for 15-30 minutes before adding filling and baking.

    Nutrition

    Calories: 226kcal
    Tried this recipe?Let us know how it was!

    If you make this recipe please leave a comment and give this recipe a rating! I aim to respond to every single comment. I am so grateful when you trust me and try one of my recipe creations in your own kitchen. I love to hear how it went!  Let’s connect on Instagram and tag me in your food pics!

    ‘Til next time,

    Christy

    Homemade Strawberry Mint Ice Cream

    Apr 30, 2022 · 2 Comments

    Homemade Strawberry Mint Ice Cream is made with wholesome ingredients such as whole milk, cream, and raw honey, combined with the sweetness of ripe strawberries. Making this creamy dessert at home is not only fun but also incredibly rewarding. The best part? You'll love knowing every single ingredient that went into making this ice cream.

    For more delicious strawberry recipes visit my posts for Strawberry Chocolate Truffles, Strawberry Jam Thumbprints and High Protein Strawberry Smoothie.

    Two strawberry mint ice cream waffle cones in whiskey glasses on a staged wooden table.

    If you're lucky enough to have strawberries in season, opt for dark red, ripe berries bursting with flavor. However, if you're like me and craving ice cream outside of strawberry season, frozen berries are the way to go (frozen berries are typically picked at flash frozen at the peak of their season). I used peppermint tea to flavor the custard but if you had fresh peppermint in your garden that would be delicious as well!

    I love the combination of mint and strawberry but enjoy experimenting with other flavors like strawberry and basil or strawberry and lavender. No matter what herbal combination you choose it'll taste like summer in every spoonful.

    Making homemade ice cream is so satisfying and feels like a real achievement. Try my homemade Chai Ice Cream and high protein Cottage Cheese "Ice Cream" as well!

    [feast_advanced_jump_to]

    Why You'll Love This Recipe

    • Naturally sweetened with honey
    • Wholesome ingredients
    • A great go-to recipe when strawberries are in season
    • By preparing this ice cream at home, you can avoid artificial additives and preservatives commonly found in store-bought ice cream
    • A great way to enjoy the nourishment of egg yolks
    • Making homemade ice cream is fun and rewarding!

    Ingredients

    The 5 ingredients to make strawberry mint ice cream in bowls and measuring cups on a wooden table.
    • Heavy cream - check the ingredients on the cream you purchase. It shouldn't contain any stabilizers or additives.
    • Honey - raw honey serves as a natural sweetener, but it also imparts a distinct flavor to the ice cream that white sugar doesn't have.
    • Egg yolks - from large eggs.
    • Peppermint tea bags - or a bundle of fresh peppermint from your garden.
    • Salt - just a pinch! It enhances the sweetness of the ice cream.
    • Strawberries - look for extra red berries that are nice and plump!

    See the recipe card below for a full list of ingredients and measurements.

    Substitutions & Variations

    • Instead of raw honey, you can use maple syrup, agave nectar, or granulated sugar as sweeteners.
    • Swap the mint for other fresh herbs like basil, thyme, lavender or rosemary to create intriguing herbal-infused ice cream flavors.
    • Crush some homemade or store-bought cookies and fold them into the ice cream for a recipe reminiscent of strawberry shortcake.
    • Before serving, consider topping the ice cream with fresh fruit slices, whipped cream, or a drizzle of honey.
    • Add a touch of freshness by grating some citrus zest (orange, lemon, or lime) into the custard base.

    I have not experimented with any other substitutions or alterations for this recipe. If you decide to make any changes by adding or substituting ingredients, I would love it if you could share your results with us by leaving a comment below.

    How To Make Strawberry Ice Cream

    Here are the step-by-step instructions to make this recipe.

    Step 1: Make the custard

    Plan Ahead: Ensure the freezer drum component of your ice cream maker has been in the freezer for a minimum of 24 hours.

    Using a heavy-bottomed saucepan such as a Dutch oven, gently warm the milk, cream and honey over medium-low heat.

    Stir until honey is all melted. Add 3 tea bags of peppermint tea. Remove from the heat and allow the tea bags to steep in the cream mixture. Taste occasionally and remove the tea bags when your base has reached the desired level of flavour.

    Separate the egg yolks from the whites. Whisk the egg yolks separately in a small bowl. Very gradually, begin to whisk ½ cup of the warm (not hot) milk and cream mixture into the egg yolks to bring them up to temperature. (It’s important to do this step very slowly to ensure you don’t accidentally cook the egg yolks.)

    Pour the tempered yolk mixture into the saucepan and cook over medium-low heat, stirring continually for about 5-10 minutes until the mixture thickens enough that it coats the back of a spoon.

    Pour the custard through a fine wire-mesh strainer into a bowl to remove any lumps.

    Place the bowl in the fridge to cool for several hours or place the bowl over an ice bath and stir until the custard is cold. You want to ensure the custard is cold before pouring it into the ice cream machine.

    Ice cream custard base in glass mixing bowl on a wooden table.

    Step 2: Make the strawberry sauce.

    In a medium-sized saucepan, combine the strawberries and honey and heat on medium-low heat. Crush the strawberries with the back of a spoon and simmer the mixture for 5-10 minutes until it has thickened and has a consistency similar to jam. Transfer the strawberry sauce to a bowl and either place over an ice bath until very cold or store in the fridge to chill.

    Crushed strawberries with honey in a bowl on a wooden table.

    Step 3: Churn the ice cream.

    Pour the cold custard and half of the strawberry sauce into the ice cream maker and churn the ice cream for 10-20 minutes until it resembles soft serve ice cream.

    Ice cream churning in an ice cream maker.

    Step 4: Begin to layer the ice cream and the strawberry sauce.

    Transfer half of the ice cream into a freezer safe container. 

    Half the chilled ice cream mixture in a freezer safe metal pan.

    Step 5: Begin to layer the ice cream and the strawberry sauce.

    Add a layer of strawberry sauce and swirl it through gently with the end of a spoon. Add the rest of the ice cream and top with the final layer of strawberry sauce. Swirl again gently. Freeze the ice cream for a minimum of 4 hours. 

    Strawberry sauce swirled on top of ice cream in a freezer safe metal pan.

    Step 6: Serve ice cream.

    When ready to serve, take the ice cream out of the freezer 10 minutes prior to serving to make scooping easier. Enjoy!

    Freezer safe pan full of ice cream with strawberry swirl on top and three round scoops on a staged wooden table with whole and crushed cones around.

    Expert Tips

    • Purchase heavy cream that contains simple ingredients like cream and milk. Some store-bought creams have unnecessary extra ingredients like stabilizers or thickeners.
    • Ensure that the freezer drum component of your ice cream maker has been in the freezer for a minimum of 24 hours. This step is crucial for a silky ice cream consistency. Ice cream will be icy if not properly churned. 
    • As you steep the tea bags in the mixture of cream, milk and honey, be sure to taste occasionally so you know when your base has reached your desired level of flavor. I find this takes between 5 and 10 minutes.
    • I love sweetening ice cream with honey not only for its nutritional benefits over white sugar but also because honey provides a creamier texture to the ice cream and pairs beautifully with the strawberry and mint flavors. I recommend a good quality, local honey.
    • In my opinion, the most difficult step of making ice cream is tempering the egg yolks before incorporating them into the warm cream mixture. Do this step really slowly to guarantee success.
    • I recommend straining the custard before pouring it into the ice cream machine. This step filters out any bits of cooked egg yolk that may disrupt the texture of the creamy ice cream.
    • Take your ice cream out of the freezer 10 minutes before serving to make scooping easier.

    Recipe FAQs

    How do I know I've churned the ice cream for long enough?

    It will look like soft serve ice cream and this takes about 15-20 minutes.

    What should I do with left over egg whites?

    If you don’t want those egg whites to go to waste you should try my Sugar Free Granola Recipe. It uses egg whites to bind the ingredients together.

    Why is it important to temper the egg yolks?

    Tempering egg yolks is essential to avoid curdling or cooking the yolks when adding them to the hot cream mixture. Slowly adding a bit of warm liquid to the yolks while whisking helps bring them to a higher temperature gradually.

    Strawberry ice cream in a waffle cone placed upside down on a wooden table.

    Storage

    Freezer

    Store in the freezer in an airtight container and enjoy within the week for the best consistency. Homemade ice cream will begin to get icy after a long time in the freezer because it doesn't contain any stabilizers.

    More Recipes You'll Love

    • Chai Tea Ice Cream Sweetened with Honey {Bengal Spice Tea}
    • a spoonful of cottage cheese ice cream held above of a bowl of cottage cheese ice cream to show the soft serve texture of the ice cream.
      Blended Cottage Cheese Ice Cream
    • A spoon sitting inside a scooped out bit of Earl Grey Panna Cotta inside an ornate tea cup.
      Earl Grey Panna Cotta
    • Apple Mousse

    If you tried this Homemade Strawberry Mint Ice Cream Recipe or any other recipe on my website, please leave a 🌟 star rating and let me know how it went in the 📝 comments below. I love hearing from you!

    Strawberry Mint Ice Cream

    Christy Faber
    Strawberry Mint Ice Cream is made with wholesome ingredients such as whole milk, cream, and raw honey, combined with the sweetness of ripe strawberries. Making this creamy dessert at home is not only fun but also incredibly rewarding.
    5 from 2 votes
    Print Recipe Pin Recipe SaveSaved!
    Prep Time 20 minutes mins
    Cook Time 20 minutes mins
    Chill time 4 hours hrs
    Total Time 4 hours hrs 40 minutes mins
    Course Dessert, Snack
    Cuisine American
    Servings 6 people
    Calories 258 kcal

    Ingredients
      

    • 2 ¼ cup whole milk
    • ¾ cup heavy cream
    • ⅓ cup raw honey
    • 5 large egg yolks
    • 3 peppermint tea bags
    • pinch of salt

    Strawberry Sauce

    • 2 cups whole strawberries
    • 3 tbsp raw honey

    Instructions
     

    • Plan Ahead: Ensure the freezer drum component of your ice cream maker has been in the freezer for a minimum of 24 hours.
    • Using a heavy bottomed saucepan such as a Dutch oven, gently warm the milk, cream and honey over medium-low heat.
    • Stir until honey is all melted. Add 3 tea bags of peppermint tea. Remove from the heat and allow the tea bags to steep in the cream mixture. Taste occasionally and remove the tea bags when your base has reached the desired level of flavour.
    • Separate the egg yolks from the whites. Whisk the egg yolks separately in a small bowl. Very gradually, begin to whisk ½ cup of the warm (not hot) milk and cream mixture into the egg yolks to bring them up to temperature. (It’s important to do this step very slowly to ensure you don’t accidentally cook the egg yolks.)
    • Pour the tempered yolk mixture into the saucepan and cook over medium-low heat, stirring continually for about 5-10 minutes until the mixture thickens enough that it coats the back of a spoon.
    • Pour the custard through a fine wire-mesh strainer into a bowl to remove any lumps.
    • Place the bowl in the fridge to cool for several hours or place the bowl over an ice bath and stir until the custard is cold. You want to ensure the custard is cold before pouring it into the ice cream machine.
    • To make the strawberry sauce: In a medium-sized saucepan, combine the strawberries and honey and heat on medium-low heat. Crush the strawberries with the back of a spoon and simmer the mixture for 5-10 minutes until it has thickened and has a consistency similar to jam. Transfer the strawberry sauce to a bowl and either place over an ice bath until very cold or store in the fridge to chill.
    • Time to churn the ice cream: Pour the cold custard and half of the strawberry sauce into the ice cream maker and churn the ice cream for 10-20 minutes until it resembles soft serve ice cream.
    • Transfer half of the ice cream into a freezer safe container. Add a layer of strawberry sauce and swirl it through gently with the end of a spoon. Add the rest of the ice cream and top with the final layer of strawberry sauce. Swirl again gently. Freeze the ice cream for a minimum of 4 hours.
    • When ready to serve, take the ice cream out of the freezer 10 minutes prior to serving to make scooping easier. Enjoy!

    Notes

    • In my opinion, the most difficult step of making ice cream is tempering the egg yolks before incorporating them into the warm cream mixture.  Do this step really slowly to guarantee success.
    • I recommend straining the custard before pouring it into the ice cream machine. This step filters out any bits of cooked egg yolk that may disrupt the texture of the creamy ice cream.
    • How do I know I’ve churned my ice cream for long enough?  It will look like soft serve ice cream and this takes about 15 minutes.
    • It’s best to enjoy homemade ice cream within several days of making it.  Because homemade ice cream doesn’t contain a lot of stabilizers, it will begin to get icy after several days. 

    Nutrition

    Calories: 258kcalCarbohydrates: 32.2gProtein: 9gFat: 11.7gSaturated Fat: 5.9gCholesterol: 183mgSodium: 109mgPotassium: 208mgFiber: 1gSugar: 30gCalcium: 150mgIron: 1mg
    Tried this recipe?Let us know how it was!

    If you make this recipe please leave a comment and give this recipe a rating! I aim to respond to every single comment. I am so grateful when you trust me and try one of my recipe creations in your own kitchen. I love to hear how it went!  Let’s connect on Instagram and tag me in your food pics!

    ‘Til next time,

    Christy

    Atole De Avena (Oatmeal Drink)

    Apr 26, 2022 · 11 Comments

    Atole De Avena, or oatmeal drink, is a warm, comforting drink so versatile that it can be enjoyed as a snack, dessert or as a calming bedtime drink. It is surprisingly filling and only lightly sweetened with coconut sugar or your choice of sweetener. 

    Atole De Avena in a clear, glass mug and a cinnamon stick inside.

    Atole De Avena, is a variation of a traditional Mexican drink. Atole is typically made with Masa Harina (corn flour) but this version is made with oat flour.

    The texture and consistency of Atole can be adjusted to your personal preference. I prefer mine to be very creamy so I blend the oats thoroughly into a fine flour. If you prefer more texture in your Atole, just pulse the oats slightly. I also prefer my Atole to be a thicker consistency that I can eat with a spoon, almost like oatmeal. I love it that way as it reminds me of the Cream of Wheat cereal I ate as a child. However, as many people prefer their Atole to be a drinkable consistency, I have created this particular recipe to be more like a beverage. 

    For more delicious oatmeal recipes check out Matcha Crinkle Cookies, Date Oatmeal Cookies, Coconut Haystacks, Coconut Flour Oatmeal Cookies.

    [feast_advanced_jump_to]

    Health Benefits Of Oats

    Oats are very nutritious and naturally gluten free. (In the case of a gluten allergy, ensure that the oats you purchase are certified gluten free.) Oats are typically associated with breakfast but I love blending oats into oat flour to use in various baked goods.

    Oats are an excellent source of manganese and a good source of copper, magnesium and vitamin B5 and B1. Oats provide a soluble fibre called beta-glucan which is excellent for promoting healthy digestion and balancing blood sugar levels. (Nutrition information sourced from Healthline)

    Why You'll Love This Recipe

    • It's a comforting drink that can be enjoyed hot, making it perfect for cold weather or when you want something cozy.
    • It's customizable - you can use whole milk or non-dairy milk, and sweeten it with your choice of coconut sugar, maple syrup, or brown sugar.
    • It's easy to make - all you need is a blender (or purchase ready made oat flour) and a pot. It only takes 5 minutes to cook.
    • It's a healthy option for breakfast as the oats and milk combination is high in fibre and protein.
    • It's versatile! You can enjoy it for breakfast, as a midday snack, or as a cozy bedtime snack.
    • It's a great option for those who are gluten-free as long as you use certified gluten-free oat flour.

    Ingredients

    Ingredients to make Atole De Avena in small bowls and measuring cups.
    • Oat flour - did you know you can easily make your own oat flour at home if you have a blender or food processor?
    • Whole milk - or swap for any dairy-free milk of your choice like oat milk, almond milk or soy milk.
    • Coconut sugar- one of my favorite natural sweeteners.
    • Vanilla extract - splurge for the pure stuff!
    • Ground cinnamon - I recommend Ceylon cinnamon otherwise known as "true cinnamon." Plus a cinnamon stick for adding to the drink if you'd like!
    • Sea salt - just a pinch to enhance flavor!

    See the recipe card below for a full list of ingredients and measurements.

    Substitutions & Variations

    • Oat Flour – you could swap for Masa Harina (corn flour), rice flour or amaranth. There are many thickeners used in Atole recipes. 
    • Coconut sugar –  You can swap the coconut sugar in this recipe for your preferred sweetener. Try sweetening with maple syrup, brown sugar, traditional piloncillo or blended dates.
    • Cinnamon – You can exchange cinnamon for other flavours. Try cardamom, pumpkin pie spice, chai spice or an earl grey tea bag.
    • Whole milk– You can use your favourite non-dairy milk. You can even make your own oat milk or pumpkin seed milk at home for the occasion.
    • Add chocolate -If you add chocolate to this recipe the Atole becomes a drink called Champurrado.
    • Vanilla extract - You can omit the vanilla extract if you don't have it, or use a few drops of almond extract.
    • Nut butter: For a nutty flavor, you can add a tablespoon of almond butter, peanut butter, or hazelnut butter to the mixture.
    • If enjoying Atole for breakfast you could consider half a scoop of unflavored protein powder for an extra boost of nutrition.

    I have not experimented with any other substitutions or alterations for this recipe. If you decide to make any changes by adding or substituting ingredients, I would love it if you could share your results with us by leaving a comment below.

    How To Make The Best Atole de Avena

    Here are the step-by-step instructions to make this recipe.

    Step 1: Make the oat flour

    Begin by grinding the oats into oat flour in a high powered blender. (If you prefer a more textured consistency, just pulse the oats once or twice.)

    Ground oats on a blue plate.

    Step 2: Combine ingredients and heat

    Add all ingredients to a medium sized pot or dutch oven and stir thoroughly. Bring to a gentle boil. Stir frequently so the milk won’t burn or boil over.

    All ingredients for Atole De Avena added into a Dutch oven with a whisk laying on top.

    Step 3: Thicken Atole

    Reduce the heat and simmer for approximately 5 minutes while stirring frequently until the Atole has thickened slightly and reaches your desired consistency.

    Ingredients for Atole De Avena whisked together in a Dutch oven.

    Step 4: Taste and adjust for flavor and serve

    Add more milk if the Atole is too thick at this stage and taste to adjust for sweetening or flavour. Pour into mugs, serve hot and enjoy!

    Atole De Avena pouring from measuring cup into a glass mug.

    Expert Tips

    • It can be hard to know what consistency you're aiming for when you make Atole for the first time. One way to describe the texture you're looking for is like a runny pudding. But don't get too caught up in nailing the "correct" consistency. My recommendation is simply to make the consistency you prefer!
    • If the consistency of your Atole is too thick, simply add more liquid until you reach the desired consistency. (After adding additional liquid always taste again to adjust for seasoning or sweetness.) When adding liquid, keep in mind Atole will thicken more as it sits.
    • Top with a sprinkle of ground cinnamon if desired or serve with a cinnamon stick.
    • Pure vanilla extract is a must for this recipe in my opinion. I know it can be really expensive but the taste of real vanilla in Atole is such a treat.

    Recipe FAQs

    What is Atole de Avena?

    Atole de Avena is a delicious hot drink made with oatmeal, milk and sugar that originates in Mexico.

    Can I make this drink dairy free?

    Definitely! You can swap whole milk for almond milk or oat milk or your favourite non-dairy beverage.

    Is Atole de Avena gluten free?

    Yes, Atole De Avena is gluten free. Oats are naturally gluten free. However, they can sometimes be processed in a facility that also processes products containing gluten. If you require the Atole to be completely free of gluten contamination, ensure that the oats you purchase are certified gluten free.

    Overhead shot of Atole De Avena in a glass mug with a cinnamon stick and cinnamon sprinkled on top.

    Storage

    Refrigerator

    You can store Atole in the fridge for 2-3 days.

    How To Reheat:

    Atole continues to thicken as it sits in the fridge so when you wish to eat it simply warm it up in a saucepan (or microwave if you prefer) with a little more milk and enjoy!

    More Oat Flour Recipes You'll Love

    • Chocolate Peppermint Crinkle Cookies
    • Healthy Oat Flour Banana Pancakes
    • Buckwheat Flour Chocolate Banana Muffins
    • stack of fudgy oat flour brownies on a white board.
      Oat Flour Brownies

    Did you make this recipe? Let me know!
    Leave a review or comment below!

    Recipe

    Atole De Avena

    Christy Faber
    Atole De Avena, or oatmeal drink, is a variation of a traditional Mexican drink. This is a warm, comforting drink so versatile it can be enjoyed as a snack, dessert or as a calming bedtime drink. Atole De Avena is surprisingly filling and only lightly sweetened with coconut sugar or your choice of sweetener.
    5 from 10 votes
    Print Recipe Pin Recipe SaveSaved!
    Prep Time 5 minutes mins
    Cook Time 10 minutes mins
    Total Time 15 minutes mins
    Course Drinks
    Cuisine Mexican
    Servings 2 people
    Calories 189 kcal

    Ingredients
      

    • ¼ cup oat flour
    • 1 ½ cup whole milk or non-dairy milk of choice
    • 2 tbsp coconut sugar or maple syrup or brown sugar
    • ⅛ tsp pure vanilla extract
    • ¼ tsp ground cinnamon
    • pinch of salt

    Instructions
     

    • Begin by grinding the oats into oat flour in a high powered blender. (If you prefer a more textured consistency, just pulse the oats once or twice.)
    • Add all ingredients to a medium sized pot or dutch oven and stir thoroughly. Bring to a gentle boil. Stir frequently so the milk won’t burn or boil over.
    • Reduce the heat and simmer for approximately 5 minutes while stirring frequently until the Atole has thickened slightly and reaches your desired consistency.
    • Add more milk if the Atole is too thick at this stage and taste to adjust for sweetening or flavor.
    • Pour into mugs. Serve hot and enjoy!

    Notes

      • It can be hard to know what consistency you're aiming for when you make Atole for the first time. One way to describe the texture you're looking for is like a runny pudding. But don't get too caught up in nailing the "correct" consistency. My recommendation is  just to make the consistency you prefer!
      • If the consistency of your Atole is too thick, simply add more liquid until you reach the desired consistency. (After adding additional liquid always taste again to adjust for seasoning or sweetness.) When adding liquid, keep in mind Atole will thicken more as it sits.
      • Top with a sprinkle of ground cinnamon if desired or serve with a cinnamon stick.
      • Use pure real vanilla extract if you can! 

    Nutrition

    Calories: 189kcalCarbohydrates: 29.6gProtein: 7.4gFat: 6.8gSaturated Fat: 3.6gCholesterol: 18mgSodium: 75mgPotassium: 342mgFiber: 1.1gSugar: 21.5gCalcium: 228mgIron: 1mg
    Tried this recipe?Let us know how it was!

    If you make this recipe please leave a comment and give this recipe a rating! I aim to respond to every single comment. I am so grateful when you trust me and try one of my recipe creations in your own kitchen. I love to hear how it went!  Let’s connect on Instagram and tag me in your food pics!

    ‘Til next time,

    Christy

    More Drinks To Enjoy

    • Super Nourishing Custard Drink
    • Homemade Tahini Hot Chocolate
    • 23 Nourishing Hot Drinks
    • Strawberry cottage cheese smoothie pouring into a glass out of a blender cup on a staged tabletop.
      Strawberry Cottage Cheese Smoothie

    Oat Flour Brownies

    Apr 21, 2022 · Leave a Comment

    stack of fudgy oat flour brownies on a white board.

    Oat Flour Brownies are a must-try recipe! These gluten-free peanut butter brownies are chocolatey, fudgy and everything you want a brownie to be but with a healthy twist. They are sweetened with maple syrup and topped with a delicious nut butter swirl (you can use peanut butter like I did or swap for a seed butter like tahini). If you're looking for another gluten-free snack to try, check out my Buckwheat Flour Chocolate Banana Muffins.

    stack of fudgy oat flour brownies on a white board.

    These healthy Oat Flour Brownies are actually flourless, gluten free and refined sugar free. Although lower-carb and healthy, these brownies don’t require a lot of complicated ingredients and are easy to make. Oats are a pantry staple in most houses and if you have a blender it’s very easy to make oat flour at home by blending oats into a very fine powder.

    With a few simple steps, you’ll have healthy brownies baking in the oven that you’re gonna love. Enjoy them with an ice cold glass of milk (or pumpkin seed milk if you’re dairy free) and top with whipped cream (or coconut cream) for an extra treat. 

    For more naturally gluten free recipes try these Oat Flour Pancakes, Peppermint Crinkle Cookies, Coconut Oatmeal Cookies and Matcha Crinkle Cookies.

    [feast_advanced_jump_to]

    Why You'll Love This Recipe

    • A healthier twist on traditional brownies
    • Naturally gluten-free
    • Naturally sweetened with maple syrup
    • Topped with a delicious nut butter swirl
    • Freezer friendly
    • A healthy dessert alternative for kids and adults alike

    Ingredients

    The 9 ingredients required to make oat flour brownies.
    • Oat flour - you can make your own oat flour at home or purchase oat flour from the store.
    • Cocoa powder - look for a high quality unsweetened cocoa powder.
    • Baking powder
    • Sea salt -enhances the flavor of the brownies and balances the sweetness.
    • Butter -unsalted and softened
    • Maple syrup - my favorite natural sweetener to replace sugar in this recipe. It also adds a subtle maple flavor to baked goods.
    • Eggs
    • Chocolate chips - I choose semi sweet but you can swap for dark chocolate or milk chocolate chips. You can also purchase sugar free chocolate chips sweetened with either dates or stevia for example.
    • Peanut butter - smooth and unsweetened peanut butter is used for the swirl topping.

    See the recipe card below for a full list of ingredients and measurements.

    Substitutions & Variations

    • If you want a dairy-free option, you can substitute the butter with coconut oil.
    • You can use dairy-free chocolate chips if you prefer or substitute them with chopped dark chocolate or sugar free chocolate.
    • You can swap the peanut butter with almond butter, cashew butter, sunflower seed butter, or tahini or any favorite nut or seed butter of your choice.
    • Add chopped nuts like walnuts, pecans, or almonds to the brownie batter for extra crunch and flavor.
    • Mix in dried fruit like cherries, cranberries, or chopped dates for a chewy and sweet addition.
    • Sprinkle a pinch of flaky sea salt on top of the baked brownies to enhance the flavors and create a sweet-salty contrast.
    • Serve brownies with a scoop of vanilla ice cream or a dollop of whipped cream for a delightful dessert.
    • Or serve with fresh berries and a dusting of powdered sugar.

    I have not experimented with any other substitutions or alterations for this recipe. If you decide to make any changes by adding or substituting ingredients, I would love it if you could share your results with us by leaving a comment below.

    How To Make Oat Flour Brownies

    Here are the step-by-step instructions to make this recipe.

    Step 1: Prep and preheat the oven and stir together the dry ingredients.

    Begin by greasing an 8x8 brownie pan or lining it with parchment paper. Preheat the oven to 350 degrees Fahrenheit.

    Blitz oats in a blender into oat flour. Carefully measure out half a cup of oat flour and add it to a medium-sized mixing bowl. (Or use half a cup of purchased oat flour.) Add cocoa powder, baking powder, espresso powder and salt. Stir together well.

    mixing bowl with dry ingredients for oat flour brownies

    Step 2: Combine the wet ingredients.

    In a separate medium-sized bowl, mix together softened butter, room temperature maple syrup and room temperature eggs.

    Eggs in a mixing bowl with a whisk ready to be whisked together with other ingredients around.

    Step 3: Combine wet and dry ingredients.

    Add the wet ingredients to the dry ingredients and mix until combined.

    mixing bowl with dry and wet ingredients about to be stirred together

    Step 4: Add chocolate chips.

    Stir in the chocolate chips until mixed evenly throughout the batter.

    mixing bowl with brownie batter and chocolate chips poured in

    Step 5: Add brownie batter to pan and mix up the peanut butter swirl.

    Pour brownie batter into the prepared pan and smooth out the top.

    In a separate small bowl, stir together peanut butter and maple syrup. Make 9-12 small dollops of the peanut butter mixture on the top of your brownie batter.

    brownie batter in a baking dish with dollops of peanut butter

    Step 6: Create swirl pattern and bake.

    With the end of a chopstick or a similar kitchen tool, swirl the peanut butter through the brownie batter to create a beautiful swirl pattern.

    Bake for 25 minutes and allow to cool completely or the brownies will be very crumbly when you cut them. Store in the fridge and enjoy!

    brownie batter in a square baking dish with peanut butter swirl

    Expert Tips

    • To ensure you're measuring the dry ingredients accurately, use the spoon-and-level method. Spoon the dry ingredients into the measuring cups. Then, use the flat edge of a knife to level off the excess.
    • You can also make this recipe in a blender if that’s faster for you. Begin by blitzing oats into oat flour and then follow with the rest of the ingredients (except the chocolate chips). Scrape down the sides of the blender to be sure everything is incorporated. Transfer the batter into the pan and then stir in the chocolate chips.
    • It’s important that you let these brownies cool completely. Oat flour brownies have no gluten in them so they won’t have as much structure and may be crumbly when they’re warm. My favorite way to eat these brownies is chilled right out of the fridge. They’re delicious that way!
    • Serve brownies with a scoop of vanilla ice cream or a dollop of whipped cream for a delightful dessert.

    Recipe FAQs

    Are oat flour brownies healthy?

    These brownies are a healthier alternative to classic brownies for sure! They are flourless and gluten free because of the oat flour and therefore are lower carb. They have minimal sweetener in the form of maple syrup which is more nutritious than white sugar. They are still a treat though! Remember sugar is sugar whether it comes in the form of white sugar or maple syrup.

    Can I make these brownies dairy free?

    Yes! To make these brownies dairy free, simply swap the butter for coconut oil and ensure that the chocolate chips you're using are dairy free.

    Why do brownie recipes call for salt?

    Adding salt to baked goods is a trick I use to be able to cut down on the sugar content. Salt brings out the natural flavor and sweetness of foods. I find a little bit of salt allows me to cut down on sugar in a recipe quite a bit without sacrificing the flavor.

    Three oat flour brownies stacked on a blue plate with another one beside them.

    Storage

    Room Temperature

    I like to store these brownies in the fridge in an airtight container. They’ll be good that way for up to 5 days or you can store them in an airtight container on the counter for up to 3 days. You can freeze them as well. They’ll be good in the freezer for months.

    More Healthy Desserts You'll Love

    • Green, dessert bowl full of Cottage Cheese Lemon Mousse on a wooden board with a handle spooning a scoop out.
      Cottage Cheese Lemon Mousse
    • Fudgy Chocolate Orange Pudding Cake
    • Apple Mousse
    • Tahini Stuffed Chocolate Covered Dates

    Did you make this recipe? Let me know!
    Leave a review or comment below!

    Recipe

    Oat Flour Brownies

    Christy Faber
    Oat Flour Brownies are chocolatey, fudgy and everything you want a brownie to be but with a healthy twist. These gluten-free peanut butter brownies are sweetened with maple syrup and topped with a delicious nut butter swirl.
    5 from 1 vote
    Print Recipe Pin Recipe SaveSaved!
    Prep Time 15 minutes mins
    Cook Time 20 minutes mins
    Total Time 35 minutes mins
    Course Dessert, Snack
    Cuisine American
    Servings 16 Brownies
    Calories 204 kcal

    Ingredients
      

    Dry Ingredients

    • ½ cup oat flour certified gluten free if necessary
    • ½ cup unsweetened cocoa powder
    • ½ tsp baking powder
    • 1 tsp espresso powder optional
    • ½ tsp unrefined sea salt

    Wet Ingredients

    • ½ cup unsalted butter softened
    • ½ cup pure maple syrup room temperature
    • 3 large eggs room temperature
    • 1 cup semi-sweet chocolate chips

    To Top The Brownies

    • ⅓ cup peanut butter
    • 2 tbsp pure maple syrup

    Instructions
     

    • Begin by greasing an 8x8 brownie pan or lining it with parchment paper. Preheat the oven to 350 degrees Fahrenheit.
    • Blitz oats in a blender into oat flour. Carefully measure out half a cup of oat flour and add it to a medium-sized mixing bowl. (Or use half a cup of purchased oat flour.) Add cocoa powder, baking powder, espresso powder and salt. Stir together well.
    • In a separate medium-sized bowl, mix together softened butter, room temperature maple syrup and room temperature eggs. Add the wet ingredients to the dry ingredients and mix until combined. Stir in chocolate chips.
    • Pour brownie batter into the prepared pan and smooth out the top.
    • In a separate small bowl, stir together peanut butter and maple syrup. Make 9-12 small dollops of the peanut butter mixture on the top of your brownie batter. With the end of a chopstick or a similar kitchen tool, swirl the peanut butter through the brownie batter to create a beautiful swirl pattern.
    • Bake for 25 minutes and allow to cool completely. Store in the fridge and enjoy!

    Notes

    • To ensure you're measuring the dry ingredients accurately, use the spoon-and-level method. Spoon the dry ingredients into the measuring cups. Then, use the flat edge of a knife to level off the excess.
    • You can also make this recipe in a blender if that’s faster for you. Begin by blitzing oats into oat flour and then follow with the rest of the ingredients (except the chocolate chips). Scrape down the sides of the blender to be sure everything is incorporated. Transfer the batter into the pan and then stir in the chocolate chips.
    • It’s important that you let these brownies cool completely. Oat flour brownies have no gluten in them so they won’t have as much structure and may be crumbly when they’re warm. My favorite way to eat these brownies is chilled right out of the fridge. They’re delicious that way!
    • Serve brownies with a scoop of vanilla ice cream or a dollop of whipped cream or with fresh berries and a dusting of powdered sugar for a delightful dessert.

    Nutrition

    Serving: 26.44gCalories: 204kcalCarbohydrates: 19.7gProtein: 4.3gFat: 13.1gSaturated Fat: 7gCholesterol: 53mgSodium: 147mgPotassium: 182mgFiber: 1.9gSugar: 13.8gCalcium: 48mgIron: 2mg
    Tried this recipe?Let us know how it was!

    If you make this recipe please leave a comment and give this recipe a rating! I aim to respond to every single comment. I am so grateful when you trust me and try one of my recipe creations in your own kitchen. I love to hear how it went!  Let’s connect on Instagram and tag me in your food pics!

    ‘Til next time,

    Christy

    Aeropress Vietnamese Coffee

    Apr 16, 2022 · 1 Comment

    This Aeropress Vietnamese Coffee recipe combines strongly brewed coffee with condensed milk and cinnamon to make a coffee that tastes like a sweetened latte.

    Vietnamese coffee brewers use a traditional Vietnamese coffee maker or dripper that brews a single serving of coffee directly into a mug with condensed milk at the bottom. An Aeropress is well suited to add a third-wave coffee spin to a Vietnamese coffee tradition because it's strong and brews directly into a mug.

    A Vietnamese coffee maker is a simple, metal coffee dripper that has two metal filters. One filter is called a tamper and can be removed from the top. The other sits over the mug under the dripper.

    A Vietnamese coffee maker looks like a little pot sitting on your mug and brews coffee slowly and strongly.

    I love coffee culture. I love that every country and region has its own way of making coffee and I even think there's something poetic about how every household makes it differently.

    My dad owns a Technovorna Moccamaster and it's a whole event when it's coffee time as the grandkids love to flick the switch and see the water bubble and go shooting up over to the filter.

    It's a completely different experience at your house or your friend's house. We have a friend who was gifted a Tassimo coffee maker and the delight she gets from being able to offer lattes amidst a busy visit with kids makes it taste so good and feel so special.

    And at home, I make pour over coffee in an intensely focused way. We chat as it brews or silently watch our caffeine juice come alive in the bottom of a carafe.

    People often apologize when making coffee for us when we're visiting but I say no. Make coffee your way and let us enjoy the beauty of differing cultures, walk in each others' shoes and drink to every person's unique journey.

    Similarly, I always look on a menu for how they serve coffee. I had Vietnamese coffee for the first time while out for lunch with my boss and was amazed by how sweet and milky it was - but still so strong.

    One of my favourite restaurant experiences was when I was out for lunch with my brothers at an Ethiopian restaurant. It was a quiet day and we were the only ones there.

    The owner, our server, was obviously multitasking as she took our orders and served us while working on paperwork.

    I noticed she offered a 'coffee ceremony'.

    Well, we had to order that.

    And it didn't disappoint.

    When we asked for it, she ran off and returned wearing a shawl and without explaining closed the restaurant doors. She then proceeded to walk around with a big stick of incense, ensuring the cloud of smoke travelled along every wall.

    She then returned to the back and emerged with a frying pan of crackling and smoking coffee beans. She explained that the beans were to be shown to the drinkers before they were used.

    She wafted the coffee smoke around the restaurant and went back to the kitchen. When she came out next she had a set of small mugs, popcorn and an Ethiopean coffee maker (a metal jug with grounds and water combined) and explained that we were to try it from oldest to youngest.

    As the oldest, I was first.

    She poured me a small cupful and asked, 'Would you like salt in it?'

    "What?"

    "Would you like salt?"

    "No, thank you."

    She paused, and the excitement she had displayed as she was performing the coffee ritual up to this point disappeared. I was clearly doing something wrong. "You have to have salt with your coffee," she pressed.

    Who was I to say no? I forced a laugh and gave in.

    The coffee was strong and dark without being bitter. The salt brought out the flavours without making it salty. This coffee was unique and incredible.

    She left the coffee with us once we had all tried it and explained it was traditional to eat popcorn with coffee in Ethiopia.

    Coffee culture is great. My advice to you is to always say 'yes' when someone offers you coffee.

    Frequently Asked Questions

    How do you make Vietnamese Iced Coffee?

    You can make Vietnamese coffee iced by making Vietnamese coffee but brewing the Aeropress directly into a mug that contains three icecubes.

    What is in Vietnamese Coffee?

    Vietnamese coffee is made of condensed milk and strongly brewed coffee. This recipe adds cinnamon to the Aeropress brewing process to give it extra flavour.

    Is Vietnamese coffee espresso?

    No. Although strong like espresso, Vietnamese coffee is brewed using gravity rather than pressure to get the water through and the coffee out.

    How much caffeine does Vietnamese iced coffee have?

    Vietnamese coffee uses Robusta beans and therefore has twice as much caffeine as typical coffee brewed with Arabica beans. An 8oz cup of Vietnamese coffee has 265mg of caffeine. (This is the same as 4 shots of espresso.)

    What does Vietnamese coffee taste like?

    Because Vietnamese coffee has a unique brewing method and uses Robusta beans, it has a unique flavour profile that is very strong. Vietnamese coffee tastes like a dark roast but without bitterness and has a thicker texture. It tastes like a sweetened latte when combined with condensed milk.

    Why is Vietnamese coffee so strong?

    Vietnamese coffee is so strong because it uses Robusta beans rather than Arabica which is what we're used to in North America. Robusta beans are known for producing a strong bitter taste and have nearly 3 times the caffeine of Arabica.

    Why is condensed milk used in Vietnamese coffee?

    Condensed milk is the traditional way of making Vietnamese coffee; the sweet and milky flavours balance the bitter robusta coffee. Historically, fresh milk wasn't widely available in Vietnam so coffee brewers used condensed milk as it doesn't go bad outside the fridge.

    How to Make Vietnamese Coffee (or or Cà phê sữa đá)

    Boil water (about three times the amount of water your mug will hold ) and measure out 20 grams of fresh coffee beans.

    Place 1 tablespoon of sweetened condensed milk in a mug.

    Grind the coffee beans finely so they look like powder and form a flat surface when you push your finger into them. Grind your beans more fine than you would for a coffee maker or pour over but not as fine as your would for your espresso maker.

    Place a paper filter in the filter holder of an Aeropress and pour boiling water over it to rinse it.

    Put the plunger in the chamber and pull it as far out as possible without breaking the seal. Place the entire thing upside down, plunger first.

    Add the ground coffee and ¼ teaspoon cinnamon to the chamber.

    Slowly pour in 50 grams of water (to bloom the coffee beans, let gasses escape) and wait 30 seconds.

    Pour 200 grams more water into the chamber and wait 15 seconds. Screw the filter holder (with a wet filter inside) onto the chamber and flip it onto your mug ( which has the condensed milk at the bottom).

    Push down on the plunger until you feel a lot of resistance and pause while still maintaining some pressure. Wait 2 or 3 seconds and repeat until you reach the bed of coffee beans or hear a hiss.

    Remove the Aeropress, unscrew the filter holder and pull out the plunger. This will make your Aeropress last longer.

    Stir the condensed milk and coffee together and enjoy!

    Tips for Making The Best Vietnamese Coffee with an Aeropress

    • You can adjust the amount of cinnamon and/or sweetened condensed milk to your own preference.
    • You can also exchange cinnamon for cardamom. We tried this and it was great! You may want to experiment with other flavours as well.
    • Sweetened condensed milk cools down your coffee so plan to drink it right away or heat up the condensed milk before brewing.

    More Recipes to Enjoy Around the Table

    Tahini Stuffed Dates

    Tahini Stuffed Chocolate Covered Dates are going to be your new favourite treat! When you bite into one you’ll think you’re eating a chocolate bar.

    Peanut Butter Swirl Black Bean Brownies

    Black Bean Brownies are among my all-time favourite comfort foods. Don’t knock ‘em ‘til you try ‘em!

    Coconut Flour Oatmeal Cookies

    These Coconut Flour Oatmeal Cookies are soft and chewy with a great melt-in-your-mouth texture from the coconut flour.

    Vietnamese Coffee in the Aeropress

    Vietnamese Coffee Made With An Aeropress

    Christy Faber
    This Aeropress Vietnamese Coffee recipe combines strongly brewed coffee with condensed milk and cinnamon to make a coffee that tastes like a sweetened latte. It's quick to make and honestly competes with any sweetened latte any day.
    5 from 1 vote
    Print Recipe Pin Recipe SaveSaved!
    Prep Time 6 minutes mins
    Cook Time 4 minutes mins
    Total Time 10 minutes mins
    Course Drinks
    Cuisine vietnamese
    Servings 1 person
    Calories 62 kcal

    Equipment

    • 1 Aeropress Coffee Maker
    • 1 Gooseneck Kettle
    • 1 Coffee Grinder

    Ingredients
      

    • 250 grams boiling water
    • 20 grams ground coffee
    • 1 tablespoon sweetened condensed milk

    Instructions
     

    • Boil about three times the amount of water as your mug will hold and measure out 20 grams of fresh coffee beans.
    • Place 1 tablespoon of sweetened condensed milk in a mug.
    • Grind the coffee beans finely so they look like powder and form a flat surface when you push your finger into them.
    • Place a paper filter in the filter holder of an Aeropress and pour boiling water over it to rinse it.
    • Put the plunger in the chamber and pull it as far out as possible without breaking the seal. Place the entire thing upside down, plunger first.
    • Add the ground coffee and ¼ teaspoon cinnamon to the chamber.
    • Slowly pour 50 grams of water in (to bloom the coffee beans, let gasses escape) and wait 30 seconds.
    • Pour 200 grams more water into the chamber and wait 15 seconds. Screw the filter holder (with a wet filter inside) onto the chamber and flip it onto your mug (with the condensed milk at the bottom).
    • Push down on the plunger until you feel a lot of resistance and pause while still maintaining some pressure. Wait 2 or 3 seconds and repeat until you reach the bed of coffee beans or hear a hiss.
    • Remove the Aeropress, unscrew the filter holder and pull out the plunger. This will make your Aeropress last longer.
    • Stir the condensed milk and coffee together and enjoy!

    Video

    https://lifearoundthetable.ca/wp-content/uploads/2022/04/Aeropress-Vietnamese-Coffee.mp4

    Nutrition

    Calories: 62kcal
    Tried this recipe?Let us know how it was!

    If you make this recipe please leave a comment and give this recipe a rating! I aim to respond to every single comment. I am so grateful when you trust me and try one of my recipe creations in your own kitchen. I love to hear how it went!  Let’s connect on Instagram and tag me in your food pics!

    ‘Til next time,

    Christy

    Tahini Stuffed Chocolate Covered Dates

    Apr 14, 2022 · 1 Comment

    Tahini Stuffed Chocolate Covered Dates are going to be your new favourite treat! When you bite into one you’ll think you’re eating a chocolate bar. Tahini stuffed dates are truly delicious. The nutty and slightly savoury flavour of tahini really balances the sweetness and caramel flavour of the Medjool date. All of this is enrobed in chocolate and topped with sesame seeds and shredded coconut. They really remind me of a Snickers bar. So good!

    For more recipes with tahini visit my posts for Tahini Hot Chocolate and Tahini Balsamic Dressing.

    Tahini Stuffed Dates are a sweet snack or dessert made with only four ingredients. Fill a Medjool date with sesame seed butter (aka tahini) and then dip it in chocolate. So simple, and really, doesn't that sound too good?

    More Delicious Snacks

    • Date Cookies
    • Peanut Butter Energy Balls
    • Black Bean Brownies
    • Peanut Butter and Jelly Quinoa Bites
    • Date Sweetened Chocolate Chip Cookies
    [feast_advanced_jump_to]

    Why You'll Love This Recipe

    • Naturally sweet
    • Naturally gluten free
    • No bake treat!
    • Simple and quick to make
    • Freezer-Friendly
    • Nutritious and Satisfying

    Ingredients

    See the recipe card below for a full list of ingredients and measurements.

    More Topping and Filling Options

    • Crushed pretzels
    • Crushed nuts like pecans or pistachios
    • Drizzle of white chocolate
    • Sesame seeds
    • Shredded coconut
    • Flaky salt
    • Add a pecan or almond inside the date for added crunch
    • Add a little jam to the filling
    • Try other nut or seed butters like peanut butter, almond butter or sunflower seed butter

    How To Make Tahini Stuffed Dates

    Here are the step-by-step instructions to make this recipe.

    Step 1: Remove the date seeds.

    Begin by removing the dates seeds by cutting a slit along one side of the date. Place the pitted dates on a large plate or baking sheet.

    Step 2: Fill the centre of each date with tahini.

    Fill the center of the date with about ½ to 1 teaspoon of tahini, however much will fit! Place these tahini filled dates in the freezer.

    Step 3: Melt the chocolate and dip the dates.

    Meanwhile, melt the chocolate chips with coconut oil on the stove in a double boiler over medium-low heat. Use oven mitts if the side of the bowl is warm to the touch. 

    Stir until the chocolate is fully melted and remove from the heat. Let the chocolate cool slightly so it's not too hot for your fingers as you dip the dates. Dip your tahini stuffed dates in the chocolate.

    Tahini stuffed dates coated in chocolate on a large serving dish on a table with ingredients around.

    Step 4: Add desired toppings and chill the chocolate dipped dates.

    Sprinkle with desired toppings. Place them in the fridge to cool until the chocolate is set and enjoy!

    Expert Tips

    • It’s really important to ensure the tahini is well stirred. Tahini can be thinner and more oily at the top of the jar and you really want the tahini to be well stirred and thick so it will stay put in the centre of the date.
    • Keep this snack in the refrigerator so the chocolate doesn’t melt. Serve them chilled.
    • Kids love to help with making this treat. Little kids can help with sprinkling shredded coconut and sesame seeds on top of the dates after they’ve been dipped in chocolate. Older kids love to help with the messy part of dipping the date in the melted chocolate. 
    • Purchasing quality tahini and quality chocolate will make a big taste difference in this recipe. A good time to treat yourself to the good stuff! 

    Recipe FAQs

    Can these treats be frozen?

    Yes! They keep really well in the freezer. The sugar content in dates prevents them from getting too hard when frozen so you can eat them directly from the freezer!

    What is tahini?

    Tahini is a seed butter made from toasted, ground, hulled sesame seeds. It’s delicious and has a nutty, slightly savoury flavour that is hard to describe but so delicious.

    More Recipes with Dates

    • Date and Walnut Gingerbread Truffles
    • Peanut Butter Pretzel Date Bark
    • Sliced banana, peanut butter and walnuts topping date oatmeal on a staged countertop.
      Banana Date Oatmeal
    • Healthy Chocolate Peppermint Fudge

    If you tried these Tahini Stuffed Chocolate Covered Dates or any other recipe on my website, please leave a 🌟 star rating and let me know how it went in the 📝 comments below. I love hearing from you!

    Recipe

    Tahini Stuffed Chocolate Covered Dates

    Christy Faber
    Tahini Stuffed Dates are going to be your new favourite treat!  When you bite into one you’ll think you’re eating a chocolate bar. They really remind me of a Snickers bar. So good!
    5 from 1 vote
    Print Recipe Pin Recipe SaveSaved!
    Prep Time 15 minutes mins
    Setting time 30 minutes mins
    Total Time 45 minutes mins
    Course Appetizer, Dessert, Snack
    Cuisine American
    Servings 22 treats
    Calories 126 kcal

    Ingredients
      

    • 1 lb Medjool dates
    • ½ cup tahini (sesame seed butter) well stirred
    • 1 ⅓ cup semi sweet chocolate chips
    • ½ tsp coconut oil

    To Top The Dates

    • sprinkle of sesame seeds
    • sprinkle of shredded coconut

    Instructions
     

    • Begin by removing the dates seeds by cutting a slit along one side of the date. Place the pitted dates on a large plate or baking sheet.
    • Fill the center of the date with about ½ to 1 teaspoon of tahini, however much will fit! Place these tahini filled dates in the freezer.
    • Meanwhile, melt the chocolate chips with coconut oil on the stove in a double boiler over medium-low heat. Use oven mitts if the side of the bowl is warm to the touch. (Instructions for a double boiler: Fill a saucepan with several inches of water and place a heat safe mixing bowl over the saucepan in order to melt your chocolate.)
    • Stir until the chocolate is fully melted and remove from the heat. Let the chocolate cool slightly so it's not too hot for your fingers as you dip the dates.
    • Dip your tahini stuffed dates in the chocolate and sprinkle with desired toppings. Place them in the fridge to cool until the chocolate is set and enjoy!

    Nutrition

    Calories: 126kcal
    Tried this recipe?Let us know how it was!

    If you make this recipe please leave a comment and give this recipe a rating! I aim to respond to every single comment. I am so grateful when you trust me and try one of my recipe creations in your own kitchen. I love to hear how it went!  Let’s connect on Instagram and tag me in your food pics!

    ‘Til next time,

    Christy

    Pumpkin Seed Milk (Pepita Milk) Recipe

    Mar 30, 2022 · 1 Comment

    Homemade Pumpkin Seed Milk is a delicious dairy free alternative that tastes similar to almond milk. The bonus is that pumpkin seed milk doesn’t require presoaking the seeds so you can make it on demand.

    Pumpkin seeds are packed with protein, magnesium, zinc, iron and manganese which makes this milk alternative so nutritious. Pumpkin seeds are also a good source of tryptophan. You know how turkey is famous for making you feel sleepy and sort of zen after eating it? That’s due to the high tryptophan content in turkey.  A handful of pumpkin seeds or a glass of pumpkin seed milk in the evening can really help you get a good night's sleep. 

    Pumpkin Seed Milk is easy to make at home and you can do it all in under 15 minutes including clean up. All that’s necessary is a high-powered blender and some cheesecloth or a nut milk bag. Store in the fridge to maintain freshness and enjoy it within 5 days.

    Healthy Habit: Making plant milk at home is a real upgrade to buying boxed plant milk in the store. Some brands of dairy free alternatives contain additives and stabilizers such as gums, carrageenan, or even flavours and excess sugar. If you have time to make this drink at home then you have the benefit of knowing exactly what has gone into your plant milk and you can’t beat the fresh taste!

    Frequently Asked Questions About Pumpkin Seed Milk

    Is Pumpkin Seed Milk Healthy?

    Pumpkin seed milk can be a great milk alternative for those avoiding dairy in their diets or those who can’t have almond milk due to nut allergies. 8oz of pumpkin seed milk provides 6.8 grams of protein and 11 grams of healthy fats. Pumpkin seeds are rich in many nutrients such as magnesium, potassium, zinc, iron and manganese. Pumpkin seed milk does not have the same nutritional profile as dairy milk however which is important to keep in mind as you find a balance of nutrition for your lifestyle.

    Does Pumpkin Seed Milk Have Protein?

    Yes, 8 oz of homemade pumpkin seed milk contains 6.8 grams of plant protein. Very comparable to 1% dairy milk which contains 7.7 grams of protein per 8 oz. (Click here for the source of this information.)

    What Does Pumpkin Seed Milk Taste Like?

    Pumpkin Seed Milk tastes remarkably like almond milk. It’s creamy and lightly sweet and if you’re already a fan of dairy free alternative beverages you will love pumpkin seed milk.

    How Do You Make Pumpkin Seed Milk?

    • Add filtered water, pumpkin seeds (and optional ingredients if desired) to a high powered blender and blend for 1-2 minutes.
    • Slowly pour the pumpkin seed milk through a cheese cloth or nut milk bag into a clean vessel and squeeze to get all the liquid extracted from the pulp.
    • Store in the fridge for freshness and enjoy within 5 days.

    Tips for Making Pumpkin Seed Milk

    • Be sure to buy raw pumpkin seeds
    • If you cringe at the thought of tossing the left over pumpkin seed pulp this site gives some helpful suggestions for avoiding food waste and using the pulp in creative ways.
    • Pumpkin seeds are a great pantry staple. If you always have them on hand then you are just minutes away from fresh delicious milk or simply eat a handful with some shredded coconut and chocolate chips for my favourite trail mix. 

    More Recipes to Enjoy Around the Table

    Tahini Hot Chocolate

    I love making homemade hot chocolate because I can control the amount of sugar. I also love knowing every single ingredient that goes into making my drink.

    Sunflower Seed Butter Cookies

    These Sunbutter cookies are packed with nutritious ingredients like rolled oats, raw sunflower seeds, shredded coconut, ground flaxseed and sunflower seed butter.

    Carrot Cake Energy Balls

    Carrot Cake Energy Balls are gluten-free and sweetened naturally with maple syrup. They keep well in the fridge and freezer.  And good news! You don’t need a food processor to make these healthy treats.  Just use a box grater.

    Pumpkin Seed Milk Recipe

    How To Make Pumpkin Seed Milk

    Christy Faber
    Homemade Pumpkin Seed Milk is a delicious dairy free alternative that tastes similar to almond milk. The bonus is that pumpkin seed milk doesn’t require presoaking the seeds so you can make it on demand.
    5 from 1 vote
    Print Recipe Pin Recipe SaveSaved!
    Prep Time 10 minutes mins
    Course Breakfast, Side Dish
    Cuisine American
    Servings 4 people
    Calories 129 kcal

    Equipment

    • high powered blender
    • cheese cloth or nut milk bag

    Ingredients
      

    • 4 cups filtered or distilled water
    • 1 cup raw pumpkin seeds

    Optional Add-Ins

    • pinch of sea salt
    • ½ tbsp pure maple syrup
    • ¼ tsp pure vanilla extract

    Instructions
     

    • Add filtered water, pumpkin seeds and optional ingredients if desired to a high powered blender and blend for 1-2 minutes.
    • Slowly pour the pumpkin seed milk through a cheese cloth or nut milk bag into a clean vessel and squeeze to get all the liquid extracted from the pulp.
    • Store in the fridge for freshness and enjoy within 5 days.

    Nutrition

    Calories: 129kcal
    Tried this recipe?Let us know how it was!

    If you make this recipe please leave a comment and give this recipe a rating! I aim to respond to every single comment. I am so grateful when you trust me and try one of my recipe creations in your own kitchen. I love to hear how it went!  Let’s connect on Instagram and tag me in your food pics!

    ‘Til next time,

    Christy

    Spinach, Sun-dried Tomato and Pesto Quiche

    Mar 27, 2022 · 5 Comments

    Spinach, Sun-dried Tomato and Pesto Quiche is a delicious combination of sweet and tart sun-dried tomatoes and the fresh flavours of basil pesto and spinach. I love this quiche recipe and I’m so excited to share it with you. This is one of my favourite flavour combinations!

    I always add sliced tomatoes to the top of quiches to add the perfect acidic balance to the rich custard.  As the tomatoes cook and meld with the custard filling, they provide a tart, acidic note to every bite, balancing out the richness of the quiche. It’s a must in my opinion! Including spinach in this recipe increases the nutritional value of every slice! You may also enjoy my Broccoli Goat Cheese Quiche or Cottage Cheese Quiche.

    Quiche is a classic brunch recipe but I often serve it for dinner as well. Quiche is so versatile making it a great recipe for your repertoire. Enjoy!

    Frequently Asked Questions About Quiche

    Can quiche be frozen?

    Yes!  Quiche is a great meal to make ahead of time. Cook the quiche fully and allow it to cool completely. Wrap the quiche really well in plastic wrap to avoid freezer burn. To reheat the quiche from frozen, set the quiche out to thaw for an hour or two. Preheat the oven to 350 degrees F and tent the quiche with aluminum foil.  Heat until the middle is warmed through, approximately 45 minutes.

    Can quiche be reheated?

    Yes, to reheat quiche from the fridge, preheat the oven to 300 degrees and tent with aluminum foil. Heat until the middle is warmed through, approximately 20-25 minutes.

    Can quiche be eaten cold?

    Definitely! Many people serve cold quiche as a side for brunch. It’s just as delicious that way.

    How to Make Spinach, Sun-dried Tomato and Pesto Quiche

    • Make your favourite pie crust recipe. (I used Ina Garten's recipe.)  Roll out the pastry and line your pie plate with pastry. Crimp the edges. This recipe makes enough filling to fill one 9 or 10 inch pie plate. Place the pie plate on a small tray to catch any overflow as you transfer the quiche into the oven.
    • Prepare add-ins. Finely chop the onion and measure out the spinach. Add 1 tablespoon butter or olive oil to a frying pan and cook until the onion is translucent and the spinach has softened. Set aside while you prepare the quiche filling.
    • Meanwhile, in a small bowl, whisk together ¼ cup of heavy cream with 2 tablespoon of flour until totally smooth and no lumps of flour remain.
    • In a 4 cup pyrex measuring cup or in a medium sized mixing bowl beat 4 eggs. To the beaten eggs, add whole milk, the flour and cream slurry you just made, shredded mozzarella cheese, salt , pepper, pesto and sun-dried tomatoes. Stir together well. Mix in the cooked spinach and onion.
    • Pour the quiche mixture into your prepared pie plate slowly, being careful not to overfill the dish. (Sometimes there is extra filling if you added extra cheese or extra spinach.)
    • Slice 1 tomato and arrange the slices over the top of the quiche.
    • Bake at 375 degree Fahrenheit for 50-60 minutes or until the quiche is clearly set in the middle and a knife inserted near the centre comes out clean. Let stand at least 10 minutes before cutting. Serve hot or cold.

    Tips for Making Quiche

    • I recommend placing the pie plate on a cookie sheet to protect your oven from potential spills.
    • Take care to not overfill the pie plate with the filling. There may be extra filling if you added extra cheese or extra spinach. Or your pie plate may have a different depth than mine.
    • You can use either homemade or store bought pesto, whichever is most convenient.
    • Use your favourite pie crust recipe. Or try my spelt flour pie crust recipe for a healthier version. I have also purchased readymade pie crusts lately and they have been a real time saver.

    More Recipes to Enjoy

    • Broccoli Goat Cheese Quiche
    • High Protein Cottage Cheese Quiche
    • Custard Oats with Mixed Berry Compote
    • Super Nourishing Custard Drink

    Recipe

    Spinach, Sun-dried Tomato and Pesto Quiche

    Christy Faber
    Spinach, Sundried Tomato and Pesto Quiche is deliciously herby with a fresh flavour from the basil pesto and a sweet/tart flavour from the sundried tomatoes.
    5 from 6 votes
    Print Recipe Pin Recipe SaveSaved!
    Prep Time 30 minutes mins
    Cook Time 1 hour hr
    Total Time 1 hour hr 30 minutes mins
    Course Breakfast, Main Course
    Cuisine French
    Servings 8 slices
    Calories 141 kcal

    Ingredients
      

    • 1 9-10 inch pie crust

    For The Quiche Filling

    • 1 tbsp butter
    • 1 small onion finely chopped
    • 2 cups spinach
    • 4 large eggs beaten
    • ¾ cup whole milk
    • ¼ cup heavy cream or whole milk
    • 2 tbsp all-purpose flour
    • 1 cup mozzarella cheese shredded
    • ½ tsp unrefined sea salt
    • ¼ tsp freshly ground black pepper
    • 3 tbsp basil pesto
    • 3 ½ tbsp oil packed sun-dried tomato snipped into small pieces

    To Top The Quiche

    • 1 small tomato sliced

    Instructions
     

    • Make your favourite pie crust recipe. (I used Ina Garten's recipe.)  Roll out the pastry and line your pie plate with pastry. Crimp the edges. This recipe makes enough filling to fill one 9 or 10 inch pie plate. Place the pie plate on a small cookie sheet to catch any overflow as you transfer the quiche into the oven.
      1 9-10 inch pie crust
    • Prepare add-ins: Finely chop the onion and measure out the spinach. Add 1 tablespoon butter or olive oil to a frying pan and cook until the onion is translucent and the spinach has softened. Set aside while you prepare the quiche filling.
      1 small onion, 2 cups spinach, 1 tablespoon butter
    • Meanwhile, in a small bowl, whisk together ¼ cup of heavy cream with 2 tablespoon of flour until totally smooth and no lumps of flour remain.
      ¼ cup heavy cream or whole milk, 2 tablespoon all-purpose flour
    • In a 4 cup pyrex measuring cup or in a medium sized mixing bowl, beat 4 eggs. To the beaten eggs. add whole milk, the cream slurry you just made, shredded mozzarella cheese, salt , pepper, pesto, and sun-dried tomatoes. Stir together well. Mix in the cooked spinach and onion.
      4 large eggs, ¾ cup whole milk, 1 cup mozzarella cheese, ½ teaspoon unrefined sea salt, ¼ teaspoon freshly ground black pepper, 3 tablespoon basil pesto, 3 ½ tablespoon oil packed sun-dried tomato
    • Pour the quiche mixture into your prepared pie plate slowly, being careful not to overfill the dish. (Sometimes there is extra filling if you added extra cheese or spinach.)
    • Slice 1 tomato and arrange the slices over the top of the quiche.
      1 small tomato
    • Bake at 375 degrees Fahrenheit for 50-60 minutes or until the quiche is clearly set in the middle and a knife inserted near the centre comes out clean. Let stand at least 10 minutes before cutting. Serve hot or cold.

    Nutrition

    Calories: 141kcal
    Tried this recipe?Let us know how it was!

    If you make this recipe please leave a comment and give this recipe a rating! I aim to respond to every single comment. I am so grateful when you trust me and try one of my recipe creations in your own kitchen. I love to hear how it went!  Let’s connect on Instagram and tag me in your food pics!

    ‘Til next time,

    Christy

    Tahini Balsamic Dressing

    Mar 20, 2022 · Leave a Comment

    Tahini Balsamic Dressing has a classic vinaigrette taste with the addition of a subtle tahini flavour throughout. It is simple to make using wholesome ingredients. (Just like my Orange Ginger Vinaigrette!)

    The secret to a delightful salad is of course a delicious dressing. I’m a big tahini fan. I love it in everything from hummus to homemade tahini hot chocolate or tahini stuffed dates. You can definitely expect more tahini recipes to come to the blog!

    You can use Tahini Balsamic Dressing in a variety of ways:

    • When I make salad for the boys, I combine cubed cheese, diced apple and cucumber and top it with this dressing. Children can be a little wary of lettuce but they love this simple salad.
    • This also makes a great dressing for a quinoa salad. I highly recommend it.
    • Use as a hummus topper. Just drizzle a generous amount of dressing over a bowl of hummus to add an extra zing of flavour. So good. 

    Frequently Asked Questions About Tahini

    Does tahini contain peanuts?

    No, tahini doesn’t contain peanuts. Tahini is made from sesame seeds. In the case of a peanut allergy, ensure that the tahini that you purchase has been processed in a peanut-free facility.

    Is tahini gluten-free?

    Tahini is gluten-free. In the case of a gluten allergy, ensure that the tahini that you purchase was processed in a gluten-free facility.

    Is tahini vegan?

    Yes, Tahini is vegan. Tahini only contains sesame seeds and in some cases some additional neutral oil and salt.

    Do you need to refrigerate tahini?

    Yes, keep tahini refrigerated to maintain freshness.

    How to Make Tahini Balsamic Dressing

    You only need these ingredients to make this delicious dressing: tahini, olive oil, balsamic vinegar, grainy dijon mustard, maple syrup, salt and pepper.

    Making your own dressing at home is a simple habit that will greatly increase the nutritional value of your salads. Store-bought dressings often contain canola oil or other unhealthy oils, sugar or extra additives to prolong the shelf life. 

    Pour all the ingredients into an 8 oz mason jar and shake until thoroughly mixed. Taste the dressing and adjust for seasoning if necessary. Store in the fridge for freshness and use within 5-7 days.  Enjoy!

    Tips for Making Balsamic Tahini Dressing

    • Stir tahini well. Tahini needs to be stirred just like natural peanut butter. It’s important to make sure it’s mixed well to achieve the right consistency for the dressing.
    • Store in the fridge for freshness.  I recommend taking it out of the fridge 10 minutes before using so the dressing is pourable.
    • Use this dressing up within 5-7 days.
    • Always use good quality olive oil. Look for extra virgin olive oil in a dark glass bottle which will protect the oil from oxidation from light.

    More Recipes To Enjoy

    • Homemade Tahini Hot Chocolate
    • Healthy Oat Flour Banana Pancakes
    • Carrot Ribbon Salad with Arugula
    • Matcha Protein Shake

    Tahini Balsamic Dressing

    close up shot of a spoon lifting tahini balsamic dressing out of the jar

    Tahini Balsamic Dressing

    Christy Faber
    The secret to a delightful salad is of course a delicious dressing. Balsamic Tahini Dressing is simple to make with wholesome ingredients like tahini, olive oil, balsamic vinegar, grainy dijon mustard, maple syrup, salt and pepper. 
    5 from 1 vote
    Print Recipe Pin Recipe SaveSaved!
    Prep Time 5 minutes mins
    Total Time 5 minutes mins
    Course Appetizer, Main Course, Salad, Side Dish
    Cuisine American
    Servings 6 people
    Calories 206 kcal

    Ingredients
      

    • ¼ cup balsamic vinegar
    • ½ cup olive oil
    • 3 tbsp tahini
    • 1 ½ tbsp pure maple syrup
    • 1 tbsp grainy dijon mustard
    • 1 tsp sea salt
    • ½ tsp freshly ground pepper

    Instructions
     

    • Pour all the ingredients into an 8 oz mason jar. Shake until thoroughly mixed.
    • Taste the dressing and adjust for seasoning if necessary.
    • Store in the fridge for freshness and use within 5-7 days.  Enjoy!

    Nutrition

    Calories: 206kcal
    Tried this recipe?Let us know how it was!

    If you make this recipe please leave a comment and give this recipe a rating! I aim to respond to every single comment. I am so grateful when you trust me and try one of my recipe creations in your own kitchen. I love to hear how it went!  Let’s connect on Instagram and tag me in your food pics!

    ‘Til next time,

    Christy

    Lacto Fermented Leeks

    Mar 13, 2022 · Leave a Comment

    Fermented leeks in a closed mason jar.

    Lacto Fermented leeks are easy to make at home and a delicious way to incorporate probiotics and beneficial enzymes into your diet. Fermentation has really grown in popularity in recent years.

    A lot of people are rekindling skills in food preservation like canning or fermentation. We are craving simpler lifestyles including getting more in touch with where our food comes from and realizing the effort it takes to make wholesome nourishing food is worthwhile. I love having fermented onions or fermented leeks in my fridge to add an extra boost of nutrition to my lunch bowls.

    Why ferment?  

    • Fermentation is a helpful and inexpensive way to preserve foods. If you have an abundant harvest from your backyard garden with more cucumbers or carrots then you know what to do with, lacto-fermentation is a great way to preserve your produce.
    • Lacto-fermenting foods yourself is a great way to save money. This method allows you to purchase discounted vegetables in the grocery store and have a way to quickly put them to use.
    • Learning to ferment foods expands your culinary skills and will give you greater understanding and appreciation for the simplicity of fermentation.
    • Fermentation adds delicious flavours to your kitchen. Fermented foods add tart, fresh and sour flavours to dishes. Try topping your power bowls with a spoonful of sauerkraut or mix your fermented leeks into a french onion style dip.
    • Ferment for your health. The health benefits from eating lacto-fermented foods and vegetables are enormous!  Fermented foods are more digestible and higher in nutrients than their raw counterparts. Fermented foods are rich in enzymes and probiotics.

    Tips for Successful Fermentation

    • Use a kitchen scale. This method ensures that you’re using enough salt and increases the chance of a successful fermentation. 
    • Keep the leeks totally submerged. It’s important that the item you’re fermenting is kept in an oxygen free environment. Peek at your fermenting jar once a day to check that everything is still submerged.
    • Discard your ferment if you see black or brightly coloured molds.
    • Discard your ferment if it smells really awful. If you’re not sure what I mean by this…. don't worry, you’ll know!.
    • Keep your ferments out of direct sunlight

    Ways To Use Fermented Leeks

    • Top burgers or sausage 
    • Mix into a Greek salad
    • Mix into a French onion style dip
    • Use as a condiment to add acidity and brightness to a dish
    • Add colour and nutrition to your plate
    • Top scrambled eggs or an omelette

    Frequently Asked Questions About Fermentation

    What is lacto-fermentation?

    Lacto-fermentation is the process of lactic-acid-producing bacteria breaking down the sugars or glucose in fruits, vegetables, or other foods into lactic acid. It does this in an environment free of oxygen. You can lacto-ferment many different vegetables or foods. Some popular examples of lacto-fermented foods would be yogurt, sourdough bread, sauerkraut and cucumbers. 

    What vegetables can be lacto-fermented?

    Most vegetables can be lacto-fermented and many fruits as well. Common vegetables to lacto-ferment include: 

    • carrots
    • cabbage
    • cucumber
    • cauliflower
    • onions and garlic
    • leeks
    • peppers

    Can I use tap water to lacto-ferment vegetables?

    You can use tap water to ferment vegetables but I recommend purchasing distilled water because the trace amounts of chlorine in tap water have the potential to affect the success of your ferment.

    How to Make Lacto-fermented Leeks

    Choose a mason jar that is the appropriate size to fit the sliced leek. I used a 16 oz wide mouth style mason jar. Place the mason jar on your kitchen scale and press tare to zero out the weight of the jar.

     Fit the sliced leek into the mason jar and pour in enough water to cover the leeks. Take note of the total weight in grams of the leeks and water combined. To determine the amount of salt you need to add in grams, multiply that number by .02.

    For example If the weight of the leeks and water combined is 800 grams then you will multiply 800 by .02 and get 16. I would add 16 grams of salt to my jar.

    Tare the scale again and add the amount of salt in grams that you determined in the above step. Put on the lid and shake well to dissolve the salt.

    It’s very important to keep the leeks submerged. To do this you can use fermentation weights, pinch bowls, a small mason jar or a plastic sandwich bag filled with a little water. (See photos for examples.)

    Leave your ferment at room temperature away from sunlight for 4-7 days. Check it once a day to make sure the leeks are submerged. Open the lid slightly on a daily basis to prevent pressure from building up in the jar. Close it again tightly.

    Once your fermented leeks have reached the desired flavour, place the jar in the fridge. This will halt the fermentation process. Your fermented leeks will now keep for a very long time. Enjoy!

    More Recipes to Enjoy Around the Table

    Lacto-Fermented Onions
    Fermenting onions at home is easy and totally worth the effort. The best part is that the health benefits are enormous!

    Buying Farm Fresh Eggs: A Guide
    Farm fresh eggs have more of the good stuff—such as omega-3’s and Vitamins A, D, and E in their richer yellow yolk. This guide will give you tips for incorporating this healthy habit into your lifestyle.

    Chili Lime Sunflower Seed Dip

    Chili Lime Sunflower Seed Dip is creamy, tangy, fresh and flavourful. Sunflower Seed dip is made from wholesome ingredients including raw sunflower seeds, a whole large carrot, olive oil and fresh citrus juice.

    Lacto Fermented Leeks

    fit the lid tightly on the mason jar and place the jar at room temperature out of sunlight and ferment for 4-7 days

    Fermented Leeks

    Christy Faber
    Fermented leeks are easy to make at home and are a delicious way to incorporate probiotics and beneficial enzymes into your diet.
    No ratings yet
    Print Recipe Pin Recipe SaveSaved!
    Prep Time 10 minutes mins
    Fermentation 4 days d
    Course Appetizer, Salad, Side Dish, Snack
    Cuisine American
    Servings 6 people
    Calories 9 kcal

    Equipment

    • kitchen scale
    • fermentation weights or plastic sandwich bags
    • mason jar (16 oz)

    Ingredients
      

    • 1 large leek
    • distilled water
    • sea salt or pickling salt

    Instructions
     

    • Choose a mason jar that is the appropriate size to fit the sliced leek. I used a 16 oz wide mouth style mason jar. Place the mason jar on your kitchen scale and press tare to zero out the weight of the jar.
    • Fit the sliced leek into the mason jar and pour in enough water to cover the leeks. Take note of the total weight in grams of the leeks and water combined. To determine the amount of salt you need to add in grams, multiply that number by .02.
    • For example If the weight of the leeks and water combined is 800 grams then you will multiply 800 by .02 and get 16. I would add 16 grams of salt to my jar.
    • Tare the scale again and add the amount of salt in grams that you determined in the above step. Put on the lid and shake well to dissolve the salt.
    • It’s very important to keep the leeks submerged. To do this you can use fermentation weights, pinch bowls, small mason jar or a plastic sandwich bag filled with a little water. (See photos for examples.)
    • Leave your ferment at room temperature away from sunlight for 4-7 days. Check it once a day to make sure the leeks are submerged. Open the lid slightly on a daily basis to prevent pressure from building up in the jar. Close it again tightly.
    • Once your fermented leeks have reached the desired flavour, place the jar in the fridge. This will halt the fermentation process. Your fermented leeks will now keep for a very long time. Enjoy!

    Nutrition

    Calories: 9kcal
    Tried this recipe?Let us know how it was!

    If you make this recipe please leave a comment and give this recipe a rating! I aim to respond to every single comment. I am so grateful when you trust me and try one of my recipe creations in your own kitchen. I love to hear how it went!  Let’s connect on Instagram and tag me in your food pics!

    ‘Til next time,

    Christy

    Fermented Onions (Lacto Fermentation Method)

    Mar 11, 2022 · 20 Comments

    three types of fermented onions in mason jars

    Fermented onions are made using brine (water and salt) and time. Fermenting onions at home is easy and totally worth the effort. The best part is that the health benefits are enormous! Fermented onions are more digestible and higher in nutrients than raw, fresh onions. Fermented vegetables are rich in enzymes and probiotics.

    Although there are many health reasons to incorporate fermented foods into your kitchen, many people choose to ferment foods for the delicious flavour. Fermenting onions makes them less pungent but creates a fresh, tangy and sour condiment that is perfect for topping dishes such as stir-fries or salads. I love having fermented onions or fermented leeks in my fridge to add an extra boost of nutrition to my lunch bowls.

    It took me a long time to work up the courage to try lacto-fermenting vegetables in my home kitchen. I was convinced of the health benefits and it was painful spending so much of my grocery budget on expensive jars of fermented vegetables from the health food store when I knew I could do it for a fraction of the cost at home. But I was nervous that I wouldn’t know if the fermentation had gone wrong.

    After a lot of reading, experimentation and watching videos including this one by Joshua Weissman, I now feel super confident when fermenting vegetables. Here are some of my tips for a successful fermentation.

    Tips for Successful Fermentation

    • Use a kitchen scale. This method ensures that you’re using enough salt and increases the chance of a successful fermentation. 
    • Keep the onions totally submerged. It’s important that the item you’re fermenting is kept in an oxygen free environment. Peek at your fermenting jar once a day to check that everything is still submerged.
    • Discard your ferment if you see black or brightly coloured molds.
    • Discard your ferment if it smells really awful. If you’re not sure what I mean by this, believe me you’ll know.
    • Keep your ferments out of direct sunlight.

    Ways To Use Fermented Onions

    • Top burgers or sausage. 
    • Mix into a Greek salad.
    • Use as a condiment to add acidity and brightness to a dish.
    • Add colour and nutrition to your plate.
    • Top scrambled eggs or an omelette.

    How to Ferment Onions

    1. Choose a mason jar that is the appropriate size to fit the sliced onion. I used a 16 oz wide mouth style mason jar. Place the mason jar on your kitchen scale and press tare to zero out the weight of the jar.
    2.  Fit the sliced onion into the mason jar and pour in enough water to cover the onions. Take note of the total weight in grams of the onion and water combined. To determine the amount of salt you need to add in grams, multiply that number by .02.
    3. For example If the weight of the onion and water combined is 800 grams then you will multiply 800 by .02 and get 16. I would add 16 grams of salt to my jar.
    4. Tare the scale again and add the amount of salt in grams that you determined in the above step. Put on the lid and shake well to dissolve the salt.
    5. It’s very important to keep the onions submerged. To do this you can use fermentation weights, pinch bowls, small mason jar or a plastic sandwich bag filled with a little water. (See photos for examples.)
    6. Leave your ferment at room temperature away from sunlight for 4-7 days. Check it once a day to make sure the onions are submerged. Open the lid slightly on a daily basis to prevent pressure from building up in the jar. Close it again tightly.
    7. Once your fermented onions have reached the desired flavour, place the jar in the fridge. This will halt the fermentation process. Your fermented onions will now keep for a very long time. Enjoy!

    Frequently Asked Questions

    What is lacto-fermentation?

    Lacto-fermentation is the process of lactic-acid-producing bacteria breaking down the sugars or glucose in fruits, vegetables, or other foods into lactic acid. It does this in an environment free of oxygen. 
    You can lacto-ferment many different vegetables or foods including meat or dairy. Some examples of popular lacto-fermented foods would be yogurt, sourdough bread, sauerkraut and cucumbers. 

    Does lacto fermentation produce alcohol?

    Yes, lacto fermentation can produce trace amounts of alcohol. This happens as the bacteria breaks sugar down into lactic acid. Typically the alcohol content is very minute but the longer a ferment is left out at room temperature, the more risk for the alcohol content to increase.

    What salt is best for lacto fermentation?

    The best salt to use for lacto fermentation would be either unrefined sea salt or pickling salt.  Avoid using an iodized salt like table salt or a heavily refined salt as this can affect your ferment.

    More Recipes to Enjoy Around the Table

    Spelt Flour Pancakes
    Spelt Flour Pancakes are a super tasty and healthy way to start the day! Made with simple, wholesome ingredients, these pancakes are a delicious way to incorporate spelt flour in your recipe repertoire.

    Einkorn Flour Banana Bread

    This banana bread recipe is made with nutritious and delicious Einkorn flour. This is an incredibly tender and moist banana bread recipe and Einkorn flour lends a wonderful nutty flavour.  

    Buckwheat Flour Banana Muffins

    Buckwheat flour lends a nutty flavour that compliments these double chocolate banana muffins so well. Oat flour adds a lightness, making the muffins more tender. These muffins are perfect for breakfast or a snack!

    Tools You May Need For This Recipe

    Kitchen Scale

    Mason Jar

    Fermentation Weights

    Pickling Salt

    Noma Guide to Fermentation

    Fermented Onions

    finished product of the fermented onions in a mason jar on a counter top

    Lacto Fermented Onions

    Christy Faber
    Fermented onions are made using brine (water and salt) and time. Fermenting onions is easy and worth the effort. The best part is that the health benefits are enormous! Fermented onions are more digestible and higher in nutrients than raw, fresh onions. Fermented vegetables are rich in enzymes and probiotics.
    5 from 10 votes
    Print Recipe Pin Recipe SaveSaved!
    Prep Time 10 minutes mins
    Fermenation 4 days d
    Total Time 4 days d 10 minutes mins
    Course Appetizer, Side Dish, Snack
    Cuisine American
    Servings 6 people
    Calories 10 kcal

    Equipment

    • kitchen scale
    • fermentation weight or plastic sandwich bag
    • mason jar (16oz)

    Ingredients
      

    • 1 large onion
    • distilled water weight to be determined
    • sea salt or pickling salt weight to be determined

    Instructions
     

    • Choose a mason jar that is the appropriate size to fit the sliced onion. I used a 16 oz wide mouth style mason jar. Place the mason jar on your kitchen scale and press tare to zero out the weight of the jar.
    •  Fit the sliced onion into the mason jar and pour in enough water to cover the onions. Take note of the total weight in grams of the onion and water combined. To determine the amount of salt you need to add in grams, multiply that number by .02.
    • For example If the weight of the onion and water combined is 800 grams then you will multiply 800 by .02 and get 16. I would add 16 grams of salt to my jar.
    • Tare the scale again and add the amount of salt in grams that you determined in the above step. Put on the lid and shake well to dissolve the salt.
    • It’s very important to keep the onions submerged. To do this you can use fermentation weights, pinch bowls, small mason jar or a plastic sandwich bag filled with a little water. (See photos for examples.)
    • Leave your ferment at room temperature away from sunlight for 4-7 days. Check it once a day to make sure the onions are submerged. Open the lid slightly on a daily basis to prevent pressure from building up in the jar. Close it again tightly.
    • Once your fermented onions have reached the desired flavour, place the jar in the fridge. This will halt the fermentation process. Your fermented onions will now keep for a very long time. Enjoy!

    Notes

    Recipe variations:  Get creative.  Try adding garlic or peppercorns, dill or other herbs to your ferment.

    Nutrition

    Calories: 10kcal
    Tried this recipe?Let us know how it was!

    If you make this recipe please leave a comment and give this recipe a rating! I aim to respond to every single comment. I am so grateful when you trust me and try one of my recipe creations in your own kitchen. I love to hear how it went!  Let’s connect on Instagram and tag me in your food pics!

    ‘Til next time,

    Christy

    How to Use a Pour Over Coffee Maker

    Mar 4, 2022 · 2 Comments

    Pour over coffee is a manual coffee brewing method. Pour over uses a dripper with a filter full of course ground coffee, a carafe or collection vessel and hot water to make (perfect and delicioso) coffee by slowly pouring water through the bed of ground coffee.

    I was first introduced to pour over coffee on a date with Christy. We were hanging out in Dundas, Ontario, walking the main street without much of a plan until we came across a cafe we hadn't been in before. And of course, we went in.

    We headed for the counter and the barista ran through our choices and explained one coffee on the menu tasted like lemons but would take a little longer to make.

    Until this moment, "good coffee" was Starbucks and I was intrigued. Lemon notes in coffee? I had to try it! And it did not disappoint. I didn't know it then but this was the beginning of a coffee journey that I'm still on today.

    In this post, I'll teach you how to make pour over coffee so you can experience the joys of good coffee at home.

    Okay -

    Lemon notes, here we come.

    How to make pour over coffee

    Quite simply, pour over coffee mixes hot water and coffee grounds in a filter to extract flavour and tasting notes. Add ground coffee to your filter in the dripper (pour over coffee maker) and slowly pour water over it to extract caffeine, flavour and heavenly notes.

    What’s fascinatingly intricate about the process is how much different brew times, amounts, drippers, coffee beans and water impacts the coffee you get in your mug. Let's learn...

    Coffee is the most chemically complex drink on the planet and as such lets off different flavours as it brews. At the beginning of extraction, acidic and fruity notes drip into your mug. At the end of extraction bitter flavours are released. This is how brew time effects your cup but how finely the coffee is ground also effects both the time the brewing takes and the notes that are released.

    And if you really want to get into the science, read Water for Coffee by Maxwell Colonna-Dashwood and University of Bath Chemist Christopher H. Hendon.

    This is why there is so much discussion (and debate) in the coffee world as there are so many variables that effect the sweet Joe we sip.

    More Posts For Coffee Lovers:

    • Aeropress Vietnamese Coffee
    • Moka Pot Latte Recipe

    Third Wave Coffee and Pour Over Coffee

    You have heard or read, ‘third-wave coffee’ and probably wondered, "what's third-wave coffee? And where was I for the first two waves?"

    The first wave of coffee saw coffee born all over the world, from small pots in hot sand pits in Turkey to simple jugs over open fires in Ethiopia and so on. This was a time when coffee was difficult to come by, took time to make and was a true luxury.

    The second wave coincided with the industrial revolution. Bialetti created the first home espresso coffee brewer with the steam-powered stovetop Moka pot (check out this Moka Pot latte recipe) and later Melitta Bentz developed the first pour over system after experimenting with a blotting paper she found in her son's school supplies because she was fed up with percolator coffee.

    All of these made coffee easier to make at home so families could keep up with a busy pace of life. This wave brought coffee into the home, made it fast and probably sparked the world’s addiction to caffeine. In fact, factory owners instituted coffee breaks so employees would work harder and longer!

    When you hear your parents and grandparents talk about coffee, think second-wave. Many drinkers during this period saw it as a means to an end and often loaded coffee with milk, sugar and other sweeteners to mask the taste.

    The third wave was a renaissance of coffee brewing and a complete revolt against the just-get-it-made mindset of the second wave. The third-wave began as a movement to make coffee tasty, to connect with older methods and to become more ethically sourced. The way coffee beans were produced and brought to our shelves was sad and a revolution was required to find better ways.

    We find ourselves in the middle of the third wave and surrounded by delicious coffee on all sides. But stay glued to your coffee influencer posts because I suspect we'll see a new wave of coffee culture soon as coffee snobs all over the world try to get closer to growers and continually improve the coffee they drink.

    I’m only scratching the surface of coffee history in this article and I encourage you to do your own research into the third-wave, how coffee is sourced and how you can support ethical trading practices all over the world!

    Okay, now let's get into the gear. What do you need to make better coffee?

    Different Kinds of Pour Over Coffee Makers

    Coffee snobs daydream of the perfect pour over set-up. But all you need is a gooseneck kettle and a "dripper". A pour over coffee maker. And you have a few choices that we'll break down in a minute.

    Pour over coffee makers are split between automatic and manual, how quickly they let coffee through their filter and their material. Glass drippers lose the least amount of heat during brewing while metal drippers bring a lot more durability. Ceramic ones fit right in between.

    Beyond these differences, the choice you make has a lot to do with personal preference and what you hope to achieve. I recommend trying as many different kinds of drippers as you can to see what you like!

    Kalita Wave

    The Kalita Wave is a metal coffee dripper with a flat bottom and five small holes. This device is known for an even extraction and great coffee (one of my personal favourites). The Kalita Wave evenly extracts because when you pour water in, it evenly distributes over the coffee and creates an even bed as the bottom is flat.

    Hario V60

    You’ll find Hario V60s all over the internet and at pour over coffee competitions as it’s seen as the easiest to manipulate. It's the easiest for changing the output or taste with different grind coarseness, water quantities and pouring techniques. Hario is a Japanese company. Their name means, 'King of glass' and they offer their dripper in a variety of materials. A V60 is cone-shaped and has a large hole in the bottom. Coffee drips out of a V60 faster than other brewers so the coarseness of coffee beans affects the output a lot. Hario V60s are known for being the most difficult to use. I like a challenge so I often use the V60 but often find the taste is different from one cup to the other.

    Image from Rogue wave Coffee

    Origami

    The Origami is similar to the Hario V60 but has a wide mouth and flatter cone shape. It also features deeper grooves around its circular design so your filter sits inside of it. This means less contact and more area for the filter to let out coffee, not just at the bottom. The Origami comes in a nice big size so you can make coffee for a few people at once. And it's beautiful.

    Chemex

    The Chemex is the most photogenic of all the pour over coffee makers with its elegant wooden wrap around the middle. The Chemex has the capacity to easily make coffee for 3 or 4 people and uses large bamboo filters. It creates a unique coffee so is worth trying out if you can!

    Image from Bodum.com

    Bodum Pour Over Coffee Maker

    Bodum makes a variety of coffee gear that may not be as instagramable, but brews great coffee! The Bodum pour over kit comes with a reusable filter and glass carafe, one of the best materials for keeping coffee hot and for preventing impurities from getting into your coffee.

    Image from Kitchenaid.ca

    Automatic Kitchen Aid Pour Over Coffee Maker

    Specialty automatic coffee makers are quite expensive but the Kitchen Aid is reasonably priced and has everything you need from an automatic coffee maker such as a shower head water dispenser and high-temperature water. I suggest rinsing your coffee filter before you brew as this will deliver a better cup of joe!

    Image from Moccamaster

    Other Automatic Pour Over Coffee Makers

    The coffee world is blooming with new automatic machines as engineers are finding ways to recreate the same quality of manually brewed coffee in a machine that plugs in. These machines can bloom coffee (don't worry, we'll cover this jargon later), get water to the proper temperature and slowly extract coffee. Some machines worth investing in are the Moccamaster, Ratio coffee maker, Melitta and famous Joy Resolve White Barisieur Tea & Coffee Machine.

    Pour-Over Coffee (Geoff's Recipe)

    coffee calculator

    Fill a kettle with water, gooseneck is preferred. Boil more than enough to fill your mug.

    Grind 25 grams of your best coffee.

    Put your dripper over your chosen mug and place a filter in the dripper. Soak it with boiling water and pour out the water. This cleans your filter and washes out anything that might effect the brew.

    Pour the ground coffee into the filter.

    Next will be a process called blooming. To bloom, slowly pour twice the coffee’s weight in water in a circular motion (avoid the edges of the coffee bed). In this recipe that is 50 grams of water. Then wait 30 seconds, the blooming occurs when gases are released from the coffee and you may see bubbles! If you skip this step, those chemicals get trapped in the coffee bed and negatively effect the flavours.

    Next, slowly pour 100 grams of water over the coffee in a circular motion and wait 30 seconds.

    Then, slowly pour 120 grams of water in a circular motion and when the coffee bed is getting low pour the remaining 155 grams in.

    Wait until 3 ½ minutes has passed, then remove the filter. At this point, all the water should have gone through and the filter will be dripping slightly.

    If you get to the end and there’s still some more water you can wait another 15 seconds or note for next time to grind the beans coarser and/or pour the last 155 grams sooner.

    Perfecting your recipe with your grinder, dripper and kettle is a process. It may take several times to get this just right. A new roast may need you to make adjustments all over again!

    How to make pour over coffee without a scale

    If you don't have access to a scale, don't worry. 25 grams of ground coffee equals ⅓ cup and the water used in the recipe (375 grams) equals about 11 ounces. Use these measurements in the recipe instead of the grams written.

    Pour Over Coffee Notes and Controversy

    In the world of gooseneck kettles and freshly ground beans, there's a lot of debate over a lot of things. You should understand the discussion so you can make your own pour over recipe choices.

    Pour over coffee ratio

    Depending on how strong you want your coffee, you will adjust the ratio of coffee to water. The most common is 1:16, often 20 grams of coffee and 320 grams of water. But you can try either 1:15 or 1:14 for a stronger brew! I personally like 1:15 so it's more caffeinated and the notes are stronger (this recipe uses a 1:15 ratio).

    Filters for pour over

    Each pour over coffee maker has its own type of filter but they either come as bleached white filters or brown bamboo filters. The one you choose can affect the flavour but only slightly. The bamboo will effect the flavour more but the bleached filters are bleached.

    The best temperature for pour over coffee

    When you brew your coffee you want the water to be slightly below boiling when it hits the bed of coffee beans (between 192 and 197 degrees Fahrenheit). There is much debate over how hot the water should be in the kettle. One school of thought says there's enough heat loss as the water pours from the kettle to the coffee beans so the water can be 200 degrees Fahrenheit or more in the kettle. The other school of thought is that there isn't substantial temperature loss and water should be 192-195 degrees Fahrenheit in the kettle.

    Common Pour Over Questions

    How much coffee do you put in a pour over?

    The quantity of coffee depends on how much output, or coffee you plan to make and it's based on the ratio you are using. A common coffee brewing ratio is 1:16 and so for a single serving of coffee, you will use 20 grams of coffee and get 320 grams of coffee out of it.

    What is the difference between pour over and drip coffee?

    Typically, drip coffee is made in an automatic machine whereas pour over is made using a dripper and gooseneck kettle. It's fair to be confused as both methods involve coffee dripping into a mug or karafe!

    How do you pour water for pour over coffee?

    Pour water in a spiral starting on the outside. Avoid pouring directly on the edge of the bed of ground coffee and directly in the middle.

    The best beans for pour over coffee

    The best coffee beans for your pour over coffee are freshly ground coffee beans roasted in the last couple of weeks. Your best bet is to find coffee beans roasted at a local cafe or nearby roastery and use them shortly after purchasing. I suggest looking for single-origin coffee beans and after you drink a few cups, make notes of what you think.

    Although it is true that coffee will have distinct flavours depending on where in the world it is sourced, the roasting process affects the flavours the most. A coffee from Ethiopia can taste rich and dark if roasted a long time, but can also be bright and fruity if it is roasted for a short time. Don't get caught up too much on choosing by region. Experiment and take notes! Don't be afraid to DM coffee roasters directly to learn more and perhaps discover why you like their coffee.

    Blends of coffee from different sources are making a comeback as they result in a more consistent flavour every time and allow roasters to make a distinct roast that's their own.

    Grinding coffee beans for pour over coffee

    Freshly ground coffee makes ALL the difference in pour over coffee and the coarseness of the grind affects your recipe. If you think about the spectrum of the most coarse (crushed beans) to the finest (unable to see individual bits) as a scale from 0 - 100 you want to aim for a 30. You want to see individual parts, a little coarser than sand at a beach. Look to grind beans until the largest bits are the size of fine sea salt.

    My Favourite Coffee Time Recipes

    Pumpkin Pie Pecan Bars

    Pumpkin Pie Pecan bars are so easy to make.  You can enjoy the taste of pumpkin pie without the fuss of making homemade pie dough. These bars aren’t overly sweet. The filling is sweetened with just maple syrup and my streusel topping uses minimal coconut sugar or brown sugar.

    Healthy Cinnamon Buns in a dutch oven with icing.
    What is more comforting than a warm cinnamon bun freshly iced right out of the oven? These cinnamon buns are unique with the hint of orange in the filling and the icing. They are satisfying but not overly sweet and you still feel great after eating them. Don’t be intimidated by the unique way of braiding them. It’s actually super easy!

    Healthy Spelt Cinnamon Buns

    What is more comforting than a warm cinnamon bun freshly iced right out of the oven? These healthy, spelt cinnamon buns are unique with the hint of orange in the filling and the icing. They are satisfying but not overly sweet and you still feel great after eating them. Don’t be intimidated by the unique way of braiding them. It’s actually super easy!

    What is more comforting than a warm cinnamon bun freshly iced right out of the oven? These cinnamon buns are unique with the hint of orange in the filling and the icing. They are satisfying but not overly sweet and you still feel great after eating them. Don’t be intimidated by the unique way of braiding them. It’s actually super easy!

    Einkorn Flour Chocolate Chip cookies

    These Einkorn Chocolate Chip cookies are delicate cookies with crisp edges and soft centres. They are incredibly flavourful and have a sophisticated deep flavour from the espresso powder and brown sugar. These cookies are made with healthy einkorn flour.

    Save This Recipe To Pinterest

    Recipe

    Pour over coffee is a manual coffee brewing method. Pour over coffee can bring out the subtle notes in your coffee and start you on a new coffee journey to enjoying cafe-quality coffee at home, every day.

    Pour Over Coffee

    Christy Faber
    Pour over coffee is a manual coffee brewing method. Pour over coffee can bring out the subtle notes in your coffee and start you on a new coffee journey to enjoying cafe-quality coffee at home, every day.
    5 from 1 vote
    Print Recipe Pin Recipe SaveSaved!
    Prep Time 6 minutes mins
    Cook Time 4 minutes mins
    Total Time 10 minutes mins
    Course Drinks
    Cuisine Japanese
    Servings 1 person
    Calories 1 kcal

    Equipment

    • 1 Gooseneck Kettle
    • 1 Coffee Dripper
    • 1 kitchen scale
    • 1 Coffee Grinder

    Ingredients
      

    • 375 grams boiling water 198 degrees Fahrenheit
    • 25 grams freshly ground coffee beans

    Instructions
     

    • Fill a kettle with water. A gooseneck kettle is preferred. Boil more than enough to fill your mug.
    • Grind 25 grams of your best coffee.
    • Put your dripper over your chosen mug and place a filter in the dripper. Soak it with boiling water and pour out the water.
    • Pour the ground coffee into the filter.
    • Place the mug with dripper on the scale and tare the scale.
    • Pour twice the coffee’s weight in water (50 grams) in a circular motion. Avoid the edges of the coffee bed.
    • Slowly pour 100 grams of water over the coffee in a circular motion and wait 30 seconds.
    • Slowly pour 120 grams of water in a circular motion and when the coffee bed is getting low pour the remaining 155 grams in.
    • Wait until 3 ½ minutes has passed and then remove the filter. At this point, all the water should have gone through and the filter will be dripping slightly.
    • Enjoy!

    Video

    https://lifearoundthetable.ca/wp-content/uploads/2022/03/How-to-Use-a-Pour-Over-Coffee-Maker-LQ-V2.mp4

    Notes

    If you get to the end and there’s still some more water you can wait another 15 seconds or note for next time to grind the beans coarser and/or pour the last 155 grams sooner.
    Perfecting your recipe with your grinder, dripper and kettle is a process. It may take several times to get this just right (and a new roast may need you to make adjustments all over again!).
    If you don’t have access to a scale, don’t worry.  25 grams of ground coffee equals ⅓ cup and the water used in the recipe (375 grams) equals about 11 ounces. Use these measurements in the recipe instead of the grams written.

    Nutrition

    Calories: 1kcal
    Tried this recipe?Let us know how it was!
    • « Go to Previous Page
    • Page 1
    • Page 2
    • Page 3
    • Page 4
    • Page 5
    • Go to Next Page »

    Primary Sidebar

    Welcome,

    I’m Christy

    a happy wife and mother to three boys, a nutritionist, a food lover and a Canadian. Creating and experimenting in the kitchen is my idea of an afternoon well spent. To me, a clean kitchen is an empty canvas of possibility and that means my kitchen never stays clean for long. My dream is that one or more of the recipes I share here will inspire you, perhaps even becoming a cherished family favourite.

    READ MORE >

    Appetizers and Sides

    • Apple and Bacon Tart with Crispy Fried Sage
    • Marinated Veggie Salad
    • Bruschetta Loaded White Bean Hummus
    • Pear and Blue Cheese Endive Boats Appetizer
    • Carrot Ribbon Salad with Arugula
    • Crunchy Quinoa and Lentil Salad

    Soups

    • Kale Parmesan Farro Soup
    • Cabbage Roll Soup
    • Creamy Carrot and Parsnip Soup
    • One-Pot Beef and Farro Soup
    • Cozy Autumn Wild Rice Soup
    • Cauliflower Sausage Soup

    Most Popular

    • Gluten-Free Buckwheat Flour Brownies
    • Five coconut flour oatmeal cookies stacked on top of each other on a cooling rack with others around.
      Healthy Coconut Flour Oatmeal Cookies
    • Strawberry cottage cheese smoothie pouring into a glass out of a blender cup on a staged tabletop.
      Strawberry Cottage Cheese Smoothie
    • Date Sweetened Chocolate Chip Cookies
    • Custard Oats with Mixed Berry Compote
    • Green, dessert bowl full of Cottage Cheese Lemon Mousse on a wooden board with a handle spooning a scoop out.
      Cottage Cheese Lemon Mousse

    As featured in

    Naturally Sweetened

    • Healthy Chocolate Pudding
    • stack of fudgy oat flour brownies on a white board.
      Oat Flour Brownies
    • Peanut Butter Swirl Black Bean Brownies
    • a bowl of date paste topped with flaky salt on a countertop with a few medjool dates beside the bowl.
      Date Paste
    • Super Nourishing Custard Drink
    • Coffee Panna Cotta

    Follow For More Recipes

    • Instagram
    • Facebook
    • Pinterest
    • Home
    • Recipe Index
    • Fall Favorites
    • About Me
    • eBooks
    • Subscribe

    Copyright © 2026 Life Around The Table | Accessibility | Privacy policy


    Rate This Recipe

    Your vote:


    A rating is required
    A name is required
    An email is required